Table of Contents
Advertisement
Advertisement
Table of Contents

Related Manuals for Merrylock MK480


Summary of Contents for Merrylock MK480
- Page 1 INSTRUCTION BOOK...
- Page 2 PREFACE Thank you for your purchase of this Combination Overlock, Chain Stitch and Cover Stitch Sewing Machine. This machine, that is intended for household use will provide you with excellent performance in sewing from light to heavy material (lawn to denim). Please refer to this Instruction Book for proper use and optimum service.
- Page 3 “IMPORTANT SAFETY INSTRUCTIONS“ When using an electrical appliance, basic safety precautions should always be followed, including the following: Read all instructions before using this overlock sewing machine. “DANGER“___ To reduce the risk of electric shock: 1. The appliance should never be left unattended when plugged in. 2.
- Page 4 17. If oil gets in eyes, immediately, rinse the oil out with water. If you swallow oil by mistake, immediately consult a medical doctor. 18. To reduce risk of injury, switch off before servicing. Close looper cover before operating. “SAVE THESE INSTRUCTIONS“ “This overlock sewing machine is intended for household use only.”...
- Page 5 CONSIGNES DE SECURITE Lors de l’utilisation de cette machine, les précautions élémentaires de sécurité doivent être pris es. Lisez attentivement toutes les consignes de sécurité suivantes avant de l’utiliser : DANGER - Pour reduire le risque de décharges électriques : * Ne laissez pas la machine sans surveillance lorsqu’elle est sous tension.
-
Page 6: Table Of Contents
TABLE OF CONTENTS PAGE PAGE 1. PRINCIPAL PARTS 18. HOW TO CHANGE THREADS : TIE ON METHOD (1) MACHINE OVERVIEW 19. STITCH LENGTH ADJUSTMENT (2) FREE ARM 20. SEWING HINTS (3) MAIN PARTS BEHIND THE LOOPER COVER (1) SECURING THE THREAD CHAIN 2. -
Page 7: Principal Parts
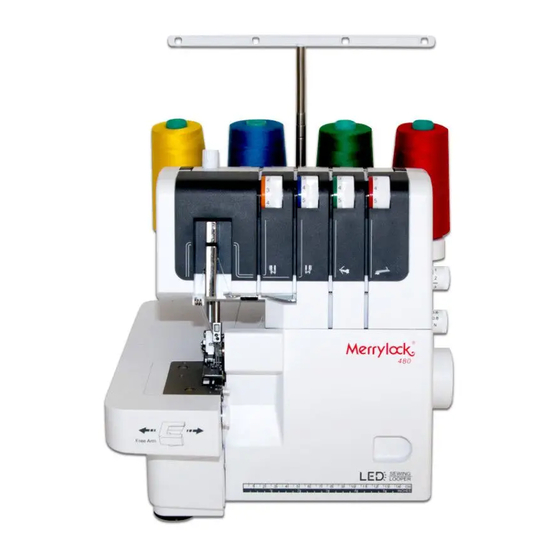
1. PRINCIPAL PARTS (1) MACHINE OVERVIEW 1. Thread guides and holder 2. Handle Left needle thread tension dial (orange) Right needle thread tension dial (blue) 5. Upper looper thread tension dial (green) 6. Lower looper thread tension dial (red) 7. Stitch plate 8. -
Page 8: Free Arm
22. Foot pressure adjusting dial 23. Thread cutter 24. Presser bar lifter and tension release 25. Moveable upper knife 26. Stitch finger lever (2) FREE ARM 1. Attached extension table * The attached extension table can be removed to expose the free arm. * To remove pull to the left. -
Page 9: Main Parts Behind The Looper Cover
(3) MAIN PARTS BEHIND THE LOOPER COVER 1. Upper looper 2. Lower looper 2. ACCESSORIES Accessories o N . 1~6 are contained in the accessory bag. 1. Flat b lade screw driver 9. Needle threader 2. Oiler 10. Screw driver 3. -
Page 10: Optional Accessories
3. OPTIONAL ACCESSORIES Optional presser feet specially prepared for this machine are available at your dealer. The snap-on type presser foot used on this machine allows easy removal and replacement. (1) OVERLOCK PRESSER FOOT Elastic Foot G20804A The Elastic Foot guides and stretches narrow elastic (6-12mm, 1/4~1/2”) wear, lingerie and other elastic insertion techniques. -
Page 11: Needle Information
4. NEEDLE INFORMATION This overlock uses a flat shank industrial needle that eliminates the possibility of inserting the needle backwards. Do not attempt to use a standard household sewing machine needle of any size or type in this overlock. ELx705 Overlock needle Needle ELx705 size 14/90 is finished with the machine. -
Page 12: Telescopic Thread Stand
6. TELESCOPIC THREAD STAND * Place the thread spools over the cone holders on the spool pin. * If the machine is already threaded, straighten the threads to prevent tangling. 7. PREPARATION FOR THREADING (1) SETTING UP THE THREAD GUIDE HOLDER * Fully extend the thread guide holder. -
Page 13: Spool Cap
(3) SPOOL CAP * When using a regular thread spool, fit the spool cap supplied with the machine onto the thread Press in spool as shown at right. Spool cap Thread spool 8. REMOVAL AND REPLACEMENT OF CHIP BOX (1) REPLACEMENT * Position the machine so the front is nearly edge of the table. -
Page 14: How To Remove And Insert Needles
10. HOW TO REMOVE AND INSERT NEEDLES (1) NEEDLE POSITION * With this machine, two needles can be inserted to Overlock left needle the needle clamp as shown in the drawing, single Overlock right needle or two needles can be used for sewing. * The Instruction Book refers to different needle positions by illustrating the needle clamp at right. -
Page 15: To Insert Needles (S)
(3) TO INSERT NEEDLES (S) * Hold the needle with the flat surface to the back. * Insert the needle into the needle socket as far as it will go. To tighten * When inserting a needle, if you first lower it down into the hole in the stitch plate it will line up with the needle socket. -
Page 16: How To Disengage Movable Upper Cutter
13. HOW TO DISENGAGE MOVABLE UPPER CUTTER Be sure to turn off power switch. (1) TO PLACE MOVABLE UPPER CUTTER IN NON-WORKING POSITION Open looper cover (page 12). * Push the movable upper cotter holder to the right as far as it will go. * Turn the holder toward fron t until the upper cutter... -
Page 17: Standard Overedge And Rolled Hem
15. STANDARD OVERLOCK AND ROLLED HEM STITCHING (1) TO SEW STANDARD OVERLOCK * Set seam width finger knob to N to move seam width finger to standard overlock sewing position. Note : Be sure to push seam width finger knob as far as it will go in the direction of setting N. -
Page 18: To Thread Thread Upper Looper (Green)
(1) TO THREAD UPPER LOOPER THREAD (GREEN) Be sure to turn off power switch. Thread the upper looper as indicated (1)~(8). * Raise Presser foot to release tension discs. * Pass thread from back to the front through the thread guide (1). * Thread the thread guide A (2) by pulling the thread towards the left until it slips under guide. -
Page 19: To Thread Lower Looper Thread (Red)
* Thread the looper area of the machine following the green color coded thread guides (4)~(7). * Thread the hole in the upper looper from front to back (8). Note : Make sure thread passes behind lower looper. Note : Use tweezers provided in the accessory case to aid in threading the looper. - Page 20 * While holding thread with finger, pass it between the tension discs and pull thread down to make certain it is properly located in between the tension discs (3). * Turn the hand wheel toward you until the lower looper extends out 5~10mm from the stitch plate edge.
-
Page 21: To Thread Overedge Right Needle
(3) TO THREAD OVERLOCK RIGHT NEEDLE THREAD (BLUE) (B ON NEEDLE CLAMP) * Thread the right needle as indicated (1)~(9). * Raise Presser foot to release Tension discs. * Pass thread from back to the front through the thread guide (1). * Thread the thread guide A (2) by pulling the thread towards the left until it slips under guide. -
Page 22: To Thread Left Needle Thread (Orange)
* Continue to thread points (4)~(9). * Slip the thread into the rear slot on the thread guide (5) and into the slot on the take-up lever cover (6). Then slip the thread into the right slot on the thread guide (7). * Before threading the eye of the needle, make sure thread is behind the thread guide located on the bottom of the needle clamp (8). - Page 23 * Thread the thread guide A (2) by pulling the thread towards the left until it slips under guide. Then pull thread along the path as illustrated. * While holding thread with finger, pass it between the tension discs and pull thread down to make certain it is properly located in between the tension discs (3).
-
Page 24: Needle Threader
17. NEEDLE THREADER * To make threading the needles easier, use the needle threader included with the accessories. * Turn the handwheel so the needles are in their highest position and lower the presser foot. Make sure one of the rectangular markings of the needle threader is pointing upwards. -
Page 25: Stitch Length Adjustment
* Place new thread on stand. * Tie new thread and old thread ends together with a square knot. Clip thread tails to 2~3cm (1 inch) length. If clipped too short, threads may come untied. * Firmly pull both thread to test knot security. * Raise Presser foot to release Tension discs. -
Page 26: Ewing With Heavy Decorative Threads
SEWING WITH HEAVY DECORATIVE THREADS IN THE LOOPERS Heavy decorative threads need less thread tension than regular threads to give the best sewing result. * When threading a heavy decorative thread, the thread guide (A) on back cover set as illustrated right. -
Page 27: Selection Of Stitches
22. SELECTION OF STITCHES This machine is capable of producing various types of stitches according to the combination of needle positions, threading methods, tension adjustment and the use of convertible right looper/ converter. Page Stitch Type Overlcok left needle Overlcok right needle Upper looper Lower looper 1. -
Page 28: Stitch Overview
Stitch Type Page Overlcok left needle Overlcok right needle Upper looper Lower looper 1-needle 3-thread stitch is for edging lightweight 13. 3-Thread fabrics. For a beautiful rolled edge, thread the Narrow Edge upper looper with decorative thread and the needle and lower looper with lightweight regular thread. - Page 29 HANDY REFERENCE CHART Tension Dial : Numbers shown are average settings on medium weight fabric with Stitch Type Needle Position Page standard #60 polyester spun thread Orange Blue Green 2-Thread Wrapped 6.0mm Overlock , Wide 2-Thread Wrapped 4.0mm Overlock Narrow 2-Thread Overlock, 6.0mm Wide...
-
Page 30: Test Sewing And Chain Off
24. TEST SEWING AND CHAIN OFF (1) TEST SEWING * When the machine is completely threaded, bring all of the threads across the stitch plate and slightly to the left under the presser foot. * Ensure that the upper blade moves against the lower blade correctly by turning the handwheel slowly toward you. -
Page 31: Rolled Edge Sewing
2 . ROLLED EDGE SEWING The rolled edge stitch is appropriate for lightweight fabrics such as lawn, voil, organdy, crepe, etc. The rolled edge is achieved by adjusting the thread tension to make the fabric edge roll under the fabric while overlocking. -
Page 32: Ornamental Flatlock Stitch
(2) ORNAMENTAL FLATLOCK STITCH * To place movable upper cutter in non-working position (see page 15). The fabric should not be trimmed on this stitch. * Follow steps 1-3 above. * Fold the fabric piece, wrong sides together, to sew a decorative stitch from the right side of the garment (at the fold). -
Page 33: Differential Feed
28. DIFFERENTIAL FEED The differential feed system consists of two sets of feed teeth arranged one behind the other. Both feed teeth work independently of each other to give perfect results when sewing on speciality fabrics. When the amount of feed by the front feed teeth is changed in relation to the feed by the rear feed teeth it will “stretch”... -
Page 34: Suggested Tension Setting
29. SUGGESTED TENSION SETTING 2- hread Wrapped Overlock , Wide and 2-Thread Tension settings are effected by : Wrapped Overlock, Narrow * Type and thickness of fabric * Needle size Lower looper thread * Size, type and fibre content of thread Overlcok right needle (1) 2-THREAD WRAPPED OVERLOCK When the lower looper thread tension is too tight... -
Page 35: 3-Thread Overlock
(4) 3-THREAD OVERLOCK (4) 3-Thread Overlock, Wide and 3-Thread Overlock, Narrow When the upper looper thread lies on the underside of the fabric : - Turn the upper looper thread tension dial (green) toward a higher number. - Or, turn the lower looper thread tension dial (red) Upper looper thread toward a lower number. -
Page 36: 4-Thread Overlock
(7) 4-THREAD OVERLOCK (7) 4-Thread Overlock When the upper looper thread line on the underside of the fabric : Overlock right - Turn the upper looper thread tension dial (green) needle thread toward a higher number. - Or, turn lower looper thread tension dial (red) Upper looper thread toward a lower number. -
Page 37: Machine Maintenance
30. MACHINE MAINTENANCE An overlock machine requires more maintenance than a conventional machine for two reasons : (a) A lot of lint is produced due to the cutting action of the knives. (b) An overlock runs at a very high speed and needs to be oiled frequently to lubricate the internal working parts. -
Page 38: Storage
(4) STORAGE When the machine is not in use, be sure to keep it unplugged. Cover the machine with the dust cover to protect it from the dust. Store the machine, so it is not exposed to direct sunlight or humidity. (5) SERVICING Have your overlock machine serviced regularly by your local authorized dealer! If you have followed the trouble shooting information. -
Page 39: Trouble Shooting
32. TROUBLE SHOOTING Problem Solution * Lengthen stitch length. * Increase presser foot pressure for heavyweight fabric. Fabric does not feed well * Decrease presser foot pressure for lightweight fabric. * Check the differential feed. * Insert needle correctly. * Do not pull fabric while sewing. Needle breaks * Tighten needle set screw. -
Page 40: Specifications
33. SPECIFICATIONS Sewing speed Maximum 1300 stitches/min Stitch length 1.0 - 5.0 mm Differential feed ratio 1:0.6 - 1:2 Left needle: 5.0 - 7.0 mm Overlock stitch width Right needle: 3.0 - 5.0 mm Needle bar stroke 27 mm 4.5 mm Presser foot rise ELx705 size: #14/90, #12/80 Needles... - Page 41 N1P01...
Need help?
Do you have a question about the MK480 and is the answer not in the manual?
Questions and answers
My needle won’t go down when sewing it seems to hit something underneath. It is as bought nothing been done to it
A possible cause for the needle not going down on the Merrylock MK480 could be that the blade is disengaged. The blade must be re-engaged before normal overlocking. If the blade is left disengaged, it could interfere with the machine's function. Also, ensure the machine is threaded correctly and that the presser foot is in the correct position.
This answer is automatically generated