Table of Contents
Advertisement
Available languages
Available languages
TM
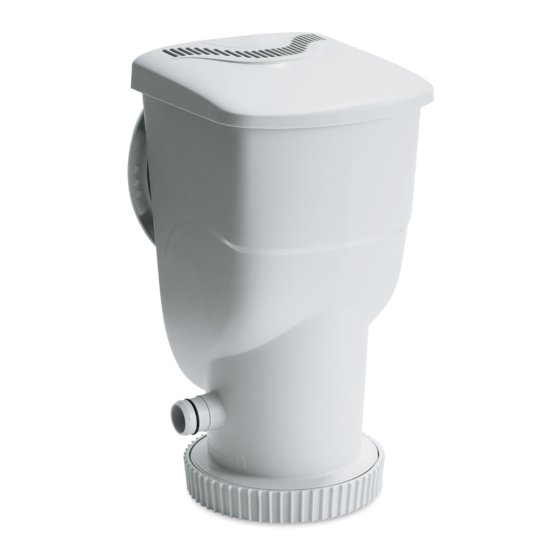
SKIMMERPLUS FILTER PUMP
OPERATING INSTRUCTIONS
Model No. 081-3852-0
DO NOT RETURN PRODUCT TO STORE
IMPORTANT:
Trileaf Distribution
Please read this manual carefully
Trifeuil Toronto, Canada
before beginning assembly of this
M4S 2B8
product. Keep this manual for future
Customer Service: 1-866-567-4089
reference.
Advertisement
Chapters
Table of Contents

Subscribe to Our Youtube Channel
Summary of Contents for Outbound SKIMMERPLUS SFX600
- Page 1 SKIMMERPLUS FILTER PUMP OPERATING INSTRUCTIONS Model No. 081-3852-0 DO NOT RETURN PRODUCT TO STORE IMPORTANT: Trileaf Distribution Please read this manual carefully Trifeuil Toronto, Canada before beginning assembly of this M4S 2B8 product. Keep this manual for future Customer Service: 1-866-567-4089 reference.
-
Page 2: Table Of Contents
Troubleshooting Guide Replacement Parts Ordering Info Should you encounter a problem with your Outbound Product, please do not return the product to the place of purchase. All Warranty claims must be made directly to Trileaf Distribution. Prior to contacting Customer Service, please first review the Troubleshooting Guide in the Installation Manual. If you are still unable to correct the problem, please contact customer service on 1-866-567-4089. -
Page 3: Warnings
IMPORTANT SAFETY INSTRUCTIONS IMPORTANT SAFETY INSTRUCTIONS When installing and using this electrical equipment, basic safety precautions should always be followed, including the following: READ AND FOLLOW ALL INSTRUCTIONS Keep for future reference. Failure to follow these warnings and instructions can result in serious injury or death to users, especially children WARNING DANGER WARNING... - Page 4 Turn on the pump for the recommended hours daily. Clean and replace filter cartridge frequently. Replace only with a genuine Outbound Brand filter cartridge. Refer to the Filter Pump manual for additional water care information.
- Page 5 WARNING Extra Safety Warning 1. Adult supervision is always required. 2. Parents should learn CPR. 3. Keep all electrical radios, speakers, and other appliances away from the swimming pool. 4. When you touch the filter, pump, or electrical parts, be sure the ground under your feet is “Bone Dry.” 5.
- Page 6 WARNING NSF NSF International P.O. Box 130140 789 N. Dixboro Road Ann Arbor MI 48105 Contact: 800-673-6275 or 734-769-8010 www.nsf.org ASTM ASTM International (formerly American Society of Testing & Materials) 100 Barr Harbor Drive, P.O. BOX C700 West Conshohocken, PA 19428-2959 Contact: 877-909-2786 (USA &...
-
Page 7: Parts List
2. All electrical components shall be installed in accordance with Article 680 of the 2017 National Electrical Code (NEC ) or its latest approved edition. ® 3. The maximum capacity of 1” diameter chlorine tablets of Outbound patented Filter Cartridge (U.S. Pat. 7,005,062): a. - Page 8 PARTS LIST Outside Pool Wall Inside Pool Wall...
- Page 9 ASSEMBLY INSTRUCTIONS Before assembly, take a few minutes to identify and become familiar with all the parts. WARNING: CLIMBING HAZARD! PLEASE PREVENT CHILDREN FROM CLIMBING ON THE FILTER CANISTER TO GAIN ACCESS TO THE POOL. Skimmer Installation 2. Slide open the Top Cover and take out the parts inside.
- Page 10 ASSEMBLY INSTRUCTIONS Pump Installation 8. Slide the Top Cover closed onto the Skimmer Canister 7. From inside the Skimmer Canister , snap the pins of the Weir into the pivot slots, one after another. The Weir should now stand upright but not stick. Push-in Inside Pool Wall Weir installation...
-
Page 11: Filter Cartridge & Care
Contact and consult your local pool supply store for solutions/treatment, and maintain an adequate pH level of pool water (see POOL WATER CARE, p. 12). 5. Dispose of any used filter media in accordance with applicable regulations/legislation. 6. Always use genuine Outbound Filter Cartridges. -
Page 12: Pool Water Care
6. You will need it to determine the amount of chemicals required, or when you contact a pool supplies expert for water testing and advice on the safe use of chemicals. NOTE: Always follow the manufacturer label directions of the chemicals you choose to use. Remove the Top Cover and Skimmer Strainer Basket to insert chlorine tablets into Outbound patented Filter Cartridges. PUMP DISASSEMBLY AND STORAGE 1. -
Page 13: Pump Servicing Instructions
PUMP DISASSEMBLY AND STORAGE b. Remove the Motor Assembly by turning open the Motor Seal Nut . Clean and completely dry the Pump. Then see STEP 3: Pump Reassembly/Replacement (p. 15-16) to reassemble the Motor into the Canister. 4. Store all the parts in a dry place that remains above 32°F (0°C) at all times. PUMP SERVICING INSTRUCTIONS The most efficient way to troubleshoot or replace the Pump is to disassemble the entire filtration system. - Page 14 PUMP SERVICING INSTRUCTIONS 5. Slowly take out the Motor Assembly . Be careful not to lose the Rubber You may need to reach inside the Nozzle or Canister Gasket Canister to free the Pump Motor. STEP 2: Rotor Inspection/Replacement The Pump consists of a Rotor Assembly and its related parts.
- Page 15 PUMP SERVICING INSTRUCTIONS STEP 3: Pump Reassembly/Replacement 1. Lubricate the Canister Gasket , then insert it back into the groove (inner IMPORTANT: make sure that the cord of the groove for SFX600/SFX1000) at the bottom of the Skimmer Canister Motor Assembly is placed through the Motor Seal Nut BEFORE replacing the Pump.
- Page 16 PUMP SERVICING INSTRUCTIONS 3. Once the Motor is correctly aligned, match the threads of the Motor Seal to that of the Canister, and tighten by twisting the Nut counter-clockwise. IMPORTANT: make sure the Nut and Canister are not cross-threaded; otherwise leaks may occur.
-
Page 17: Troubleshooting Guide
TROUBLESHOOTING GUIDE WARNING: UNPLUG THE POWER CORD BEFORE TROUBLESHOOTING THE FILTER PUMP. Problem Cause Solution A Pump not plugged in A Plug the Power Cord Set into a grounded power outlet. 1. Pump Motor does not start, or B Power Cord Set and/or B If problem persists, have the circuit checked by a qualified electrician. -
Page 18: Replacement Parts Ordering Info
REPLACEMENT PARTS ORDERING INFO SFX600 SFX1000 SFX1500 Description Part # P58PP1954W05 P58PP1954W05 P58PP1954W05 Motor Seal Nut P58PP1954G8U P58PP1954G8U P58PP1954G8U Rubber Nozzle P58182601K01 P58182601K01 P58185201K01 Pump Motor Assembly P58X0601C000 P58X1001C000 P58X1500CK01 Canister Gasket / Motor Seal P58147800K01 P58147800K01 P58164800K01 P58PP1950W05 P58PP1950W05 P58PP1950W05 Top Cover P58PP1950G8U... - Page 19 POMPE FILTRANTE SKIMMERPLUS CONSIGNES D’UTILISATION N° de modèle : 081-3852-0 NE RETOURNEZ PAS L’ARTICLE AU DÉTAILLANT IMPORTANT : Trifeuil Distribution Veuillez lire attentivement ce guide Trifeuil Toronto, Canada avant de procéder à l’assemblage M4S 2B8 de cet article. Conservez ce guide Service à...
- Page 20 Guide de dépannage Renseignements relatifs aux commandes de pièces de rechange Si vous éprouvez des difficultés avec votre article Outbound , ne le retournez pas au point de vente. Tout recours à la garantie doit être fait directement auprès de Distribution Trifeuil. Avant de contacter le service à la clientèle, lisez d’abord le chapitre Dépannage de la notice d’utilisation. Si à ce moment, le problème n’est toujours pas réglé, veuillez communiquer avec le Service à...
-
Page 21: Avertissements
CONSIGNES DE SÉCURITÉ IMPORTANTES MISES EN GARDE IMPORTANTES Lors de l’installation et de l’utilisation de cet appareil électrique, respectez toujours des précautions de sécurité élémentaires, parmi lesquelles : LIRE ET RESPECTER TOUTES LES INSTRUCTIONS Conserver pour consultation ultérieure. Ne pas respecter ces mises en garde et instructions peut provoquer des blessures graves ou la mort des utilisateurs, notamment des enfants. AVERTISSEMENT DANGER AVERTISSEMENT... - Page 22 Démarrez la pompe pendant les heures quotidiennes recommandées. Lavez et remplacez fréquemment la cartouche filtrante. Remplacez-la exclusivement par une cartouche filtrante d’origine de la marque Outbound véritable. Consultez la notice de la pompe de filtration pour obtenir des informations supplémentaires d’entretien de l’eau.
- Page 23 AVERTISSEMENT Premiers secours 1. Gardez un téléphone fonctionnant et une liste des numéros d’urgence près de la piscine. 2. Obtenez la certification RCR (réanimation cardiorespiratoire). En cas d’urgence, la RCR immédiate peut faire une différence cruciale et sauver la vie de quelqu’un. Avertissement spécifique 1.
- Page 24 AVERTISSEMENT ASME American Society of Mechanical Engineers Two Park Avenue, New York NY 10016-5990 Contact : 800 843-2763 (États-Unis et Canada) ou 973 882-1170 (hors de l’Amérique du Nord) www.asme.org NSPI National Spa and Pool Institute (voir APSP) UL Underwriters Laboratories 333 Pfingsten Road,Northbrook IL 60062-2096 Contact : 877 854-3577 ou 847 272-8800 www.ul.com...
-
Page 25: Liste Des Pièces
® approuvée la plus récente. 3. La capacité maximale de pastilles de chlore d’un diamètre d’un pouce de la cartouche filtrante brevetée Outbound (Brevet É.-U. 7 005 062) : a. Cartouches de type D : 2 b. Cartouches de type A/C : 6 Vérifiez vos niveaux de chlore pour déterminer le bon nombre de pastilles de chlore à... - Page 26 LISTE DES PIÈCES Paroi externe de la piscine Paroi interne de la piscine...
- Page 27 INSTRUCTIONS D’INSTALLATION Avant le montage, prenez quelques minutes afin d’identifier et vous familiariser avec toutes les pièces. AVERTISSEMENT : GRIMPAGE DANGEREUX ! VEUILLEZ EMPÊCHER LES ENFANTS DE GRIMPER SUR LE SYSTÈME DE FILTRATION POUR ALLER DANS LA PISCINE. Installation de l’écumoire 2.
- Page 28 INSTRUCTIONS D’INSTALLATION Installation de la pompe 7. À partir de l’intérieur du boîtier de l’écumoire , enclenchez les goupilles du 8. Faites glisser le couvercle supérieur pour le fermer sur le boîtier de déversoir dans les fentes de pivotage, l’une après l’autre. Le déversoir l’écumoire devra maintenant se tenir droit, sans être coincé.
-
Page 29: Utilisation Et Entretien De La Cartouche Filtrante
(voir TRAITEMENT DE L’EAU DE LA PISCINE, p. 12). 5. Jetez tout support de filtrage usagé conformément aux règlements/lois applicables. 6. Utilisez toujours les cartouches filtrantes véritables Outbound... -
Page 30: Entretien De L'eau De La Piscine
Retirez le couvercle supérieur et le panier de l’écumoire pour insérer les comprimés de chlore dans les cartouches filtrantes brevetées de Outbound DÉMONTAGE ET RANGEMENT DE LA POMPE 1. Arrêtez la pompe, et débranchez-la de la prise électrique. 2. Démontez les raccords de refoulement a. -
Page 31: Instructions D'entretien De La Pompe
IMPORTANT SAFETY INSTRUCTIONS 3. Démontez la pompe : a. Faites glisser le couvercle supérieur pour l’ouvrir, enlevez le panier de protection pour crépine , la cartouche filtrante et toute pastille de chlore encore à l’intérieur, et détachez le déversoir . Nettoyez et séchez toutes les pièces, et lubrifiez généreusement le joint d’étanchéité en caoutchouc de l’écumoire avec de la gelée de pétrole. - Page 32 INSTRUCTIONS D’ENTRETIEN DE LA POMPE Il se peut que vous deviez mettre 5. Enlevez lentement le bloc moteur . Veillez à ne pas perdre la buse en la main à l’intérieur du boîtier pour caoutchouc ou le joint du boîtier dégager le moteur de la pompe.
- Page 33 INSTRUCTIONS D’ENTRETIEN DE LA POMPE IMPORTANT : assurez-vous que le cordon du bloc ÉTAPE 3 : Remontage/remplacement de la pompe moteur est placé à travers l’écrou d’étanchéité 1. Lubrifiez le joint du boîtier , ensuite réinsérez-le dans la rainure (rainure intérieure pour SFX600/SFX1000) au pied du boîtier de l’écumoire du moteur AVANT de remplacer la pompe.
- Page 34 INSTRUCTIONS D’ENTRETIEN DE LA POMPE 3. Une fois que le moteur est bien aligné, agencez les filets de l’écrou d’étanchéité du moteur à ceux du boîtier, et serrez en tournant l’écrou dans le sens inverse des aiguilles d’une montre. IMPORTANT : assurez-vous que l’écrou et le boîtier ne sont pas faussés; sinon des fuites peuvent avoir lieu.
-
Page 35: Guide De Dépannage
GUIDE DE DÉPANNAGE ATTENTION : DÉBRANCHEZ LA POMPE FILTRANTE AVANT TOUTE TENTATIVE DE DÉPANNAGE. Problème Cause Solution A Brancher l’ensemble de cordon d’alimentation à une prise de courant A La pompe n’est pas branchée 1. Le moteur de la mise à la terre. pompe B L’ensemble de cordon démarre pas ou... -
Page 36: Renseignements Relatifs Aux Commandes De Pièces De Rechange
RENSEIGNEMENTS RELATIFS AUX COMMANDES DE PIÈCES DE RECHANGE SFX600 SFX1000 SFX1500 Clé Description PIÈCE # P58PP1954W05 P58PP1954W05 P58PP1954W05 Écrou d’étanchéité du moteur P58PP1954G8U P58PP1954G8U P58PP1954G8U Buse P58182601K01 P58182601K01 P58185201K01 Moteur de la pompe P58X0601C000 P58X1001C000 P58X1500CK01 Joint du réceptacle/scellage du moteur P58147800K01 P58147800K01 P58164800K01...
Need help?
Do you have a question about the SKIMMERPLUS SFX600 and is the answer not in the manual?
Questions and answers