Advertisement
Quick Links
Advertisement

Related Manuals for luxvision RU-1000


Summary of Contents for luxvision RU-1000
- Page 2 Notification Dear Users, Thank you for your purchase of RU 1000 Refraction Unit. Please take time to read our user’s manual carefully before use. This guarantees you to make full use of this unit and prolongs the operation life of this unit.
-
Page 3: Table Of Contents
Content Function Introduction ..................4 Name of Parts ....................4 Installation .....................5 Attention ......................8 Operation ......................8 After-Service ....................10 Specifications ....................11... -
Page 4: Function Introduction
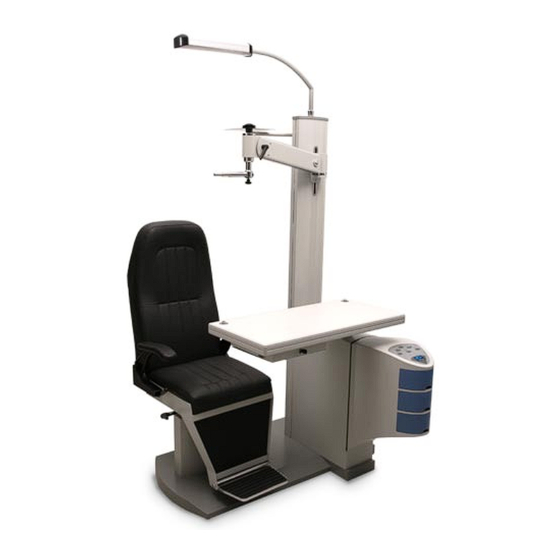
1. Function Introduction The testing stand for ophthalmology with multifunction is one of a series of products designed to meet customers requirements. lt is made of high quality in shape, firmness in structure, convenience in maintenance and ease in operation, it is wear resistant and corrosion proof. -
Page 5: Installation
3. Installation Please, open the packing box and check the packing list, then examine the parts according to the packing list. Installation of chair back (Fig. 1) 1. Remove M8 bolts form the support of handrails at left and right sides. 2. - Page 6 Post (Fig. 2) 1. Open the power box and insert the plugs of wires into sockets according to different colors. 2. Install the post and tighten the screws. Post Support Scrow Holes of hanging Fig 2 Parts of Post 1. Light Source (Fig. 3) Put the wires in and insert the plugs of wires into the sockets according to different colors.
- Page 7 2. Projector Fixer (Fig. 4) Projector Fixer base Projector Fixer Lever Screw Fixer base Screw Lever Fig 4 Arm (Fig. 5) 1. Insert the arm fixer into sleeve and tighten the screws 2. Insert the arm lock it up Sleave Screw Fixer Fig 5...
-
Page 8: Attention
4. Attention The A.C power source should be coincident to the local power source.Please, check it before operation. There is an overheating protector for the motor. Once the overheating protector works, the life of the chair can not rise up or descend down. After ten minutes, the chair should work normally again. - Page 9 Push “On” button of “Power” switch, the indicator lights and indicates the power supply is on. Push “Off” button of “Power” switch, the indicator turns off indicates the power supply is off. Use of the Chair 1. Push the “Up” chair button continuously so that the chair go up slowly; push the “Down”...
-
Page 10: After-Service
1. Loose the fixer of the arm and adjust the level of the arm on the post. 2. Loose the locking lever of the arm, then the arm be rotated around the fixer and the micro-adjustment of the vertical position of the sight disc is possible. Then adjust it to an ideal position, and lock it up again. -
Page 11: Specifications
7. Specifications Max. Angle for Rotation 9-0° of Sliding Table Distance for Displacement 360mm of Sliding Table Distance for Stroke 160mm of Electrical Driven Chair Max. Loading Capacity of Arm 10kg Power of Light Source Power Source AC220V(AC110V) 50Hz... - Page 12 LUXVISION, Inc. shall not be liable for any errors or for incidental or consequential damages in connection with the furnishing, performance, or use of this manual or the examples...
Need help?
Do you have a question about the RU-1000 and is the answer not in the manual?
Questions and answers