Table of Contents
Advertisement
Advertisement
Table of Contents

Summary of Contents for Uniden PRO501XL
- Page 1 PRO501 XL Citizens Band Radio Australian Edition unidE!n°o OPERATING GUIDE...
-
Page 2: Licensing Requirements
STRICTLY PROHIBITED. determining components e.g. Crystals, Transistors, IC's, Diodes, or any part of a unique nature, with parts other than those recommended by Uniden may cause violation to the SMA type acceptance technical requirement. Licensing Requirements Before using your tranceiver, you must obtain a Citizen Band Radio License f~om the Spectrum Management Agency (SMA). -
Page 3: Emergency Operation
Before operating the PRO501 XL: 1. Be sure you read and understand SMA Rules and Regulations. 2. Be sure that the power cord, microphone and antenna are properly connected. 3. Turn the power on by sliding the PWR switch to ON. Receive 1. - Page 4 PRO501 To connect the Cigarette LighterAdapter Plug: IMPORTANT: The Cigarette negative ground vehicles. Do not attempt to operate the unit with the Adapter Plug connected to a positive ground vehicle. 1. Remove the screw from the top half of the plug shell (Be careful not to lose the hex nut).
-
Page 5: Controls And Functions
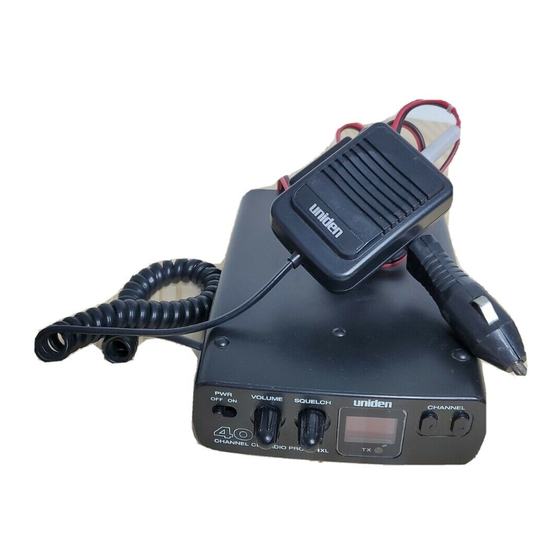
Controls And Functions Front Panel 1. PWR Turns the unit on and off. 2. VOLUME Adjusts the volume level. 3. SQUELCH Adjusts the squelch level. 4. Channel Selector Selects any of the 40 CB channels. 5. TX Indicator LED lights to indicate when the radio is transmitting. 6. -
Page 6: Installation
Mount the radio to the bracket rear panel and the microphone hanger has been installed 1. First select an ideal location in yo~r vehicle to mount the PRO501XL. Make sure the location will not interfere with your driving. is underneath the dashboard on the passenger side. -
Page 7: Connecting The Microphone
4. Secure the radio to the mounting the provided mounting knobs (2). 5. To mount the radio at an angle: Loosen the mounting knobs. Tilt the radio. Tighten the mounting knobs. Connecting the Microphone Plug the Microphone Cord connector into the jack on the left-hand side of the radio. Connecting the Antenna Connect the CB antenna plug to the ANT. -
Page 8: Specifications
Channels: Frequency Range: Frequency Control: Frequency Tolerance: Operating Temperature: Microphone: Input Voltage: Size: Complete Package: Antenna Connector: Transm iller Power Output: Modulation: Frequency Response: Output Impedance: Receiver Sensitivity: Selectivity: ImageRejection: IFFrequency: Automatic Gain Control (AGC): Squelch: Frequency Response: Distortion: Internal Speaker: Specifications shown are typical and subject Specifications... -
Page 9: Troubleshooting
Servicing Your CB If you determine that service is necessary, contact your local dealer or return the unit in its original carton to Uniden concise description of the problem, your name, address, a telephone number where you can be reached during working hours and a copy of the original purchase receipt to the address listed in the warranty (at the end of this manual). -
Page 10: Warranty
Uniden Australia Pty. Ltd. ACN 001 885 498 OF WARRANTY: ELEMENTS duration of this warranty, its PRO501XL CB Radio (hereinafter referred to as the Product), to be free from defects in materials and craftmanshipwith only the limitations or exdusions set out below.


Need help?
Do you have a question about the PRO501XL and is the answer not in the manual?
Questions and answers