Table of Contents
Advertisement
Quick Links
Artikelnummer / Article no. 1410 0101
Operating Instructions
Seed counter
Contador 2
Inclusive semi-automatic filling station
Contafill 2
Pfeuffer GmbH
Flugplatzstraße 70
97318 Kitzingen
GERMANY
Phone: +49 9321 9369–0
Fax:
+49 9321 9369–50
info@pfeuffer.com
Revision 7/25.04.2019
www.pfeuffer.com
Translation of the Original Operating Instructions
Advertisement
Table of Contents

Related Manuals for Pfeuffer Contador 2


Summary of Contents for Pfeuffer Contador 2
- Page 1 Artikelnummer / Article no. 1410 0101 Operating Instructions Seed counter Contador 2 Inclusive semi-automatic filling station Contafill 2 Pfeuffer GmbH Flugplatzstraße 70 97318 Kitzingen GERMANY Phone: +49 9321 9369–0 Fax: +49 9321 9369–50 info@pfeuffer.com Revision 7/25.04.2019 www.pfeuffer.com Translation of the Original Operating Instructions...
- Page 2 The Pfeuffer GmbH has prepared and reviewed these Operating Instructions with the greatest care. However, no guarantee is made for its completeness or accuracy.
-
Page 3: Table Of Contents
Mains switch (plug/socket combination) ..............9 2.1.2 Protective coverings....................10 Operating and danger areas on the CONTADOR 2 ..............10 Operating and maintenance personnel ................. 10 Safety measures (to be carried out by the operating company) ........... 10 General safety instructions ....................11 Safety tests .......................... - Page 4 Contador 2 Operating Instructions Installation and operation ...................... 21 Assembling the CONTADOR 2 ....................21 Connections and installation of the external air pump ............21 Connection to a compressed air system ................22 Assembling the filling station CONTAFILL 2 (optional) ............23 6.4.1...
-
Page 5: Introduction
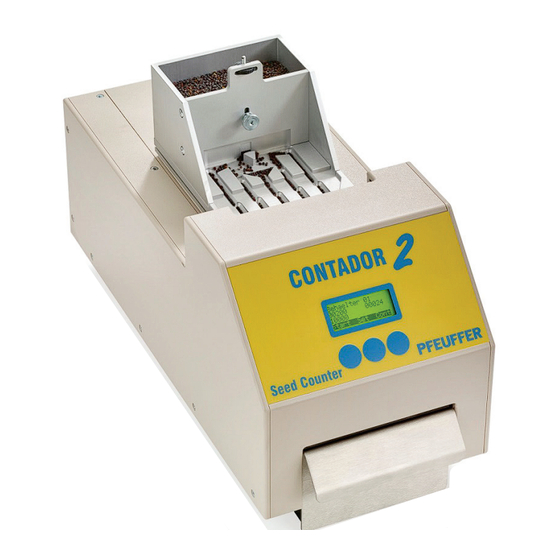
Introduction Intended use The CONTADOR 2 seed counter is used to count cleaned seeds such as grain, oil seeds, corn legumes and similar, dust-free products in order to establish, for example, the thousand seed weight. The maximum counting rate is 5.000 seeds/min. -
Page 6: Declaration Of Conformity Contador 2
Contador 2 Operating Instructions Declaration of conformity CONTADOR 2 EC/EU Declaration of conformity In accordance with the EC/EU Directives Machinery 2006/42/EC and Electromagnetic Compatibility (EMC) 2014/30/EU Manufacturer: Pfeuffer GmbH Flugplatzstraße 70 97318 Kitzingen GERMANY Person responsible for collating the technical documentation:... -
Page 7: Declaration Of Incorporation Contafill 2
Contador 2 Operating Instructions Declaration of incorporation CONTAFILL 2 Declaration of incorporation for partly completed machinery in accordance to the EC Directives Machinery 2006/42/EC Pfeuffer GmbH Manufacturer: Flugplatzstraße 70 97318 Kitzingen GERMANY Person responsible for collating the technical documentation: Lothar Pfeuffer, general manager... -
Page 8: Structural Features Of The Danger Notes
Contador 2 Operating Instructions Structural features of the danger notes The operating instructions from Pfeuffer GmbH contain instructions that you must comply with for your personal safety as well as to avoid damage to property. The instructions for your personal safety are highlighted by a warning triangle. -
Page 9: Identification
The type plate with the type designation can be found on the rear panel of the CONTADOR 2. It is important that the correct type designation is specified if queries are made. This will help us to process the query in a quick and efficient manner. -
Page 10: Protective Coverings
Contador 2 Operating Instructions 2.1.2 Protective coverings The CONTADOR 2 is protected from any intervention in the machine during operation by means of a plastic housing. Inspection Interval Method Operating and danger areas on the CONTADOR 2 Operating area Make sure the installation height is sufficient (according to the stature of the operating personnel). A suitable base (e.g. -
Page 11: General Safety Instructions
Hazardous substances (in Germany, the technical rules for hazardous substances – TRGS 555 apply) Environmental protection regulations Electrical connections The desktop power supply of the CONTADOR 2 may be connected only to a properly earthed socket with protective conductor. General safety instructions The safety equipment and safety instructions described in these Operating Instructions must be observed. -
Page 12: Safety Tests
Contador 2 Operating Instructions Safety tests Pfeuffer GmbH carried out the following safety tests at the factory: Testing and checking according to DIN EN 60204-1: Check that the electrical equipment is in compliance with the technical documentation. Continuous connection of the protective earth system ... -
Page 13: Technical Data
Contador 2 Operating Instructions Technical data CONTADOR 2 Dimensions 375x168x185 mm Weight approx. 5 kg Power supply (via desktop Input: 100–240 V / 47–63 Hz power supply ETC45G-24) Output 24 V , max. 1.88 A Power consumption: 24 VA Container volumes No. -
Page 14: Delivery, Transport And Storage
The relevant article numbers can be found in chapter 10. Transport and packaging Systems and machines supplied by the Pfeuffer GmbH will be carefully checked and packaged prior to dispatch, however, damage during transport cannot be excluded. Figure 3: CONTADOR 2 packaging Pos. - Page 15 Figure 6: Packaging drawer Lift up the CONTADOR 2 out of the box. Make sure that the CONTADOR 2 will only fit in one direction into the lower packing element (because of the stand feet). Only in this way, a horizontal level is guaranteed.
-
Page 16: Temporary Storage
Pfeuffer GmbH. Figure 8: Packaging cardboard floor Temporary storage The freight packaging of the CONTADOR 2 and the accessories and replacement parts is designed to be stored for six months as of delivery. Storage conditions Closed and dry room with a room temperature of min. -10 °C to max. +60 °C... -
Page 17: Function
Contador 2 Operating Instructions Function Overview Figure 9: CONTADOR 2 – Components Laserstrahlung Laser Klasse 1 nach DIN EN 60825-1:2008-05 Figure 10: CONTADOR 2 – Machine rear panel Pos. Name Pos. Name Desktop power supply Equipment fuse Air pump Mains switch... -
Page 18: Functional Sequence
Contador 2 Operating Instructions Functional sequence The filled feed container is positioned at the place intended for the CONTADOR 2. The machine automatically detects the feed container (container no. 1 for rapeseed and small seeds, container no. 2 for grain, container no. 3 for maize and legumes and container no. 4 for fine seeds) and then loads the optimum parameters for this. -
Page 19: Additions And Accessories
Refer to chapter 6.4 for more information about assembling and operating the CONTAFILL 2. Figure 11: CONTADOR 2 with connected filling station CONTAFILL 2 Figure 12: Stand with carousel When operating mode P is selected (refer to chapter 7.5.1), a carousel with full bags can be removed from the CONTAFILL 2 and a second carousel with empty bags inserted. -
Page 20: External "Start" Key
Contador 2 Operating Instructions 5.4.2 External »START« key The »START« key is available as a foot switch or as a hand-held »START« key. It enables the count to start (with and without CONTAFILL 2) – it is no longer necessary to press the appropriate function key. -
Page 21: Installation And Operation
Assembling the CONTADOR 2 The Installation and operation chapter is intended only for specialists. Carefully unpack the CONTADOR 2 and position it horizontally. A correct, horizontal assembly of the machine guarantees an even distribution of the seeds in the feed channels. -
Page 22: Connection To A Compressed Air System
The connection points on the T-piece must also be secured using cable ties, refer to figure 16. Use the PVC hose to connect the air pump with the CONTADOR 2. During operation, the air pump must be connected to a 230-V socket. -
Page 23: Assembling The Filling Station Contafill 2 (Optional)
Ensure that the feet of the seed counter are located in the intended positions. Connect the air pump and the desktop power supply to the CONTADOR 2 (refer to chapter 6.2). Use the connection cable to connect the CONTAFILL 2 filling station to the CONTADOR 2. -
Page 24: Assembly And Loading The Carousel
Contador 2 Operating Instructions 6.4.1 Assembly and loading the carousel Assemble the carousel as shown in the figure below. Figure 18: Assembly drawing carousel Item Designation Countersunk head screw M4x12 mm (2x) Shaft holder Guide shaft (2x) Carousel Platform... - Page 25 Contador 2 Operating Instructions Figure 20: Loading with bags 11.5x20 cm Figure 21: Loading with bags 8x12.5 cm Modification for bottles The U-shaped holders on the platform are fastened with plastic countersunk expanding rivets. Push out the countersunk expanding rivets and keep all individual parts in a safe place.
-
Page 26: Inserting The Carousel
Position a feed container on the seed counter. Insert the drawer (without CONTAFILL 2). Switch the CONTADOR 2 on at the mains switch. Start the external air pump. Observe the information concerning operation in chapter 7. -
Page 27: Operation
The CONTADOR 2 may be operated only by qualified and trained operating personnel. The function keys The CONTADOR 2 is operated by three function keys which are fitted to the front of the machine. Use the keys to select the inversely shown fields in the display. - Page 28 Contador 2 Operating Instructions Set takes you to the main menu. Container 01 0000 Start Stop ↑ and ↓ move you through the menu, and choose a menu item with Set. preset counter → preset counter Contafill → Contafill ↑...
- Page 29 Contador 2 Operating Instructions Main menu Hidden settings ↓↑ ↓↑ Button Buttons Button Buttons code language Chapter 7.7.2 Chapter 7.7 dirt alarm default display Submenu Chapter 7.7.1 container set. Submenu Chapter 7.7.3 laser test Chapter 8.5 <---- Back to counting menu...
-
Page 30: Selecting The Feed Container
Independent settings for any container can be set, saved and called up under container numbers 8 to 15. The actual container number is then ignored. If you want to set different values for a container, then contact the Pfeuffer GmbH. Page 30 of 46 Revision 7 ©... -
Page 31: Counting The Seed/Grain
Counting the seed/grain After switching on the CONTADOR 2 at the mains switch the counting menu appears. Use the three metal pins to position the required feed container on the CONTADOR 2. Make sure the area is clean. - Page 32 Contador 2 Operating Instructions Then select the menu item preset counter using the ↑ ↓ keys and confirm with Set. →preset counter Contafill ↑ ↓ With Next select the desired digit position. The ↑ in the third row of the display highlights the digit position that is to be processed.
-
Page 33: Interrupting The Count
Current count End of the counting Shortly before the counting process is finished the CONTADOR 2 reduces the counting speed in two steps, first slightly and then stronger. When reaching the preset value the vibrating unit automatically stops the CONTADOR 2. -
Page 34: Setting The Gate Height
The values established can be used to create a list as a reference. NOTE Never adjust the gate height during the count! This can cause damage to the CONTADOR 2. Figure 31: Setting the gate height Pos. Name Container no. -
Page 35: Counting The Seed/Grain With Contafill 2
Contador 2 Operating Instructions Counting the seed/grain with CONTAFILL 2 An electronic sensor enables the machine to automatically detect whether or not a bag or bottle is positioned in the filling position of the carousel. If no container is located at the appropriate position, the carousel rotates automatically by one position without losing the product to be counted. -
Page 36: Bag" Counting Mode - Contafill 2
Contador 2 Operating Instructions 7.5.1 »Bag« counting mode - CONTAFILL 2 First of all, establish the count value (refer to chapter 7.4). Then select menu item Contafill and confirm with Set. preset counter → Contafill container ↑ ↓ bags and turn can be selected as menu sub-items. -
Page 37: Contafill 2 - Manually Rotating The Filling Position
Contador 2 Operating Instructions 7.5.2 CONTAFILL 2 – manually rotating the filling position In the turn submenu you can rotate the carousel with ++ by in each case one position further. This is necessary in order to achieve a specific carousel removal position, or to remove or replace a bag/bottle. -
Page 38: Setting The Display (Illumination, Brightness And Contrast)
NOTE You should not change any of the values here! This will overwrite the factory settings! If you want to set different values for a container, then contact the Pfeuffer GmbH. Page 38 of 46 Revision 7 © 2019 – Pfeuffer GmbH... -
Page 39: Maintenance And Cleaning
The Maintenance and cleaning chapter is only intended for specialist operators. NOTE Opening the housing and inappropriate operation will invalidate the warranty. To ensure trouble-free operation, it is essential for the CONTADOR 2 to be cleaned and maintained at regular intervals. DANGER... -
Page 40: Inspection Intervals And Functional Check
CAUTION Warning about laser radiation! In the CONTADOR 2, only a small, diffused beam is emitted through the installed light barriers. The installed lasers have class 1 – laser radiation harmless in accordance with DIN EN 60825-1 2008:5... -
Page 41: Check The Positioning Of The Lasers By Means Of A Laser Test
Check the positioning of the lasers by means of a laser test The light barrier in the CONTADOR 2 consists of five individual light barriers. Each one has a line sensor that is illuminated by a line laser. In an ideal scenario, the light line illuminates the sensor line centrally and horizontally. -
Page 42: Renewing The Equipment Fuse
Articel number see in chapter 10. NOTE Always refer to the type plate for the precise fuse rating! Switch off the CONTADOR 2 using the main switch and disconnect the mains plug from the electrical power supply. Laserstrahlung... -
Page 43: Faults - Causes And Remedy
Appropriate tools and test instruments must be provided to these personnel. If the specified measures do not prove successful, contact Pfeuffer GmbH. It is important for all questions to specify the correct type designation, serial number and year of manufacture. -
Page 44: 10 Spare Parts And Accessories
CONTADOR 2. Pfeuffer GmbH shall not be held liable or any damages resulting from the use of non- original parts and non-original spare parts. -
Page 45: 11 Emergency
Disassembly may be carried out only by specialist personnel. Disconnect the mains plug before you start disassembling. The CONTADOR 2/CONTAFILL 2 must be disposed of in accordance with the statutory local environmental regulations (Waste Electrical and Electronic Equipment Directive 2012/19/EU). - Page 46 Contador 2 Operating Instructions Notes: Page 46 of 46 Revision 7 © 2019 – Pfeuffer GmbH...
Need help?
Do you have a question about the Contador 2 and is the answer not in the manual?
Questions and answers