Panasonic KX-DT635 Quick Reference Manual

Panasonic KX-DT635 Quick Reference Manual

Digital proprietary telephone

Advertisement

Thank you for purchasing this Panasonic product. Please read this manual
carefully before using this product and save this manual for future use. For
more details as well as settings information, please refer to the manuals of
the PBX.
Manuals and supporting information are provided on the Panasonic web site
at:
https://panasonic.net/cns/pcc/support/pbx/
Note
• In this manual, the suffix of each model number (e.g., KX-DT635NE) is
omitted unless necessary.
• The illustrations may differ from the appearance of the actual product.
Font Information (KX-DT680 only)
Font information is available on the following Panasonic web site:
https://panasonic.net/cns/pcc/support/pbx/
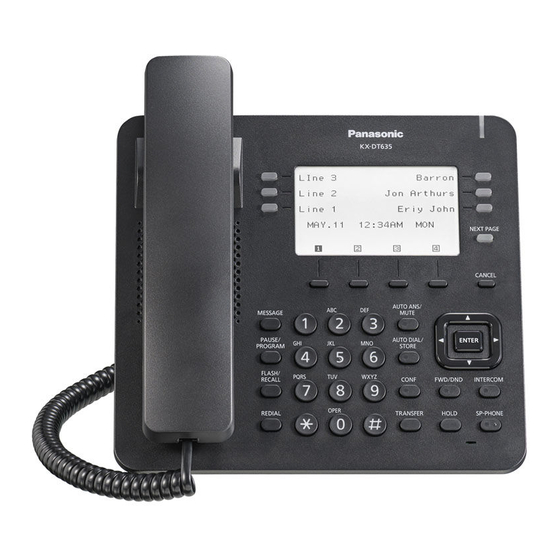
Quick Reference Guide
Digital Proprietary Telephone
KX-DT635/KX-DT680
Model No.

Advertisement

Table of Contents
loading

Summary of Contents for Panasonic KX-DT635

  • Page 1 KX-DT635/KX-DT680 Model No. Thank you for purchasing this Panasonic product. Please read this manual carefully before using this product and save this manual for future use. For more details as well as settings information, please refer to the manuals of the PBX.
  • Page 2: For Users In European Countries

    1 Important Information 1 Important Information 1.1 For Users in European Countries This product is intended to be connected to Panasonic KX series PBX only. For information of Compliance with EU relevant Regulatory Directives, Contact to Authorized Representative: Panasonic Testing Centre...
  • Page 3: For Users In The United States

    Trade Name: Panasonic Model No.: KX-DT635, KX-DT680 Responsible Party: Panasonic Corporation of North America Two Riverfront Plaza, Newark, NJ 07102-5490 Support Contact: 1 (800) 528-6747 Option 1 This device complies with Part 15 of the FCC Rules. Operation is subject to...
  • Page 4: Hearing Aid Compatibility

    1.6 For Users in Canada Hearing Aid Compatibility This telephone provides magnetic coupling for hearing aids as defined by the FCC in 47 CFR Section 68.316. Use only handsets or other acoustic devices with this equipment that are compliant with the hearing aid compatibility requirements of FCC Part 68.
  • Page 5 1.7 For Users in Thailand device may not cause interference, and (2) this device must accept any interference, including interference that may cause undesired operation of the device. • This Class B digital apparatus complies with Canadian ICES-003. CAUTION Any changes or modifications not expressly approved by the party responsible for compliance could void the user’s authority to operate this product.
  • Page 6: Accessory Information

    Handset Cord (1) Telephone Line Cord (1) Stand (1) Note • The illustrations may differ from the appearance of the actual product. 2.2 Optional Accessories Model Wall Mount Kit KX-DT635/KX-DT635C/ KX-A435 KX-DT680/KX-DT680C KX-DT635AL/KX-DT635NE/ KX-A435X KX-DT635UK/KX-DT635X/ KX-DT680AL/KX-DT680NE/ KX-DT680UK/KX-DT680X The Wall Mount Kit contains the following accessories.
  • Page 7 2.2 Optional Accessories Wall mounting adaptor (1) Screws for wall mounting (3)* * Two screws are for attaching the unit to a wall. One screw is for attaching the wall mounting adaptor to the unit.
  • Page 8: Location Of Controls

    3 Location of Controls 3 Location of Controls KX-DT635NE KX-DT635 CANCEL...
  • Page 9 3 Location of Controls KX-DT635AL/KX-DT635SX/KX-DT635UK/KX-DT635X KX-DT635...
  • Page 10 3 Location of Controls KX-DT635 KX-DT635...
  • Page 11 3 Location of Controls KX-DT635C KX-DT635...
  • Page 12 3 Location of Controls KX-DT680NE KX-DT680 CANCEL...
  • Page 13 3 Location of Controls KX-DT680AL/KX-DT680SX/KX-DT680UK/KX-DT680X KX-DT680...
  • Page 14 3 Location of Controls KX-DT680 KX-DT680...
  • Page 15 When you receive an intercom call, the lamp flashes green, and on an outside call, the lamp flashes red. When someone has left you a message, the lamp stays on red. [ ]/[NEXT PAGE]: Used to switch the page for the flexible buttons. (KX-DT635 only)
  • Page 16 3 Location of Controls ]/[CANCEL]: Used to cancel the selected item. Handset Hook: Keeps the handset stable when the unit is mounted on a wall. Navigator Key: Used to adjust the volume and so on. [ ]/[ENTER]: Used to assign the selected item. ]/[MESSAGE]: Used to leave a message waiting indication or call back the party who left the message waiting indication.
  • Page 17 3 Location of Controls ]/[SP-PHONE] (Speakerphone): Used for performing hands-free operations. Microphone: Used for hands free conversations.
  • Page 18: Before Operating The Telephone

    LCD contrast While on-hook Press [ ]/[PAUSE/PROGRAM]. Enter Press [ ]/[ENTER]. Press [ ] or [ ] to adjust the LCD contrast (KX-DT635) or the LCD backlight (KX-DT680). Press [ ]/[ENTER]. Press [ ]/[CANCEL]. * Note for KX-DT680 • This setting adjusts the brightness of the LCD backlight instead of the LCD contrast.
  • Page 19 Enter 2 digits (01-30) using the dial keys (0-9), or press [ ] or [ ] to select the ring tone. Press [ ]/[ENTER]. Press [ ]/[CANCEL]. LCD backlight mode (KX-DT635 only) While on-hook Press [ ]/[PAUSE/PROGRAM]. Enter Press [ ]/[ENTER].
  • Page 20: Feature Operations

    5 Feature Operations 5 Feature Operations 5.1 Making Calls Calling To an extension Go off-hook. Dial an extension number. To an outside party Go off-hook. Press a flexible button. Dial the outside party’s phone number. Redial Go off-hook. Press [ ]/[ ]/[REDIAL].
  • Page 21: Making Calls

    5.1 Making Calls System Speed Dialing Go off-hook. Press [ ]/[AUTO DIAL/STORE]. Enter a system speed dialing number (3 digits). Personal Speed Dialing To store Go off-hook. Enter Enter a personal speed dialing number (2 digits). Enter the phone number to store (max. 32 digits). Press After the confirmation tone, go on-hook.
  • Page 22: During A Conversation

    5.2 During a Conversation Press [ ]/[ENTER]. Press [ ]/[CANCEL]. To dial Go off-hook. Press the flexible button assigned as a One-touch Dialing button. Enter the outside line access number before an outside phone number. 5.2 During a Conversation Call Hold To hold Press [ ]/[HOLD].
  • Page 23: Multiple Party Conversation

    Each item can be named on the LCD screen through personal or system programming to reflect the function of its corresponding flexible button. Additionally, the flexible buttons can be organized into 4 “pages”, allowing you to assign a total of 24 items (KX-DT635)/48 items (KX-DT680). CO03 CO06...
  • Page 24 Self Labeling LCD Display Press [ ]/[PAUSE/PROGRAM]. Press a flexible button, or press the [ ]/[NEXT PAGE] button (KX-DT635)/Soft button: S5 (KX-DT680), and then press a flexible button. Enter Enter the number to store (max. 32 digits). Press [ ]/[ENTER].
  • Page 25: Installation And Setup

    6 Installation and Setup 6 Installation and Setup Note • Panasonic assumes no responsibility for injuries or property damage resulting from failures arising out of improper installation or operation inconsistent with this documentation. 6.1 Attaching the Stand Note • If you place the display face down when you attach the stand, be sure to place a soft cloth under the display.
  • Page 26: Removing The Stand

    6.2 Removing the Stand 6.2 Removing the Stand Tilt the stand in the direction indicated while pushing the PUSH marks with both hands. PUSH PUSH 6.3 Adjusting the Stand Position Push the PUSH marks in the direction indicated, with both hands, and tilt and slide the stand until it becomes fixed in the desired position.
  • Page 27 6.4 Connections 6.4 Connections *1 The telephone line cord (included) *2 Connect to a PBX *3 Handset cord (included) *4 To a handset *5 EHS headset jack *6 Headset jack...
  • Page 28 • Cords used to connect devices to the EHS jack or headset jack must be less than 3 m (9.8 ft) in length. Note • For up-to-date information about headsets that have been tested with this unit, refer to the following web site: https://panasonic.net/cns/pcc/support/pbx/sys_com/index.html...
  • Page 29: Wall Mounting

    7 Wall Mounting 7 Wall Mounting 7.1 Wall Mounting Connect the handset cord. Insert the 3 tabs of the wall mounting adaptor into the designated openings in the base. Fasten the wall mounting adaptor to the base with 1 screw. (Recommended torque: 0.4 N·m [4.08 kgf·cm/3.54 lbf·in] to 0.6 N·m [6.12 kgf·cm/5.31 lbf·in]) Connect the cables to the unit, and run the cables through the grooves in...
  • Page 30: Hooking The Handset

    7.2 Hooking the Handset 7.2 Hooking the Handset To Hook the Handset during a Conversation Hook the handset over the top edge of the unit. To Lock the Handset Hook when the Unit is Wall Mounted Remove the handset hook from the slot. Turn it up-side-down.
  • Page 31 One screw here WALL MOUNTING TEMPLATE 1. Drive the screws into the wall as indicated. 2. Hook the unit onto the screw heads. Note Make sure to set the print size to correspond with the size of this page. If the dimensions of the paper output still deviate slightly from the measurements indicated here, use the measurements indicated here.
  • Page 32 PNQX9073ZA PD0620KU0...

Table of Contents