Table of Contents
Advertisement
Quick Links
RS100 - RSC100
RS100 - RSC100
WORKSHOP MANUAL
WORKSHOP MANUAL
2018
Rel. 0.0
PRODUCTION YEAR
The manufacturer reserves the right to make all the necessary technical or commercial improvements to
its products, so there may be some differences between the series of engines and the contents of this
manual. However the basic specifications and different operating procedures will remain the same.
by STIGA - No use of the illustrations or duplication, reproduction or translation, even partial, of the texts
in this document may be made without explicit authorization.
IMPORTANT NOTICE : The information contained herein is intended for Service Operations and professionals
only, able to competently perform the operations described herein, using the appropriate equipment in
order to safeguard se-curity and performance of the machine. The manufacturer is not liable for damages
or injuries arising from operations performed by individuals or inadequate facilities.
Advertisement
Table of Contents

Related Manuals for Stiga RS100


Summary of Contents for Stiga RS100
- Page 1 However the basic specifications and different operating procedures will remain the same. by STIGA - No use of the illustrations or duplication, reproduction or translation, even partial, of the texts in this document may be made without explicit authorization.
-
Page 3: Table Of Contents
<< BACK >> Engine RS100 - RSC100 CONTENTS INTRODUCTION ..................... 5 1. RULES AND PROCEDURES FOR SERVICE CENTRES .......... 6 1.1. Guarantee validity ..........................6 1.2. Service repairs after guarantee period ....................6 1.3. Fault notification .............................6 1.4. Spare parts request ..........................6 2. GENERAL AND SAFETY REGULATIONS ............. 7 2.1. Qualification of operators ........................7... - Page 4 8.3. Adjusting minimum speed ........................26 8.4. Adjusting maximum speed .........................26 8.5. Adjusting the carburation ........................26 9. CARBURATION valid for RS100 model) ..............27 9.1. Removing and cleaning the carburettor ...................27 9.2. Replacing the carburettor ........................30 9.3. Adjusting maximum speed .........................30 9.4.
-
Page 5: Introduction
Centres the information necessary for a correct particularly important information, risks, warnings maintenance, dismantling and repair procedure and prescriptions: for engines RS100 and RSC100. Interventions on the engine must be performed in accordance with instructions in the following pages Warns of operations that should be carried... -
Page 6: Rules And Procedures For Service Centres
<< BACK >> Engine RS100 - RSC100 INDEX 1. RULES AND PROCEDURES FOR SERVICE CENTRES 1.1. Guarantee validity The warranty is supplied under the terms, procedu- res and limits stated in the contract. 1.2. Service repairs after guarantee period The Service Centre must write a report for each intervention containing the serial number of the 3.1], and summary information about... -
Page 7: General And Safety Regulations
<< BACK >> Engine RS100 - RSC100 INDEX 2. GENERAL AND SAFETY REGULATIONS regulations that apply to most repair shops, we IMPORTANT: Before commencing with any recommend you: intervention, carefully read the information provided in the present manual, in particular - disconnect the spark plug cap before servicing;... -
Page 8: Warning Labels
<< BACK >> Engine RS100 - RSC100 INDEX 2. GENERAL AND SAFETY REGULATIONS 2.4. Warning labels readequate ventilation and, therefore, avoid gas poisoning. On the canopy motor, in a immediately identifica- tion position, are some indication or prescription plates for the safety operator. -
Page 9: Technical Data And Specifications
<< BACK >> Engine RS100 - RSC100 INDEX 3. TECHNICAL DATA AND SPECIFICATIONS 3.4. Expendable materials RSC100 RS100 Unleaded (green) Petrol minimum 90N.O. - da 5 a 35 °C SAE 30 Engine oil - da -15 a + 35°C 10W30... -
Page 10: Tightening Torques
<< BACK >> Engine RS100 - RSC100 INDEX 3. TECHNICAL DATA AND SPECIFICATIONS 3.6. Tightening torques Mod. RSC 100 60-70 Nm 4-6 Nm 7-9 Nm 8-12 Nm 11-13 Nm 8-10 Nm 8-10 Nm 8-12 Nm 16-20 Nm 8-12 Nm 6-8 Nm... -
Page 11: Table Of Tightening Torques
<< BACK >> Engine RS100 - RSC100 INDEX 3. TECHNICAL DATA AND SPECIFICATIONS 3.7. Table of Tightening torques Chapter Ref. Description of screw Tightening torques Assembly fixing nut 8 - 10 Nm Tank fixing screw 8 - 10 Nm Fixing nuts, starter assembly... -
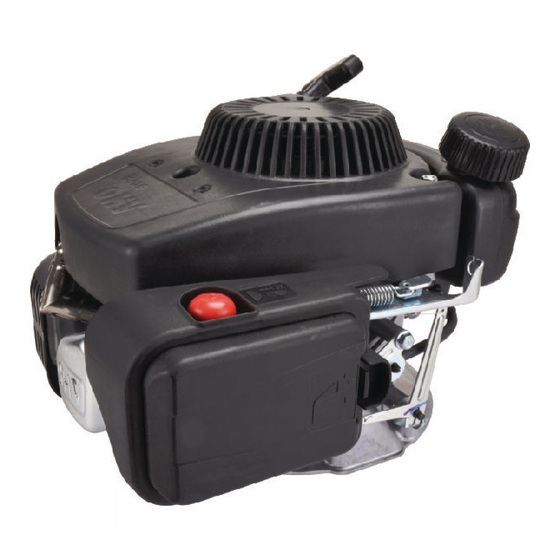
Page 12: Identification Of Engine Units
<< BACK >> Engine RS100 - RSC100 INDEX 3. TECHNICAL DATA AND SPECIFICATIONS 3.8. Identification of engine units For ease of reference, this manual has subdivided maintenance operations into different sections, each of which refers to an engine component unit as indicated in the diagrams below. -
Page 13: Engine Tuning And Testing
<< BACK >> Engine RS100 - RSC100 INDEX 4. ENGINE TUNING AND TESTING 4.1. Operating guidelines The engine requires a series of interventions (shown in the table below) in order to ensure minimum basic maintenance. Every 25 Every 50 Every 5 hours... -
Page 14: Functional Test
<< BACK >> Engine RS100 - RSC100 INDEX 4. ENGINE TUNING AND TESTING 4.3. Functional test A functional test needs to be carried out at the end of each servicing operation, to check that the operations made are effective. The test must be... -
Page 15: Tank And Supply
<< BACK >> Engine RS100 - RSC100 INDEX 5. TANK AND SUPPLY IMPORTANT: Carefully read the information below before commencing any intervention. General Information The fuel supply system comprises the petrol tank connected to the carburettor by a pipe; a mesh filter at the bottom of the tank prevents deposits and impurities from reaching the carburettor. -
Page 16: Emptying And Removing The Tank
<< BACK >> Engine RS100 - RSC100 INDEX 5. TANK AND SUPPLY 5.1. Emptying and removing the tank 1 - Remove the ring (1) of the petrol pipe (2) from the tank side and drain all the fuel from the tank and the pipe into a suitable container. -
Page 17: Checking And Cleaning The Breather Pipe
<< BACK >> Engine RS100 - RSC100 INDEX 5. TANK AND SUPPLY 5 - Empty the tank and dispose of the petrol used for cleaning in accordance with the laws in force. 5.1] 6 - Refit the tank tightening the screws (5) to the torques indicated. -
Page 18: Starting System
<< BACK >> Engine RS100 - RSC100 INDEX 6. STARTING SYSTEM General information The starter assembly inside the cover consists of a rope wound around a pulley. The movement from the pulley to the fan (and therefore to the engine shaft) is transmitted through a pair of couplings. The return of the pulley and the rewinding of the rope are obtained from a spiral spring. -
Page 19: Replacing The Hooks
<< BACK >> Engine RS100 - RSC100 INDEX 6. STARTING SYSTEM 4 - Rotate the pulley (4) through about 6 complete turns anticlockwise in order to load the spring and hold it still. 5 - Insert one end of the rope (5) (ø 3mm - length... -
Page 20: Intake System
<< BACK >> Engine RS100 - RSC100 INDEX 7. INTAKE SYSTEM General information The intake system uses an air filter directly connected to the carburettor by means of a manifold which conveys the air/petrol mixture to the inlet valve. See the relevant section for advice on resolving problems due to the malfunctioning of the air intake system. - Page 21 7 - Refit the element (3) and the cover (1) into their housings, into its housing, paying attention to hook up the clips correctly (2). model RS100 During the installation of the sponge filter element, make sure it is properly posi- tioned between the tabs, as shown in the figure.
-
Page 22: Maintenance Of Sponge Filtering Element ( Model Rs100)
<< BACK >> Engine RS100 - RSC100 INDEX 7. INTAKE SYSTEM 7.1a. Maintenance of sponge filtering element ( model RS100) 7.1] 1 - Remove the cover and remove the filter element (1). WARNING: Close the intake duct to prevent the entry of foreign objects. -
Page 23: Carburation ( Valid For Rsc100 Model)
<< BACK >> Engine RS100 - RSC100 INDEX 8. CARBURATION valid for RSC100 model) General information The carburettor has a float with a fixed jet and a “CHOKE” control. See the relevant section for advice on resolving problems due to carburation. - Page 24 << BACK >> Engine RS100 - RSC100 INDEX 8. CARBURATION valid for RSC100 model) 5 - Using pliers, disconnect the intake butterfly rod (7) and slide the small rod (8) for the relative com- pensation spring upwards. 6 - Disconnect the wire (9) from the choke butterfly lever, completely remove the carburettor (10) for the relative compensation spring upwards (11).
- Page 25 << BACK >> Engine RS100 - RSC100 INDEX 8. CARBURATION valid for RSC100 model) 8 - Pull out the pin (16), dismount the float (17) and remove the gasket (18). 9 - Undo the main jet (19) and pull out the pilot jet (20).
-
Page 26: Replacing The Carburettor
<< BACK >> Engine RS100 - RSC100 INDEX 8. CARBURATION valid for RSC100 model) 8.2. Replacing the carburettor 1 - Perform operations 1 - 2 - 3 - 4 - 5 - 6 - 12 - 13 - 14 8.1] - 15 indicated in section above. -
Page 27: Carburation ( Valid For Rs100 Model)
<< BACK >> Engine RS100 - RSC100 INDEX 9. CARBURATION valid for RS100 model) General information The carburettor is a fixed jet floating type with “PRIMER”. See the relevant section for advice on resolving problems due to carburation. The carburettor is located on the left-hand side of the engine. For maintenance operations it is necessary to dismantle the air intake filter in the sequence shown below. - Page 28 << BACK >> Engine RS100 - RSC100 INDEX 9. CARBURATION valid for RS100 model) 6 - Using pliers, disconnect the intake butterfly rod (6) and slide the small rod (7) for the relative com- pensation spring upwards. 7 - Completely remove the carburettor (8) and the gasket (9).
- Page 29 << BACK >> Engine RS100 - RSC100 INDEX 9. CARBURATION valid for RS100 model) 9 - Pull out the pin (14), dismount the float (15) and remove the gasket (16). 10 - Undo the main jet (17) and pull out the pilot jet (18).
-
Page 30: Replacing The Carburettor
<< BACK >> Engine RS100 - RSC100 INDEX 9. CARBURATION valid for RS100 model) 9.2. Replacing the carburettor 1 - Perform operations 1 - 2 - 3 - 4 - 5 - 6 - 7 - 13 - 14 9.1] - 15 - 16 indicated in section above. -
Page 31: Governor System Of The Carburettor
<< BACK >> Engine RS100 - RSC100 INDEX 10. GOVERNOR SYSTEM OF THE CARBURETTOR General information The carburettor governor system uses a engine shaft linkage fitted on a support fixed to the left-hand side of the engine, completed by a counterweight device, driven by the camshaft, and thus sensitive to changes in the engine’s revolution pattern depending on load. -
Page 32: Adjusting Maximum Speed ( Model Rsc100)
<< BACK >> Engine RS100 - RSC100 INDEX 10. GOVERNOR SYSTEM OF THE CARBURETTOR 10.2. Adjusting maximum speed ( model RSC100) 1 - Check that the throttle cable is adjusted cor- 10.1]. rectly FAST 2 - Let the engine heat up for a few minutes then set the throttle control to “FAST”. - Page 33 << BACK >> Engine RS100 - RSC100 INDEX 10. GOVERNOR SYSTEM OF THE CARBURETTOR 7 - If the above checks do not show any faults, the phasing of the governor’s control lever (12) with respect to the counterweight device must be...
-
Page 34: Adjusting Maximum Speed ( Model Rs100)
<< BACK >> Engine RS100 - RSC100 INDEX 10. GOVERNOR SYSTEM OF THE CARBURETTOR 10.2a. Adjusting maximum speed ( model RS100) Check the rotation speed on the speed indicator (5). 2 - Bend the plate (6) slightly upwards using pliers to increase the engine RPM and downwards to decrease it. -
Page 35: Replacing The Lever Support ( Model Rsc100)
<< BACK >> Engine RS100 - RSC100 INDEX 10. GOVERNOR SYSTEM OF THE CARBURETTOR 10.3. Replacing the lever support ( model RSC100) 7.1] 1 - Remove the filter element and the 8.1]. filter holder 2 - Position the choke lever to minimum (“SLOW”... -
Page 36: Replacing The Lever Support ( Model Rs100)
<< BACK >> Engine RS100 - RSC100 INDEX 10. GOVERNOR SYSTEM OF THE CARBURETTOR 10.3a. Replacing the lever support ( model RS100) 7.1] 1 - Remove the filter element and the 9.1]. filter holder 2 - Disconnect the spring (7). -
Page 37: Ignition
<< BACK >> Engine RS100 - RSC100 INDEX 11. IGNITION General information The ignition system has a fan with an electronic coil which supplies high voltage to the spark plug. See the relevant section for advice on resolving problems related to the ignition. -
Page 38: Adjusting The Air Gap And Checking The Coil
<< BACK >> Engine RS100 - RSC100 INDEX 11. IGNITION 11.2. Adjusting the air gap and checking the coil 6.1]. 1 - Remove the starter assembly 2 - Make sure that the earth cable faston (6) of the coil (7) is not oxidized; if it is, disconnect, clean and remount it, spraying it with a special antioxidant. -
Page 39: Replacing The Coil
<< BACK >> Engine RS100 - RSC100 INDEX 11. IGNITION 11.1]. 7 - Perform a spark test as indicated in - If the spark jumps: the coil functions properly and in the event of malfunction, verify that the cut-off cable (13) is not earthed. -
Page 40: Turning Off And Stopping The Engine
<< BACK >> Engine RS100 - RSC100 INDEX 12. TURNING OFF AND STOPPING THE ENGINE General information The engine is turned off and stopped by releasing a lever on the lawnmower. The cable acts on a lever which simultaneously activates a microswitch that sends the coil to earth as well as a brake which acts on the flywheel. -
Page 41: Checking The Brake
<< BACK >> Engine RS100 - RSC100 INDEX 12. TURNING OFF AND STOPPING THE ENGINE 12.3. Checking the brake 6.1]. 1 - Remove the starter assembly 2 - Check that the thickness of the friction pad (8) is not less than 2 mm at its thinnest point. -
Page 42: Replacing The System For Turning Off And Stopping The Engine
<< BACK >> Engine RS100 - RSC100 INDEX 12. TURNING OFF AND STOPPING THE ENGINE 12.4. Replacing the system for turning off and stop- ping the engine 6.1]. 1 - Remove the starter assembly 8.1] mod. 2 - Remove the filter assembly RSC100 (or 9.1]... -
Page 43: Exhaust System
<< BACK >> Engine RS100 - RSC100 INDEX 13. EXHAUST SYSTEM General information The exhaust system consists of a muffler installed on the cylinder together with a gasket, a spacer and a heatproof baffle. 16]. To solve problems in the exhaust system, see the relevant chapter 13.1. Removing and replacing the muffler... -
Page 44: Engine Block - External Operations
<< BACK >> Engine RS100 - RSC100 INDEX 14. ENGINE BLOCK - External operations 14.1. Checking the heating unit seal 1 - Remove the cap (1) and take out the spark plug (2). 2 - Manually set the piston to the TDC (Top Dead Centre) of the compression stroke so that both valves are closed. -
Page 45: Adjusting The Valve Clearance
<< BACK >> Engine RS100 - RSC100 INDEX 14. ENGINE BLOCK - External operations 14.2. Adjusting the valve clearance WARNING: The adjustment must be made with the engine is cold. 1 - Remove the cover and demount the spark plug 14.1]. -
Page 46: Dismantling And Replacing The Complete Fan
<< BACK >> Engine RS100 - RSC100 INDEX 14. ENGINE BLOCK - External operations 14.3. Dismantling and replacing the complete 6.1]. 1 - Remove the starter assembly 2 - Operate the exhaust brake. 3 - Using an airgun, undo the nut (13). -
Page 47: Blow-By Check
<< BACK >> Engine RS100 - RSC100 INDEX 14. ENGINE BLOCK - External operations 14.4. Blow-by check 14.3]. 1 - Remove the complete fan 2 - Unscrew the screw (19) fixing the closing plate (20). 3 - Check that the reed (21) is not blocked or de- formed. -
Page 48: Replacing The Lower Compression Ring Of The Engine Shaft (Sump Side)
<< BACK >> Engine RS100 - RSC100 INDEX 14. ENGINE BLOCK - External operations 14.6. Replacing the lower compression ring of the engine shaft (sump side) NOTE - Before executing this operation di- scharge all the oil from the bowl and rotate 180°... -
Page 49: Engine Block - Overhauling Internal Parts
<< BACK >> Engine RS100 - RSC100 INDEX 15. ENGINE BLOCK - Overhauling internal parts 15.1. Removing the engine 5.1]. 1 - Empty the tank of fuel 2 - Drain the oil in the sump by removing the filler plug and turning the mower on its side. -
Page 50: Carter Opening
<< BACK >> Engine RS100 - RSC100 INDEX 15. ENGINE BLOCK - Overhauling internal parts All the following operations on the grass cutter ne- cessitate the removal of the motor. 15.2. Carter opening 1 - ( RSC100 model only) Remove the carbu- 8.1]... -
Page 51: Dismantling And Checking The Camshaft And Counterweight Governor
<< BACK >> Engine RS100 - RSC100 INDEX 15. ENGINE BLOCK - Overhauling internal parts 15.3. Dismantling and checking the camshaft and counterweight governor 1 - Bring the piston to the TDC (Top Dead Centre). 15.2]. 2 - Open the crank case 3 - Remove the camshaft (9). - Page 52 << BACK >> Engine RS100 - RSC100 INDEX 15. ENGINE BLOCK - Overhauling internal parts 9 - In the case of breakage or irregular operation of the counterweights the whole group, fixed by a plate (15) and a screw (16) must be replaced.
-
Page 53: Dismantling And Checking The Piston, Piston Rings, Connecting Rod And Engine Shaft
<< BACK >> Engine RS100 - RSC100 INDEX 15. ENGINE BLOCK - Overhauling internal parts 15.4. Dismantling and checking the piston, piston rings, connecting rod and engine shaft NOTA - These paragraphs describe all the operations for checking and overhauling the thermal components of the engine;... - Page 54 << BACK >> Engine RS100 - RSC100 INDEX 15. ENGINE BLOCK - Overhauling internal parts 9 - To check the wear in the compression rings, insert them one at a time into the cylinder (25) by about 10-15 mm and measure the gap between the two ends with a feeler gauge (28);...
- Page 55 << BACK >> Engine RS100 - RSC100 INDEX 15. ENGINE BLOCK - Overhauling internal parts 13 - Check the diameter of the gudgeon pin (32) in several places and replace it if it is less than 11.95 mm, even at a single point.
- Page 56 << BACK >> Engine RS100 - RSC100 INDEX 15. ENGINE BLOCK - Overhauling internal parts 16 - On the engine shaft (26), removed beforehand, use a digital gauge to check the diameter of the connecting rod pin. The value must not be less than 23.92 mm or the engine shaft will have to be replaced.
- Page 57 << BACK >> Engine RS100 - RSC100 INDEX 15. ENGINE BLOCK - Overhauling internal parts 19 - Fit the connecting rod (22), gudgeon pin (32) and clamping rings (31) to the piston (24). NOTE - The marking on the piston must be directed towards the intake.
- Page 58 << BACK >> Engine RS100 - RSC100 INDEX 15. ENGINE BLOCK - Overhauling internal parts 22 - Mount the engine shaft (26) and the connecting rod cap (21) with the relative screws (23), taking care with the position references (38) so as to avoid inverting the mounting direction of the cap.
-
Page 59: Overhauling The Valves
<< BACK >> Engine RS100 - RSC100 INDEX 15. ENGINE BLOCK - Overhauling internal parts 15.5 Overhauling the valves NOTE - These paragraphs describe all the operations for checking and overhauling the valves; it is left to the operator to assess the advisabi-... - Page 60 << BACK >> Engine RS100 - RSC100 INDEX 15. ENGINE BLOCK - Overhauling internal parts 6 - Check the free length of the spring (43) and replace the spring of it is less than 29,4 mm. 7 - When mounting: - carefully clean the valve guides and housings of any foreign body;...
- Page 61 << BACK >> Engine RS100 - RSC100 INDEX 15. ENGINE BLOCK - Overhauling internal parts 9 - Close the carter and fix the screws (6) to the 15.2]. indicated couple 10 - During assembly perform the operations 15.2] indicated in section...
-
Page 62: Troubleshooting
<< BACK >> Engine RS100 - RSC100 INDEX 16. TROUBLESHOOTING PROBLEM CAUSE SOLUTION The engine brake cable is faulty or Adjust and/or replace the cable 12.1] unfastened Replace the whole shut-down group The OFF microswitch is faulty 12.2] Check electrical cabling of earth wire Coil earth connection 11.1]... - Page 63 << BACK >> Engine RS100 - RSC100 INDEX 16. TROUBLESHOOTING PROBLEM CAUSE SOLUTION The tank cap has a clogged breather Clean and/or replace the cap 5.3]; pipe Check correct valve operation 15.5]. Check that the spark plug is The engine starts but does Insufficient pressure 11.1].
- Page 64 << BACK >> Engine RS100 - RSC100 INDEX 16. TROUBLESHOOTING PROBLEM CAUSE SOLUTION The engine brake cable is bent or Check and/or adjust the cable 12.1] jammed The engine does not turn off The earth cable is disconnected or Check and/or replace oil breather 11.1]...
- Page 65 << BACK >> Engine RS100 - RSC100 INDEX page 65 Release 00 - 03/2018 Service manual...
Need help?
Do you have a question about the RS100 and is the answer not in the manual?
Questions and answers