
Related Manuals for Locosys RTK-M100


Summary of Contents for Locosys RTK-M100
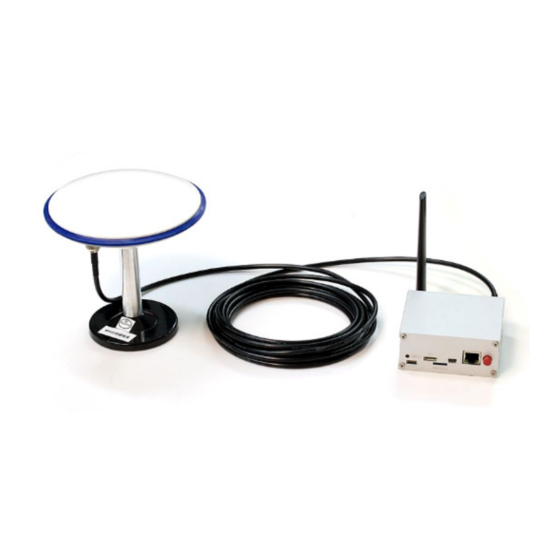
- Page 1 RTK-M100 M100 User’s Manual User’s Manual © 2020 LOCOSYS Technology Inc.
- Page 2 RTK-M100 User’s Manual Document history Version Date Updates May 31, 2020 Creation. Page 1of14...
-
Page 3: Table Of Contents
RTK-M100 User’s Manual Contents INTRODUCTION ..............................3 FEATURE ................................3 APPLICATION ............................... 3 HARDWARE DESCRIPTION ........................... 4 4.1. BLOCK DIAGRAM ............................4 4.2. ETHERNET CONNECTOR ..........................4 4.3. MINI USB CONNECTOR............................ 4 4.4. MICRO SD CONNECTOR ........................... 4 4.5. I/O CONNECTOR ............................. 4 4.6. -
Page 4: Introduction
RTK-M100 system have not only 64M bytes on-board flash memory for saving up to 7 days of RTK position data, but also a micro SD interface to log RTK position data and GNSS raw data for post processing. -
Page 5: Hardware Description
RTK-M100 User’s Manual 4. Hardware description 4.1. Block diagram 4.2. Ethernet connector The product does not support the hot plug of Ethernet. If Ethernet is going to be used, please insert Ethernet cable before turning on the power of the product. -
Page 6: Serial Port Connector
RTK-M100 User’s Manual Pin 4: IO_PWR, power input for IO pin 1 ~ 4. Input voltage range is 3.3V~5.5V. Pin 5: IO_01, general purpose IO pin 1. Logic level is based on the voltage of IO_PWR. Pin 6: IO_02, general purpose IO pin 2. Logic level is based on the voltage of IO_PWR. -
Page 7: Rf Connectors Of Rtk Antenna
RTK-M100 User’s Manual 4.7. RF connectors of RTK antenna The product supplies the dedicated 3.3V power to the external GNSS antennas through RF connectors of RTK module. It has built-in antenna short circuit protection. The product can detect RTK antenna connection status. If RTK antenna is not properly connected, green LED will be always on. -
Page 8: Getting Started
RTK-M100 User’s Manual 6. Getting started 1. Install USB driver for MS Windows. It can be downloaded at http://www.prolific.com.tw/UserFiles/files/PL2303_Prolific_DriverInstaller_v1200.zip. 2. If Ethernet is going to be used, plug in Ethernet cable before power on the product. 3. If 4G/LTE is going to be used, insert a micro SIM card with no PIN lock as described in the section 5. -
Page 9: Configuration Examples
6. Now you can run PC software tool RTKFox to evaluate the product. 7. Configuration examples RTK-M100 product series can work in three different modes, including rover, base station and sensor mode. The user can use PC software tool RTKFox to configure. After finishing the steps in section 6, RTKFox starts as below. -
Page 10: Configuration Example Of The Rover
RTK-M100 User’s Manual 7.1. Configuration example of the rover Click the radio button of “Rover” to show the setting page as below picture. 7. Click the selection “Position Mode”. There are three options. The option “kinematic” is for RTK position. The option “Moving baseline” is for RTK heading. The option “kinematic + moving baseline”... - Page 11 RTK-M100 User’s Manual 12. Click “Satellite Info” button to check the received GNSS signal strength. Most signals should be higher than 40. If you want to see satellite information from the reference/base station, you can click “Display” button and select “Rover & Base”.
- Page 12 RTK-M100 User’s Manual 13. Click “Monitor Status” button. If “bps of NETWORK” varies, the connection to NTRIP Caster is established and the correction data for RTK is received. 14. Click “Solution Result” button. You can see RTK fix or not and the other information of RTK position.
-
Page 13: Configuration Example Of The Base Station
RTK-M100 User’s Manual 7.2. Configuration example of the base station Click the radio button of “Base Station” to show the setting page as below picture. If the position of the product is known, select “LLH” and input its latitude, longitude and height. - Page 14 RTK-M100 User’s Manual Check 4G/LTE connection by clicking “Network” button. If the product registers to the network of the telecom provider, it will show “Connected” as below picture. Click “Satellite Info” button to check the received GNSS signal strength. Most signals should be higher than 40.
-
Page 15: Rtk Network
Most countries have Continuously Operating Reference Stations (CORS) operated by the government or enterprises. The standard protocol called NTRIP is adopted to access these RTK differential corrections. RTK-M100 product have 4G/LTE modem and support NTRIP that can access these corrections to achieve centimeter RTK accuracy.
Need help?
Do you have a question about the RTK-M100 and is the answer not in the manual?
Questions and answers