Table of Contents

Related Manuals for Miele KFN 28032 D WS


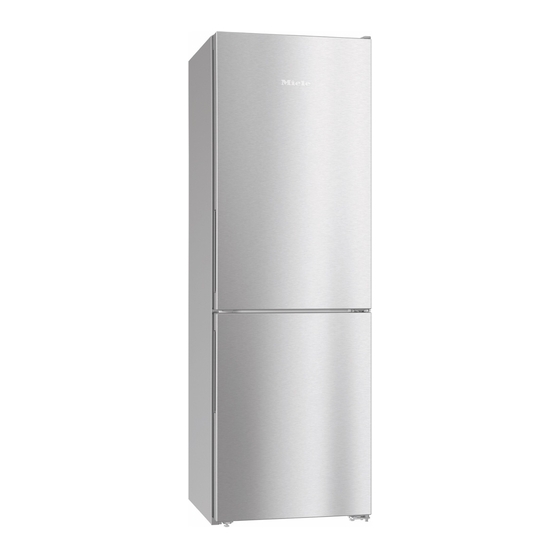
Summary of Contents for Miele KFN 28032 D WS
- Page 1 Operating and installation instructions Fridge-freezer To prevent the risk of accidents or damage to the appliance, it is essential to read these instructions before it is installed and used for the first time. en–AU, NZ M.-Nr. 11 210 740...
-
Page 2: Table Of Contents
Contents Warning and Safety instructions................ 5 Caring for the environment ................ 13 How to save energy..................... 14 Guide to the appliance .................. 16 Accessories ...................... 18 Accessories supplied .................... 18 Optional accessories..................... 18 Before using for the first time ................ 20 Before using for the first time ................ - Page 3 Contents Explanation of the different settings..............35 Switching Party mode on/off ................ 35 Switching Holiday mode on/off .............. 36 Using the minute minder (QuickCool timer) .......... 37 Activating or deactivating the safety lock / .......... 38 Switching the appliance off ................. 38 Switching Sabbath mode ...
- Page 4 Contents Cleaning the front of the appliance and the side panels........56 Stainless steel appliances ................ 56 Cleaning the ventilation gaps ................56 Cleaning the compressor and metal grille at the back of the appliance ....56 Cleaning the door seals..................57 Starting up the appliance after cleaning ...............
-
Page 5: Warning And Safety Instructions
The appliance is not suitable for use in areas where there is a risk of explosion. Miele cannot be held liable for damage resulting from improper or incorrect use of the appliance. - Page 6 Warning and Safety instructions This appliance is not intended for use by persons (including children) with reduced physical, sensory or mental capabilities, or lack of experience and knowledge, unless they have been given supervision or instruction concerning its use by a person responsible for their safety, and are able to recognise the dangers of misuse.
- Page 7 – disconnect the appliance from the mains electricity supply, – ventilate the room where the appliance is located for several minutes, and – call Miele. The more coolant there is in a refrigeration appliance, the larger the room should be in which it is installed. In the event of a leakage, if the appliance is in a small room, there is a danger of combustible gases building up.
- Page 8 If the connection cable is faulty, it must only be replaced by a Miele approved service technician in order to avoid a hazard. Do not connect the appliance to the mains electricity supply by a multi-socket unit or an extension lead.
- Page 9 Repairs and other work by unqualified persons could be dangerous. Maintenance work and repairs to electrical appliances must only be carried out by a Miele approved service technician. The manufacturer's warranty will be invalidated if the appliance is not repaired by a Miele approved service technician.
- Page 10 Warning and Safety instructions Do not store explosive materials in the appliance or any products containing propellants (e.g. spray cans). Flammable gas mixtures can be ignited by electrical components. Danger of fire and explosion! Do not operate any electrical equipment (e.g. an electric ice cream maker) inside the appliance.
- Page 11 Warning and Safety instructions Use only genuine original Miele spare parts. If spare parts or accessories from other manufacturers are used, the warranty will be invalidated, and Miele cannot accept liability. Cleaning and care Do not use any oils or grease on the door seals, as these will cause the seals to deteriorate and become porous with time.
- Page 12 Warning and Safety instructions Disposal of your old appliance If your old appliance has a door lock, destroy it. This way you will prevent the risk of playing children accidentally locking themselves in and endangering their lives. Splashes of coolant can damage the eyes. Be careful not to damage any part of the pipework whilst awaiting disposal, e.g.
-
Page 13: Caring For The Environment
Please dispose of it at your local community waste collection / recycling centre for electrical and electronic appliances, or contact Miele. You are also responsible for deleting any personal data that may be stored on the appliance being disposed of. -
Page 14: How To Save Energy
How to save energy Normal energy Increased energy consumption consumption Installation/ In a ventilated room. In an enclosed, unventilated Maintenance room. Protected from direct In direct sunlight. sunlight. Not situated near a heat Situated near a heat source source (radiator, oven). (radiator, oven). - Page 15 How to save energy Normal energy Increased energy consumption consumption The drawers and shelves are arranged as they were when the appliance was delivered. Only open the door when Frequent opening of the necessary and for as short a door for long periods will time as possible.
-
Page 16: Guide To The Appliance
Guide to the appliance a Control panel with display b Interior lighting c Door shelf d Fan e Adjustable shelf f Bottle rack g Condensate channel and drain hole h Fruit and vegetable drawers i Bottle shelf with bottle holder j Recessed handle with door opening aid (Click2open) k NoFrost module... - Page 17 Guide to the appliance Symbols in the display Controls Symbol Function Standby For switching on the whole appliance; For switching on the refrigerator section separately Settings mode For selecting settings (see “Selecting further settings”) / Minus/plus For altering a setting (e.g. temperature) For confirming a setting / ...
-
Page 18: Accessories
Accessories Accessories supplied Optional accessories A range of useful Miele accessories and Bottle holder care products are available for your appliance. Accessories are available from Miele directly (see back cover for contact details). Bottle rack The fins of the bottle holder jut out into... - Page 19 Replacement filters to fit the Active AirClean holder are available. We recommend replacing the charcoal filters every 6 months. Miele all purpose microfibre cloth Light soiling and fingerprints on stainless steel fronts, control panels and furniture can be easily removed with this microfibre cloth.
-
Page 20: Before Using For The First Time
Before using for the first time Before using for the first time Connecting the appliance Connect the appliance to the mains Removing packaging material electricity supply. Remove all packaging material from the inside of the appliance. Removing the protective foil The appliance is covered with protective foil to protect it during transportation. -
Page 21: Switching On And Off
– Temperature in the freezer section = -18 °C Standby Touch briefly. The welcome message Miele - Willkommen will appear in the display for approx. 3 seconds. If this does not happen and appears in the display, the safety lock is activated (see “Selecting further settings”... -
Page 22: Start Screen
Switching on and off Start screen Switching off the appliance You can switch the appliance off in Settings mode (see “Selecting further °C settings”). °C °C The start screen is the screen from which all settings can be selected. ... - Page 23 Switching on and off Switching off the refrigerator section separately The refrigerator section can be switched off without having to switch °C off the freezer section. Useful tip: We recommend using the Start screen – refrigerator section switched Holiday mode function if you are away on holiday (see “Selecting further The temperature display for the...
-
Page 24: Switching Off For Longer Periods Of Time
Switching on and off The refrigerator section is switched on and will start to cool. It will gradually reach the set temperature. The interior lighting will come on when the refrigerator section door is opened. Switching off for longer periods of time If, during a long absence, the appliance is switched off but not cleaned and the door(s) left shut,... -
Page 25: The Correct Temperature
The correct temperature It is very important to set the correct ... in the refrigerator section temperature for storing food in the We recommend a temperature of 4 °C appliance. Bacteria will cause food in the refrigerator section. which is not stored at the correct temperature to deteriorate rapidly. -
Page 26: Temperature Display
The correct temperature Temperature display Setting the temperature The temperatures for the refrigerator and freezer sections can be set °C independently of each other. Touch the temperature display for the °C section you want to change. The previously set temperature will Start screen appear. -
Page 27: Temperature Range
The correct temperature Touch after setting the temperature to confirm your entry. Or wait approximately 8 seconds after the last touch of a sensor. The temperature will then be adopted automatically. Useful tip: The newly set temperature can also be confirmed and adopted by closing the appliance door. -
Page 28: Using Superfreeze, Supercool And Dynacool
Using SuperFreeze, SuperCool and DynaCool The following functions are available Useful tip: To save energy, you can depending on the section: manually switch off SuperFreeze once the freezer reaches a constant – Refrigerator section temperature of -18 °C or colder. Monitor SuperCool ... -
Page 29: Dynacool Function
Using SuperFreeze, SuperCool and DynaCool DynaCool function Switching a function on or off Touch the temperature display for the When the dynamic cooling function (DynaCool) is not switched on, the section you want. natural circulation of air will cause different temperature zones in the ... -
Page 30: Displaying A Selected Function
Using SuperFreeze, SuperCool and DynaCool Functions that are switched on are not displayed on the start screen. Following an interruption to the power supply any function which was previously switched on will be switched off. Displaying a selected function Touch the temperature display for the relevant section. -
Page 31: Temperature And Door Alarm
Temperature and door alarm The appliance has been fitted with a The acoustic and visual signals will be warning system which ensures that the activated if: temperature in the freezer section – The appliance is switched on and the cannot rise unnoticed and to avoid temperature in the appliance differs energy being wasted if a door is left greatly from the set temperature. -
Page 32: Door Alarm
Temperature and door alarm You can exit the flashing temperature The door alarm is only displayed on display early: the start screen. Touch the temperature display for the When you are in Settings mode, the freezer section. door alarm is automatically supressed. No symbol will be displayed and no The flashing, warmest temperature alarm will sound. -
Page 33: Selecting Further Settings
Changing the temperature unit °C °F Demo mode (only visible when switched on) Resetting factory settings Accessing information about Display (important when your appliance reporting a fault to Miele Service) Reminder to replace charcoal On (orange symbol)/Off filter... - Page 34 Selecting further settings Selecting further settings In Settings mode , certain settings can be adjusted and functions selected, allowing you to adjust the refrigeration appliance to suit your requirements. See the following pages for more Settings mode information on these settings.
- Page 35 Selecting further settings Entering values Explanation of the different settings All values entered must be confirmed with . If the value is not confirmed, Switching Party mode on/off the display will revert to the start screen after approx. 15 seconds and the This function is particularly useful if you selected or altered values will not be need to cool or freeze large quantities...
- Page 36 Selecting further settings Switching Holiday mode on/off If Holiday mode cannot be switched on, the refrigerator section has been This function is useful when you go on switched off separately. holiday if you do not wish to switch the refrigerator section off completely and If Party mode, SuperCool or DynaCool do not need a high degree of cooling.
- Page 37 Selecting further settings Using the minute minder – When the minute minder duration (QuickCool timer) has elapsed An audible signal will sound and will The minute minder can be used to time activities in the kitchen, e.g. chilling flash. pastry.
- Page 38 Selecting further settings – Switching off the safety lock Activating or deactivating the safety lock / Touch the display. The safety lock can be activated to appears. secure against unintentional: Touch for approx. 6 seconds. – switching off The start screen appears.
- Page 39 Selecting further settings Switching Sabbath mode on/off – Switching Sabbath mode on Touch . The appliance has a Sabbath mode to support the observance of religious lights up orange. customs. Then lights up white in the display. The following are switched off: –...
- Page 40 Selecting further settings Switching the keypad tone Setting the time before the door / alarm is triggered on/off The appliance has a door alarm. If a Each time a selectable field in the door is open for a longer period of time display is touched, a keypad tone an alarm will sound (unless this has sounds.
- Page 41 Setting the temperature unit °C/°F Useful tip: This data is important for You can choose between degrees reporting an appliance fault to Miele's Celsius °C and degrees Fahrenheit °F customer service department.
- Page 42 Selecting further settings Reminder to replace charcoal filter The appliance is not supplied with charcoal filters with holder KKF-FF (Active AirClean). These are available to purchase separately (see “Accessories – Optional accessories”). If the charcoal filter indicator has been activated, you will be reminded to replace the filters after approx.
-
Page 43: Using The Refrigerator Efficiently
Using the refrigerator efficiently Coldest area Different storage zones The coldest area in the refrigerator Due to the natural air circulation there section is directly above the fruit and are different temperature zones in the vegetable drawer and at the back of the refrigerator. -
Page 44: Food Which Is Not Suitable For Storage In The Refrigerator
Using the refrigerator efficiently Food which is not suitable for Storing food correctly storage in the refrigerator Ensure that food stored in the refrigerator section is in packaging or Not all food is suitable for refrigeration covered properly. This will prevent at temperatures below 5 °C because it food smells from affecting other foods, is sensitive to cold. -
Page 45: Adjusting The Interior Fittings (Refrigerator Section)
Adjusting the interior fittings (refrigerator section) Adjusting the door shelves/ Adjusting or removing the bottle shelf bottle holder Only move door/bottle shelves when they are empty. Push the door/bottle shelf upwards, then remove it by pulling it forwards. Replace the shelf at the required height. -
Page 46: Adjusting The Bottle Rack
Adjusting the interior fittings (refrigerator section) Adjusting the bottle rack Moving the charcoal filters The bottle rack is available as an Charcoal filters and a KKF-FF (Active optional accessory (see “Guide to the AirClean) holder are available as appliance - Optional accessories”). optional accessories (see “Guide to the appliance - Optional accessories”). -
Page 47: Freezing And Storing Food
Freezing and storing food Freezing fresh food Storing frozen food Fresh food should be frozen as quickly Never refreeze partially or fully as possible so that the nutritional value defrosted food. Defrosted food may of the food, its vitamin content, only be refrozen after it has been appearance and flavour are maintained. -
Page 48: Home Freezing
Freezing and storing food – Allow hot foods and drinks to cool Home freezing down before placing them in the Only freeze food which is fresh and freezer. Placing hot foods or drinks in in good condition. the freezer causes food that is already frozen to partially thaw and Tips on home freezing increases energy consumption. - Page 49 Freezing and storing food Before placing food in the appliance – Freezing the maximum amount of food When freezing more than 2 kg of fresh food, switch on the SuperFreeze If the ventilation gaps are blocked function for some time before placing the cooling performance will the food in the freezer (see “Using decrease and energy consumption...
- Page 50 Freezing and storing food Storage time for frozen food Defrosting frozen food The storage life of food varies greatly, Never refreeze partially or fully even when a constant temperature of defrosted food. Defrosted food may -18 °C is maintained. Even in frozen only be refrozen after it has been products, degradation processes take cooked.
-
Page 51: Using Accessories
Freezing and storing food Cooling drinks quickly Using accessories To cool drinks quickly in the refrigerator Making ice cubes section, switch on the SuperCool function. If you want to cool a large amount of drinks, or if you want to cool drinks in the freezer section, select Party mode ... -
Page 52: Defrosting
Defrosting Refrigerator section Freezer section The refrigerator section defrosts The appliance is equipped with a automatically. “NoFrost” system. The freezer defrosts automatically. Condensate and frost can build up on the back wall of the refrigerator section The moisture generated in the while the compressor is running. -
Page 53: Cleaning And Care
Cleaning and care Cleaning agents Do not let water get into the electronic unit or the lighting. Cleaning and conditioning agents used inside the appliance must be Risk of damage due to moisture food safe. ingress. The steam from a steam cleaning To avoid damaging the surfaces of your appliance can damage plastic parts appliance, do not use:... -
Page 54: Preparing The Appliance For Cleaning
Cleaning and care Dismantling an adjustable shelf Preparing the appliance for cleaning Before cleaning the shelf remove the plastic strip and protective strip at the Switch the appliance off. back of the shelf. Proceed as follows: appears in the display and cooling is ... -
Page 55: Cleaning The Interior And Accessories
Cleaning and care Cleaning the interior and Risk of damage as a result of accessories excessively high dishwasher temperatures. The appliance should be cleaned Some parts of the appliance may regularly, or at least once a month. become unusable, e.g. deform, if they are washed in the dishwasher at Clean up any spills, stains or food more than 55 °C. -
Page 56: Cleaning The Front Of The Appliance And The Side Panels
(you could Therefore it is best to remove soiling use a Miele vacuum cleaner dusting from the appliance doors and side brush, for example). A build-up of panels immediately. -
Page 57: Cleaning The Door Seals
Cleaning and care Cleaning the door seals Starting up the appliance after cleaning If a door seal is damaged or has Refit all shelves and accessories in come out of the groove, the door will the appliance. not close properly and cooling performance will be reduced. -
Page 58: Replacing The Charcoal Filters
“Selecting further settings – Reminder to replace charcoal filter”). Replacement KKF-RF charcoal filters can be obtained from Miele or the Miele online shop. Useful tip: The holder for the charcoal filters is dishwasher-safe. Pull the charcoal filter holder upwards to remove it from the shelf. -
Page 59: Problem Solving Guide
With the help of the following guide, minor faults in the performance of the appliance, some of which may result from incorrect operation, can be remedied without contacting Miele. This will save you time and money because you won't need a service call. - Page 60 See “Installation – Location”. Increase the temperature of the room. The door seal is No tools are required to change the door seal. damaged and needs to Change the door seal. A replacement is available be replaced. from Miele.
- Page 61 Problem solving guide Problem Possible cause and remedy Ice or condensation has The door seal has come out of its groove. built up inside the Check that the door seal is correctly seated in the appliance. groove. The door seal is damaged. ...
- Page 62 Problem solving guide Messages in the display Message Possible cause and remedy lights up in the Demo mode is switched on. display, the appliance Switch Demo mode off (see “Selecting further does not get cold even settings – Switching Demo mode off”). though the controls and the interior lighting are working.
- Page 63 Problem solving guide Message Possible cause and remedy lights up red in the The temperature alarm has been activated (see freezer section “Temperature and door alarm”). The temperature in temperature display and the freezer section has risen higher or fallen lower an alarm sounds.
- Page 64 Problem solving guide Message Possible cause and remedy There is a power cut: The temperature in the lights up red in the appliance over the last few days or hours has risen display and an alarm too high because of a power cut or an interruption to sounds.
- Page 65 F To switch the alarm off touch in the display. with numbers appears Call Miele. and an alarm sounds. To report the fault you need the fault code and also the model number and serial number of your appliance.
- Page 66 This lighting corresponds to risk group RG 2. If the cover is defective, the eyes may be injured. If the lighting cover is defective, do not look from a close range directly into the lighting with optical instruments (e.g. magnifying glass or similar). Call Miele.
- Page 67 Problem solving guide Other problems Problem Possible cause and remedy The door to the freezer This is not a fault. The suction caused by opening will not open because it and closing the door is preventing the door from has been opened and opening.
-
Page 68: Noises
Noises Normal What causes them noises Brrrrr ... A humming noise is made by the motor (compressor). This noise can get louder for brief periods when the motor switches on. Blubb, A gurgling noise can be heard when coolant is circulating blubb ... -
Page 69: Service
Contact in case of fault In the event of any faults which you cannot remedy yourself, please contact Miele. Contact information for Miele can be found at the end of this booklet. Please quote the model and serial number of your appliance when contacting Miele. -
Page 70: Electrical Connection
Electrical connection The appliance is supplied with a mains Do not connect the appliance to the cable and moulded plug ready for mains electricity supply using an connection to an AC single-phase 220– extension lead. Extension leads do not 240 V 50 Hz supply. guarantee the required safety of the appliance (e.g. -
Page 71: Installation
Your refrigeration appliance must not be installed side-by-side with another refrigeration appliance because it is not equipped with built-in heating units in the side panels. Please contact Miele for information on which combinations are suitable for your appliance. -
Page 72: Ventilation
Installation Ventilation Risk of damage due to condensation on the external Risk of fire and damage due to appliance panels. insufficient ventilation! In environments with high humidity, If the refrigeration appliance is not condensation can build up on ventilated sufficiently, the external appliance panels, which can compressor will run more frequently... -
Page 73: Fitting The Supplied Wall Spacers
Installation Fitting the supplied wall Installation spacers Two people are required for installing the appliance. The wall spacers supplied must be used in order to achieve the stated energy consumption values and to The appliance must be empty prevent the build-up of condensation when it is installed. -
Page 74: Aligning The Appliance
Installation Aligning the appliance Installing the appliance in existing kitchen units Risk of fire and damage due to insufficient ventilation! If the appliance is not ventilated sufficiently, the compressor will run more frequently and for longer periods. This will result in increased energy consumption and a higher operating temperature of the ... - Page 75 Installation Top box Refrigeration appliance Housing unit Wall * The appliance depth is increased by approx. 35 mm for appliances with wall spacers fitted. The appliance can be built into a run of kitchen units and installed directly next to a kitchen furniture unit. The appliance front must protrude in front of furniture fronts by at least 65 mm.
-
Page 76: Appliance Dimensions
Installation Appliance dimensions * Dimensions without wall spacers fitted. Appliance depth is increased by 35 mm with the wall spacers supplied fitted. [mm] [mm] [mm] [mm] KFN 28032 D ws 1,006 1,817 1,806 KFN 28032 D edt/cs 1,006 1,817 1,806... -
Page 77: Changing The Door Hinging
Changing the door hinging The appliance is supplied with right- Removing the top covers hand hinging. If left-hand hinging is Close the upper door. required, the hinges must be changed. Danger of injury and damage when changing the door hinging! There is an increased danger of injury and damage if the refrigeration appliance is installed by a single... - Page 78 Changing the door hinging Removing the upper door Removing the lower door Danger of injury when removing Danger of injury when removing the upper door! the lower door! The appliance door is no longer As soon as the hinge pin is removed secure once the hinge plate has from the lower door, the door will no been removed.
- Page 79 Changing the door hinging Lift the lower door off and place it Then tighten the screw . carefully to one side. Insert the stopper into the other hole. Changing over the lower hinge plate Remove the cover and refit on the opposite side.
- Page 80 Changing the door hinging Changing the middle hinge Preparing the doors plate over Useful tip: Place a suitable cover over a stable surface to protect the appliance door from damage. Place the door on it with the outside facing down. Carry out the following steps on both doors.
- Page 81 Changing the door hinging Changing over the spring clip Refitting the lower door Place the spring clip (closing hook) on the opposite side: Press the lug downwards and push the spring clip to the side out of the guide. ...
- Page 82 Changing the door hinging Refitting the upper door Inserting the upper hinge plate Fit the hinge plate on the opposite Place the upper door onto middle side and secure it in place with the hinge pin . screws . If necessary, drill pilot holes for the screws or use a battery ...
-
Page 83: Aligning The Appliance Doors
Aligning the appliance doors The appliance doors can be aligned To align the upper door, use the outer with the appliance housing after they slots in the middle hinge plate: have been fitted. In the following illustration the door is not shown in the closed position to make it easier to see what you have to To align the lower door use the long... - Page 87 Miele Experience Centre South Melbourne: Freemans Bay, Auckland 1011 206-210 Coventry Street South Melbourne, VIC 3205 Miele Experience Centre Auckland: Miele Experience Centre and Office Sydney: 8 College Hill 3 Skyline Place Freemans Bay, Auckland 1011 Frenchs Forest, NSW 2086 Telephone:...
- Page 88 KFN 28032 ws, KFN 28032 edt/cs en–AU, NZ M.-Nr. 11 210 740 / 00...
Need help?
Do you have a question about the KFN 28032 D WS and is the answer not in the manual?
Questions and answers