Table of Contents
Advertisement
Quick Links
Advertisement
Table of Contents

Related Manuals for IDTECK iMDC-MAIN

Summary of Contents for IDTECK iMDC-MAIN
-
Page 3: Table Of Contents
........11 2.1 Supplied Parts in iMDC-MAIN Gift Box . - Page 4 5 iMDC-RIM POWER WIRING ....28 6 NETWORK CABLE WIRING BETWEEN iMDC-MAIN AND iMDC-RIM ... . 28 6.1 WIRING WHEN PORTS ARE ENOUGH TO CONNECT NETWORK DEVICE...
- Page 5 ......... 40 2.1 iMDC-MAIN IP ADDRESS SETTING .
-
Page 7: Safety Information
Safety Information CAUTION: TO REDUCE THE RISK OF ELECTRIC SHOCK, DO NOT REMOVE COVER (OR BACK) NO USER SERVICEABLE PARTS INSIDE. REFER SERVICING TO QUALIFIE D SERVICE PERSONNEL. This symbol indicates that dangerous voltage consisting a risk of electric shock is pres ent within this unit. - Page 8 3. Do not connect multiple controllers to a single adapter. Exceeding the capacity may cau se abnormal heat generation or fire. 4. Securely plug the power cord into the power receptacle. Insecure connection may caus e fire. 5. When installing the controller, fasten it securely and firmly. The fall of controller may ca use personal injury.
-
Page 9: Important Safety Instructions
IMPORTANT SAFETY INSTRUCTIONS 1. Read these instructions. 2. Keep these instructions. 3. Heed all warnings. 4. Follow all instructions. 5. Do not use this apparatus near water. 6. Clean only with dry cloth. 7. Do not block any ventilation openings. Install in accordance with the manufacturer’s ins tructions. -
Page 11: Imdc Instruction
Exit Buttons, Door Contact Sensors, PIR Sensors, Window Br eakage Sensors and Fire Sensors to strengthen security. iMDC consists of iMDC-MAIN and iMDC-RIM, between these are connected by Ether net communication. And iMDC-MAIN can establish the independent or multiple netw ork connection via network communication. - Page 12 APB only allowed exit for the user who has once got into the door first and it doesn’t allow any user trying twice entry or twice exit in a row. As it were, as 2 of card reader s equipped on the both sides of the entrance and exit of one door, the user has to let the card-reader read the user card properly each time of entrance/exit so that only pe rson who got in with the card read by the card reader equipped on the entrance side can get out also only by letting the card reader read the card for exit.
- Page 13 - Timed ARM: After specific time set by user, iMDC becomes ARM mode. - Free ARM/DISARM: Using by free ARM/DISARM card, ARM/DISARM mode can b e set without keypad. - Group ARM/DISARM: If you want to set alarm to grouped reader, the ARM/DISA RM groups which belong to applicable readers are set the alarm automatically.
- Page 14 Each holiday code can be set-up at each time schedule code. USER DEFINED POWER FAIL SAFE/POWER FAIL SECURE When the communication between iMDC-MAIN and iMDC-RIM is interrupted becaus e of a blaze or disaster etc, iMDC offers two output modes, Power Fail Safe and Powe r Fail secure.
- Page 15 REDUNDANCY FUNCTION You can install sub iMDC-MAIN for redundancy. If communication between main iM DC-MAIN and iMDC RIM is disconnected because of the hardware defects or network problems, sub iMDC-MAIN will be automatically changed to redundant iMDC-MAIN t o substitute damaged iMDC-MAIN.
- Page 16 VARIOUS IN/OUTPUT SETTING iMDC is equipped with maximum of 128 input ports and 128 output ports. - Input port type setting: You can specify whether the format of the input signal is blocked (NO) or connected (NC) in normal operation. Various input devices you w ant to use can be connected by specifying NO or NC status.
-
Page 17: Identifying Supplied Parts
IDENTIFYING SUPPLIED PARTS Please unpack and check the contents of the box. Supplied Parts in iMDC-MAIN Gift Box Supplied Parts in iMDC-RIM Gift Box IDENTIFYING SUPPLIED PARTS p.11... -
Page 18: Dimension
DIMENSION iMDC-MAIN BOARD p.12 iMDC INSTRUCTION... -
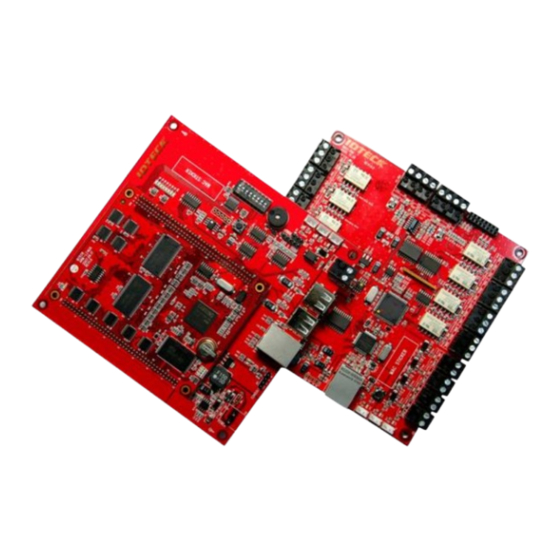
Page 19: Imdc-Main Board Arrangement And Description
LED indicates status of Ethernet communication. onnector Power Status L It’s the connector to be connected to enclosure using cable. If power is normally supplied to iMDC-MAIN, red LED is turned on. Connector Buzzer It’s the buzzer to generate beep sound. -
Page 20: Imdc-Main Operating Status Led Description
It’s the LED to indicate iMDC-MAIN is operated to start. rating Star t LED iMDC-MAI It’s the LED to verify whether the iMDC-MAIN is official versio N Official n before starting operation. The LED turns on during processi Version Ve ng verification and it’s off when verification is finished. -
Page 21: Imdc-Rim Board
The LED flickers when communication be Communic tween iMDC-MAINs is processed. ation Stat iMDC-MAI FLICKER It’s the LED to indicate iMDC-MAIN function setting is possible N Setting by STARWATCH ENTERPRISE. Status LED Event Savi FLICKER It’s the LED to indicate event saving status happened in iMDC- ng Status MAIN. -
Page 22: Imdc-Rim Board Arrangement And Description
iMDC-RIM BOARD ARRANGEMENT AND DESCRIPTION Code Description Fixing Hole It’s the hole to fix up iMDC on enclosure using screws. Reader #1 Port It’s the reader port to process Wiegand Reader Input. Reader #2 Port It’s the reader port to process Wiegand Reader Input. Relay Output # It’s the ports for FORM-C (COM, NO, NC) Relay Output. - Page 23 RJ45 It’s the Ethernet connection port to perform communication betw een iMDC-MAIN and Host PC, iMDC-MAIN and the other iMDC-M AINs, iMDC-MAIN and iMDC-RIM. Power Status L It’s the connector to be connected to enclosure using cable. If red LED is turned on, it means power has properly supplied.
- Page 24 Code Description tains even after reset. Status LED It’s the LED to indicate iMDC-RIM’s status. The LED turns off durin g normal status. p.18 iMDC INSTRUCTION...
-
Page 25: Installation Tips & Check Points
INSTALLATION TIPS & CHECK POINTS INSTALLATION CONFIGURATION The system installation cables should be connected as follows; p.19... -
Page 26: Recommended Cable Type And Permissible Length Of Cable
RECOMMENDED CABLE TYPE AND PERMISSIBLE LEN GTH OF CABLE Reference Description Cable specification Maximum distance DC +12V → Power iMDC-MAIN Belden #9409, 18 AWG DC +12V → Power iMDC-RIM 2 conductor, unshielded Reader (Power and Data) Belden #9512, 22 AWG 150m Reader →... - Page 27 It is strongly recommended to add a reverse diode between the inductor coils to a bsorb this surge voltage. If you do not connect a reverse diode, the surge voltage will transfer and damage the electronic circuit of the controller. 1N4004 – 1N4007 or equality efficiency diode is included in gift box.
-
Page 29: Initial Setting
MAIN board is used, Board IDs must be different than each others. There is an 8 channel DIP switch on the right middle of the iMDC-MAIN for Board ID setting. Each channel of DIP switch has assigned address values and the Board ID is the sum value of each switch set to “ON”... - Page 30 DIP Switch Board ID Number Setting Status p.24 INITIAL SETTING...
-
Page 31: Wiring
Wiring must be done before main power switched on to the iMDC-RIM. Wiring aft er main power switched on may cause electrical shock. iMDC WIRING CONFIGURATION The figure below is basic installation configuration for iMDC-MAIN and iMDC-RIM. Wire iM DC as the configuration below. Code... -
Page 32: Wiring Parts Code
Code PC for installing application software ,STARWATCH ENTERPRISE iMDC-MAIN iMDC-RIM Reader Door Lock Door Contact Exit Button Power WIRING PARTS CODE IMDC-MAIN IMDC-RIM p.26 WIRING... -
Page 33: Gnd Wiring
GND WIRING When installing iMDC-MAIN and iMDC-RIM, you must connect GND wire of Power terminal block to 1ST class EARTH GROUND. EARTH GROUND wiring equalizes all ground level to zer o and protects from the thunderbolt or surge voltage. iMDC-MAIN POWER WIRING Confirm that main power switched OFF before wiring. -
Page 34: Imdc-Rim Power Wiring
Connect GND (black) wire of DC12V power supply to Power terminal block (GND) of iM ● DC-RIM. NETWORK CABLE WIRING BETWEEN iMDC-MAIN AN D iMDC-RIM WIRING WHEN PORTS ARE ENOUGH TO CONNECT NETWORK DEVICE Follow below the ‘(Figure: solution.1)’ for wiring if there are enough TCP/IP ports to connect network devices (hub, router, etc). -
Page 35: Wiring When Ports Are Not Enough To Connect To Network Device
If there are not enough TCP/IP ports to connect network devices (hub, router, etc), configur e equality network using by cross cable and then follow the ‘(Figure: Solution 2)’. Please refe r to ‘6.Network setting’ for more information about IP setting between iMDC-MAIN and iMD C-RIM. -
Page 36: Reader Wiring
READER WIRING Connect RF reader to Reader Port of iMDC-RIM as follow. Wiring below is an example of Reader Port #1(EX_RD1) connection. If you want to connect second reader, use Reader Port #2(EX_RD2) for connecting second reader. Connect +12V (red) wire of RF reader to Reader Port terminal block (+12V) of iMDC-RI ●... -
Page 37: Input Wiring
INPUT WIRING Connect Door contact and exit button to Input Port terminal block (INPUT_1 ~ INTPUT_8) of iMDC-RIM as follow. Connect Exit Button to Input Port terminal block (INPUT_1) of iMDC-RIM. ● Connect Door Contact to Input Port terminal block (INPUT_2) of iMDC-RIM. ●... -
Page 38: In Case Of Power Fail Secure Door Lock
IN CASE OF POWER FAIL SECURE DOOR LOCK; Connect +12V wire of DC12V power supply to Output Port terminal block (RCOM1) of i ● MDC-RIM. Connect (+) wire of Door Lock to Output Port terminal block (RNO1) of iMDC-RIM. ● Connect (-) wire of Door Lock to GND(-) wire of DC12V power supply. -
Page 39: Reader Led/Buzzer Controlling In Power Fail Secure Mode
Connect (-) wire of Alarm Device to GND(-) wire of the DC12V power supply. ● Must connect reverse diode between (+) wire and (-) wire of Alarm Device. [IMPORTAN ● READER LED/BUZZER CONTROLLING IN POWER FAIL SECURE MODE Power Fail Secure Mode In this mode, if power is failed or emergencies occur, the door is closed automatically. -
Page 40: How To Operate
How to operate The Wiegand wire of reader is being connected to reader #1, and then if LED control wire is connected as figure above, LED color is changed from Red to Green. READER LED/BUZZER CONTROLLING IN POWER FAIL SAFE MODE Power Fail Safe Mode In this mode, if power is failed or emergencies occurs, the door is opened automatically. -
Page 41: How To Operate
How to operate; The Wiegand wire of reader is being connected to reader #1, and then if LED control wire is connected as figure above, LED color is changed from Green to Red. If you are using separate power sources for the iMDC and the Door Lock, it is reco mmended to ground each power source properly. -
Page 43: Network Setting
PRIVATE IP NETWORK SETTING Above figure is the configuration using private ID. The configuration is the most stable netw ork system for IMDC-MAIN and IMDC-RIM. It is advised to build up private LAN network for I MDC-MAIN and IMDC-RIM. The IP is searched and set automatically using STARWATCH ENTERPRISE or iMDC EMULATO R. -
Page 44: Correct Private Ip Setting Example
CORRECT PRIVATE IP SETTING EXAMPLE iMDC-MAIN Network Setting (When Using C-Class) iMDC-MAI Subnet Gate Communication Communicatio RIM Port P2P Port N IP Addres mask Server IP Address n Port Number Number Number 192.168. 255.25 192.1 192.1 192.168.10.3 6001 6005 6002 10.99... -
Page 45: Wrong Private Ip Setting Example
6005 WRONG PRIVATE IP SETTING EXAMPLE When Using C-Class (Subnetmask : 255.255.255.0) iMDC-MAIN IP: 192.168.10.10 // iMDC-RIM (1): 192.168.11.30 // iMDC-RIM (2): 192.168. 11.31 When Using B-Class (Subnetmask : 255.255.0.0) iMDC-MAIN IP: 172.16.1.2 // iMDC-RIM (1): 172.17.10.1 // iMDC-RIM (2): 172.17.10.2 PRIVATE IP NETWORK SETTING p.39... -
Page 46: Public Ip Network Setting
Above figure is the configuration using public IP broadband. If you use the same public IP broadband, it is possible to search all of the iMDC-MAIN, iMDC -RIM board connected on the same network by using automatic searching function of STAR TWHATCH ENTERPRISE or iMDC EMULATOR. - Page 47 bed, STARWATCH ENTERPRISE program has been already installed. 1. Select the Device Setting Wizard on main tool bar. 2. Site setting is displayed. If there are already existed sites, double clik the registered site. 3. To register new site, click the ‘Site Setting’ button.Input the ‘Site Name’ where you want to install the device.
- Page 48 Device Name, RIM Board IP Address, Sub-net Mask, Gateway, and DNS Address to t he applicable iMDC-MAIN board. Click the ‘Auto Search iMDC Controller’ button then a ll of the iMDC-MAINs connected on the same network is searched. Select the iMDC-M AIN you want to register and move down with drag and drop.
-
Page 49: Imdc-Rim Ip Address Setting
P2P(Peer to Peer) Port Insert port number to connect iMDC-MAIN. Default is 6002. 6. After iMDC-MAIN setting is finished check all of settings in the first column then click th e ‘iMDC Network Setting’ button to transmit input information to iMDC-Main. - Page 50 DNS Server Address Insert DNS server address for iMDC-RIM Board. iMDC IP Address Insert iMDC-MAIN IP address that connects to iMDC-RIM Board. IP address which was registered during drag and drop stage will be set as default valu iMDC Port Insert port number to connect iMDC-RIM Board and iMDC-MAIN.
- Page 51 4. Check previous steps for iMDC-MAIN and iMDC-RIM board setting have completed pro perly and click the ‘Save’ button to finish setting. iMDC-RIM IP ADDRESS SETTING p.45...
-
Page 53: Imdc Emulator
EMULATOR iMDC EMULATOR is made to basically test the network setting of iMDC-MAIN and iMDC-RI M. Refer to the description below for the setting. ENVIROMENT SETTING 1. ENVIROMENT SETTING is to set the communication port between iMDC-MAIN, iMDC-R p.47... -
Page 54: Firmware Dowload
Receive Port The port for communication between iMDC-MAIN and iMDC-RIM. Default value is 6005. 2. [Save Communication port]: This button is used to save changed values of iMDC-MAIN and iMDC-RIM Receive Port. Using default port value is recommended. FIRMWARE DOWLOAD 1. -
Page 55: Imdc Search
2. [Select Firmware!!!]: This button is to open window to transmit firmware. 3. Select the firmware you want to update. 4. [Start Transmission!!!]: This button is to send firmware to the device (iMDC-MAIN or i MDC-RIM). If you stop in the middle of transmitting process, you should restart from #2 step. -
Page 56: Rim Search
Searched iMDC-MAIN’s MAC Address is displayed on the iMDC-MAIN LIST. 2. Double click iMDC-MAIN’s MAC Address you want to confirm or change. 3. [Download Information!!!]: This button is to change the network information of the iM DC-MAIN. -
Page 57: Imdc Setting
SETTING iMDC POLLING TEST ‘iMDC POLLING TEST’ is to change polling test and network information by selecting specific iMDC-MAIN. 1. Set the iMDC-MAIN’s IP address and port for polling test Code Description iMDC IP It‘s iMDC-MAIN’s IP address. Default value is 192. -
Page 58: Imdc-Main Network Setting
NETWORK SETTING 1. Enter the iMDC-MAIN’s IP address and port you want to use. 2. [Upload Information!!!]: This button is to search iMDC-MAIN network information. 3. Searched iMDC-MAIN’s network information is displayed. iMDC-MAIN INFOMATION Description Firmware Version It shows version of iMDC-MAIN. -
Page 59: Rim Setting
4. If you want to change iMDC-MAIN’s network setting, change network setting in ‘iMDC- MAIN INFORMATION’ and click the [Download Information!!!] button to complete. RIM SETTING iMDC-RIM NETWORK SETTING In terms of the specific iMDC-RIM, you can test how to operate or change network informati on. -
Page 60: Imdc-Rim Test
It’s DNS address of searched iMDC-RIM board. iMDC-RIM PORT It’s port address of searched iMDC-RIM board. It is used to communicate between iMDC-RIM board and iMDC-MAIN. Usi ng default (6005) is recommended. iMDC-MAIN IP It’s IP address of iMDC-MAIN to connect iMDC-RIM board. - Page 61 s Test Mode. The read card ID (number) is displayed. It indicates that #8 input of iMDC-RIM is generated. Status of input is displayed as ON a nd OFF If you click [Output test] button, 8 relay outputs of iMDC-RIM are generated for 3 secon After test is finished, click the [iMDC-RIM Reboot] button to initialize iMDC-RIM.
-
Page 63: Operations
OPERATIONS NORMAL OPERATION Power on When Power is supplied to the iMDC, only the Red LED is turned on. Reading of registered card When a registered card (or PIN) is read, the door (Relay #1) will open for 3 seconds (D efaults) with the applicable LED on. -
Page 64: Initial Setting Value
INITIAL SETTING VALUE When you operate the iMDC first time or you initialize the iMDC, the controller will set up all values to the default settings (Factory Settings). You can change the settings for desired app lication environment. Please refer to the “10. APPENDIX” section for the default setting value p.58 OPERATIONS... -
Page 65: Troubleshooting
In this case, after device setting is finished using STARTWATCH ENTERPRIS E, reboot iMDC-MAIN and iMDC-RIM. Then, iMDC-MAIN recognizes that t he communication is connected and operated normally. 2. If it occurs during normal operation. - Page 66 WINDOW START RUN window Input ‘cmd’ and click ‘OK’ button then MS-D OS window is displayed as below. Ping test of iMDC-MAIN or iMDC-RIM installed by users is progressed in M S-DOS window. If It’s normal status, the message below is displayed.
- Page 67 (Power can be used separately but GND must be connected by iMDC’s GND.) 4. Check the network condition between iMDC-MAIN and iMDC-RIM. -Check the Ethernet cable between iMDC-MAIN and iMDC-RIM is connect p.61...
- Page 68 -Try ping test using IP address of iMDC-MAIN and iMDC-RIM. 5. When noises are shown on the signals, it is recommended to use shield ed wires and the unused wires to the common ground. You can use repea ters, also.
-
Page 69: Appendix
APPENDIX Default value of iMDC-RIM Index No READER INPUT OUTPUT Reader Reader Input Exit Button Door Contact Sensor p.63... -
Page 70: Output
Output Door Lock Alarm Event Output Number (32Door: RIM 12EA) DOOR READER OUTPUT INPUT DOOR LOCK ALARM EXIT CONTACT SENSOR p.64 APPENDIX... - Page 71 Default value of output time is 3 seconds. DOOR LOCK DOOR LOCK output number when access is granted. ALARM ALARM output number when alarm events occur. Output number about other events Ex) If a card is presented to reader #1, # 1 iMDC-RIM board output is activated. If t he error occurs, output is activated to #2 output port of #1 iMDC-RIM board for 3 seconds.
-
Page 73: Specification
SPECIFICATION iMDC-MAIN Specification iMDC-MAIN Model 32Bit Micro processor Embedded Linux Operating System 128MByte SDRAM Memory Program Mem 128MByte Flash Memory Data Memory 200,000 Users User 200,000 Event Buffer Event Buffer DC +12V, Max.700mA Power / Current Ethernet Communication Communication 10/100 Mbps... -
Page 74: Imdc-Rim Specification
(Available to set output format) 0 ~ +65C (+32 ~ +149F) Operating Temperature 10% ~ 90% Relative Humidity Non-condensing Operating Humidity 137mm x 137mm x 18mm (5.4” x 5.4” x 0.75”) Dimension (W x H x T) 148g (0.33lbs) Weight FCC, CE, KC Certification iMDC-RIM Specification... -
Page 75: Diode Specification
DIODE SPECIFICATION Model 1N4007 Power / Current 50 ~ 1000 V / Min.1.0 A DIODE SPECIFICATION p.69... -
Page 77: Fcc Registration Information
FCC REGISTRATION INFORMATION FCC Requirements Part 15 Caution: Any changes or modifications in construction of this device which are not expressly approved by the responsible for compliance could void the user's authority to operate the e quipment. NOTE: This device complies with Part 15 of the FCC rules. Operation is subject to the following two conditions;... -
Page 79: Rma Request
RMA Request If you have any questions or problems regarding the RMA services, please contact us using t he contact information below. Friendly representatives at IDTECK are always standing by to provide the best after sales services. IDTECK Headquarter 5F, Ace Techno Tower B/D, 684-1, Deungchon-Dong,...
Need help?
Do you have a question about the iMDC-MAIN and is the answer not in the manual?
Questions and answers