Table of Contents
Advertisement
Quick Links
User's Guide TD-4420TN/4520TN
RJ-2035B/RJ-2055WB
User's Guide (English)
RJ-3035B/RJ-3055WB
User's Guide RJ-2035B/RJ-2055WB/RJ-3035B/RJ-3055WB
Version 01
ENG
Product specifications vary by region. For more information, see
the Specification Sheet available from the Brother support website
at support.brother.com.
© 2020 Brother Industries, Ltd. All rights reserved.
Advertisement
Table of Contents

Related Manuals for Brother RJ-2035B


Summary of Contents for Brother RJ-2035B
- Page 1 User's Guide TD-4420TN/4520TN RJ-2035B/RJ-2055WB User's Guide (English) RJ-3035B/RJ-3055WB User's Guide RJ-2035B/RJ-2055WB/RJ-3035B/RJ-3055WB Version 01 Product specifications vary by region. For more information, see the Specification Sheet available from the Brother support website at support.brother.com. © 2020 Brother Industries, Ltd. All rights reserved.
- Page 2 Trademarks ® The Bluetooth word mark and logos are registered trademarks owned by the Bluetooth SIG, Inc. and any use of such marks by Brother Industries, Ltd. is under license. ® ® Wi-Fi is a registered trademark of Wi-Fi Alliance CG Triumvirate is a trademark of Agfa Corporation.
-
Page 3: Table Of Contents
Contents 1. Introduction ....................1 2. Operations Overview ................... 2 2.1 Unpack the printer and check the components ........2 2.2 Printer Overview ..................3 2.2.1 Front View ..................3 2.2.2 Interior View ..................4 2.2.3 Rear View ..................5 2.2.4 LED Indicators and Buttons ............. - Page 4 5.1 The Gap/Black Mark Sensors Calibration..........42 5.2 Self-test and Dump Mode ..............43 5.3 Printer Initialization ................47 6. BPM (Brother Printer Management Tool) ..........49 6.1 Start the BPM ..................49 6.2 Calibrating the Media Sensor using the BPM ........50 7.
-
Page 5: Introduction
1. Introduction The RJ-2035B/RJ-2055WB/RJ-3035B/RJ-3055WB is a compact and light-weight mobile printer ideal for organizations that have a mobile workforce. Its IP54-rated rugged case is splash, dust, and shock resistant, and offers operational mobility virtually anywhere. The printer can be connected to a computer or mobile device using USB, NFC tag, Bluetooth, or Wi-Fi a/b/g/n to print using various mobile and desktop printing software. -
Page 6: Operations Overview
2. Operations Overview 2.1 Unpack the printer and check the components Note Keep the packaging materials in case you must ship the printer. The components included in the box: RJ-2035B/RJ-2055WB RJ-3035B/RJ-3055WB Printer Belt Clip Rechargeable Li-ion Battery AC Adapter... -
Page 7: Printer Overview
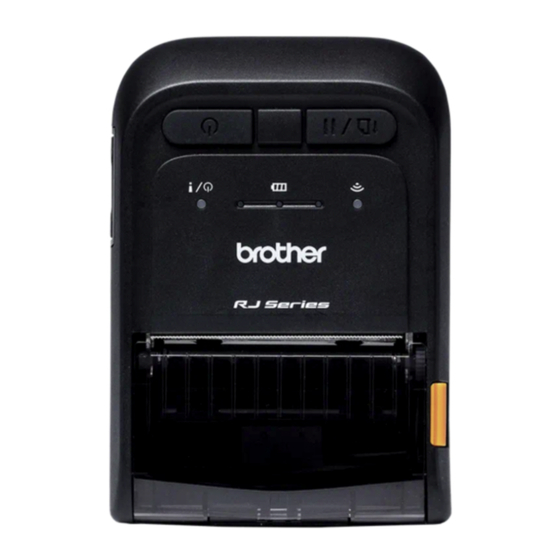
2.2 Printer Overview 2.2.1 Front View RJ-2035B/RJ-2055WB RJ-3035B/RJ-3055WB Media Compartment Cover LED Indicators Power Button Feed/Pause Button Media Compartment Cover Release Tab Media View Window... -
Page 8: Interior View
2.2.2 Interior View RJ-2035B/RJ-2055WB RJ-3035B/RJ-3055WB Tear Edge Print Head Platen Roller Black Mark Sensor Gap Sensor* * Product specifications vary by region. For more information, see the Specification Sheet available from the Brother support website at support.brother.com. -
Page 9: Rear View
2.2.3 Rear View RJ-2035B/RJ-2055WB RJ-3035B/RJ-3055WB Rechargeable Li-ion Battery Battery Release Latch Interface Cover Power Port USB Port (Micro Type USB 2.0) -
Page 10: Led Indicators And Buttons
2.2.4 LED Indicators and Buttons RJ-2035B/RJ-2055WB Power Button Feed/Pause Button Wi-Fi/Bluetooth Status LED Indicator Battery Status LED Indicators Printer Status LED Indicator Buttons Function Press and hold for three seconds to turn the printer on/off. Power Button • Ready status: Feeds one label or receipt. - Page 11 The printer has entered sleep mode after more than two minutes of Green (blinking inactivity. To change the sleep mode time, see FBPL Command Reference every two seconds) Manual on the Brother support Printer Status website. The Media Compartment Cover is Red (solid) open.
- Page 12 RJ-3035B/RJ-3055WB Power Button Feed/Pause Button Wi-Fi/Bluetooth Status LED Indicator Battery Status LED Indicators Printer Status LED Indicator Buttons Function Press and hold for three seconds to turn the printer on/off. Power Button • Ready status: Feeds one label or receipt. •...
- Page 13 The printer has entered sleep mode after more than two minutes of inactivity. To change the sleep mode Green (blinking every time, see FBPL Command Reference two seconds) Manual on the Brother support website. Printer Status The Media Compartment Cover is Red (solid) open.
-
Page 14: Battery Charging Cycle
2.2.5 Battery Charging Cycle 1. When the printer is on or in use Charging Complete Power Saving Mode Charging Starts (The printer turns off (Charging continues) automatically) Note The printer automatically turns off if the battery is fully charged and if it has not received any print jobs for 30 minutes. - Page 15 Note When the printer's battery is being charged, the Printer Status LED blinks in orange. To check the charging status, press the Power button. 2. When the printer is off To check the charging status, press the Power button. Charging Cycle LED Indicators Charge...
- Page 16 For RJ-3035B/RJ-3055WB only To check the charge level and life of the Rechargeable Li-ion Battery, use the Brother Printer Management Tool (BPM). You can download the BPM from your model's Downloads page at support.brother.com. To display the Battery Capacity and Battery Life in the BPM: 1.
-
Page 17: Set Up Your Printer
3. Set up Your Printer 3.1 Install the Battery RJ-2035B/RJ-2055WB Insert the battery into the Battery Compartment as illustrated. Gently press the battery down and pull the Battery Release Latch until it locks into place. Battery safety warning: •... - Page 18 RJ-3035B/RJ-3055WB Insert the battery into the Battery Compartment as illustrated. Gently press the battery down. Pull the Battery Release Latch and push until it locks into place. Battery safety warning: • DO NOT throw the battery into fire, expose to heat, disassemble or modify it. DO NOT connect the + and - terminals with metal objects such as wire.
-
Page 19: Charge The Battery
Make sure you fully charge the battery before the first usage. This may take up to two hours. 3.2.1 Charge the Printer's Battery 1. Open the Interface Cover and plug RJ-2035B/RJ-2055WB the Power Cord into the Power Port. 2. Plug the Power Cord into a power outlet (an electrical socket). -
Page 20: Charge The Battery Using The Battery Charger (Pa-Bc-005)
3.2.2 Charge the Battery using the Battery Charger (PA-BC-005) (Optional: only compatible with RJ-3035B/RJ-3055WB) Plug the power adapter of the Battery Charger into a grounded AC outlet (an earthed electrical socket). Plug the charger connector into the Battery Charger's DC socket. Insert the battery into the slot as illustrated. - Page 21 On. Note When the battery is fully charged, the Battery Status LED lights in green and the charging stops Status LED automatically. Note The 4-bay Battery Charger is also available. For RJ-2035B/RJ-2055WB: PA-4BC-001 For RJ-3035B/RJ-3055WB: PA-4BC-002 Status LED...
-
Page 22: Loading The Media
3.3 Loading the Media 1. Press the Media Compartment RJ-2035B/RJ-2055WB RJ-3035B/RJ-3055WB Cover Release Tab and lift the Media Compartment Cover. 2. Insert the media roll as illustrated, and pull out enough paper over the tear edge. - Page 23 3. Press down the Media RJ-2035B/RJ-2055WB RJ-3035B/RJ-3055WB Compartment Cover on both sides to close it gently, and make sure it has closed correctly. We recommend calibrating the sensor every time you change the media. (See section 5.1 The Gap/Black Mark Sensors...
-
Page 24: Printer Driver Installation
1. Connect your printer to the computer using a USB cable. 2. Visit support.brother.com, go to your model's Downloads page, and download the latest printer driver and software. 3. Run the Seagull Driver Wizard application and select Install printer drivers and USB. -
Page 25: Bluetooth Connection (Windows)
Bluetooth & other devices and enabling Bluetooth. 4. Select Add Bluetooth or other device and select your printer. 5. Visit support.brother.com, go to your model's Downloads page, and download the latest printer driver and software. 6. Run the Seagull Driver Wizard application and select Install printer drivers and Bluetooth. -
Page 26: Wi-Fi Network Connection (Windows)
3. Specify SSID, Encryption, and Key (Network Password), and then click Set. 4. Click Get and confirm that the printer's IP address is correct. 2. Visit support.brother.com, go to your model's Downloads page, and download the latest printer driver and software. -
Page 27: Creating And Printing Labels Using Bartender
3.5 Creating and Printing Labels Using BarTender BarTender is a label creation tool, which can be downloaded for free from the product's page at support.brother.com. 1. Launch BarTender. • For Windows 10, Windows Server 2016, or Windows Server 2019: Start > BarTender 2016 R7 UltraLite > click BarTender UltraLite, or double-click the BarTender UltraLite icon on the desktop. -
Page 28: Connect Your Printer To A Computer
3.6 Connect Your Printer to a Computer To connect your printer to a computer, use a Micro USB 2.0 cable. 1. Open the Interface Cover. 2. Connect the printer to the USB Port computer with the USB cable. Note The Micro USB 2.0 cable is not included with the printer and must be purchased separately. -
Page 29: Accessories
4. Accessories 4.1 Install the Belt Clip RJ-2035B/RJ-2055WB Insert the belt clip into the slot on the back of the printer as illustrated. Press the clip down until it locks into place. - Page 30 RJ-3035B/RJ-3055WB Remove the battery from the printer. Insert the Belt Clip into the slot in the Battery Compartment. Press the Belt Clip until it locks into place. Install the battery back into the printer.
-
Page 31: Install The Roll Holder (Pa-Rh-002) (Optional)
4.2 Install the Roll Holder (PA-RH-002) (Optional) For RJ-3035B/RJ-3055WB only Press the Media Compartment Cover Release Tab and lift the Media Compartment Cover. Insert the Label Spindle into the paper roll as illustrated. 3. Install the Fixing Tabs on both sides of the paper roll. - Page 32 4. Insert the label roll with the installed Fixing Tabs and Label Roll Spindle into the printer. 5. Press down the Media Compartment Cover on both sides to close it gently, and make sure it has closed correctly.
-
Page 33: Install The Roll Spacer Set (Optional)
4.3 Install the Roll Spacer Set (Optional) For RJ-2035B/RJ-2055WB: PA-RS-001 For RJ-3035B/RJ-3055WB: PA-RS-002 Note To use a customized media width, install the required number of Roll Spacers in the Media Compartment. Use the same number of Roll Spacers on each side. - Page 34 2. Insert the Roll Spacers into the RJ-2035B/RJ-2055WB Spindle Slots on both sides of the Media Compartment as illustrated. Slot RJ-3035B/RJ-3055WB Slot...
- Page 35 RJ-2035B/RJ-2055WB Note The media width can be changed from 1" (25.4 mm), 1.5" (38.1 mm), 2" (50.8 mm), to 2.5" (63.5 mm) by attaching or detaching both sides of the Roll Spacers. When installing the Roll Spacers, use the same number of Roll Spacers on each side.
- Page 36 3. Press down the Media Compartment Cover on both sides to close it gently, and make sure it has closed correctly. Note When the Media Compartment Cover is closed correctly, it locks into place and the printer automatically feeds a small amount of the media.
-
Page 37: Use The Ip54 Protective Case With Shoulder Strap (Optional)
4.4 Use the IP54 Protective Case with Shoulder Strap (Optional) For RJ-2035B/RJ-2055WB: PA-CC-002 For RJ-3035B/RJ-3055WB: PA-CC-003 1. Use the zipper to open the case cover. 2. Place the printer in the case. Note The printing side must face the... - Page 38 3. Zip up the case cover. Make sure the Outer Cover is open and fixed while printing. Outer Cover Open Outer Cover Fixed...
-
Page 39: Install The Shoulder Strap With An Adapter (Optional)
4.5 Install the Shoulder Strap with an Adapter (Optional) 1. Remove the battery from the printer. 2. Insert the Shoulder Strap Adapter into the slot in the Battery Compartment. 3. Reinstall the battery in the printer and pull the Battery Release Latch until it locks into place. -
Page 40: Using The 1-Bay Charging Cradle (Optional)
4.6 Using the 1-bay Charging Cradle (Optional) For RJ-2035B/RJ-2055WB: PA-CR-003 For RJ-3035B/RJ-3055WB: PA-CR-004 1. Insert the printer into the RJ-2035B/RJ-2055WB Charging Cradle, and then gently press the printer down. RJ-3035B/RJ-3055WB 2. Connect the Charging Cradle's RJ-2035B/RJ-2055WB RJ-2035B/RJ-2055WB power adapter to its Power Port. - Page 41 4. The charging starts. RJ-2035B/RJ-2055WB RJ-3035B/RJ-3055WB When the battery is fully charged, all three Battery Status LEDs are lit in green.
-
Page 42: Using The 4-Bay Charging Cradle (Optional)
4.7 Using the 4-bay Charging Cradle (Optional) For RJ-2035B/RJ-2055WB: PA-4CR-001 For RJ-3035B/RJ-3055WB: PA-4CR-002 1. You can install the 4-bay Charging Cradle either vertically or horizontally. To install the 4-bay Charging Cradle vertically, use the supplied base support. Vertical Installation Horizontal Installation 2. - Page 43 Horizontal Installation 3. Connect the Charging Cradle's power adapter to its Power Port. 4. Connect the Charging Cradle's power adapter to a grounded AC outlet (an earthed electrical socket). The plug may differ by country...
-
Page 44: Rechargeable Lithium-Ion Battery (Optional)
When the battery is fully charged, all three Battery Status LEDs on the printer are lit in green. 4.8 Rechargeable Lithium-Ion Battery (Optional) For RJ-2035B/RJ-2055WB: PA-BT-008 (Standard) For RJ-3035B/RJ-3055WB: PA-BT-009 (Standard), PA-BT-010 (Smart Battery) -
Page 45: Power-On Utilities
5. Power-on Utilities There are three power-on utilities to set up and test the printer's functions. To activate a power-on utility: 1. Turn off the printer. 2. Press and hold the Feed/Pause button ( ) and then turn on the printer. 3. -
Page 46: The Gap/Black Mark Sensors Calibration
5.1 The Gap/Black Mark Sensors Calibration The Gap/Black Mark Sensor sensitivity should be calibrated when: A new printer is purchased Label media is changed To calibrate the Gap/Black Mark Sensor: 1. Turn off the printer. 2. Press and hold the Feed/Pause button ( ) and then turn on the printer. -
Page 47: Self-Test And Dump Mode
5.2 Self-test and Dump Mode The printer calibrates the sensor, detects the media length, prints internal settings, and then enters the dump mode. To perform the printer self-test and enter dump mode: 1. Turn off the printer. 2. Press and hold the Feed/Pause button ( ) and then turn on the printer. - Page 48 Self-test You can print the printer configuration after the media sensor calibration. The self-test printout lists the printer's configuration and available memory space, and can indicate whether there is any dot damage on the heater component. Self-test Printout Model name Firmware version Firmware checksum Printer serial number...
- Page 49 Self-test Printout Bluetooth settings Total number of downloaded files and available memory space. Print Head check pattern...
- Page 50 Dump mode The printer will enter dump mode after printing the printer configuration. This mode allows users to verify and debug the printer's programs. The characters in the left column are received from the printer's system and those in the right column are their hexadecimal representation.
-
Page 51: Printer Initialization
After the initialization, the following factory settings will be restored: Parameter Default Setting Speed 76.2 mm/s (3 ips) Density Media Width RJ-2035B/RJ-2055WB: 1.89" (48 mm) RJ-3035B/RJ-3055WB: 2.84" (72 mm) Media Height RJ-2035B/RJ-2055WB: 2" (50.8 mm) RJ-3035B/RJ-3055WB: 4" (101.5 mm) Print Direction... - Page 52 Parameter Default Setting Reference Point 0,0 (upper left corner) Offset Code Page Clear Flash Memory IP Address DHCP...
-
Page 53: Bpm (Brother Printer Management Tool)
6. BPM (Brother Printer Management Tool) The Brother Printer Management Tool (BPM) is an integrated tool allowing you to: Check a printer’s status and settings. Change printer settings. Send additional commands to a printer. Download graphics and fonts. -
Page 54: Calibrating The Media Sensor Using The Bpm
Printer Function Bitmap Font Manager For more information, see Brother Printer Management Tool Quick Start Guide. 6.2 Calibrating the Media Sensor using the BPM Use the BPM to set the media sensor type (Gap Sensor or Black Mark Sensor) and calibrate the selected sensor. -
Page 55: Product Specifications
7. Product Specifications 7.1 General Specifications General Specifications RJ-2035B/RJ-2055WB RJ-3035B/RJ-3055WB 3.11" (79 mm) (W) × 4.13" (105 mm) (W) × Dimensions 4.57" (116 mm) (H) × 4.57" (116 mm) (H) × 1.44" (36.5 mm) (D) 1.95" (49.5 mm) (D) Enclosure Plastic Weight (incl. -
Page 56: Print Specifications
<3.5 h RJ-3055WB Charging Time only) (by 12 V / 1 A charger) Environmental Conditions RJ-2035B/RJ-2055WB RJ-3035B/RJ-3055WB Operating Temperature -15˚C - 50˚C (5˚F - 122˚F) Storage Temperature -30˚C - 70˚C (-22˚F - 158˚F) Operation / Storage: 10% to 90% Relative Humidity... -
Page 57: Media Specifications
7.3 Media Specifications Media RJ-2035B/RJ-2055WB RJ-3035B/RJ-3055WB Specifications Media Roll Maximum Outer Dimension: Maximum Outer Dimension: Capacity 1.18" (30 mm) 1.57" (40 mm) Black mark sensor model: Receipt paper Black mark receipt paper (mark on the printing side) Linerless (Optional) ... -
Page 58: Troubleshooting
• The battery's metal contact • Turn the printer on. pins are dirty. • Charge the battery. • The battery has finished. [RJ-2035B/RJ-2055WB] The Brother Printer • Close the Media Compartment Cover. The Media Compartment Management Tool shows Cover is open. [RJ-3035B/RJ-3055WB] “Head Open”. - Page 59 Problem Possible Cause Solution • The Print Head is dirty. • Clean the Print Head. Blank labels with gray lines. • The Platen Roller is dirty. • Clean the Platen Roller. Turn the printer on and off to skip the dump The printer is in Hex Dump Irregular printing mode.
-
Page 60: Maintenance
2. Allow the Print Head to cool down changing a new label roll. for at least one minute. 3. Wipe the Print Head with a cotton swab dipped in isopropyl alcohol or ethanol. [RJ-2035B/RJ-2055WB] Print Head Print Head Heating element Cotton swab Heating element... - Page 61 Cleaning Method Interval Printer Part 1. Turn the power off. Clean the Platen Roller 2. Rotate the Platen Roller and wipe it when changing a new label Platen Roller thoroughly with a lint-free cloth or roll. cotton swab dipped in isopropyl alcohol or ethanol.
Need help?
Do you have a question about the RJ-2035B and is the answer not in the manual?
Questions and answers