Table of Contents
Advertisement
Quick Links
Advertisement
Table of Contents

Related Manuals for Toshiba W45T


Summary of Contents for Toshiba W45T
- Page 1 Getting Ready Making and Answering Calls Manual Character Input Phone Book / Pair Function Mail Hello Messenger Camera EZweb EZ Navi au Music EZ ・ FM PC Site Viewer Limit Mode Smart Mode Others Remote Auto Lock / W45T Troubleshooting Index...
- Page 2 Introduction Thank you for purchasing the W45T. Before using your W45T, be sure to read the W45T Basic Manual (this PDF manual) to ensure correct usage. After you have finished reading this manual, store this PDF manual and the printed manuals in safe places so you can retrieve them whenever you need them.
-
Page 3: Cell Phone Etiquette
Cell Phone Etiquette Etiquette for Cell Phone Use ■ The cell phone always emits weak radio waves when power is on. ■ Use the cell phone in an enjoyable and safe manner without forgetting to be considerate of others around you. ●The use of cell phones is not ●Be considerate of where you allowed in some places... -
Page 4: Cell Phone Basics
Cell Phone Basics Cell Phone Features Hello Messenger au Music Camera Up to five members You can use your W45T You can take with compatible au as a portable audio player. photos and movie cell phones can clips and then... - Page 5 Manner Mode and Voice Memo Manner Mode Voice Memo You can use manner mode to turn When you cannot answer calls, off the incoming call ring tone and the cell phone can play an other tones so as not to answering message (Japanese) inconvenience other people.
- Page 6 Do not use the cell phone while driving! Holding a cell phone, talking on a cell phone, looking at a cell phone display to send mail or perform some other operation while driving is against the law in Japan. (Revised Traffic Control Law, effective November 1, 2004) ×...
- Page 7 Spam and One-ring Calls If you receive spam: You can set the mail filters to reject only specific mail or mail indicated by 未承諾広告※ (Unsolicited Advertisement), which often tends to be spam. The following mail filters are available for rejecting spam: ...
- Page 8 Disaster Message Board Service About Disaster Message Board When a big scale disaster occurs, you can register your safety information through EZweb. The registered safety information can be referred from anywhere in Japan through EZweb or Internet. ●When a big scale disaster occurs, from au phone, you can register your safety information Registering such as your condition or comments to the 災...
- Page 9 Top display of the Disaster Safety information Message Board registration display 災害用伝言板 災害用伝言板 登録 for registration 伝言板トップ 〜登録〜 被災状況 〜サービス提供中〜 無事です。 安否情報の登録・確認が 被害があります。 Safety information 自宅に居ます。 できます。 避難所に居ます。 reference display コメント見て 登録(ご利用可能地域の ...
-
Page 10: Table Of Contents
Contents ●Introduction ●Cell Phone Etiquette ………………………………………………………………………………1 ●Cell Phone Basics……………………………………………………………………………………2 ●Contents ………………………………………………………………………………………………8 ●Getting Ready Checking the Contents of the Box ……………………………………………………………10 Names of Parts …………………………………………………………………………………11 Security Code and Passwords …………………………………………………………………12 Charging the Battery Pack ……………………………………………………………………13 Learning the Basics ……………………………………………………………………………14 Turning On Power ………………………………………………………………………………16 Configuring Initial Settings ……………………………………………………………………17 Switching the Display Language to English …………………………………………………18 Viewing the Display ……………………………………………………………………………20... - Page 11 Taking Photos in Smart Mode ………………………………………………………………116 Viewing Photos in Smart Mode………………………………………………………………117 ●Other Functions …………………………………………………………………………………118 ●In Case You Lose Your W45T …………………………………………………………………119 Setting Conditions for Enabling the Remote Auto Lock …………………………………119 Remotely Enabling the Auto Lock on Your W45T …………………………………………120 ●Troubleshooting …………………………………………………………………………………121 ●Index ………………………………………………………………………………………………122...
-
Page 12: Getting Ready
Getting Ready Checking the Contents of the Box The box contains the cell phone and accessories. ・ Cell phone ・ Battery pack ・ Desktop holder ・ Toshiba round-type ・ Stereo earphones earphone jack adapter 01 (sample) ・ USB cable (sample) ・ CD-ROM W45T ・ Basic Manual (Japanese) ・ Instruction Manual (Japanese) 目次/準備 ... -
Page 13: Names Of Parts
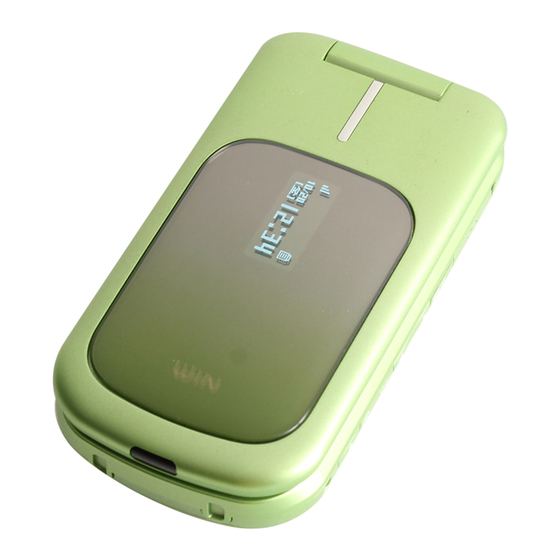
Names of Parts From the Front From the Back Lux Sensor Incoming LED Earpiece Display Sub-display Charge indicator Macro focus switch Warp function key Strap eyelet EZ apps key/ Camera(lens) Soft key 1 Mobile light Phone book key/ Soft key 2 Mail key Memo key/ ... -
Page 14: Security Code And Passwords
Security Code and Passwords You can use the security code and passwords described below to restrict use of your W45T. Take care not to forget the security code and passwords, because they are required for performing various operations and using subscription services. -
Page 15: Charging The Battery Pack
Confirm that the charge indicator lights. ・Charging: The charge indicator lights. ・Charging finished: The charge indicator goes out. If you turn on power to W45T and charge the battery pack, W45T beeps when it starts or finishes charging. Note Note... -
Page 16: Learning The Basics
Learning the Basics Key Assignments :EZ apps startup :Incoming History :E-mail :Voice memo setting/cancel; character delete; operation cancel :Make and answer calls; use the Pair function 0〜9、 *、# :Phone number and character input :Display Launcher menu :Phone Book :Outgoing History ... - Page 17 Warp Function Key Use the up, down, left, and right parts of the key to select items and to move the cursor. Press the center of the key to confirm a selected item. Selects items, and moves the cursor up, down, /f left and right.
-
Page 18: Turning On Power
Turning On Power Hold down S for at least one second. Standby screen Check the signal strength. Strong Medium Weak Very weak Out of range ・You cannot receive or make calls if is displayed. Check the battery level. Very low Full Empty Charging... -
Page 19: Configuring Initial Settings
Configuring Initial Settings Initial menu When the standby screen is displayed, press @. Press 3 設定しない (Do Not Setup). Note Note ・Even if you do not configure the initial settings, you can still make and answer calls. ・The initial settings include changing the lock number, setting the character size, setting the Notify Call ID, and setting the call ring tone. -
Page 20: Switching The Display Language To English
Switching the Display Language to English You can switch the display language for function names and other items to English. When the standby screen is displayed, press @. Use E to select 機能 (Function) and then press @ (選択 [Select]). Press 3 画面表示... - Page 21 Use G to select English and then press @ (Select). Use G to select Alphabet and then press @ (Select).
-
Page 22: Viewing The Display
Viewing the Display Display indicators keep you informed when new e-mail arrives, about the status of function settings, etc. Display ① ② ③ ④ ⑤ ⑥ ⑦ Indicator Description ① Indicates signal strength. ② Indicates battery level. Indicates that EZweb is in use. ⑧... - Page 23 Sub display ① ② ③ ④ ⑤ Indicator Description ① Indicates signal strength. Indicates that the manner mode is ② turned on. Indicates that au Music Player is in use. ⑥ ③ Indicates that EZ ・ FM is in use. Indicates the voice recorder is recording.
-
Page 24: Using Menus
Using Menus Launcher Menu The Launcher menu provides you with access to various W45T functions. The Launcher menu contains the following items. au Music Player Data Folder EZ・FM Camera PC Site Viewer Hello Messenger SD Card Menu Ir Receiving Limit Mode... - Page 25 Using Live Menu The Live menu enables you to easily access functions unique to CDMA 1X WIN from the standby screen. When the standby screen is displayed, press M to display the Live menu. Use F to select a service, use G to select an item and then press @ (Select) to access a function.
- Page 26 Option Menus An Option menu for performing various related operations will open if you press K when is displayed in a screen for configuring function settings, entering characters, or performing other operations. K(Option) K(Close) About Displaying Alert Window If the alert window is displayed on the standby screen, Alert window you can temporarily hide the alert window and display the Launcher menu by pressing S and then @.
-
Page 27: Initializing E-Mail And Ezweb
Initializing E-mail and EZweb To use e-mail and EZweb, you need to apply for an EZweb subscription. If you did not apply for an EZweb subscription at the time of purchase, contact an au shop or the au Customer Service Center. Also, before use, be sure to configure initial settings. -
Page 28: Changing Your E-Mail Address
Changing Your E-mail Address You can change the account name part of the E-mail address e-mail address as indicated to the right. △△△@ezweb.ne.jp Part you can change Domain name When the standby screen is displayed, press L and then press 7 E-mail Setup. Press 4 Other Setup. - Page 29 Use G to select 承諾する (Accept) and then press @ (Select). Use G to select the entry box, press @ (Edit), enter an e-mail address using single-byte alphanumeric characters, and then press @ (OK). ・For details on entering e-mail addresses, see page 42. Use G to select 送信...
-
Page 30: Using Extra Large Characters
Using Extra Large Characters Turning on extra large characters will display the names of callers and addresses on the Call Screen, the phone book list, etc. Example: Switching the character size from Telephone to Extra Large When the standby screen is displayed, press @. -
Page 31: Making And Answering Calls
Making and Answering Calls Making a Call When the standby screen is displayed, use 0 to 9 to enter the phone number you want to call. ・When calling to a regular phone, you also need to enter the area code. Press Q. -
Page 32: Answering A Call
Answering a Call To answer a call, press Q. ・When you have finished the call, press S. Display When a Call is Received The phone number of the caller appears. If the caller's phone number and name are in your phone book, the name is also displayed. -
Page 33: Redialing (Outgoing History/Incoming History)
Redialing (Outgoing History/Incoming History) Example: Returning a call to a phone number in the incoming history When the standby screen is displayed, press D. ・Pressing C while the standby screen is displayed displays the Outgoing History screen. ・The phone numbers are displayed in order of the most recent to the oldest. -
Page 34: One-Ring Calls
One-ring Calls What is a One-ring Call? A one-ring call is a call from an unknown caller that only rings once, causing it to be stored in the incoming history. One-ring calls are often used to get the receiver to return the call, which will connect you to a dating service or some other service that charges caller at high rates. -
Page 35: Turning On Manner Mode
Turning On Manner Mode The cell phone informs you of an incoming call or message by vibrating. When the standby screen is displayed, hold down V for at least one second. aThis turns on manner mode, and displays on the standby screen. -
Page 36: Turning On Voice Memo
Turning On Voice Memo When the standby screen is displayed, hold down R for at least one second. aThe answering message (Japanese) is played, then voice memo is turned on, which is indicated by on the standby screen. Turning Off Voice Memo When the standby screen is displayed, hold down R for at least one second. -
Page 37: Playing A Voice Memo
Playing a Voice Memo If a voice memo is recorded Memo and the number of memos appear on the standby screen. Use G to select Memo and then press @. Use G to select the voice memo you want to play and then press @ (Play). -
Page 38: Changing The Incoming Ring Tone
Changing the Incoming Ring Tone When the standby screen is displayed, press @. Use E to select Function and then press @ (Select). Press 2 Sound/Vib./LED. Press 1 Incoming Call. Press 2 Melody. - Page 39 Use G to select Fixed Pattern and then press @ (Select). Use G to select Pattern 3 and then press J (Play). ・If you press J (Back) or R, the tone stops playing and you can select another tone. Press @ (OK). aThe incoming ring tone is set.
-
Page 40: Adjusting The Incoming Ring Tone Volume
Adjusting the Incoming Ring Tone Volume When the standby screen is displayed, press @. Use E to select Function and then press @ (Select). Press 2 Sound/Vib./LED. Press 1 Incoming Call. Press 1 Volume. -
Page 41: Adjusting The Earpiece Volume During A Call
Use G to adjust the volume and then press @ (OK). ・Each press of G changes the volume one step. After a vibration alert, the ring tone sounds while gradually increasing in volume. STEP DOWN The ring tone sounds while gradually decreasing in volume. STEP UP The ring tone sounds while gradually increasing in volume. -
Page 42: Character Input
Character Input Character Entry Modes When a character entry screen is displayed, you can select the character entry mode if you press J. Menu Items Kanji:Kanji conversion mode aA :Double-byte alphanumeric mode abAB :Single-byte alphanumeric mode 12 :Double-byte number mode 1234... - Page 43 Entering Two or More Characters Assigned to the Same Key After you enter the first character, press C to move the cursor ( ■ ) to the right and then enter the next character. Example: Entering "ab" Press 2 once. Press C once.
-
Page 44: Entering E-Mail Addresses
- Period (.) or zero (0) cannot be used as the first character. How to Enter E-mail Addresses Use 1 to 0 to enter characters and numbers. Example: Entering "taro.23@toshiba.co.jp" for the recipient's e-mail address Enter "taro.23". t : Press 8 once. - Page 45 Press J (abAB) and then press # Phrase. Use G to select Internet and then press @ (Select). Use G to select .co.jp and then press @ (Select). a".co.jp" is entered. Note Note ・ To enter ".co.jp" etc., you can use the Sentence menu.
-
Page 46: Entering Pictograms
Entering Pictograms When a character entry screen is displayed, press J (abAB). ・You can also enter symbols, emoticons, and useful sentences (fixed text) from the character entry mode menu. Press 9 ・You can switch the Pictogram screen by category, such as Face, if you press L or M. -
Page 47: Phone Book/Pair Function
Phone Book Saving a Phone Book Entry New screen Hold down K for at least one second. Use G to select (Name) and then press @ (Select). Enter a name and then press @ (OK). aThe (Reading) for the name is entered automatically. - Page 48 Saving a Phone Book Entry (continued) Use G to select a phone number class and then press @ (Select). ・Follow the next two steps to enter an e-mail address. If you do not want to enter an e-mail address, proceed to Step 9. Use G to select (E-mail 1) and then press @ (Select).
-
Page 49: Dialing From The Phone Book
Dialing from the Phone Book When the standby screen is displayed, press K. Use E to select the entry containing the phone number you want to dial and then press @ (Select). Press Q. -
Page 50: Editing Phone Book Entries
Editing Phone Book Entries Select the entry you want to edit and press @ (Select). Press K (Option) and then press 1 Edit. Edit the contents and then press J (Add). Use G to select Overwrite and then press @ (OK). -
Page 51: Saving A Phone Number From The Incoming Or Outgoing History
Saving a Phone Number from the Incoming or Outgoing History Example: Saving a phone number from the incoming history to the phone book When the standby screen is displayed, press D and use G to select the phone number you want to save. Press K (Option) and then press 1 Add Phone Book. -
Page 52: Registering A Pair Person
Pair Function You can register a maximum of five pair persons you contact often to easily call or send mail. You can also invite pair persons to a Hello Messenger meeting. Registering a Pair Person When the standby screen is displayed, press Q. -
Page 53: Making A Call To A Pair Person
Making a Call to a Pair Person When the standby screen is displayed, press Q. Use F to select the person you want to call. Use G to select Call and then press @ (Select). ・To confirm the phone number and other registered information, select Check/Reg/Cancel, press @ (Select), and then use G to select Check. -
Page 54: Sending A Mail To A Pair Person
Sending a Mail to a Pair Person When the standby screen is displayed, press Q. Use F to select the person you want to send a mail. Use G to select E-mail or C-mail and then press @ (Select). ・To create an e-mail message, see "Creating and Sending E-mail Messages" on page 54. -
Page 55: Mail
Mail EZweb Subscription Required Using E-mail To use e-mail, you need to apply for an EZweb subscription. If you did not apply for an EZweb subscription at the time of purchase, contact an au shop or the au Customer Service Center. Also, before use, be sure to configure initial settings. -
Page 56: Creating And Sending E-Mail Messages
Creating and Sending E-mail Messages When the standby screen is displayed, press L and then press 1 Create New. Use G to select To and then press @ (Select). Press @ (Select) and then press 1 Use Phone Book. ・You can specify up to five addresses for the To, Cc, and Bcc fields. - Page 57 Use G to select Subject and then press @ (Select). Enter a subject and then press @ (OK). ・You cannot enter single-byte Japanese characters or a new line in a subject. Use G to select Text and then press @ (Select). Enter the text of the message and then press @ (OK).
-
Page 58: Reading Received E-Mail Messages
Reading Received E-mail Messages When you receive an e-mail message Email appears on the standby screen along with the number of messages received. Use G to select Email and then press @. Indicators :Indicates a folder containing a new message. Press @ (Select). - Page 59 Viewing a Received Message Sender of the message Time and date the message The e-mail address of was received the sender may appear in place of the name. Message text Message subject Name of attached file, if any See page 58. Note Note ・The procedure may differ depending on the e-mail settings.
-
Page 60: Reading An E-Mail Message With An Attached Photo Or Movie
Reading an E-mail Message with an Attached Photo or Movie Example: Viewing an attached photo Display the e-mail message (page 56). Use G to select the file name and then press @ (Rcv). Press @ (Play). Note Note ・Some files will already be displayed on the screen in Step 1, while other files will require that you select the file name, and then press @ (Play) (Step 2). -
Page 61: Replying To Received E-Mail Messages
Replying to Received E-mail Messages When the standby screen is displayed, press L and then press 2 Inbox. Press @ (Select). Use G to select the message you want to reply to and then press @ (Select). Press J (Reply). aThe Create Mail screen appears. -
Page 62: Rejecting Spam
Rejecting Spam The setting of mail filters to reject spam is recommended. Also, selecting サポート設定 (Supportive Settings) enables you to set mail filters easily while answering questions that appear on the screen. Setting Mail Filters Example: Connecting to サポート設定 (Supportive Settings) When the standby screen is displayed, press L. -
Page 63: Using C-Mail
Using C-mail C-mail is a service that enables the use of phone numbers as addresses to exchange messages between au cell phones that support c-mail. A c-mail message can contain up to 50 double-byte (or 100 single-byte) characters. A message is sent to a phone number. -
Page 64: Creating And Sending C-Mail Messages
Creating and Sending C-mail Messages When the standby screen is displayed, hold down L for at least one second, and then press 1 Create New. Enter the text of the message and then press @ (OK). Use G to select Use Phone Book and then press @ (Select). -
Page 65: Reading Received C-Mail Messages
Reading Received C-mail Messages Received c-mail messages are saved to the Inbox. When you receive a c-mail message Cmail appears on the standby screen along with the number of received messages. Use G to select Cmail and then press @. Indicators :Indicates a read message. -
Page 66: Hello Messenger
Hello Messenger Hello Messenger is a service that enables you to use a desired cartoon-style character to represent you in a meeting (exchange text, sound, and other data in real time) between au cell phones that support Hello Messenger. The host can select up to four members from the phone book to join the meeting. -
Page 67: Displaying Hello Messenger
Displaying Hello Messenger When the standby screen is displayed, press @. Use E to select Hello Messenger and then press @ (Select). When Starting Hello Messenger for the First Time Press @ (OK), use E to select your character, and then press @(設定) (Set). -
Page 68: Holding A Meeting
Holding a Meeting You can start a meeting by selecting the members to invite to the meeting from the phone book, a group, or the hello ranking (members that you invited or that invited you to a meeting in the past), or use the pair function to start a meeting. -
Page 69: Inviting Members To A Meeting
Inviting Members to a Meeting You can start a meeting by inviting members registered in the members list. Use G to select スタート (Start) from the Hello Messenger menu (see page 65) and then press @(選択). Use G to select アドレス帳 (Phone Book) and then press @(選択). -
Page 70: Accepting An Invitation To Join A Meeting
メンバーをミーティングにお誘いする Accepting an Invitation to Join a Meeting When you receive an invitation to a meeting, the ring tone sounds and/or the cell phone vibrates, and then a message inviting you to join the meeting appears. However, if the ring tone mode is set to 自動応答モード... -
Page 71: Camera
Camera Your cell phone has three-megapixel camera (3,240,000 pixels available) that you can use to shoot photos and movies. It also has a self-timer for taking photos. You can use images you record for the standby screen, and you can attach them to e-mail messages. -
Page 72: Photo And Movie Shooting Tips
Photo and Movie Shooting Tips When shooting photos or movies, frame the subject within the display and hold the W45T steady with both hands to avoid shaking. When oriented vertically When oriented horizontally Lux Sensor Mobile light Camera (lens) Orient the W45T so... -
Page 73: Taking A Photo
Taking a Photo When the standby screen is Monitor screen displayed, hold down P for at least one second. aThe monitor screen appears. Point the lens at the subject Preview screen and then press @ (Shot) or aThe photo you just took appears. Saving a Photo Press @ (Save) in the preview screen. -
Page 74: Recording A Movie
Recording a Movie When the standby screen is displayed, press @. Use E to select Camera and then press @ (Select). Press 2 Movie. aThe monitor screen appears. Point the lens at the subject and then press @ (Rec) or aThe cell phone emits a recording start sound, and lights when... -
Page 75: Attaching Photos Or Movies To E-Mail Messages
Note Note ・ If you do not want to save the movie, press R in the preview screen, use G to select Yes, and then press @ (OK). ・ The following shows how to read the file name in the Data Folder when you record a movie in the High L mode. -
Page 76: Viewing Photos Or Movies
Viewing Photos or Movies Example: Viewing a photo When the standby screen is displayed, press @. Use E to select Data Folder and then press @ (Select). Use G to select Photo Folder and then press @ (Select). ・To view a movie, select Movie Folder. Use G to select a folder and then press @ (Select). -
Page 77: Ezweb
EZweb EZweb Subscription Required EZweb is an information service that allows you to enjoy using the Internet ® ® on your cell phone. You can also download Chaku-Uta-Full , Chaku-Uta news, and other data from web pages. To use EZweb, you need to apply for an EZweb subscription. If you did not apply for an EZweb subscription at the time of purchase, contact an au shop or the au Customer Service Center. -
Page 78: Accessing Sites
Accessing Sites Viewing the EZ Top Menu You can access EZweb from the Top menu. A variety of useful and fun sites are available on EZweb. キーワード検索機能 (Search by Keyword) Provides an information search function for searching by keyword. カテゴリで探す (Search by Category) ... - Page 79 Basic Operations Use G to select the site you want to access and then press @ (OK). Pressing D or R returns to the previous screen. Holding down either key for at least one second returns to the Top menu. Select the item you Select the item you want to display and...
-
Page 80: Bookmarking Frequently Accessed Pages
Bookmarking Frequently Accessed Pages You can save the titles and URLs you often visit, which makes it easy to return to them when you want. When the page you want to bookmark is displayed, press K (Browser menu). Press 1 New bookmark. ・Some pages cannot be bookmarked. -
Page 81: Viewing Bookmarked Pages
Viewing Bookmarked Pages When the standby screen is displayed, press M and then use F to select the EZweb. Use G to select Bookmark and then press @ (Select). Use G to select the bookmark for the page you want to view and then press @ (Access). -
Page 82: Downloading Chaku-Uta
® Downloading Chaku-Uta When the standby screen is displayed, press M and then use F to select the EZweb. Use G to select Top Menu and then press @ (Select). Use G to select カテゴリで 探す (Category Search) and then press @ (OK). Use G to select 着うた... - Page 83 Follow the instructions that appear on the display. aDownload is completed. ・Downloaded data is saved automatically to the Data Folder. Press J (Play). aThe downloaded Chaku-Uta ® plays. During playback, press @ (Regist). aThe Register to where? menu appears. Use G to select the tone you ®...
-
Page 84: What You Can Do With Ez Channel
With EZ Channel, you can simply pre-register the programs you want to watch on the W45T to have the latest content delivered automatically. This enables you to enjoy mobile programs unique to au in a similar manner to the way you would enjoy the TV or magazines. - Page 85 Enjoying EZ Channel Registering Programs You can register up to three of the programs you like from Jump To Program Guide. The data is downloaded during the period from late at night until early in the morning and is saved to Registered Program. ©ナノメディア ...
-
Page 86: Ez Navi
Position Search Area Message You can check the location of another au phone that supports Position Search from your W45T. The two services Auto Position Jump To EZnavi Site Search (fee is charged) and Position Search Mail (free) are available. - Page 87 EZ Navi Walk for when you go out Displays various useful menu items for when you are out. View the latest information and recommendations. * おためしナビ enables you to try out demonstrations for the オススメ 音声ナビ...
-
Page 88: What You Can Do With Position Search
What You Can Do with Position Search Position Search enables you to check the location of your child at anytime by simple operations on your W45T. Two types of services are available in Position Search: Position Search Mail(位置確認メール)and Auto Position Search(いつでも位置確認)... -
Page 89: What You Can Do With Area Message
What You Can Do with Area Message When your child approaches (or is in) a specific area during a predefined time period, a notification message is sent to your cell phone automatically. You can also set your child's phone to notify you if your child leaves (or is not in) a specific area. -
Page 90: Au Music
au Music What You Can Do with au Music The au Music service enables you to enjoy music. au MusicMenu ® Downloading Chaku-Uta-Full au Music Player [Jump To EZ Music] Jump To EZ Music Music Folder ® You can access the official site to download Chaku-Uta-Full Storage of Songs and Playlists ... - Page 91 You can show slide shows of your photos Based on the music you usually listen to on while listening to the songs you like. your W45T, this service discovers new music and finds new friends who listen to the same kinds of music.
-
Page 92: Downloading Chaku-Uta-Full
® Downloading Chaku-Uta-Full ® The Chaku-Uta-Full service enables you to download whole tracks of high-quality songs of artists. You can set part of a downloaded ® ® Chaku-Uta-Full as the Chaku-Uta for a ring tone. When the standby screen is displayed, press M. - Page 93 ® Setting Chaku-Uta-Full as a Ring Tone ® Example : Using the preset information to set a Chaku-Uta-Full as a ring tone When the standby screen is displayed, press M, and then use F to select au Music. Use G to select Music Folder, press @ (Select), use G to select Chaku-Uta-Full, and then press @ (Select).
-
Page 94: Listening To Chaku-Uta-Full
® Listening to Chaku-Uta-Full When the standby screen is displayed, press M, and then use F to select au Music. Use G to select au Music Player and then press @ (Select). Use G to select ライブラリ (Library) and then press @ (Select). -
Page 95: Switching To Background Music Playback Or Exiting Au Music Player
Basic Operations Player Screen アポロ イエロー・リング Playback song number Playback time ・You can press F to play ・You can hold F for at least the previous/next song. one second to rewind/forward the song. Adjusting the Volume You can use G, V, and U to adjust the volume. Pausing and Resuming Playback You can use @ to pause/resume playback. -
Page 96: Ez・Fm
Connector Note Note ・ When you insert or remove the connector of the Toshiba round-type earphone jack adapter 01 into/from the flat-type earphone jack, be sure to keep it straight. Listening to EZ・FM ・ When the standby screen is displayed, press @. -
Page 97: Switching To Background Music Reception Or Exiting Ez・Fm
Basic Operations EZ・FM Screen Press R and select each area. Frequency area ・You can use F to manually select a station in increments of 0.1 MHz. ・You can hold F for at least one second to automatically select a station. Song name display area ・... -
Page 98: Pc Site Viewer
PCs, thanks to a distinctive feature of CDMA 1X WIN, high-speed packet communication of up to 2.4 Mbps downstream. Viewing Sites for PCs You can view sites for PCs on your W45T. The PC site viewer has two display modes: small screen and PC screen. Sites for PCs Viewing Sites with PC Site Viewer スモールスクリーン ... -
Page 99: Accessing Sites
Accessing Sites When the standby screen is displayed, press @. Use E to select PC Site Viewer, press @ (Select), and then press K (OK). Press 1 トップページ (Top Page). ・The DUOGATE site (http://duogate.jp/) appears. Basic Operations You can use F to scroll the screen. You can use G to select a link on the screen or scroll. -
Page 100: Using The Standby Specification Function
Using the Standby Specification Function You can display part of a website on the standby screen. The website screen selected for the standby specification function appears on the standby screen after a certain amount of time elapses. Display a page you like, press K(メニュー)(Menu), and then 5 待受指定... - Page 101 From a PC: http://my.kddi.com/ (MyKDDI) * An application needs to be submitted before you can start using this service. From your W45T: M ⇒ EZweb ⇒ Top Menu ⇒ auお客さまサポート (au Customer Support)
-
Page 102: Limit Mode
Limit Mode Limit Mode allows a parent or superior to limit how much each function can be used to prevent overuse of the cell phone by a child or subordinate. Limits can be placed on incoming and outgoing calls and c-mail. Registering Permitted Members If you register permitted members, your cell phone allows incoming and outgoing calls and c-mail from/to them regardless of the Use Limit settings. - Page 103 Use E to select a phone book entry and then press @ (Select). Press J (OK). Use G to select Yes and then press @ (OK).
-
Page 104: Limiting Calls And C-Mail
Limiting Calls and C-mail You can limit incoming and outgoing calls and c-mail (Access Limit). Example: Only allowing outgoing calls to permitted members When the standby screen is displayed, press @. Use E to select Limit Mode and then press @ (Select). Press 4 Limit Mode Setup. - Page 105 Use G to select Limit Setup and then press @ (Select). Use G to select Access Limit and then press @ (Select). Use G to select Outgo and then press @ (Select). Use G to select Only Permit Member and then press @ (Select).
-
Page 106: Setting Use Limits
Setting Use Limits You can configure your cell phone to prohibit outgoing calls and/or c-mail if the monthly planned use limit will be exceeded. Example: Limiting the call amount When the standby screen is displayed, press@. Use E to select Limit Mode and then press @ (Select). - Page 107 Use G to select Use Limit and then press @ (Select). Use G to select Call and then press @ (Select). Use G to select Limited and then press @ (Select). Enter the call amount and then press @ (OK). Note Note ・Your cell phone does not place limits on outgoing calls and c-mail to permitted...
-
Page 108: Turning Limit Mode On And Off
Turning Limit Mode On and Off When the standby screen is displayed, press@. Use E to select Limit Mode and then press @ (Select). Press 5 Limit · Cancel. Enter your Limit Mode password and then press @ (OK). Use G to select ON and then press @(OK). -
Page 109: Smart Mode
Smart Mode Setting Smart Mode enables limited and simplified operations of the phone function, phone book, camera, mail, EZweb and other often-used functions. Entering Smart Mode When the standby screen is displayed, press @. Use E to select Smart Mode and then press @ (Select). -
Page 110: Exiting Smart Mode
Exiting Smart Mode When the standby screen is displayed, press @. Use G to select Setup and then press @ (Select). Use G to select Exit SmartMode and then press @ (Select). Use G to select Yes and then press @ (OK). aThis exits Smart Mode. -
Page 111: Viewing The Display In Smart Mode
Viewing the Display in Smart Mode The following indicators are available for checking the status on the standby display when your cell phone is in Smart Mode. ① ② Indicator Description ① Indicates signal strength. ② Indicates battery level. ③ ③... -
Page 112: Viewing The Smart Menu
@ (Select) and then press and then press Camera Alarm Calendar Notepad Calculator Useful Function ・ au Music Player Toshiba Site Data Folder Volume Melody Standby Screen Setup Character/Pict Size Manner Mode Pay/Apply Exit Smart Mode My Number Note Note ・For details on the key assignment and basic operations, see page 14. - Page 113 Using Live Menu The Live menu enables you to easily access functions unique to CDMA 1X WIN from the standby screen. When the standby screen is displayed, press M to display the Live menu. Use G to select a menu item, press @ (Select), use G to select a function, and then press @ (Select).
-
Page 114: Saving A Phone Book Entry Using Smart Mode
Saving a Phone Book Entry Using Smart Mode When the standby screen is displayed, press K. Use G to select Yes and then press @ (OK). Enter a name and then press @ (OK). Use G to select Direct Input and then press @ (Select). - Page 115 Use G to select Direct Input and then press @ (Select). ・If you do not want to enter an e-mail address, use G to select Not Input, press @ (Select), and then proceed to Step 8. ・You can also use G to select Sent History or Received Hist and enter an e-mail address from there.
-
Page 116: Creating And Sending E-Mail/C-Mail Messages In Smart Mode
Creating and Sending E-mail/C-mail Messages in Smart Mode Example : Creating and sending an e-mail message When the standby screen is displayed, press L. Use G to select E-mail and then press @ (Select). ・To create a c-mail message, select C-mail. - Page 117 Enter a subject and then press @ (OK). Enter the text of the message and then press @ (OK). ・You can use G to select an item and then press @ (Edit) to edit the currently selected item. Press J (Send). aThe e-mail message is sent.
-
Page 118: Taking Photos In Smart Mode
Taking Photos in Smart Mode When the standby screen is displayed, press @. Use G to select Camera and then press @ (Select). Use G to select Photo and Monitor screen then press @ (Select). aThe monitor screen appears. Point the lens at the subject Preview screen and then press @ (Shot) . -
Page 119: Viewing Photos In Smart Mode
Viewing Photos in Smart Mode When the standby screen is displayed, press @. Use G to select DataFolder and then press @ (Select). Use G to select PhotoFolder and then press @ (Select). Use G to select a folder and then press @ (Select). -
Page 120: Other Functions
Other Functions In addition to the functions covered in this Basic Manual, the W45T also has the following convenient features. Global Expert The W45T supports Global Expert, which is based on the use of au IC cards. Global Expert is a global roaming service that enables you to insert and use your au IC card in an overseas GSM cell phone. -
Page 121: In Case You Lose Your W45T
In Case You Lose Your W45T If you set the remote auto lock to ON in advance, you will be able to remotely enable the auto lock on the W45T to prevent others from using your cell phone. Setting Conditions for Enabling the Remote Auto Lock You can enable the auto lock if you call your W45T repeatedly from a registered phone number within a pre-specified period of time. -
Page 122: Remotely Enabling The Auto Lock On Your W45T
Note Note ・The remote auto lock cannot be enabled when the W45T is turned off or out of the service area, or Emission OFF is set to ON. -
Page 123: Troubleshooting
Troubleshooting Reference Symptom Check Measure Page ●Is the battery pack charged? Charge the battery pack. Cannot turn on ●Did you hold down S for at least Hold down S for at least one second. power. one second? Hold down S for at least one second. ●Is power turned on? Move to a location where (out... -
Page 124: Index
Index Replying …………………………59 Accessories ………………………10 Viewing attached images………58 Adjusting the earpiece volume …39 E-mail address ……………………25 Alert window ………………………24 Changing ………………………26 Area Message …………………84,87 Entering …………………………42 au Music ……………………………88 Entering characters ………………40 Exiting ……………………………93 Entering characters from the same key …41 ®... - Page 125 Photos Limiting …………………………102 Attaching to e-mail ……………73 Registering members …………100 Taking ……………………………71 Setting use limits ………………104 Playback Turning on ……………………106 Voice memo ……………………35 Live menu …………………………23 Position Search ………………84,86 Power supply Turning off power ………………16 Mail Turning on power ………………16 C-mail ……………………………61 E-mail ……………………………53 Manner mode ………………………33...
- Page 126 OKINAWA CELLULAR TELEPHONE COMPANY Cellphone and PHS operators collect and recycle unused telephones, batteries and Manufactured by: battery chargers at stores bearing the logo regardless of brand and TOSHIBA CORPORATION manufacturer to protect the environment October 2006 Edition and reuse valuable resources.
Need help?
Do you have a question about the W45T and is the answer not in the manual?
Questions and answers
Can Toshiba W45T connect to wifi in New Zealand