
Related Manuals for Toshiba A5516T


Summary of Contents for Toshiba A5516T
- Page 1 Basic Contents/ Getting Ready Manual Making and Answering Calls Character Input Phone Book Pair Function Mail Camera EZweb EZ Navi Limit Mode Smart Mode A5516T Others/Index...
- Page 2 Introduction Thank you for purchasing the A5516T. Before using your A5516T, be sure to read the A5516T Basic Manual (this PDF manual) to ensure correct usage. After you have finished reading this manual, store this PDF manual and the printed manuals in safe places so you can retrieve them whenever you need them.
-
Page 3: Cell Phone Etiquette
Cell Phone Etiquette Etiquette for Cell Phone Use ■ The cell phone always emits weak radio waves when power is on. ■ Use the cell phone in an enjoyable and safe manner without forgetting to be considerate of others around you. ●The use of cell phones is not ●Be considerate of where you allowed in some places... -
Page 4: Cell Phone Basics
Cell Phone Basics Cell Phone Features Limit Mode/ Making/ Camera Answering Calls Smart Mode You can take You can select a mode that Your cell phone is photos and movie restricts operation, or a packed with useful clips and then features such as mode that allows simplified send them easily... -
Page 5: Manner Mode And Voice Memo ⋯⋯⋯⋯⋯⋯⋯⋯⋯⋯⋯⋯⋯⋯⋯⋯⋯⋯⋯⋯⋯⋯⋯⋯⋯3
Manner Mode and Voice Memo Manner Mode Voice Memo You can use manner mode to turn When you cannot answer calls, off the incoming call ring tone and the cell phone can play an other tones so as not to answering message (Japanese) inconvenience other people. -
Page 6: Do Not Use The Cell Phone While Driving
Do not use the cell phone while driving! Holding a cell phone, talking on a cell phone, looking at a cell phone display to send mail or perform some other operation while driving is against the law in Japan. (Revised Traffic Control Law, effective November 1, 2004) ×... -
Page 7: Spam And One-Ring Calls ⋯⋯⋯⋯⋯⋯⋯⋯⋯⋯⋯⋯⋯⋯⋯⋯⋯⋯⋯⋯⋯⋯⋯⋯⋯⋯⋯⋯5
Spam and One-ring Calls If you receive spam: You can set the mail filters to reject only specific mail or mail indicated by 未承諾広告※ (Unsolicited Advertisement), which often tends to be spam. The following mail filters are available for rejecting spam: Danger! ・未承諾広告フィルター... -
Page 8: Disaster Message Board Service ⋯⋯⋯⋯⋯⋯⋯⋯⋯⋯⋯⋯⋯⋯⋯⋯⋯⋯⋯⋯⋯⋯⋯⋯6
Disaster Message Board Service About Disaster Message Board When a big scale disaster occurs, you can register your safety information through EZweb. The registered safety information can be referred from anywhere in Japan through EZweb or Internet. ●When a big scale disaster occurs, from au phone, you can register your safety information Registering such as your condition or comments to the 災... - Page 9 Top display of the Disaster Safety information Message Board registration display 災害用伝言板 災害用伝言板 登録 for registration 伝言板トップ ∼登録∼ 被災状況 ∼サービス提供中∼ 無事です。 安否情報の登録・確認がで 被害があります。 きます。 自宅に居ます。 Safety information 避難所に居ます。 登録(ご利用可能地域の方の コメント見て reference display み登録可能です) 確認 コメント入力 (全角100文字 削除 まで) お知らせメール設定 災害用伝言板 サービス概要...
-
Page 10: Table Of Contents
Contents ● Introduction ● Cell Phone Etiquette Etiquette for Cell Phone Use ⋯⋯⋯⋯⋯⋯⋯⋯⋯⋯⋯⋯⋯⋯⋯⋯⋯⋯⋯⋯⋯⋯⋯⋯⋯⋯1 ● Cell Phone Basics Cell Phone Features ⋯⋯⋯⋯⋯⋯⋯⋯⋯⋯⋯⋯⋯⋯⋯⋯⋯⋯⋯⋯⋯⋯⋯⋯⋯⋯⋯⋯⋯⋯2 Manner Mode and Voice Memo ⋯⋯⋯⋯⋯⋯⋯⋯⋯⋯⋯⋯⋯⋯⋯⋯⋯⋯⋯⋯⋯⋯⋯⋯⋯3 Checking the Power, Signal Strength, and Battery Level ⋯⋯⋯⋯⋯⋯⋯⋯⋯⋯⋯⋯⋯⋯3 Do not use the cell phone while driving!⋯⋯⋯⋯⋯⋯⋯⋯⋯⋯⋯⋯⋯⋯⋯⋯⋯⋯⋯⋯⋯⋯4 Spam and One-ring Calls ⋯⋯⋯⋯⋯⋯⋯⋯⋯⋯⋯⋯⋯⋯⋯⋯⋯⋯⋯⋯⋯⋯⋯⋯⋯⋯⋯⋯5 Disaster Message Board Service ⋯⋯⋯⋯⋯⋯⋯⋯⋯⋯⋯⋯⋯⋯⋯⋯⋯⋯⋯⋯⋯⋯⋯⋯6 ●... - Page 11 ● Pair Function Registering a Pair Person ⋯⋯⋯⋯⋯⋯⋯⋯⋯⋯⋯⋯⋯⋯⋯⋯⋯⋯⋯⋯⋯⋯⋯⋯⋯⋯⋯47 Making a Call to a Pair Person ⋯⋯⋯⋯⋯⋯⋯⋯⋯⋯⋯⋯⋯⋯⋯⋯⋯⋯⋯⋯⋯⋯⋯⋯⋯48 Sending a Mail to a Pair Person ⋯⋯⋯⋯⋯⋯⋯⋯⋯⋯⋯⋯⋯⋯⋯⋯⋯⋯⋯⋯⋯⋯⋯⋯49 ● Mail Using E-mail ⋯⋯⋯⋯⋯⋯⋯⋯⋯⋯⋯⋯⋯⋯⋯⋯⋯⋯⋯⋯⋯⋯⋯⋯⋯⋯⋯⋯⋯⋯⋯⋯⋯50 Creating and Sending E-mail Messages ⋯⋯⋯⋯⋯⋯⋯⋯⋯⋯⋯⋯⋯⋯⋯⋯⋯⋯⋯⋯⋯51 Reading Received E-mail Messages ⋯⋯⋯⋯⋯⋯⋯⋯⋯⋯⋯⋯⋯⋯⋯⋯⋯⋯⋯⋯⋯⋯54 Reading an E-mail Message with an Attached Photo or Movie ⋯⋯⋯⋯⋯⋯⋯⋯⋯⋯⋯56 Rejecting Spam ⋯⋯⋯⋯⋯⋯⋯⋯⋯⋯⋯⋯⋯⋯⋯⋯⋯⋯⋯⋯⋯⋯⋯⋯⋯⋯⋯⋯⋯⋯⋯57 Replying to Received E-mail Messages ⋯⋯⋯⋯⋯⋯⋯⋯⋯⋯⋯⋯⋯⋯⋯⋯⋯⋯⋯⋯⋯58...
-
Page 12: Getting Ready
Checking the Contents of the Box The box contains the cell phone and accessories. ・ Cell phone ・ Battery pack (attached to the cell phone) ・ Desktop holder ・ Toshiba AC adapter 02 ・ Basic Manual (Japanese) ・ Instruction Manual (Japanese) 目次 目次/準備... -
Page 13: Names Of Parts ⋯⋯⋯⋯⋯⋯⋯⋯⋯⋯⋯⋯⋯⋯⋯⋯⋯⋯⋯⋯⋯⋯⋯⋯⋯⋯⋯⋯⋯⋯⋯11
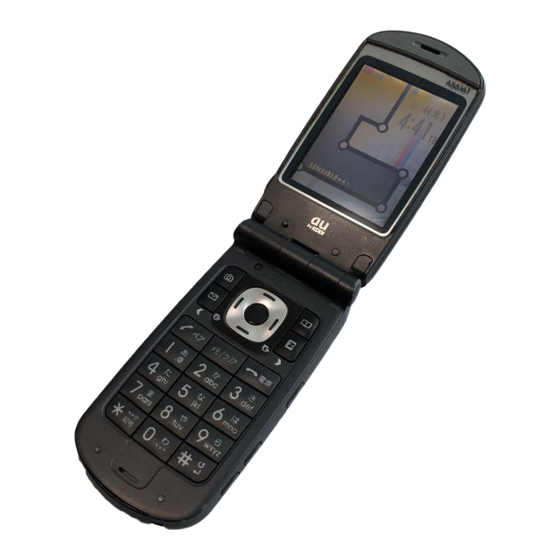
Names of Parts Incoming indicator (green) Charge indicator (red) Sub display Earpiece Mobile light Camera (lens) Built-in antenna Display Speaker Battery pack cover (for built-in battery pack) Application key Warp function key Side key 1 Camera key/ Side key 2 Soft key 1 Phone book key/Soft key 2 Mail key... -
Page 14: Charging The Battery Pack ⋯⋯⋯⋯⋯⋯⋯⋯⋯⋯⋯⋯⋯⋯⋯⋯⋯⋯⋯⋯⋯⋯⋯⋯⋯⋯⋯12
Confirm that the charge indicator lights red. ・Charging: The charge indicator lights red. ・Charging finished: The charge indicator goes out. If you turn on power to A5516T and charge the battery pack, A5516T beeps when it starts or finishes charging. Note Note ・Hold the desktop holder while removing the A5516T. -
Page 15: Built-In Antenna ⋯⋯⋯⋯⋯⋯⋯⋯⋯⋯⋯⋯⋯⋯⋯⋯⋯⋯⋯⋯⋯⋯⋯⋯⋯⋯⋯⋯⋯⋯⋯13
Built-in Antenna The antenna of the A5516T is built into its case. Built-in Note Note antenna ・Touching or covering the area around the built-in antenna may weaken a signal. In particular, do not affix any stickers or other decorations in the area around the built-in antenna. -
Page 16: Learning The Basics
Learning the Basics Key Assignments D :Incoming History C :Outgoing History :Camera :Phone Book :E-mail :EZweb Q :Make and answer R :Voice memo calls; use the Pair setting/cancel; function character delete; operation cancel 0∼9、*、# S :Power on/off; end :Phone number and call character input P :EZapps startup... -
Page 17: Soft Keys
Warp Function Key Use the up, down, left, and right parts of the key to select items and to move the cursor. Press the center of the key to confirm a selected item. Selects items, and moves the cursor up, down, /... -
Page 18: Personal Identification Numbers And Passwords ⋯⋯⋯⋯⋯⋯⋯⋯⋯⋯⋯⋯⋯⋯⋯⋯⋯16
Personal Identification Numbers and Passwords You can use the personal identification numbers and passwords described below to restrict use of your A5516T. Take care not to forget the numbers and passwords, because they are required for performing various operations and using subscription services. -
Page 19: Configuring Initial Settings ⋯⋯⋯⋯⋯⋯⋯⋯⋯⋯⋯⋯⋯⋯⋯⋯⋯⋯⋯⋯⋯⋯⋯⋯⋯⋯⋯17
Configuring Initial Settings Initial menu When the standby screen is 初期設定 displayed, press @. 今すぐ設定する あとで設定する 設定しない フ ゜ ロフィール 基本的な機能の設定を はじめに行えます Press 3 設定しない (Do Not Launcher menu Setup). Note Note ・Even if you do not configure the initial settings, you can still make and answer calls. ・The initial settings include changing the lock number, setting the character size, setting the Notify Call ID, and setting the call ring tone. -
Page 20: Switching The Display Language To English ⋯⋯⋯⋯⋯⋯⋯⋯⋯⋯⋯⋯⋯⋯⋯⋯⋯⋯⋯18
Switching the Display Language to English You can switch the display language for function names and other items to English. When the standby screen is displayed, press @. aThe Launcher menu appears. Use E to select 機能メニュー M _ 機能 時間... -
Page 21: Using Menus
Use G to select Alphabet and then press @ (Select). aThe display language is set to English. Using Menus Launcher Menu The Launcher menu provides you with access to various A5516T functions. The Launcher menu contains the following items. Voice Recorder Data Folder Limit Mode... -
Page 22: Option Menus
Using Menus (continued) Use E to select an item. Press @ (Select). Menu M _ Time/Pay/Apply Sound/Vibrator aThe item selected in the Launcher Display Privacy menu appears. User Assist Application Extra Note Note Alert window ・If the alert window is displayed on the standby screen, select ... -
Page 23: Indicators ⋯⋯⋯⋯⋯⋯⋯⋯⋯⋯⋯⋯⋯⋯⋯⋯⋯⋯⋯⋯⋯⋯⋯⋯⋯⋯⋯⋯⋯⋯⋯⋯⋯⋯21
Indicators Display indicators keep you informed when new e-mail arrives, about the status of function settings, etc. ① ② ③ ④ ⑤ Indicator Description ① Indicates signal strength. ② Indicates battery level. 7/ 1( ) 7/ 1( ) Indicates that EZweb is in use. ⑥... -
Page 24: Initializing E-Mail And Ezweb⋯⋯⋯⋯⋯⋯⋯⋯⋯⋯⋯⋯⋯⋯⋯⋯⋯⋯⋯⋯⋯⋯⋯⋯⋯⋯22
Initializing E-mail and EZweb To use e-mail and EZweb, you need to apply for an EZweb subscription. If you did not apply for an EZweb subscription at the time of purchase, contact an au shop or the au Customer Service Center. Also, before use, be sure to configure initial settings. -
Page 25: Changing Your E-Mail Address ⋯⋯⋯⋯⋯⋯⋯⋯⋯⋯⋯⋯⋯⋯⋯⋯⋯⋯⋯⋯⋯⋯⋯⋯⋯23
Changing Your E-mail Address You can change the account name part of the E-mail address e-mail address as indicated to the right. △△△@ezweb.ne.jp Part you can change Domain name When the standby screen is E−mail Setup Receive・Dsply displayed, press L and then ... - Page 26 Changing Your E-mail Address (continued) Use G to select the entry みご入力ください。 2.Eメールアト゛レスは半角英数字20 文字まで入力可能です。 box, press @ (Edit), and 記号は「.」「ー」のみ使用可能 です。「.」は連続して利用し たり、最初と最後には利用 できません。最初に数字の 「0」を使用することはできま enter an e-mail address using せん。 single-byte alphanumeric @ezweb.ne.jp characters. ・For details on entering e-mail addresses, see page 39. Press @ (OK), use G to 文字まで入力可能です。...
-
Page 27: Using Extra Large Characters ⋯⋯⋯⋯⋯⋯⋯⋯⋯⋯⋯⋯⋯⋯⋯⋯⋯⋯⋯⋯⋯⋯⋯⋯⋯25
Using Extra Large Characters Turning on extra large characters will display the names of callers and addressees on the Call Screen, the phone book list, etc. When the standby screen is displayed, press @. aThe Launcher menu appears. Menu M _ Use E to select Function and ... -
Page 28: Making And Answering Calls
Making and Answering Calls Making a Call When the standby screen is 0 to 9 to displayed, use enter the phone number you 030001XXXX want to call. ・When calling to a regular phone, you also need to enter the area code even in the same area. -
Page 29: Answering A Call ⋯⋯⋯⋯⋯⋯⋯⋯⋯⋯⋯⋯⋯⋯⋯⋯⋯⋯⋯⋯⋯⋯⋯⋯⋯⋯⋯⋯⋯⋯⋯27
Answering a Call To answer a call, press Q. ・When you have finished the call, press S. Display When a Call is Received Incoming The phone number of the caller appears. If the caller's phone number and name are in your phone ... -
Page 30: Redialing (Outgoing History/Incoming History) ⋯⋯⋯⋯⋯⋯⋯⋯⋯⋯⋯⋯⋯⋯⋯⋯⋯⋯28
Redialing (Outgoing History/Incoming History) Example: Returning a call to a phone number in the incoming history When the standby screen is Incom History 01 7/ 1 16:00 Kate Baker displayed, press 02 6/30 15:35 030002XXXX ・Pressing C while the standby screen 03 6/29 14:48 Tom Daniels is displayed displays the Outgoing 04 6/28 13:30... -
Page 31: One-Ring Calls ⋯⋯⋯⋯⋯⋯⋯⋯⋯⋯⋯⋯⋯⋯⋯⋯⋯⋯⋯⋯⋯⋯⋯⋯⋯⋯⋯⋯⋯⋯⋯⋯29
One-ring Calls What is a One-ring Call? A one-ring call is a call from an unknown caller that only rings once, causing it to be stored in the incoming history. One-ring calls are often used to get the receiver to return the call, which will connect you to a dating service or some other service that charges caller at high rates. -
Page 32: Turning On Manner Mode ⋯⋯⋯⋯⋯⋯⋯⋯⋯⋯⋯⋯⋯⋯⋯⋯⋯⋯⋯⋯⋯⋯⋯⋯⋯⋯⋯30
Turning On Manner Mode The cell phone informs you of a call by vibrating. When the standby screen is 7/ 1( ) 7/ 7/ 1( ) displayed, hold down T (side key 2) for at least one second. ... -
Page 33: Turning On Voice Memo⋯⋯⋯⋯⋯⋯⋯⋯⋯⋯⋯⋯⋯⋯⋯⋯⋯⋯⋯⋯⋯⋯⋯⋯⋯⋯⋯⋯31
Turning On Voice Memo When the standby screen is Set Voice Memo displayed, hold down R for Playing Answring Msg at least one second. aThe answering message (Japanese) is played, then voice memo is turned on, which is indicated by on the standby screen. -
Page 34: Playing A Voice Memo ⋯⋯⋯⋯⋯⋯⋯⋯⋯⋯⋯⋯⋯⋯⋯⋯⋯⋯⋯⋯⋯⋯⋯⋯⋯⋯⋯⋯32
Playing a Voice Memo If a voice memo is recorded 7/ 7/ 1( ) 7/ 1( ) Memo and the number of memos appear on the standby screen. INFORMATION Call 1 Item Memo 1 Item ... -
Page 35: Changing The Incoming Ring Tone ⋯⋯⋯⋯⋯⋯⋯⋯⋯⋯⋯⋯⋯⋯⋯⋯⋯⋯⋯⋯⋯⋯⋯33
Changing the Incoming Ring Tone When the standby screen is displayed, press @. aThe Launcher menu appears. Use E to select Function and Menu M _ Time/Pay/Apply Sound/Vibrator then press @ (Select). Display Privacy User Assist ... - Page 36 Changing the Incoming Ring Tone (continued) Use G to select Fixed Pattern Fixed Pattern M212 Pattern 1 Pattern 2 and then press @ (Select). Pattern 3 Pattern 4 aThe Fixed Pattern menu appears. Pattern 5 Pattern 6 Pattern 7 Pattern 8 Play Add...
-
Page 37: Adjusting The Incoming Ring Tone Volume ⋯⋯⋯⋯⋯⋯⋯⋯⋯⋯⋯⋯⋯⋯⋯⋯⋯⋯⋯⋯35
Adjusting the Incoming Ring Tone Volume When the standby screen is displayed, press @. aThe Launcher menu appears. Use E to select Menu M _ Function and Time/Pay/Apply Sound/Vibrator then press @ (Select). Display Privacy User Assist ... -
Page 38: Adjusting The Earpiece Volume During A Call ⋯⋯⋯⋯⋯⋯⋯⋯⋯⋯⋯⋯⋯⋯⋯⋯⋯⋯⋯36
Adjusting the Incoming Ring Tone Volume (continued) Use G to adjust the volume and then press @ (OK). ・Each press of G changes the volume one step. After a vibration alert, the ring tone sounds while gradually increasing in volume. STEP DOWN The ring tone sounds while gradually decreasing in volume. -
Page 39: Character Input
Character Input Character Entry Modes When a character entry screen is displayed, you can select the character entry mode if you press J. Name Left 32 Menu Items ■ Kanji Symbol Kanji:Kanji conversion mode aA HlfSym aA :Double-byte alphanumeric mode abAB... -
Page 40: Deleting Characters
Entering Two or More Characters Assigned to the Same Key After you enter the first character, press C to move the cursor ( ■ ) to the right and then enter the next character. Example: Entering "ab" Press 2 once. Press C once. -
Page 41: Entering E-Mail Addresses⋯⋯⋯⋯⋯⋯⋯⋯⋯⋯⋯⋯⋯⋯⋯⋯⋯⋯⋯⋯⋯⋯⋯⋯⋯⋯⋯39
- Two or more periods (.) cannot be used in succession. - Zero (0) cannot be used as the first character. How to Enter E-mail Addresses Use 1 to 0 to enter characters and numbers. Example: Entering "taro.23@toshiba.co.jp" for the recipient's e-mail address Enter "taro.23". Addr:To Left 58 taro.23... - Page 42 Entering E-mail Addresses (continued) Press J (abAB) and then Sentence Internet press # Phrase. Greeting Message Reply aThe category list appears. Business Others Use G to select Internet and Internet 01 TEL0900001×××× 02 △□△□△□@ezweb.ne then press @ (Select). 03 @ezweb.ne.jp...
-
Page 43: Entering Pictograms ⋯⋯⋯⋯⋯⋯⋯⋯⋯⋯⋯⋯⋯⋯⋯⋯⋯⋯⋯⋯⋯⋯⋯⋯⋯⋯⋯⋯⋯41
Entering Pictograms When a character entry screen Text Left10000 ■ is displayed, press J (abAB). Kanji Symbol aA HlfSym abAB aThe character entry mode menu appears. 12 (^O^) 1234 Alpha ・You can also enter symbols, emoticons, ... -
Page 44: Phone Book
Phone Book Saving a Phone Book Entry New screen New Hold down K 7/ 1( ) 7/ 7/ 1( ) Name for at least one second. NO Group ... - Page 45 Use G to select a phone New Kelly Miller KellyMiller number class and then press 0900001XXXX @ (Select). NO Group aThe New screen reappears. ・Follow the next two steps to enter an e-mail address. If you do not want to enter an e-mail address, proceed to Step 8.
-
Page 46: Dialing From The Phone Book ⋯⋯⋯⋯⋯⋯⋯⋯⋯⋯⋯⋯⋯⋯⋯⋯⋯⋯⋯⋯⋯⋯⋯⋯⋯⋯44
Dialing from the Phone Book When the standby screen is あ・・た・・・・・・ 赤木 displayed, press K to display 井上 上島 岡本 the phone book name list. 岡元 MulSearch Change Use E to select the entry 001 Alice Lopez 030001XXXX abcd@□□□□□□□.□□.□□... -
Page 47: Editing Phone Book Entries ⋯⋯⋯⋯⋯⋯⋯⋯⋯⋯⋯⋯⋯⋯⋯⋯⋯⋯⋯⋯⋯⋯⋯⋯⋯⋯45
Editing Phone Book Entries Select the entry you あ・・た・・・・・・ 001 Alice Lopez 7/ 1( ) 7/ 7/ 1( ) want to edit 赤木 030001XXXX 井上 abcd@□□□□□□□.□□.□□ and press 上島 NO GPS Info @ (Select). 岡本 岡元 ... -
Page 48: Saving A Phone Number From The Incoming Or Outgoing History
Saving a Phone Number from the Incoming or Outgoing History Example: Saving a phone number from the incoming history to the phone book When the standby screen is Incom History 01 7/ 1 15:35 displayed, press D and use 030001XXXX 02 6/30 16:00 Kate Baker G to select the phone 03 6/29 14:48... -
Page 49: Pair Function
Pair Function You can register a maximum of five pair persons you contact often to easily call or send mail. Registering a Pair Person When the standby screen is NO entry displayed, press Q. aThe pair person screen appears. Call E−mail... -
Page 50: Making A Call To A Pair Person ⋯⋯⋯⋯⋯⋯⋯⋯⋯⋯⋯⋯⋯⋯⋯⋯⋯⋯⋯⋯⋯⋯⋯⋯⋯48
Making a Call to a Pair Person When the standby screen is Kelly Mille displayed, press Q. 0900001XXXX △△△△@ezweb. aThe pair person screen appears. Call E−mail C−mail Check Use F to select the person Kate Baker you want to call. 0900002XXXX... -
Page 51: Sending A Mail To A Pair Person ⋯⋯⋯⋯⋯⋯⋯⋯⋯⋯⋯⋯⋯⋯⋯⋯⋯⋯⋯⋯⋯⋯⋯⋯49
Sending a Mail to a Pair Person When the standby screen is Kelly Mille displayed, press Q. 0900001XXXX △△△△@ezweb. aThe pair person screen appears. Call E−mail C−mail Check Use F to select the person Kate Baker you want to send a mail. 0900002XXXX... -
Page 52: Mail
Mail EZweb Subscription Required Using E-mail To use e-mail, you need to apply for an EZweb subscription. If you did not apply for an EZweb subscription at the time of purchase, contact an au shop or the au Customer Service Center. Also, before use, be sure to configure initial settings. -
Page 53: Creating And Sending E-Mail Messages ⋯⋯⋯⋯⋯⋯⋯⋯⋯⋯⋯⋯⋯⋯⋯⋯⋯⋯⋯⋯⋯51
Creating and Sending E-mail Messages When the standby screen is Create Mail To L and then Subject displayed, press Attachment Text press 1 Create New. aThe Create Mail screen appears. Use G to select To and then ... - Page 54 Creating and Sending E-mail Messages (continued) Use G to select Subject and Subject Left 100 ■ then press @ (Select). aThe Subject entry screen appears. Symb Enter a subject and then Create Mail Alice Lopez press @ (OK). ...
- Page 55 Press J (Send). Way Of Send Send フォトメール便送信 aThe Way of Send menu appears. マイ絵文字送信 おてがる絵文字送信 Use G to select Send and Sending E−mail then press @ (Select). aThe animation for sending e-mail is displayed and the e-mail message is ...
-
Page 56: Reading Received E-Mail Messages ⋯⋯⋯⋯⋯⋯⋯⋯⋯⋯⋯⋯⋯⋯⋯⋯⋯⋯⋯⋯⋯⋯54
Reading Received E-mail Messages When you receive an e-mail message 7/ 1( ) 7/ 7/ 1( ) Email appears on the standby screen along with the number of messages received. ... -
Page 57: Viewing A Received Message
Viewing a Received Message Mail001 Message subject Time and date the message 7/ 1 11:30 Totally cute was received Kelly Miller Hi! Message text Took a picture of a Sender of the message cute cat. The e-mail address of (31KB)050701_1030~ Name of attached file, if any the sender may appear 01.JPG... -
Page 58: Reading An E-Mail Message With An Attached Photo Or Movie ⋯⋯⋯⋯⋯⋯⋯⋯⋯⋯⋯56
Reading an E-mail Message with an Attached Photo or Movie Example: Viewing an attached photo Display the e-mail message (page 54). Mail001 7/ 1 11:30 Totally cute Kelly Miller Hi! Took a picture of a cute cat. (31KB)050701_1030~ 01.JPG Use G to select the file name ... -
Page 59: Rejecting Spam ⋯⋯⋯⋯⋯⋯⋯⋯⋯⋯⋯⋯⋯⋯⋯⋯⋯⋯⋯⋯⋯⋯⋯⋯⋯⋯⋯⋯⋯⋯⋯57
Rejecting Spam The setting of mail filters to reject spam is recommended. Setting Mail Filters Mail filters setting screen When the standby screen is displayed, press L. 「####@ .vodafone.ne.jp」へ aPress 6 E-mail Setup. 変更するようお願いします。 なお、一括指定先は自動的に 変更されますので変更する aPress 3 Other Setup. 必要はありません。 1 未承諾広告フィルター... -
Page 60: Replying To Received E-Mail Messages ⋯⋯⋯⋯⋯⋯⋯⋯⋯⋯⋯⋯⋯⋯⋯⋯⋯⋯⋯⋯⋯58
Replying to Received E-mail Messages When the standby screen is Inbox 0/30 MainFolder displayed, press L and then press 2 Inbox. aThe Inbox opens. Press @ (Select). MainFolder 0/30 001 7/ 1 11:30 Totally cute aThe Main Folder opens. - Page 61 Refer to "Creating and Create Mail Kelly Miller Sending E-mail Messages" Re:Totally cute Attachment (Steps 8 and 9 on page 52) Yeah. Cute kitty. and enter the text of the >Hi! >Took a picture of a message. cute cat. Send Select Option Press J (Send). ...
-
Page 62: Using C-Mail ⋯⋯⋯⋯⋯⋯⋯⋯⋯⋯⋯⋯⋯⋯⋯⋯⋯⋯⋯⋯⋯⋯⋯⋯⋯⋯⋯⋯⋯⋯⋯⋯⋯60
Using C-mail C-mail is a service that makes it possible to exchange messages between two au cell phones that support c-mail. A c-mail message can contain up to 50 double-byte (or 100 single-byte) characters. Subscribers in the Kanto and Chubu areas do not need a separate subscription to use c-mail. -
Page 63: Creating And Sending C-Mail Messages ⋯⋯⋯⋯⋯⋯⋯⋯⋯⋯⋯⋯⋯⋯⋯⋯⋯⋯⋯⋯⋯61
Creating and Sending C-mail Messages When the standby screen is Text Left 100 ■ displayed, hold down L for at least one second, and then press 1 Create New. Symb aThe Text entry screen appears. Enter the text of the message ... -
Page 64: Reading Received C-Mail Messages ⋯⋯⋯⋯⋯⋯⋯⋯⋯⋯⋯⋯⋯⋯⋯⋯⋯⋯⋯⋯⋯⋯62
Reading Received C-mail Messages Received c-mail messages are saved to the Inbox. When you receive a c-mail message 7/ 1( ) 7/ 7/ 1( ) Cmail appears on the standby screen along with the number of received messages. INFORMATION ... -
Page 65: Camera
Camera Your cell phone has a mega pixel camera (1,300,000 pixels available) that you can use to shoot photos and movies. It also has a self-timer for taking photos. You can use images you record for the standby screen, and you can attach them to e-mail messages. -
Page 66: Photo And Movie Shooting Tips ⋯⋯⋯⋯⋯⋯⋯⋯⋯⋯⋯⋯⋯⋯⋯⋯⋯⋯⋯⋯⋯⋯⋯⋯64
Photo and Movie Shooting Tips When shooting photos or movies, frame the subject within the display or sub display and hold the A5516T steady with both hands to avoid shaking. Taking a Photo Recording a Movie Photo Mail, Wallpaper, and Multiple Modes... -
Page 67: Data Sizes⋯⋯⋯⋯⋯⋯⋯⋯⋯⋯⋯⋯⋯⋯⋯⋯⋯⋯⋯⋯⋯⋯⋯⋯⋯⋯⋯⋯⋯⋯⋯⋯⋯⋯65
Data Sizes When the Data Folder is used in the factory settings, the number of photos/movies you can capture is shown below if all the photos/movies are captured in the same mode. However, the following numbers may vary depending on photography/recording conditions. Photo (Factory setting: Wallpaper) Approximate Data... -
Page 68: Taking A Photo ⋯⋯⋯⋯⋯⋯⋯⋯⋯⋯⋯⋯⋯⋯⋯⋯⋯⋯⋯⋯⋯⋯⋯⋯⋯⋯⋯⋯⋯⋯⋯⋯66
Taking a Photo When the standby screen is Monitor screen displayed, press J. aThe monitor screen appears. ・To turn on the mobile light, press U (side key 1) while the monitor screen is displayed. Point the lens at the subject Preview screen and then press @ (Shot) or T (side key 2). -
Page 69: Recording A Movie ⋯⋯⋯⋯⋯⋯⋯⋯⋯⋯⋯⋯⋯⋯⋯⋯⋯⋯⋯⋯⋯⋯⋯⋯⋯⋯⋯⋯⋯⋯67
Recording a Movie When the standby screen is Monitor screen displayed, hold down J for at least one second. aThe monitor screen appears. 000s/015s ・To turn on the mobile light, press U ... - Page 70 Note Note ・ If you press Q ( ) while the monitor screen is displayed, the key-operation guidance screen will appear for approximately 15 seconds. ・ Movies are saved to the Movie Folder in the Data Folder. ・ If you do not want to save the movie, press R in the preview screen, use G to select Yes, and then press @ (OK).
-
Page 71: Viewing Photos Or Movies ⋯⋯⋯⋯⋯⋯⋯⋯⋯⋯⋯⋯⋯⋯⋯⋯⋯⋯⋯⋯⋯⋯⋯⋯⋯⋯⋯69
Viewing Photos or Movies Example: Viewing a photo When the standby screen is displayed, press @. aThe Launcher menu appears. Use E to select Data Folder Data Folder xx.xMB All Data User Folder and then press @ (Select). Photo Folder Sound File No.: 13Item... -
Page 72: Attaching Photos Or Movies To E-Mail Messages ⋯⋯⋯⋯⋯⋯⋯⋯⋯⋯⋯⋯⋯⋯⋯⋯⋯70
Attaching Photos or Movies to E-mail Messages While the preview screen is displayed after shooting a photo or movie, press J (E-mail). aThe photo or movie is attached to an e-mail message and the Create Mail screen appears. ・The (Attachment) indicator changes automatically to , indicating that an image has been attached. -
Page 73: Ezweb
EZweb EZweb Subscription Required What is EZweb? EZweb is an information service that allows you to enjoy using the Internet ® on your cell phone. You can also download Chaku-Uta , news, and other data from information web pages. To use EZweb, you need to apply for an EZweb subscription. If you did not apply for an EZweb subscription at the time of purchase, contact an au shop or the au Customer Service Center. -
Page 74: Accessing Sites ⋯⋯⋯⋯⋯⋯⋯⋯⋯⋯⋯⋯⋯⋯⋯⋯⋯⋯⋯⋯⋯⋯⋯⋯⋯⋯⋯⋯⋯⋯⋯72
Accessing Sites Displaying the Top Menu EZトッフ゜メニュー EZ Menu 7/ 1( ) 7/ 7/ 1( ) Press au style Top Menu ┗△△△□□□△△△ Bookmark とくする情報 1 Top Menu. URL Input 最新情報 EZサーヒ゛スで探す Last Screen ┗△△△□□□△△△ Data Folder カテコ゛リで探す ヒ゛シ゛ネス&ニュース Screen Memo ┗△△△□□□△△△ ... -
Page 75: Viewing The Ez Top Menu ⋯⋯⋯⋯⋯⋯⋯⋯⋯⋯⋯⋯⋯⋯⋯⋯⋯⋯⋯⋯⋯⋯⋯⋯⋯⋯⋯73
Viewing the EZ Top Menu You can access EZweb from the Top menu. A variety of useful and fun sites are available on EZweb. au style Introduces information and sites that au recommends. とくする情報 Presents gifts and push information to the EZweb subscriber for free. -
Page 76: Downloading Chaku-Uta
® Downloading Chaku-Uta When the Top menu is カテコ゛リで探す EZサーヒ゛スで探す displayed (page 73), use G ┗△△△□□□△△△ ニュース・天気 着うたフル 着うた・着ムーヒ゛ー to select カテゴリで探す 着Flash(アニメ) 着信メロテ゛ィ 待ちうた (Category Search) and then カラオケ・ホ゛イス 画像・キャラクター press @ (Select). aThe カテゴリで探す (Category Search) screen appears. Use G to select 着うた... - Page 77 Press J (Play). Melody aThe downloaded Chaku-Uta ® plays. ・Downloaded data is saved automatically to the Data Folder. During playback, press Melody Register to where? @ (Add). Ring Tone E−mail Tone Message Tone aThe Register to where? menu appears. C−mail Tone ID Unsent Tone Pay Phone Tone Not Support Tone Use G to select the tone you ®...
-
Page 78: Bookmarking Frequently Accessed Pages ⋯⋯⋯⋯⋯⋯⋯⋯⋯⋯⋯⋯⋯⋯⋯⋯⋯⋯⋯⋯76
Bookmarking Frequently Accessed Pages You can save the titles and URLs you often visit, which makes it easy to return to them when you want. When the page you want to ☆☆☆☆☆ Add Bookmark bookmark is displayed, press お天気 To Data Folder... -
Page 79: Viewing Bookmarked Pages ⋯⋯⋯⋯⋯⋯⋯⋯⋯⋯⋯⋯⋯⋯⋯⋯⋯⋯⋯⋯⋯⋯⋯⋯⋯⋯77
Viewing Bookmarked Pages When the standby screen is EZ Menu Top Menu displayed, press M. Bookmark URL Input Last Screen aThe EZ Menu appears. Data Folder Screen Memo Clear History Press 2 Bookmark. Bookmark auオススメ 001 http://△△△△△.△△. aThe Bookmark list appears. 002 http://□□□.□□.□□ 003 今日の天気 Use G to select the bookmark for the page you want to view and then press @ (Access). -
Page 80: Ez Navi
Area Message to inform of your arrival in a specific area When your A5516T enters (or goes out of) a specific area during a predefined time period, Area Message emits an alarm tone and automatically sends a message to another au phone you have specified. -
Page 81: Ez Navi Walk For When You Go Out
EZ Navi Walk for when you go out Going-Out Menu EZnaviwalk menu EZnaviwalk Going−Out Menu My Spot Go Home Current Map Current Mail Displays menus that are useful when you are out. My Spot Go Home Select... -
Page 82: What You Can Do With Position Search ⋯⋯⋯⋯⋯⋯⋯⋯⋯⋯⋯⋯⋯⋯⋯⋯⋯⋯⋯⋯⋯80
What You Can Do with Position Search Position Search enables you to check the location of your child at anytime by simple operations on your A5516T. Two types of services are available in Position Search: Position Search Mail(位置確認メール)and Auto Position Search(いつでも位置確認)... -
Page 83: What You Can Do With Area Message⋯⋯⋯⋯⋯⋯⋯⋯⋯⋯⋯⋯⋯⋯⋯⋯⋯⋯⋯⋯⋯⋯81
What You Can Do with Area Message When your child enters (or goes out of) a specific area during a predefined time period, the cell phone he/she carries emits an alarm tone and automatically sends a message to your cell phone. Area Message 【Features】... -
Page 84: Using Ez Navi Walk ⋯⋯⋯⋯⋯⋯⋯⋯⋯⋯⋯⋯⋯⋯⋯⋯⋯⋯⋯⋯⋯⋯⋯⋯⋯⋯⋯⋯⋯82
Using EZ Navi Walk ①Registering Your Home Location ② Looking Up the Way Home Perform the required procedure in front Perform the required procedure while of your home. out. Note Note ・ Before use, be sure to configure initial settings. If you have not yet configured initial settings, see page 22. -
Page 85: Looking Up The Way Home ⋯⋯⋯⋯⋯⋯⋯⋯⋯⋯⋯⋯⋯⋯⋯⋯⋯⋯⋯⋯⋯⋯⋯⋯⋯⋯83
Use G to select Current Point, press @ (Select) to obtain the GPS information, and then press @ (OK). aYour current location is registered as your home. Looking Up the Way Home Using this feature makes it easy to navigate from your current location to the location indicated by GPS information you registered as your home using My Spot. -
Page 86: Limit Mode
Limit Mode Limit Mode allows parents or superiors to impose limits on how much each function can be used. This helps to prevent overuse of the cell phone by their offspring or subordinates. Restrictions can be placed on incoming and outgoing calls, incoming and outgoing e-mail and c-mail, EZweb use, and EZapps* use. - Page 87 No and then press @ (OK). ・If you do not want to enter a hint, select Note Note ・For the hint, enter something that will help to remind you of the password. Example: Password :20051224 Hint :Day I bought A5516T...
-
Page 88: Setting The Use Limit ⋯⋯⋯⋯⋯⋯⋯⋯⋯⋯⋯⋯⋯⋯⋯⋯⋯⋯⋯⋯⋯⋯⋯⋯⋯⋯⋯⋯⋯86
Setting the Use Limit You can configure the cell phone to prohibit outgoing calls and mail send if a monthly use limit amount is exceeded. On the Limit Mode screen LimitModeSetupM724 (page 84), press 4 Limit Password? ... - Page 89 Use G to select Use Limit and Use Limit M724 Call [NOLimit] then press @ (Select). Mail・Web [NOLimit] Cmail [NOLimit] NOLimit Use G to select Call and Call M724 Limited NOLimit then press @ (Select).
-
Page 90: Turning Limit Mode On And Off ⋯⋯⋯⋯⋯⋯⋯⋯⋯⋯⋯⋯⋯⋯⋯⋯⋯⋯⋯⋯⋯⋯⋯⋯⋯88
Turning Limit Mode On and Off On the Limit Mode screen Limit・Cancel M725 (page 84), press 5 Limit · Password? Cancel. Back Hint Enter the current Limit Mode Limit・Cancel M725 password and then press ... -
Page 91: Checking The Limit Mode Status Of Use ⋯⋯⋯⋯⋯⋯⋯⋯⋯⋯⋯⋯⋯⋯⋯⋯⋯⋯⋯⋯⋯89
Checking the Limit Mode Status of Use On the Limit Mode screen Status of use M722 Call (page 84), press 2 This · Last Mail・Web Cmail Mth Use. Use G to select Call and Call M722 UseInThisMonth... -
Page 92: Smart Mode
Smart Mode Setting Smart Mode enables limited and simplified operations of the phone function, phone book, camera, mail, EZweb and other often-used functions. Entering Smart Mode When the standby screen is displayed, press @. aThe launcher menu appears. Use E to select Smart Mode ... -
Page 93: Exiting Smart Mode ⋯⋯⋯⋯⋯⋯⋯⋯⋯⋯⋯⋯⋯⋯⋯⋯⋯⋯⋯⋯⋯⋯⋯⋯⋯⋯⋯⋯⋯⋯91
Exiting Smart Mode When the standby screen is displayed, press @. aThe Smart menu appears. Use G to select Function and Set Function Volume then press @ (Select). Melody Standby Screen Character Size aThe Set Function menu appears. Manner Mode Memo... -
Page 94: Viewing The Smart Menu ⋯⋯⋯⋯⋯⋯⋯⋯⋯⋯⋯⋯⋯⋯⋯⋯⋯⋯⋯⋯⋯⋯⋯⋯⋯⋯⋯92
Viewing the Smart Menu The Smart menu contains the following items. Call Mail Camera Data Folder Alarm Function My Number Indicator Function Name Description See Phone Book Phone book number recall for dialing See incom hist Calling History recall for dialing See outgo hist Call Add Phone Book... - Page 95 Indicator Function Name Description Volume Call ring tone setting Melody Standby Screen Standby screen setting Character Size Display character size setting Function Manner Mode Normal manner mode setting Voice memo setting Memo Voice recorder recording Exit SmartMode Smart Mode exit (P.91) My Number Display of own phone number and e-mail address...
-
Page 96: Saving A Phone Book Entry Using Smart Mode ⋯⋯⋯⋯⋯⋯⋯⋯⋯⋯⋯⋯⋯⋯⋯⋯⋯⋯94
Saving a Phone Book Entry Using Smart Mode When the standby screen is displayed, press K. Register new phone book item? Yes No Use G to select Yes and then Name Tel Mail ■ press @ (OK). ... - Page 97 Use G to select Input and Name Tel Mail ■ then press @ (Select). aThe e-mail address input screen appears. ・If you do not want to enter an e-mail Symb Left Left 64 address, press @ (OK) and proceed to Step 8. ・You can also use G to select See Sent Hist or See recv hist and enter an e-mail address from there.
-
Page 98: Creating And Sending E-Mail/C-Mail Messages In Smart Mode ⋯⋯⋯⋯⋯⋯⋯⋯⋯⋯⋯96
Creating and Sending E-mail/C-mail Messages in Smart Mode Example : Creating and sending an e-mail message When the standby screen is Select Mail E−mail displayed, press L. C−mail aThe Select Mail menu appears. Use G to select E-mail and E−mail... - Page 99 Enter a subject and then Addr Sbjt Text ■ press @ (OK). aThe Text entry screen appears. Symb Left10000 Enter the text of the message Create Mail Kelly Mille and then press @ (OK). Tomorrow’s Attachment ...
-
Page 100: Using The Camera In Smart Mode⋯⋯⋯⋯⋯⋯⋯⋯⋯⋯⋯⋯⋯⋯⋯⋯⋯⋯⋯⋯⋯⋯⋯⋯98
Using the Camera in Smart Mode Taking a Photo When the standby screen is Camera Take A Picture displayed, press J. Shoot Movie aThe Camera menu appears. Use G to select Take A Picture and then press @ (Select). ... -
Page 101: Viewing A Photo
Viewing a Photo When the standby screen is displayed, press @. aThe Smart menu appears. Use G to select Data Folder Data Folder All Photo Folder and then press @ (Select). Movie Folder aThe Data Folder menu appears. ... -
Page 102: Other Functions ⋯⋯⋯⋯⋯⋯⋯⋯⋯⋯⋯⋯⋯⋯⋯⋯⋯⋯⋯⋯⋯⋯⋯⋯⋯⋯⋯⋯⋯⋯⋯100
Other Functions In addition to the functions covered in this Basic Manual, the A5516T also has the following features. Only Mail You can send a message with a movie or photo attachment to a specific recipient without opening the A5516T. -
Page 103: Troubleshooting
(silent indicator) displayed on Increase the volume of the not play. incoming call ring tone. the standby screen? Cannot charge the ●Is the Toshiba AC adapter 02 Insert the adapter in the power outlet properly. battery pack. plugged into a power outlet? - Page 104 Index E-mail address ⋯⋯⋯⋯⋯⋯⋯⋯22 Accessories ⋯⋯⋯⋯⋯⋯⋯⋯⋯10 Changing ⋯⋯⋯⋯⋯⋯⋯⋯⋯23 Adjusting the earpiece volume ⋯36 Entering ⋯⋯⋯⋯⋯⋯⋯⋯⋯⋯39 Antenna ⋯⋯⋯⋯⋯⋯⋯⋯⋯⋯⋯13 Entering characters ⋯⋯⋯⋯⋯⋯37 Area Message ⋯⋯⋯⋯⋯⋯⋯78,81 Entering characters from the same key ⋯38 Entering pictograms ⋯⋯⋯⋯⋯⋯41 Extra large characters ⋯⋯⋯⋯⋯25 Battery level ⋯⋯⋯⋯⋯⋯⋯⋯⋯13 EZ Navi Walk ⋯⋯⋯⋯⋯⋯⋯79,82 Battery pack ⋯⋯⋯⋯⋯⋯10,11,12 Current Mail ⋯⋯⋯⋯⋯⋯⋯⋯79...
- Page 105 Playback Voice memo ⋯⋯⋯⋯⋯⋯⋯⋯32 Mail C-mail ⋯⋯⋯⋯⋯⋯⋯⋯⋯⋯⋯60 Position Search ⋯⋯⋯⋯⋯⋯78,80 E-mail ⋯⋯⋯⋯⋯⋯⋯⋯⋯⋯⋯50 Power supply Manner mode ⋯⋯⋯⋯⋯⋯⋯⋯⋯30 Turning off power ⋯⋯⋯⋯⋯⋯13 Turning on power ⋯⋯⋯⋯⋯⋯13 Movies Attaching to e-mail ⋯⋯⋯⋯⋯70 Photo Mail Service⋯⋯⋯⋯⋯⋯70 Recording ⋯⋯⋯⋯⋯⋯⋯⋯⋯67 Ring tones Viewing ⋯⋯⋯⋯⋯⋯⋯⋯⋯⋯69 Changing the type⋯⋯⋯⋯⋯⋯33 Changing the volume ⋯⋯⋯⋯35 Names of parts ⋯⋯⋯⋯⋯⋯⋯⋯11 Signal ⋯⋯⋯⋯⋯⋯⋯⋯⋯⋯⋯⋯13...
- Page 106 OKINAWA CELLULAR TELEPHONE COMPANY Cellphone and PHS operators collect and recycle unused telephones, batteries and Manufactured by: battery chargers at stores bearing the logo regardless of brand and TOSHIBA CORPORATION manufacturer to protect the environment October 2005 Edition and reuse valuable resources.
Need help?
Do you have a question about the A5516T and is the answer not in the manual?
Questions and answers