
Related Manuals for Varian 3900GC


Summary of Contents for Varian 3900GC
- Page 1 Maneuvering the Assembly Documentation 1. Select your bookmark of interest 2. Click on the (+) to expand your selection and select the submenu 3. Navigate through the document with these buttons...
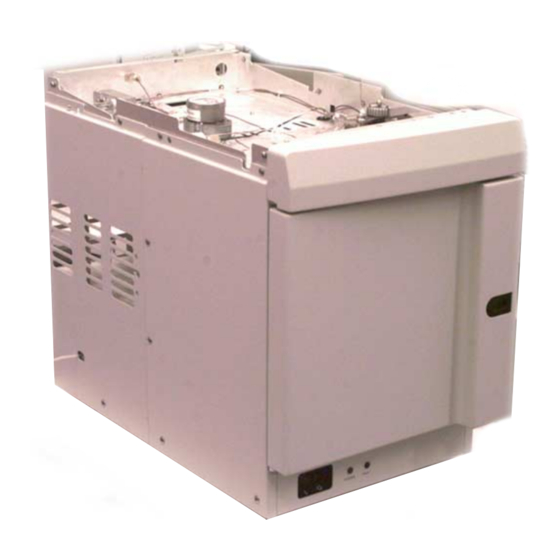
- Page 2 Assy, Basic Electrical, (120v Shown) MENU LIST HISTORY 1 of 23 PAGE: ASSY, BASIC ELECTRICAL, (120V SHOWN) 3900GC GALILEO STATION #1, ASSEMBLY PROCEDURES Dave Maderos PREPARED BY: Sax Makthepharack REVISED BY: CONTROL: INDUSTRIAL ENGINEERING REV. DATE: 07 - 18 - 00...
- Page 3 DOC: 03-933001-01 PARTS TOOLS DESC: Assy, Basic Electrical, (120v Shown) MENU LIST HISTORY 2 of 23 PAGE: R0-028120-23 12-222008-12, 4 PLCS WASHER, #10, FLAT SCREW, 8-32 X 3/4, PAN R0-028000-84 03-933207-01 FOOT, MOUNTING SPACER, SOFT CHASSIS FOOT 03-925315-02, 3 PLCS PLASTIC, FOOT 12-901163-00, 2 PLCS SCREW, 8-32 X 3/8, SEM...
- Page 4 DOC: 03-933001-01 PARTS TOOLS DESC: Assy, Basic Electrical, (120v Shown) MENU LIST HISTORY 3 of 23 PAGE: 3900 GALILEO BASIC (ELECTRICAL) ASSEMBLY PROCEDURES RUBBER FOOT/DOOR HINGE INSTALLATION 1.1.1 Place chassis assembly, 03-933010-01 upside down. Install 3 each 8-32 X 3/4" screws, 12-222008-12 into 3 each plastic foot, 03-925315-02 and secure one foot/screw assembly into each front corner of chassis and one foot/screw assembly into the back left corner of chassis as shown.
- Page 5 DOC: 03-933001-01 PARTS TOOLS DESC: Assy, Basic Electrical, (120v Shown) MENU LIST HISTORY 4 of 23 PAGE: 24-799873-00, 2 PLCS BUSHING, NYLON, SNAP, BLACK 5/8 03-933509-01 ASSY, HARNESS, DOOR./LED 03-933504-01 ASSY, HARNESS, CIRCUIT BREAKER 120VAC POWER SWITCH HOUSING (REF.) 03-933505-01, (REF.) ASSY, HARNESS, CIRCUIT BREAKER 101/230VAC REAR VIEW (REF.) REFERENCE TEXT FOR OTHER VERSIONS...
- Page 6 DOC: 03-933001-01 PARTS TOOLS DESC: Assy, Basic Electrical, (120v Shown) MENU LIST HISTORY 5 of 23 PAGE: CIRCUIT BREAKER/WIRING HARNESS INSTALLATION 1.2.1 Route 1/4" quick-connect lugs of appropriate circuit breaker harness, 03-933504-01 (for 120VAC) 03-933505-01 (for 101/230VAC) through innermost hole of the rear chassis panel as shown. 1.2.2 Route the RED/GREEN LED and magnetic sensor of Door/LED harness, 03-933509-01 through outermost hole of the rear chassis panel as shown.
- Page 7 DOC: 03-933001-01 PARTS TOOLS DESC: Assy, Basic Electrical, (120v Shown) MENU LIST HISTORY 6 of 23 PAGE: 3/16” NUT DRIVER R0-028000-55, 2 PLCS STANDOFF, 4-40 THRU X .25L X 3/16 HEX RIGHT SIDE OVEN COVER (REF.) MAGNETIC SWITCH INSTALLATION 03-933174-01 COVER, RIGHT SIDE OVEN 03-933205-03, (THICK) GASKET, TRANSFERLINE, .37 THK...
- Page 8 DOC: 03-933001-01 PARTS TOOLS DESC: Assy, Basic Electrical, (120v Shown) MENU LIST HISTORY 7 of 23 PAGE: DOOR CATCH/RIGHT SIDE OVEN COVER INSTALLATION 1.3.1 Secure door catch, 03-933158-01 to chassis using two each 8-32 X 1/4" screws, 12-901165-00 as shown. 1.3.2 Place one (thin) .25 thk Transferline Gasket (03-933205-02) over stud mount with large hole on the Right Side Oven Cover.
- Page 9 DOC: 03-933001-01 PARTS TOOLS DESC: Assy, Basic Electrical, (120v Shown) MENU LIST HISTORY 8 of 23 PAGE: 03-925594-01 13-312008-00, 2 PLCS POWER LINE EMI/RFI FILTER NUT, KEPS, #8 03-933503-01 ASSY, CABLE, AC INPUT E-2 LABELED GROUND WIRE 12-901161-00, 2 PLCS AC INPUT CABLE WITH SCREW, 6-32 X 3/8, SEMS #8 kEPS NUT (REF.)
- Page 10 DOC: 03-933001-01 PARTS TOOLS DESC: Assy, Basic Electrical, (120v Shown) MENU LIST HISTORY 9 of 23 PAGE: TRANSFORMER/LINE FILTER/VENT STEPPER MOTOR/WIRING HARNESS INSTALLATION 1.4.1 Working from the rear of the chassis, install fan motor channel, 03-933170-01 onto rear oven chassis panel using eight each 8-32 X 1/4" screws, 12-901165-00 as shown.
- Page 11 DOC: 03-933001-01 PARTS TOOLS DESC: Assy, Basic Electrical, (120v Shown) MENU LIST HISTORY 10 of 23 PAGE: 3/32” ALLEN WRENCH 12-901165-00, 6 PLCS SCREW, 8-32 X 1/4”, SEM RECTANGLE CUTOUT FOR EXHAUST VENT DUCT TAB VENT DOOR INSTALLATION 03-933190-01 VENT DUCT TOP 03-933189-01 EXHAUST VENT DUCT 03-933007-01...
- Page 12 DOC: 03-933001-01 PARTS TOOLS DESC: Assy, Basic Electrical, (120v Shown) MENU LIST HISTORY 11 of 23 PAGE: DOOR VENT/VENT DUCT INSTALLATION 1.5.1 Obtain vent door assembly, 03-933007-01 and place the flex coupler onto the stepper motor shaft. Tighten coupler set screw using a 3/32" Hex Key.
- Page 13 DOC: 03-933001-01 PARTS TOOLS DESC: Assy, Basic Electrical, (120v Shown) MENU LIST HISTORY 12 of 23 PAGE: INSTALL MOTOR IN ORIENTATION AS SHOWN INTAKE DUCT 03-933196-01 ARM SUPORT INTAKE DUCT REFERENCE TEXT FOR OTHER VERSIONS 03-933012-01 ASSY, COLUMN OVEN MOTOR, 120V 22-119785-00 CLAMP, CABLE 1/8”...
- Page 14 DOC: 03-933001-01 PARTS TOOLS DESC: Assy, Basic Electrical, (120v Shown) MENU LIST HISTORY 13 of 23 PAGE: DOOR VENT/VENT DUCT INSTALLATION 1.6.1 Make all the proper bends in intake duct, 03-933196-01 per template. 1.6.2 Place intake-duct around vent door shaft and secure first with 2 each 8-32 X 1/4" screws, 12-901165-00 into exhaust vent duct, 03-933189-01 as shown.
- Page 15 DOC: 03-933001-01 PARTS TOOLS DESC: Assy, Basic Electrical, (120v Shown) MENU LIST HISTORY 14 of 23 PAGE: INSERT HEATER WIRE THROUGH CERAMIC INSULATOR HERE! 12-901165-00, 6 PLCS SCREW, 8-32 X 1/4, SEMS 03-933187-01 FAN, 8.0DIA. X 1.75 PITCH 03-933014-01 ASSY, COLUMN OVEN HEATER, 120V REFERENCE TEXT FOR OTHER VERSIONS FIGURE 1 51-408249-00...
- Page 16 DOC: 03-933001-01 PARTS TOOLS DESC: Assy, Basic Electrical, (120v Shown) MENU LIST HISTORY 15 of 23 PAGE: FAN BLADE/HEATER ASSEMBLY/TEMPERATURE PROBE INSTALLATION 1.7.1 Insert Shipping Pin, 03-933198-01 to support column fan motor. Install fan blade 03-933187-01 onto motor shaft with set screw on the motor shaft flat at 12:00 and the other set screw at 3:00.
- Page 17 DOC: 03-933001-01 PARTS TOOLS DESC: Assy, Basic Electrical, (120v Shown) MENU LIST HISTORY 16 of 23 PAGE: 1177 INJECTOR NUT ASSEMBLY 24-799873-00 BUSHING, NYLON, SNAP, BLACK 5/8 1177 ACTUATOR KNOB 12-901165-00, 2 PLCS SCREW, 8-32 X 1/4, SEM BRACKET (REF.) 03-933510-01 ASSY, CABLE, INJECTOR SWITCH 03-925996-01...
- Page 18 DOC: 03-933001-01 PARTS TOOLS DESC: Assy, Basic Electrical, (120v Shown) MENU LIST HISTORY 17 of 23 PAGE: 1177 INJECTOR INSTALLATION 1.8.1 Obtain the appropriate 1177 injector, 03-925996-01 (for 120VAC, Type 21), 03-925996-02 (for 230VAC, Type 21) and 03-925996-03 (for 101VAC, Type 21) or 03-925997-01 (for 120VAC, Type 25), 03-925997-02 (for 230VAC, Type 25) and 03-925997-03 (for 101VAC, Type 25)..
- Page 19 DOC: 03-933001-01 PARTS TOOLS DESC: Assy, Basic Electrical, (120v Shown) MENU LIST HISTORY 18 of 23 PAGE: 1177 HEATER CONTACTS 1177 INJECTOR PROBE WIRE WIRE TO PINS 2 & 4 WIRE TO PIN 1 & 11 CONN. DETAIL STEP 1.9.1 STEP 1.9.2a STEP 1.9.2b 51-406927-00...
- Page 20 DOC: 03-933001-01 PARTS TOOLS DESC: Assy, Basic Electrical, (120v Shown) MENU LIST HISTORY 19 of 23 PAGE: FINAL WIRING/CONNECTIONS 1.9.1 Obtain 4-pin connector housing, 51-406927-00 and install the 1177 heater contacts into pins 2 and 4 as shown. NOTE: There is no polarity requirement.
- Page 21 DOC: 03-933001-01 PARTS TOOLS DESC: Assy, Basic Electrical, (120v Shown) MENU LIST HISTORY 20 of 23 PAGE: VENT STEPPER MOTOR WIRE THROUGH HERE COLUMN MOTOR WIRE THROUGH HERE STEP 1.10.1 STEP 1.10.2 STEP 1.10.3 PROBE/INJECTOR WIRE THROUGH HERE 22-119650-00 TY-WRAP, NYLON, NATURAL, SHORT (MPB) “P3 TO MAIN BOARD”...
- Page 22 DOC: 03-933001-01 PARTS TOOLS DESC: Assy, Basic Electrical, (120v Shown) MENU LIST HISTORY 21 of 23 PAGE: 1.10 FINAL WIRING/CONNECTIONS 1.10.1 Route the vent stepper motor wires through the cable clamps on the chassis top and channel, 03-933170-01 and twist. 1.10.2 Route the column fan motor wires through the standoff clamp closest the exhaust duct and twist.
- Page 23 DOC: 03-933001-01 PARTS TOOLS DESC: Assy, Basic Electrical, (120v Shown) MENU LIST HISTORY 22 of 23 PAGE: COLUMN PROBE/INJECTOR PROBE AND SWITCH CONNECTOR (J1) DOOR/LED AND STEPPER MOTOR 18-PIN (J6) EFC FLAT CABLE (J3) INJECTOR HEATER CONNECTOR (J13) POWER FAIL SOLENOID CONNECTOR (J21) TRANSFORMER SECONDARY COLUMN FAN MOTOR (J16)
- Page 24 DOC: 03-933001-01 PARTS TOOLS DESC: Assy, Basic Electrical, (120v Shown) MENU LIST HISTORY 23 of 23 PAGE: 03-933151-01 12-902733-00, 8 PLCS ASSY, COLUMN RACK SCREW, 8-32 X 5/16, TRUSS 03-933008-01 ASSY, FRONT DOOR, MODEL 3900 VOLTAGE CONFIGURATION LABEL REAR PANEL (REF.) 1.12 FINAL ASSEMBLY 1.12.1 Position electronics module assembly onto right rear of chassis and secure using eight each 8-32 X 5/16"...
- Page 25 DOC: 03-933001-01 PARTS TOOLS DESC: Assy, Basic Electrical, (120v Shown) MENU LIST HISTORY 24 of 23 PAGE: Dave Maderos PREPARED BY: Sax Makthepharack REVISED BY: CONTROL: INDUSTRIAL ENGINEERING REV. DATE: 07 - 18 - 00 SHOWN...
- Page 26 DOC: 03-933001-0X PARTS TOOLS DESC: Assy, Basic, (Pneumatic) MENU LIST HISTORY 1 of 8 PAGE: ASSY, BASIC, (PNEUMATIC) 3900GC STATION #2, ASSEMBLY PROCEDURES Dave Maderos PREPARED BY: Sax Makthepharack REVISED BY: CONTROL: INDUSTRIAL ENGINEERING REV. DATE: 08 - 16 -00 SHOWN...
- Page 27 12-901163-00, 4 PLCS SCREW, SEM, 8-32 X 1/4 SCR, SEM, 8-32 X 3/8 03-933508-01 FIGURE 1 FIGURE 2 FIGURE 3a ASSY, CABLE, EFC, 3900GC 03-925377-01 3800 PNEUMATICS MANIFOLD 03-933194-01 BRACKET, MANIFOLD 12-901165-00, 2 PLCS SCREW, SEM, 8-32 X 1/4 37-000820-15 1/8”...
- Page 28 MENU LIST HISTORY 3 of 8 PAGE: 3900GC BASIC ASSEMBLY PROCEDURES (PNEUMATIC) OPERATION IN SEQUENCE 1.1.1 Loosely install four each 8-32 X 3/8" screws, 12-901163-00 into lower chassis as shown. See Figure 1. 1.1.2 Plug the EFC ribbon cable, 03-933508-01 into connector J1 on the appropriate EFC sub assembly, 03-933016-21 or 25.
-
Page 29: Viton Ferrule Disc. Use -50
DOC: 03-933001-0X PARTS TOOLS DESC: Assy, Basic, (Pneumatic) MENU LIST HISTORY 4 of 8 PAGE: 03-917157-00 12-901165-00, 2 PLCS WASHER FERRULE, HOLD USE -50 SCREW, SEM, 8-32 X 1/4 57-000028-00 FIGURE 6 FIGURE 7 FIGURE 8 VALVE, NUPRO B-2SA 03-917142-00 28-849067-00, 3 PLCS VITON FERRULE DISC. -
Page 30: Solenoid, 3900 Power Fail
DOC: 03-933001-0X PARTS TOOLS DESC: Assy, Basic, (Pneumatic) MENU LIST HISTORY 5 of 8 PAGE: 1.1.10 Bend the copper tube to position brass tee until it touches the chassis top. Reference Figure 6. 1.1.11 Install septum purge valve, 57-000028-00 onto chassis front above column oven as shown. Secure valve with side port pointed away from 1177 injector using a 9/16"... - Page 31 DOC: 03-933001-0X PARTS TOOLS DESC: Assy, Basic, (Pneumatic) MENU LIST HISTORY 6 of 8 PAGE: FIGURE 12 FIGURE 13 FIGURE 14 1.1.16 Route one each 1/16" stainless steel tube 03-917145-01 from the power fail solenoid "OUT" port to the end nut of the septum purge valve, 57-000028-00, using two each washers, 03-917157-00 and 2 each viton ferrules, 03-917142-00 as shown.
- Page 32 DOC: 03-933001-0X PARTS TOOLS DESC: Assy, Basic, (Pneumatic) MENU LIST HISTORY 7 of 8 PAGE: 1.1.22 Observing the proper alignment (green to green, yellow to yellow, (type 21 only) pin to pin and SST to brown/natural PEEK) place all three tubes through a condyne plate, 03-917141-00.
-
Page 33: Cover, Left Side Service
DOC: 03-933001-0X PARTS TOOLS DESC: Assy, Basic, (Pneumatic) MENU LIST HISTORY 8 of 8 PAGE: 12-902733-00, 14 PLCS SCREW, 8-32 X 5/16, SS 03-933173-01 COVER, OVEN, LEFT SIDE 03-933172-01 COVER, LEFT SIDE SERVICE “DATE INSTALLED” COMPOSITE 03-933201-01 03-933204-01 LABEL FROM P/N 03-933204-01 (REF.) LABEL, MAX PRESS, CARRIER GAS LABEL, S/N TAG, MODEL 3900 SERIAL NUMBER LABEL (SMALL) - Page 34 DOC: BUTTON-UP STATION PARTS TOOLS DESC: Assy, Button-Up, 3900GC Galileo MENU LIST HISTORY 1 of 3 PAGE: ASSY, BUTTON-UP, 3900GC GALILEO BUTTON-UP STATION, ASSEMBLY PROCEDURES Dave Maderos PREPARED BY: Sax Makthepharack REVISED BY: CONTROL: INDUSTRIAL ENGINEERING REV. DATE: 08 - 25 - 00...
- Page 35 DOC: BUTTON-UP STATION PARTS TOOLS DESC: Assy, Button-Up, 3900GC Galileo MENU LIST HISTORY 2 of 3 PAGE: 12-902733-00, 4 PLCS SCREW, 8-32 X 5/16, TRUSS, SS 03-933193-01, 4 PLCS 03-933013-01 ROLLER, INJECTOR COVER ASSY, INJECTOR COVER 14-901074-00, 4 PLCS WASHER, FLAT, #6...
- Page 36 Affix a 12" piece of masking tape, 3M part number 2090-2 on both sides of front door assembly and oven sides as shown. 1.1.7 Install 3900GC into shipping box, 03-933000-BX and place accessory kits, column box, line cord and cap as shown in shipping kit reference.
- Page 37 DOC: BUTTON-UP STATION PARTS TOOLS DESC: Assy, Button-Up, 3900GC Galileo MENU LIST HISTORY 4 of 3 PAGE: Dave Maderos PREPARED BY: Sax Makthepharack REVISED BY: CONTROL: INDUSTRIAL ENGINEERING REV. DATE: 08 - 25 - 00 SHOWN...
- Page 38 Assy, INSTL/Kit, GC/MS EFC Power Fail LIST HISTORY 1 of x PAGE: ASSY, INSTL/KIT, GC/MS EFC POWER FAIL 3900GC STATION X, ASSEMBLY PROCEDURES Dave Maderos PREPARED BY: Sax Makthepharack REVISED BY: CONTROL: INDUSTRIAL ENGINEERING REV. DATE: 06 - 16 - 00...
- Page 39 DOC: 03-925520-00 PARTS TOOLS DESC: MENU Assy, INSTL/Kit, GC/MS EFC Power Fail LIST HISTORY 2 of x PAGE: NOTES: xxxxxxxxxxxxxxxxxxxxxxxxxxxxxxxxxxxxxxxxx 03-917143-00 PIN, BLANK-OFF 03-917142-00, 3 PLCS FERRULE, VITON 28-849071-00 FITTING HOSE ADAPTER, ELBOW, 10-32 03-917145-01 TUBING, 1/16OD X .030ID X 1/2” LG, SST 03-925457-02 VALVE, SOLENOID, 3-WAY, W/2 PIN CONN 28-849067-00, 3 PLCS...
- Page 40 DOC: 03-925520-00 PARTS TOOLS DESC: MENU Assy, INSTL/Kit, GC/MS EFC Power Fail LIST HISTORY 3 of x PAGE: Dave Maderos PREPARED BY: Sax Makthepharack REVISED BY: CONTROL: INDUSTRIAL ENGINEERING REV. DATE: 06 - 16 - 00 SHOWN...
- Page 41 DOC: 03-925520-00 PARTS TOOLS DESC: MENU Assy, INSTL/Kit, GC/MS EFC Power Fail LIST HISTORY 4 of x PAGE: Dave Maderos PREPARED BY: Sax Makthepharack REVISED BY: CONTROL: INDUSTRIAL ENGINEERING REV. DATE: 06 - 16 - 00 SHOWN...
- Page 42 PARTS TOOLS DESC: EFC Sub-Assembly, Installation MENU LIST HISTORY 1 of 5 PAGE: EFC SUB-ASSEMBLY, INSTALLATION 3900GC GALILEO STATION GC SUBS, ASSEMBLY PROCEDURES PREPARED BY: Sax Makthepharack REVISED BY: CONTROL: INDUSTRIAL ENGINEERING REV. DATE: 09 - 25 - 00 SHOWN...
- Page 43 DOC: 03-933016-21/25 PARTS TOOLS DESC: EFC Sub-Assembly, Installation MENU LIST HISTORY 2 of 5 PAGE: Figure 1 Figure 2 Figure 3 Figure 4 Figure 5 Figure 6 PREPARED BY: Sax Makthepharack REVISED BY: CONTROL: INDUSTRIAL ENGINEERING REV. DATE: 09 - 25 - 00 SHOWN...
- Page 44 MENU LIST HISTORY 3 of 5 PAGE: 3900GC EFC SUB- ASSEMBLY PROCEDURES OPERATION IN SEQUENCE 1.1.1 Rivet two each filter spring clips, 03-949744-00 to EFC sub-plate, 03-933203-01 using four each rivets, 17-699907-00 not shown. 1.1.2 Mount the appropriate EFC, 03-925110-21 (Type 21) or 03-925110-25 (type 25) to EFC Sub-plate, 03-933203-01 with four each 8-32 X 1/4"...
- Page 45 DOC: 03-933016-21/25 PARTS TOOLS DESC: EFC Sub-Assembly, Installation MENU LIST HISTORY 4 of 5 PAGE: Figure 7 Figure 8 Figure 9 Figure 10 Figure 11 Figure 12 PREPARED BY: Sax Makthepharack REVISED BY: CONTROL: INDUSTRIAL ENGINEERING REV. DATE: 09 - 25 - 00 SHOWN...
- Page 46 DOC: 03-933016-21/25 PARTS TOOLS DESC: EFC Sub-Assembly, Installation MENU LIST HISTORY 5 of 5 PAGE: Figure 13 Figure 14 1.1.15 Lay the EFC sub-assembly down as shown in Figure 13 to measure and adjust tubing length. Adjust the SST tube that is not labeled to 16"...
- Page 47 DOC: 03-933016-21/25 PARTS TOOLS DESC: EFC Sub-Assembly, Installation MENU LIST HISTORY 6 of 5 PAGE: PREPARED BY: Sax Makthepharack REVISED BY: CONTROL: INDUSTRIAL ENGINEERING REV. DATE: 09 - 25 - 00 SHOWN...
- Page 48 DESC: Assy, Heater, 101V, 120V & 230V MENU LIST HISTORY 1 of 4 PAGE: ASSY, HEATER 101V, 120V & 230V 3900GC STATION GC SUBS, ASSEMBLY PROCEDURES 120V VERSION SHOWN Dave Maderos PREPARED BY: Sax Makthepharack REVISED BY: CONTROL: INDUSTRIAL ENGINEERING REV. DATE:...
- Page 49 DOC: 03-933014-01 PARTS TOOLS DESC: Assy, Heater, 101V, 120V & 230V MENU LIST HISTORY 2 of 4 PAGE: (REFERENCE 03-933005-00 DRAWING) .045 MIN 101V/120V COIL GAP (TYPICAL) SPACING DETAIL (NO SCALE) FIGURE 1 .025 MIN 230V COIL GAP (TYPICAL) SPACING DETAIL (NO SCALE) 03-933005-02 (FIGURE 2) 03-933005-01/03 (FIGURE 1)
- Page 50 DOC: 03-933014-01 PARTS TOOLS DESC: Assy, Heater, 101V, 120V & 230V MENU LIST HISTORY 3 of 4 PAGE: 12-222006-06, 2 PLCS SCREW, 6-32 X 3/8” LG, PHMS, SST 14-122006-00, 2 PLCS WASHER, FLAT, #6 12-222006-03, 6 PLCS HEATER ELEMENT SCREW, 6-32 X 3/16” LG, PHMS, SST 03-933506-01 HARNESS, COL OVEN HEATER 03-933005-01...
- Page 51 DOC: 03-933014-01 PARTS TOOLS DESC: Assy, Heater, 101V, 120V & 230V MENU LIST HISTORY 4 of 4 PAGE: 3900 GALILEO, 101V, 120V & 230V HEATER ASSEMBLY PROCEDURES OPERATION IN SEQUENCE 1.1.1 Build the appropriate heater element assembly, 03-933005-0X as detailed on drawing. 1.1.2 Insert one each 6-32 x 3/8"...
- Page 52 DOC: 03-933012-00 PARTS TOOLS DESC: Assy, Column Oven Motor MENU LIST HISTORY 1 of 3 PAGE: ASSY, COLUMN OVEN MOTOR SUB-ASSEMBLIES STATION, ASSEMBLY PROCEDURES Dave Maderos PREPARED BY: Sax Makthepharack REVISED BY: CONTROL: INDUSTRIAL ENGINEERING REV. DATE: 08 - 21 - 00 SHOWN...
- Page 53 DOC: 03-933012-00 PARTS TOOLS DESC: Assy, Column Oven Motor MENU LIST HISTORY 2 of 3 PAGE: 03-925307-01 ASSY, MOTOR, COL., FAN, 120V PIN NUMBER WIRE COLOR 03-925307-02 ASSY, MOTOR, COL., FAN, 230V GRN/YEL 03-933177-01, 2 PLCS 03-925307-03 BRACKET, MOTOR MOUNT ASSY, MOTOR, COL., FAN, 101V 51-406932-00 CONN.
- Page 54 DOC: 03-933012-00 PARTS TOOLS DESC: Assy, Column Oven Motor MENU LIST HISTORY 3 of 3 PAGE: COLUMN OVEN MOTOR ASSEMBLY PROCEDURES OPERATION IN SEQUENCE - Note: This operation should be performed in a well ventilated area and assembler should wear rubber gloves.
- Page 55 DOC: 03-933012-00 PARTS TOOLS DESC: Assy, Column Oven Motor MENU LIST HISTORY 4 of 3 PAGE: Dave Maderos PREPARED BY: Sax Makthepharack REVISED BY: CONTROL: INDUSTRIAL ENGINEERING REV. DATE: 08 - 21 - 00 SHOWN...
- Page 56 TOOLS DESC: Assy, Front Door MENU LIST HISTORY 1 of 3 PAGE: ASSY, FRONT DOOR 3900GC STATION GC SUBS, ASSEMBLY PROCEDURES Dave Maderos PREPARED BY: Sax Makthepharack REVISED BY: CONTROL: INDUSTRIAL ENGINEERING REV. DATE: 06 - 12 - 00 SHOWN...
- Page 57 DOC: 03-933008-00 PARTS TOOLS DESC: Assy, Front Door MENU LIST HISTORY 2 of 3 PAGE: 71-300053-00 SENSOR, MAGNETIC PROXIMITY, ACTUATOR FRONT DOOR (REF.) 03-933186-03 VIBRATION ISOLATOR (OBROUND) R0-028000-55, 2 PLCS STANDOFF, 4-40 X 1/4”, HEX SEE EXPLODED VIEW BELOW MAGNETIC SENSOR INSTALLATION 12-901165-00, 4 PLCS SCREW, 8-32 X 1/4 SEMS, SST 03-933011-01...
- Page 58 DOC: 03-933008-00 PARTS TOOLS DESC: Assy, Front Door MENU LIST HISTORY 3 of 3 PAGE: FRONT DOOR ASSEMBLY PROCEDURES BRACKET ASSEMBLY 1.1.1 Install two Roll Pins, 19-224776-00 on both sides of the Latch Release, 03-933159-01 using Press Tool until pins bottoms out. 1.1.2 Install two Teflon Flat Washers, 14-999408-00 onto the Roll Pins previous installed and install Strike Plate, 03-933157-00 onto roll pins as shown.
- Page 59 DOC: 03-933008-00 PARTS TOOLS DESC: Assy, Front Door MENU LIST HISTORY 4 of 3 PAGE: Dave Maderos PREPARED BY: Sax Makthepharack REVISED BY: CONTROL: INDUSTRIAL ENGINEERING REV. DATE: 06 - 12 - 00 SHOWN...
- Page 60 TOOLS DESC: Assy, Vent Door MENU LIST HISTORY 1 of 3 PAGE: ASSY, VENT DOOR 3900GC STATION GC SUBS, ASSEMBLY PROCEDURES Dave Maderos PREPARED BY: Sax Makthepharack REVISED BY: CONTROL: INDUSTRIAL ENGINEERING REV. DATE: 06 - 12 - 00 SHOWN...
- Page 61 DOC: 03-933007-00 PARTS TOOLS DESC: Assy, Vent Door MENU LIST HISTORY 2 of 3 PAGE: 17-699938-00, 2 PLCS RIVET, BLIND, ∅.125 X .390, SST/STL 14-901074-00, 2 PLCS WASHER, FLAT, #6, .16ID X .87OD 03-933155-01, 2 PLCS INSULATION, VENT DOOR 17-699907-00, 4 PLCS RIVET, BLIND, ∅.125 X .265, SST/STL 03-933154-01, 2 PLCS DOOR, VENT...
- Page 62 DOC: 03-933007-00 PARTS TOOLS DESC: Assy, Vent Door MENU LIST HISTORY 3 of 3 PAGE: VENT DOOR ASSEMBLY PROCEDURES OPERATION IN SQUENCE 1.1.1 Place the Vent Door Shaft, 03-933152-01 with stepped end of shaft opposite the end plate on Fixture T-8982 and align the holes on the shaft with the holes on the fixtures.
- Page 63 DOC: 03-933007-00 PARTS TOOLS DESC: Assy, Vent Door MENU LIST HISTORY 4 of 3 PAGE: Dave Maderos PREPARED BY: Sax Makthepharack REVISED BY: CONTROL: INDUSTRIAL ENGINEERING REV. DATE: 06 - 12 - 00 SHOWN...
- Page 64 TOOLS DESC: Assy, Electronics Module MENU LIST HISTORY 1 of 3 PAGE: ASSY, ELECTRONIC MODULE 3900GC STATION GC SUBS, ASSEMBLY PROCEDURES FAN CONNECTOR REFERENCE J20 STEP 1.1.3 Dave Maderos PREPARED BY: Sax Makthepharack REVISED BY: CONTROL: INDUSTRIAL ENGINEERING REV. DATE:...
- Page 65 DOC: 03-933006-00 PARTS TOOLS DESC: Assy, Electronics Module MENU LIST HISTORY 2 of 3 PAGE: 03-910873-01 COMPUTER, PROGRAMMED, 3900 MB TOP VIEW (REF.) INSTALLATION DETAILS 12-222008-24, 4 PLCS SCREW, 8-32 X 1-1/2” LG, PHMS, SST 12-222006-04, 8 PLCS SCREW, 6-32 X 1/4” LG, PHMS, SST 20-839825-00 FINGER GUARD, FAN 03-933350-01...
- Page 66 DOC: 03-933006-00 PARTS TOOLS DESC: Assy, Electronics Module MENU LIST HISTORY 3 of 3 PAGE: ELECTRONICS MODULE ASSEMBLY PROCEDURES 51-959920-00, 4 PLCS OPERATION IN SQUENCE FEMALE SCREW LOCK SET, 4-40 X .31 1.1.1 Install Chassis Fan Assembly, 03-925305-01 onto Right Side Service Cover, 03-933171-01, using Fan Finger Guard, 20-839825-00, four 8-32 x 1-3/8”...
- Page 67 DOC: 03-933006-00 PARTS TOOLS DESC: Assy, Electronics Module MENU LIST HISTORY 4 of 3 PAGE: Dave Maderos PREPARED BY: Sax Makthepharack REVISED BY: CONTROL: INDUSTRIAL ENGINEERING REV. DATE: 06 - 14 - 00 SHOWN...
- Page 68 HISTORY 1 of 12 PAGE: 3900GC GALILEO HY-POT, 3900 CONNECTION, ESTABLISH COMMUNICATIONS, LEAK TEST AND FUNCTIONAL TEST Note: While using the computer, the term "click" refers to using the mouse to position the pointer to the required location and pushing the left mouse button.
- Page 69 DOC: 3900GC TEST STATION PARTS TOOLS DESC: 3900GC GALILEO TEST MENU LIST HISTORY 2 of 12 PAGE: ESTABLISH COMMUNICATIONS 1.3.1 Turn on the computer. After booting up, the Star Toolbar should be visible on the screen. CLICK HERE STEP 1.3.2 1.3.2...
- Page 70 STEP 1.3.4 CLICK HERE STEP 1.3.3 1.3.3 Click on the button. 1.3.4 To establish communications between the computer and the 3900GC, click on the menu. Then click the item. Bob Jolley PREPARED BY: Sax Makthepharack REVISED BY: CONTROL: INDUSTRIAL ENGINEERING REV.
- Page 71 DOC: 3900GC TEST STATION PARTS TOOLS DESC: 3900GC GALILEO TEST MENU LIST HISTORY 4 of 12 PAGE: CLICK HERE CLICK HERE STEP 1.3.5 STEP 1.3.6 1.3.5 Click the button. 1.3.6 Click the button. Bob Jolley PREPARED BY: Sax Makthepharack REVISED BY: CONTROL: INDUSTRIAL ENGINEERING REV.
- Page 72 DOC: 3900GC TEST STATION PARTS TOOLS DESC: 3900GC GALILEO TEST MENU LIST HISTORY 5 of 12 PAGE: CLICK HERE CLICK HERE CLICK HERE STEP 1.3.9 STEP 1.3.7 STEP 1.3.10 CLICK HERE STEP 1.3.9 1.3.7 Turn the 3900 power switch on.
- Page 73 DOC: 3900GC TEST STATION PARTS TOOLS DESC: 3900GC GALILEO TEST MENU LIST HISTORY 6 of 12 PAGE: CLICK HERE STEP 1.3.11 CLICK HERE STEP 1.3.12 1.3.11 Wait for data to appear, then click the button. 1.3.12 Click the button. Bob Jolley...
- Page 74 DOC: 3900GC TEST STATION PARTS TOOLS DESC: 3900GC GALILEO TEST MENU LIST HISTORY 7 of 12 PAGE: CLICK HERE STEP 1.3.13 1.3.13 Click on the Instrument menu . Then click the configuration item as shown. 1.3.14 Verify that the 3900 icon is in the Instrument 1 box. If the 3900 icon is at the bottom of the screen, click and drag it to the location shown.
- Page 75 DOC: 3900GC TEST STATION PARTS TOOLS DESC: 3900GC GALILEO TEST MENU LIST HISTORY 8 of 12 PAGE: CLICK HERE STEP 1.4.1 1.3.15 The screen should look similar to this when the 3900 is online. LEAK TEST 1.4.1 Open Leak_Test_3900.mth by clicking...
- Page 76 DOC: 3900GC TEST STATION PARTS TOOLS DESC: 3900GC GALILEO TEST MENU LIST HISTORY 9 of 12 PAGE: CLICK HERE CLICK HERE STEP 1.4.2 STEP 1.4.4 1.4.2 In the list, click on Leak_Test_3900.mth and then click open. 1.4.3 In the Injector EFC Status block, the Type 1 Pressure Setpoint and the Actual Pressure should go to 80.0 psi. Note: Assure Col Oven and 1177 Actual temperatures stabilize at the Set values.
- Page 77 DOC: 3900GC TEST STATION PARTS TOOLS DESC: 3900GC GALILEO TEST MENU LIST HISTORY 10 of 12 PAGE: CLICK HERE STEP 1.5.1 CLICK HERE STEP 1.5.2 FUNCTIONAL TEST 1.5.1 Open Leak_Functional_3900.mth by clicking and then clicking 1.5.2 In the list, click on Functional_Test_3900.mth and then click open.
- Page 78 DOC: 3900GC TEST STATION PARTS TOOLS DESC: 3900GC GALILEO TEST MENU LIST HISTORY 11 of 12 PAGE: 1.5.3 Verify initial values: A) Pressure Set point and Actual Pressure equilibrate to 10psi. B) Oven temp. equilibrates to 50 deg. C) Injector temp. equilibrates to 100 deg.
- Page 79 DOC: 3900GC TEST STATION PARTS TOOLS DESC: 3900GC GALILEO TEST MENU LIST HISTORY 12 of 12 PAGE: CLICK HERE STEP 1.5.8 1.5.8 Set Injector (C) to 90 and click Close & Update. 1.5.9 Verify 3900 faults, and red LED illuminates on 3900.
- Page 80 LIST HISTORY 1 of 12 PAGE: 3900GC GALILEO CONNECTION, ESTABLISH COMMUNICATIONS, FLOW CHECK AND BURN-IN Warning: Before and during, heating of the injector, make sure Helium is flowing through it. Note: While using the computer, the term "click" refers to using the mouse to position the pointer to the required location and pushing the left mouse button.
- Page 81 STEP 1.2.4 CLICK HERE STEP 1.2.3 1.2.3 Click on the button. 1.2.4 To establish communications between the computer and the 3900GC, click on the menu. Then click the item. Bob Jolley PREPARED BY: Sax Makthepharack REVISED BY: CONTROL: INDUSTRIAL ENGINEERING REV.
- Page 82 DOC: BURN-IN STATION PARTS TOOLS DESC: Burn-In Test Procedures MENU LIST HISTORY 3 of 12 PAGE: CLICK HERE CLICK HERE STEP 1.2.5 STEP 1.2.6 1.2.5 Click the button. 1.2.6 Click the button. Bob Jolley PREPARED BY: Sax Makthepharack REVISED BY: CONTROL: INDUSTRIAL ENGINEERING REV.
- Page 83 DOC: BURN-IN STATION PARTS TOOLS DESC: Burn-In Test Procedures MENU LIST HISTORY 4 of 12 PAGE: CLICK HERE CLICK HERE CLICK HERE STEP 1.2.9 STEP 1.2.7 STEP 1.2.10 CLICK HERE STEP 1.2.9 1.2.7 Turn the 3900 power switch on. 1.2.8 If the last 4 digits of the serial number, of the 3900 being tested, are already in the Host Name block, skip the next step.
- Page 84 DOC: BURN-IN STATION PARTS TOOLS DESC: Burn-In Test Procedures MENU LIST HISTORY 5 of 12 PAGE: CLICK HERE STEP 1.2.11 CLICK HERE STEP 1.2.12 1.2.11 Wait for new data to appear, click on the line corresponding to the 3900 being setup, then click the button.
- Page 85 DOC: BURN-IN STATION PARTS TOOLS DESC: Burn-In Test Procedures MENU LIST HISTORY 6 of 12 PAGE: CLICK HERE STEP 1.2.13 1.2.13 Click on the Instrument menu . Then click the configuration item as shown. 1.2.14 Verify that the 3900 icon, with the Address selected in step 1.2.10, is in an Instrument box. If the 3900 icon is at the bottom of the screen, click and drag it to an unused Instrument box.
- Page 86 DOC: BURN-IN STATION PARTS TOOLS DESC: Burn-In Test Procedures MENU LIST HISTORY 7 of 12 PAGE: CLICK HERE STEP 1.3.1 1.2.15 The screen should look similar to this when the 3900 is online. FLOW CHECK 1.3.1 Open Burn-in_Setup_3900.mth by clicking and then clicking Bob Jolley PREPARED BY: Sax Makthepharack...
- Page 87 DOC: BURN-IN STATION PARTS TOOLS DESC: Burn-In Test Procedures MENU LIST HISTORY 8 of 12 PAGE: CLICK HERE STEP 1.3.2 1.3.2 In the list, click on Burn-in_Setup_3900.mth and then click Open. 1.3.3 Critical data: A) Go to Setup... to check the following: Column length = 30;...
- Page 88 DOC: BURN-IN STATION PARTS TOOLS DESC: Burn-In Test Procedures MENU LIST HISTORY 9 of 12 PAGE: CLICK HERE CLICK HERE STEP 1.4.2 STEP 1.4.3 BURN-IN Note: The 3900 Connection and Establish Communications sections must be completed prior to performing Burn-In. 1.4.1 Remove injector nut and septum &...
- Page 89 DOC: BURN-IN STATION PARTS TOOLS DESC: Burn-In Test Procedures MENU LIST HISTORY 10 of 12 PAGE: CLICK HERE CLICK HERE STEP 1.4.4 STEP 1.4.5 1.4.4 Click Begin. 1.4.5 Click OK Bob Jolley PREPARED BY: Sax Makthepharack REVISED BY: CONTROL: INDUSTRIAL ENGINEERING REV.
- Page 90 DOC: BURN-IN STATION PARTS TOOLS DESC: Burn-In Test Procedures MENU LIST HISTORY 11 of 12 PAGE: CLICK HERE STEP 1.4.6 1.4.6 Click OK Bob Jolley PREPARED BY: Sax Makthepharack REVISED BY: CONTROL: INDUSTRIAL ENGINEERING REV. DATE: 10 - 17 - 00 SHOWN...
- Page 91 DOC: BURN-IN STATION PARTS TOOLS DESC: Burn-In Test Procedures MENU LIST HISTORY 12 of 12 PAGE: 1.4.7 After heated zones reach set temperatures and Stabilization has ended, click Start. Critical data: A) Column Oven temp. = 350 C B) Injector temp. = 320 C; 260 C after 4 hrs 1.4.8 Burn-in is performed for a minimum of 4 hours, and terminated at the test technicians discretion.
- Page 92 1.1.7 Turn OFF the DIMMPC programming fixture. 1.1.8 Affix a printed label (AVERY P/N 05412 or equivalent) that reads: "03-910873-01 ©2000 VARIAN" on the DIMMPC. Locate label on the second largest IC of DIMMPC. 1.1.9 Remove the DIMMPC from the programming fixture and re-package it into its electrostatic shielding box.
- Page 93 DOC: DIMMPC PARTS TOOLS DESC: DIMMPC Programming Procedures MENU LIST HISTORY 2 of 2 PAGE: 1.2.2 Under ’STANDARD SETUP" depress the "ENTER" key. Using the "right arrow" key, move over to the "FLOPPY A" Icon and depress the "ENTER" key again. 1.2.3 A box entitled "FLOPPY A"...
- Page 94 P/N: 03-933001-01 ALL PART NAMES / PART NUMBERS DESC: Assy, Basic Electrical, (120v Shown) (IN NUMERICAL ORDER) PAGE: 1 of 2 03-925210-01 03-933014-01 03-933207-01 HOUSING, POWER SWITCH, STANDARD ..pg. 4 ASSY, COLUMN OVEN HEATER, 120V ..pg. 14 SPACER, SOFT CHASSIS FOOT .....pg. 2 03-925306-01 03-933151-01 03-933500-01...
- Page 95 P/N: 03-933001-01 ALL PART NAMES / PART NUMBERS DESC: Assy, Basic Electrical, (120v Shown) (IN NUMERICAL ORDER) PAGE: 2 of 2 12-901163-00, 2 PLCS 14-901030-00, 2 PLCS 24-799873-00 SCREW, 8-32 X 3/8, SEM........pg. 2 WASHER, #10 FLAT, SST ......pg. 20 BUSHING, NYLON, SNAP, BLACK 5/8 .....pg.
-
Page 96: Table Of Contents
LABEL, S/N TAG, MODEL 3900 ......pg. 8 ADAPTER, HOSE, ELBOW....... pg. 4 03-933508-01 37-000820-15 ASSY, CABLE, EFC, 3900GC......pg. 2 1/8” DIAMETER COPPER TUBING, 4.5” ..pg. 2 12-901161-02, 2 PLCS (REF.) 57-000028-00 SCREW, SEMS, 6-32 X 3.8, SST ......pg. 5... - Page 97 P/N: BUTTON-UP STATION ALL PART NAMES / PART NUMBERS DESC: Assy, Button-Up (IN NUMERICAL ORDER) PAGE: 1 of 1 03-933013-01 ASSY, INJECTOR COVER ........pg. 2 03-933161-01 COVER, INJECTOR...........pg. 2 03-933193-01, 4 PLCS ROLLER, INJECTOR COVER ......pg. 2 03-933195-01 CAP ..............pg. 2 03-933198-01 SHIPPING PIN ...........pg.
- Page 98 DOC: 03-925520-00 PARTS TOOLS DESC: MENU Assy, INSTL/Kit, GC/MS EFC Power Fail LIST HISTORY 1 of x PAGE: 03-917142-00, 3 PLCS FERRULE, VITON 2 03-917143-00 PIN, BLANK-OFF 2 03-917145-01 TUBING, 1/16OD X .030ID X 1/2” LG, SST 2 03-917157-00, 3 PLCS WASHER, FERRULE, VITON 2 03-925457-02 VALVE, SOLENOID, 3-WAY, W/2 PIN CONN 2...
- Page 99 P/N: XX-XXXXXX-XX ALL PART NAMES / PART NUMBERS DESC: Template (IN NUMERICAL ORDER) PAGE: 1 of 1...
- Page 100 P/N: 03-933014-01 ALL PART NAMES / PART NUMBERS DESC: Assy, Heater, 101V/120V/230V (IN NUMERICAL ORDER) PAGE: 1 of 1 03-933005-01 HEATER COL. OVEN, 1000W, 120V AC...pg. 3 03-933005-02 HEATER COL. OVEN, 1000W, 230V AC...pg. 3 03-933005-03 HEATER COL. OVEN, 1000W, 101V AC...pg. 3 03-933150-01 BAFFLE, INNER OVEN........pg.
- Page 101 P/N: 03-933012-00 ALL PART NAMES / PART NUMBERS DESC: Assy, Column Oven Motor (IN NUMERICAL ORDER) PAGE: 1 of 1 03-925307-01 ASSY, MOTOR, COL., FAN, 120V.....pg. 2 03-925307-02 ASSY, MOTOR, COL., FAN, 230V.....pg. 2 03-925307-03 ASSY, MOTOR, COL., FAN, 101V.....pg. 2 03-933177-01, 2 PLCS BRACKET, MOTOR MOUNT ......pg.
- Page 102 P/N: 03-933008-00 ALL PART NAMES / PART NUMBERS DESC: Assy, Front Door (IN NUMERICAL ORDER) PAGE: 1 of 1 03-933011-01 ASSY, COLUMN OVEN DOOR ......pg. 2 03-933156-01 DOOR, FRONT , GC ..........pg. 2 03-933157-00 STRIKE PLATE ..........pg. 2 03-933159-01 LATCH RELEASE ..........pg. 2 03-933160-01, 2 PLCS SPRING, OVEN DOOR........pg.
- Page 103 P/N: 03-933007-00 ALL PART NAMES / PART NUMBERS DESC: Assy, Vent Door (IN NUMERICAL ORDER) PAGE: 1 of 1 03-925565-01 FLEX COUPLING..........pg. 2 03-933152-01 SHAFT, VENT DOOR ........pg. 2 03-933153-01, 2 PLCS ARM, VENT DOOR ..........pg. 2 03-933154-01, 2 PLCS DOOR, VENT .............pg.
- Page 104 P/N: 03-933006-00 ALL PART NAMES / PART NUMBERS DESC: Assy, Electronics Module (IN NUMERICAL ORDER) PAGE: 1 of 1 03-910873-01 COMPUTER, PROGRAMMED, 3900 MB ..pg. 2 03-925305-01 ASSY, CHASSIS FAN ........pg. 2 03-933171-01 COVER, RIGHT SIDE SERVICE .......pg. 2 03-933350-01 ASSY, PWA, MAIN BOARD .......pg.
Need help?
Do you have a question about the 3900GC and is the answer not in the manual?
Questions and answers