Advertisement
Quick Links
Introduction
This Quick Start Guide can help you install the ReadyGuard quickly and easily by providing the
basic steps for installation using the built-in defaults. For more detailed information and important
notes, refer to the ReadyGuard Installation Instructions.
The following steps assume that one of the system's default tables will be used.
For programming data values and Powerline Carrier Devices other than those listed in the default
tables, see the Installation Instructions.
Default Table Summary
Zone Table 1
1
-------
2
front door
3
back door
4
window
5
motion detector
6
-------
7
-------
8
-------
9
-------
26
loop 3 arm away
27
loop 2 disarm
28
loop 4 close device 1
29
loop 1 restore device 1
30
loop 3 arm away
31
loop 2 disarm
32
loop 4 close device 1
33
loop 1 restore device 1
92
duress
99
silent alarm
User
1-2-3-4
Code
Install
4-1-1-2
Code
‡ zones 26 – 33 are button zones and programmed the same as in Table 1.
Entering Program Mode: installer code + 8 0 0
Interactive Mode
* 56 Zone Programming
* 83 Sequential Mode
*84 Assign Zone Voice Descriptors
Exiting Program Mode
* 99 allows re-entry into the Program mode using Installer Code + 8 0 0.
* 98 inhibits re-entry into the Programming mode using the Installer Code.
NOTES:
• Tables 2 and 4 support the automatic paging feature (open/close events reported to pager phone
number), and a Powerline Carrier Device programmed as device 8, which closes and stays closed upon
burglary alarms and restores after bell timeout. For other applications or actions (e.g., using a pulsing
siren), see the *80 Powerline Carrier Device Programming section of the Installation Instructions.
• Primary report format for all tables is Ademco's Contact ID reporting. Tables 2 and 4 also use Contact ID
for secondary reporting. Tables 1, 3, and 5 use 4+1 format for secondary reporting.
• Tables 1 and 5 record all events in the event log. Tables 2, 3, and 4 record only alarms, alarm restores,
troubles, and trouble restores in their event logs.
Table 2
Table 3
-------
-------
front door
front door
back door
back door
window
window
motion detector
window
smoke detector
window
-------
window
-------
motion detector
-------
smoke detector
‡
‡
‡
‡
‡
‡
‡
‡
duress
duress
silent alarm
silent alarm
1-2-3-4
4-1-1-2
Zone characteristics, report codes, and serial numbers
5800 Series transmitter serial numbers
Voice descriptors for each zone
Table 4
-------
front door
back door
window
window
window
window
motion detector
smoke detector
‡
‡
‡
‡
‡
‡
‡
‡
‡
‡
‡
‡
‡
‡
‡
‡
duress
silent alarm
1-2-3-4
1-2-3-4
4-1-1-2
4-1-1-2
Used to Program
N8889-1QS 9/98
Table 5
-------
front door
back door
window
motion detector
-------
-------
-------
-------
‡
‡
‡
‡
‡
‡
‡
‡
duress
silent alarm
1-2-3-4
4-1-1-2
Advertisement

Related Manuals for First Alert ReadyGuard


Summary of Contents for First Alert ReadyGuard
- Page 1 N8889-1QS 9/98 Introduction This Quick Start Guide can help you install the ReadyGuard quickly and easily by providing the basic steps for installation using the built-in defaults. For more detailed information and important notes, refer to the ReadyGuard Installation Instructions.
- Page 2 Steps to Installing ReadyGuard Separate the front assembly from the back plate and mount the back plate. DO NOT disconnect the ribbon cable from the terminal strip board. Disconnect the cable only from the front assembly board. Make wiring connections as follows: Connect the incoming phone line to either the 8-position jack or terminals 2 (TIP) and 3 (RING).
- Page 3 FLYING LEADS INTERFERENCE RECEIVED, INCLUDING INTERFERENCE RINGER EQUIVALENCE: 0.6B THAT MAY CAUSE UNDESIRED OPERATION. ReadyGuard WIRING CONNECTIONS 5800 Series Transmitter Loop Numbers: The following illustration shows the compatible transmitters and their associated input types and loop designations. LOOP 3 LOOP...
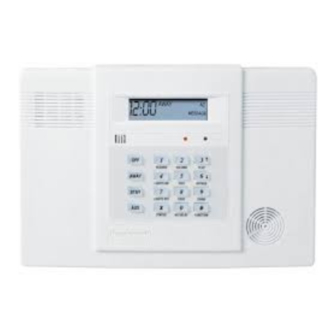
- Page 4 Keypad Functions (when default programming is used) Security Functions Checking system status: (high level messages); press again for secondary messages. STATUS STATUS To arm in STAY mode: Press and hold down (or enter your code + ) See note below. STAY STAY To restart exit delay:...
Need help?
Do you have a question about the ReadyGuard and is the answer not in the manual?
Questions and answers