Keller LEO 5 Manual
Hide thumbs
Also See for LEO 5:
- Operating instructions manual (24 pages) ,
- Operating instructions manual (12 pages) ,
- Operating instructions manual (16 pages)
Table of Contents
Advertisement
Quick Links
Advertisement
Table of Contents

Related Manuals for Keller LEO 5


Summary of Contents for Keller LEO 5
- Page 1 MANUAL LEO 5 Keller AG für Druckmesstechnik...
-
Page 2: Table Of Contents
Handling example: How to stop the peak mode..5 Menu structure..............6 2.3.1 Main menu..............6 2.3.2 Sub menu ..............7 2.3.3 Sub menu settings ............10 USB connection.............12 Installing the USB – driver LEO 5 ........13 Optional – establish a Bluetooth connection....17 Charge accumulator ............20 Disposal ..................20 General Safety Instructions.............21... -
Page 3: General Information
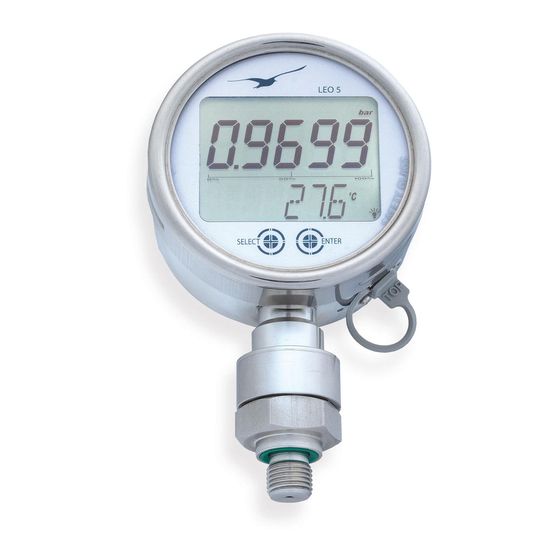
1 General information The LEO 5 is powered by accumulator and will be charged when connected to USB Port. As the accumulator is fix built in the device it cannot be replaced. 2 Operating instructions 2.1 Touch Display LEO 5 has two keys integrated into the display. -
Page 4: Manage The Device With Touch Pannels
2.2 Manage the device with touch pannels choose different functions press „SELECT“ activate commands or functions press “ENTER” Remark: The display automatically switches back to the main display 10 seconds after the last key touch. - 4 -... -
Page 5: Example: Setting The Peak Mode
2.2.1 Example: Setting the peak mode Turn on the instrument by pressing the SELECT key followed by pressing the ENTER key Press the “SELECT”–key 3 times: The lower display part will show “MENU” Press “ENTER” Press “SELECT” ”–key 3 times: The lower display part will show “PEAK”... -
Page 6: Menu Structure
2.3 Menu structure 2.3.1 Main menu Main Display Reset Min.-/Max.-value are set to the actual pressure Turns off the instrument and ends an active record Menu Releases the sub menu functions - 6 -... -
Page 7: Sub Menu
Peak START PEAK off: Normal measuring mode with 2 measurements per second. PEAK on: Fast measuring mode with 5000 measurements per second RF BT On/OFF Switch the LEO 5 Bluetooth modul “On” or “OFF” to communicate wireless - 7 -... - Page 8 Zero SET Sets a new pressure zero reference Zero RESET Sets the pressure zero to factory setting UNIT Unit selection CONT Activates or deactivates the automatic turn off function Display Main display selection - 8 -...
- Page 9 BACKL Backlight setting RESL Choose resolution ACCU Accumulator information and charge status EXIT Each sub menu can be left by pressing “ENTER” while “EXIT” is displayed. The display will switch back to the sub menu - 9 -...
-
Page 10: Sub Menu Settings
2.3.3 Sub menu settings Unit selection Continuous Display selection mode ↓ ↓ ↓ bar, mbar, hPa, CONT on: select the lower kPa, MPa, PSI, Deactivates the display option. kp/cm , cmH automatic turn-off Select between: O, inH function. O, mmHg, inHg... - Page 11 Backlight setting Resolution Accu information Exit selection ↓ ↓ ↓ The backlight can set measurement displays sub menu can be be turn “ON”, “OFF” value resolution accumulator voltage left by pressing or “ONOFF” between 0 to 4 and visualizes the “ENTER”...
-
Page 12: Usb Connection
2.4 USB connection To connect the device to USB, remove the backside mounted rubber protection to access the USB plug. Hint: The rubber also acts as over pressure safety valve in case of damages at the pressure sensor when inner pressure is raised to a critical pressure. -
Page 13: Installing The Usb - Driver Leo 5
2.5 Installing the USB – driver LEO 5 To enable the USB communication you have to install the manually the LEO5 USB – driver. Connect the LEO5 with the PC by a USB cable. After the PC has detected this device the following message will appear: "USB Device not recognized"... - Page 14 Please follow the introduction shown in the picture to install the driver. choose the path where the driver is stored. - 14 -...
- Page 15 The Computer starts to install the new driver. Windows doesn’t recognize the driver. Please click on “Continue Anyway”. - 15 -...
- Page 16 Now the driver is installed and the device is recognized windows. The device manager is listing the device as “Manometer” with assigned comport number. This com port number must be select manually in the PC software. Remark: If the device is...
-
Page 17: Optional - Establish A Bluetooth Connection
Switch the LEO 5 Bluetooth module on. More information in the chapter menu structure. Step 3: establish Bluetooth connection To establish a connection with the LEO 5, open the window “Devices and Printers” and select “Add a device”. (see picture 1.2) - Page 18 1.1 picture 1.2 - 18 -...
- Page 19 If device is not found, search again until the device is listed in the window. May it takes a few tries to detect the device. After the LEO 5 is found, select it and click on the “Next” button. - 19 -...
-
Page 20: Charge Accumulator
Step 5: Confirm the pass code The LEO 5 will send a pass code. If you want to establish the Bluetooth connection, you have to accept the pass code. After this, you will see a window that confirm the established Bluetooth connection. -
Page 21: General Safety Instructions
4 General Safety Instructions When installing and operating the digital manometer, attention must be paid to the corresponding safety regulations. Only mount the digital manometer onto unpressurized systems. On pressure ranges ≥61 bar, the pressure connections could show residual hydraulic oil, determined by production flow.
Need help?
Do you have a question about the LEO 5 and is the answer not in the manual?
Questions and answers