Table of Contents
Advertisement
Quick Links
Advertisement
Table of Contents

Related Manuals for Kitronik MOVE mini Mk2


Summary of Contents for Kitronik MOVE mini Mk2
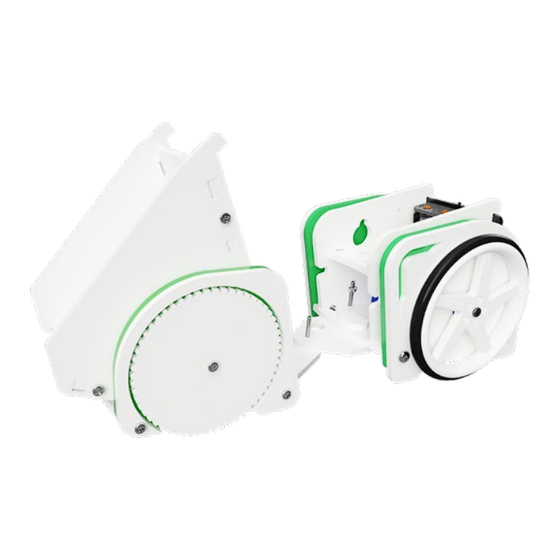
- Page 1 GET TIPPING WITH THE TIPPER TRAILER ADD-ON For :MOVE mini Mk2 V2.0...
- Page 2 NOTES This kit is compatible with all versions of :MOVE mini but this booklet has been designed for :MOVE mini Mk2. If you have the original :MOVE mini, visit kitronik.co.uk/5670 for instructions. BUILD INSTRUCTIONS DISASSEMBLY Remove the ‘:MOVE’ panel and Servo:Lite board from your :MOVE mini.
- Page 3 TRAILER SIDE Push the screws through the side panels as shown and thread an M2 nut onto the end by approx. 3mm. M2 x 16mm ADD WHEELS Use an M2 x 6mm screw to attach the wheel as shown, making sure to leave the screw a little loose, allowing the wheel to spin freely.
- Page 4 REPEAT Repeat steps 3-5 for the opposite side, making sure components are in reverse order. Then set these aside. ADD SERVO Take the base plate and line up the servo as shown. Then slot in the two mounting brackets making sure the flat edges are facing in towards the servo.
- Page 5 ADD LEFT SIDE Take the left side panel made earlier and assemble it onto the base plate, taking care to line up the gears so that the tipper is horizontal. You will need to fit the nuts into the T-joints on the base plate and tighten.
- Page 6 ADD RIGHT SIDE Add the second side panel on the opposite side, like in Step 10. Slot the rear bucket panel in and tighten the screws in the base. Finally insert the second M2 x 6mm screw into the rear panel and secure with another M2 nut.
- Page 7 :MOVE mini. Finally clip the :MOVE panel back in the front and tuck the excess wires away. NOTE: With the back of the board facing you - the third servo attaches to uppermost, right, set of pins. GET CODING! Visit kitronik.co.uk/5670 for help.
- Page 8 UK by For more information on RoHs and CE please visit kitronik.co.uk/rohs-ce. Children assembling this product should be supervised by a competent adult. The product contains small parts so should be kept out of reach of children under 3 years old.
Need help?
Do you have a question about the MOVE mini Mk2 and is the answer not in the manual?
Questions and answers