Table of Contents
Advertisement
Advertisement
Table of Contents

Related Manuals for Denyo DCA Series


Summary of Contents for Denyo DCA Series
- Page 1 No.B58443 00314B INSTRUCTION MANUAL ALTERNATING CURRENT GENERATING SETS DCA-70,-125,-180ESEI IMPORTANT: READ AND UNDERSTAND THIS MANUAL CAREFULLY BEFORE USE OF THIS MACHINE. KEEP THIS MANUAL FOR YOUR FUTURE REFERENCE. 2-8-5 Nihonbashi-horidomecho, Chuo-ku, Tokyo, 103-8566 Japan...
-
Page 2: Table Of Contents
CONTENTS SAFETY PRECAUTIONS FOR GENERATORS ..............1. DCA SERIES ........................General ........................Machine structure ....................Machine appearance and internal component devices ........... Control switches and meters ................... 10 1-4-1 Engine start/stop controls ..................1-4-2 Engine indicators ....................1-4-3 Generator controls and indicators ................16 Noise ........................ - Page 3 5. FUEL, COOLANT AND LUBRICANTS ................6. PERIODIC CHECKUP AND MAINTENANCE ..............43 Safety precautions for periodic checkup and maintenance ........43 Periodic chechup ..................... 44 6-2-1 Maintenance schedule .................... 6-2-2 Checking/every 250 hours ..................6-2-3 Checking/every 500 hours ..................6-2-4 Checking/every 1000 hours ..................
- Page 4 FOREWORD • We are very thankful for your special choice of our MACHINE in the market. • Please read this manual carefully and understand for proper use this machine. • Please keep this manual at your prescribed location where operator can always take this manual. •...
-
Page 5: Safety Precautions For Generators
SAFETY PRECAUTIONS FOR GENERATORS In order to ensure safe operation, the following symbols are used for explanation of the machine operation. The following symbols, found throughout this manual, alert you to potentially dangerous conditions to the operator, service personnel, or the equipment. WARNING: This symbol refers to a hazard or unsafe practice which can result in severe personal injury or death. - Page 6 SAFETY LABEL Safety labels are attached to the following positions of the machine. • Keep these safety labels clean at all times. • When safety labels are spoiled or lost, contact distributor or our office specifying the nameplate No. shown below and ask for new ones. Parts name Parts number CAUTION : Instruction manual...
- Page 7 DANGER: ELECTRIC SHOCK can kill. Do not touch the output terminals during operation to prevent decease due to electric shock. • Never touch the output terminals during operation. If your hands or the machine are wet, it will result in a death or serious injury.
- Page 8 WARNING: DIESEL CAUTION: FUEL can cause fire HOT COOLANT can or explosion. cause severe scalds. Fuel and oil are flammable. Incorrect handling If the radiator cap is opened while the water results in danger of ignition or fire. temperature is high, steam or hot water will spout •...
- Page 9 CAUTION: Operator. CAUTION: Noise. Do not operate the machine if operator is tired too This machine generates large noise if the door is much or drinks some alcohol or take some drugs. open. Surrounding to large noise may cause hearing •...
- Page 10 Observe all the safety precautions including ones stated in the manual. Entrust the repair to trained personnel of Denyo or its distributor who are capable of contacting us as required. Parts number When consulting us, specify...
-
Page 11: Dca Series
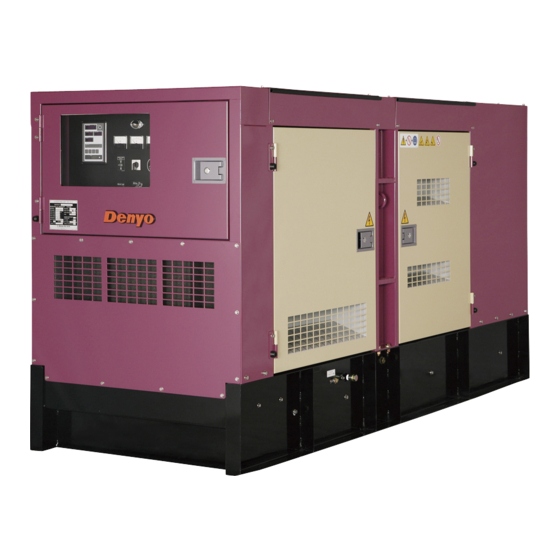
1. DCA SERIES 1-1 General • DCA series generator is intended for generating power source where there is no power source. • For further details, see “7 Principal data”. 1-2 Machine structure •... - Page 12 Fig. 2 Model DCA-125ESEI Parts number Parts number Hanger Single phase output receptacle 16A Rope hanger Engine exhaust port Radiator cooling water refilling port cover Cooling air intake port Fuel tank refilling port cover Cooling air exhaust port Fuel drain plug 15.
-
Page 13: Control Switches And Meters
1-4 Control switches and meters • The control switches and meters are located inside the door having a window on the rear of the machine. • The control panel is mounted on the bodywork with hinges and is fastened by screws. Loosening the screws has access to repairing or replacing electrical parts in the control box. - Page 14 1. Starter switch The switch is 3-position switch which can be operated with its specific key only. 1) OFF This switch should be set in this position unless the machine is in operation. The key can be inserted or pulled out in this position. 2) RUN This switch should be set in this position when the machine is in operation.
-
Page 15: Engine Indicators
1-4-2 Engine indicators 4. Engine monitor (1) Engine indicator That indicates the numerical values of engine speed, engine oil pressure, run hours, battery charging voltage, or engine coolant temperature. Indicated Items Unit engine speed engine oil pressure ×100kPa battery charging voltage engine coolant temperature ºC 1 - Engine Speed... - Page 16 (2) Fuel Level Indicator That Indicates a fuel level in the fuel tank. All the lights are indicated green when the fuel is full. The green lights stop indicating one by one as the fuel level decrease, finally the red light will be indicated when it is only one green light is left. Replenish the tank when there becomes only one lamp turned on.
- Page 17 The hour meter has an internal battery The engine monitor incorporates both a rechargeable internal battery as well as a charging circuit. While the generator is not in operation, the engine monitor will still indicate the hours operated via its internal battery. While the generator is in operation, the internal battery recharges.
- Page 18 5. Indication/alarm lamp (1) Preheat lamp This machine has automatically preheating device. If turn the starter switch to “RUN” position, it will according to cooling water (coolant) temperature with the preheat lamp goes on. When the preheat lamp goes off, it indicates that preheating is completed. (2) Warning Lamps This monitor indicates the following failures, if any one of them occurs.
- Page 19 2. If abnormal operation, push the “DIAGNOSTIC BUTTON”. Continue pushing the “DIAGNOSTIC BUTTON”, and the failure code will appear (Blinking display). • If operation is normal, the code “1” will repeatedly blink. • If operation is abnormal, the failure code will blink three times. If there is more than 1 failure, it will repeat the codes in ascending order.
-
Page 20: Generator Controls And Indicators
1-4-3 Generator controls and indicators 7. Frequency meter This meter indicates the frequency of the outputted voltage. Make sure that it reads 50Hz when running. 8. Ammeter This meter indicates the current going to the connected load. It must not exceed the rated current. -
Page 21: Transportation, Storage And Installation
TRANSPORTATION, STORAGE AND INSTALLATION 2-1 Safety precautions for transportation, storage and installation WARNING • When lifting or transporting the machine, use only appropriate devices which comply with the local safety codes and regulations. • When lifting the machine, use the hanger located at the roof center. •... -
Page 22: Transportation
2-2 Transportation • When lifting or transporting the machine, use only appropriate devices which comply with the local safety codes and regulations. For dimensions and weight of the machine, refer to “7 Principal Data”. See Fig 5 for the center of gravity. Fig. -
Page 23: Preparing For Operation
3. If it is impossible to run the engine regularly, extra precautions must be taken. 1) Consult the instruction manual for the engine. 2) Remove the battery. Store it in the same environment as for the machine. Keep the battery clean and coat its terminals lightly with petroleum jelly. Recharge the battery regularly. -
Page 24: Installation
2-4 Installation 2-4-1 Installation 1. Install the generator on a well ventilated, horizontal, even and solid floor. If the floor is not horizontal enough to keep the machine leveled, consult your sales distributor. When installing the machine on a trailer, fasten the trailer and fix the wheels by stoppers. Avoid a site exposed to rain or high temperature. - Page 25 5. Do not direct the exhaust towards passers-by or residences, etc. 6. If the generator is operated indoors; • Install an exhaust pipe of sufficient diameter to let the engine exhaust gas out directly. • Check for sufficient ventilation and position the ventilator so that the exhaust from the machine will not be re-circulated in the room even if the ventilation is proper.
- Page 26 Model DCA-70ESEI Model DCA-125ESEI Model DCA-180ESEI Fig. 7 1. Oil level gauge 6. Alternator 2. Oil refilling port cap 7. Fuel filter cartridge 3. Oil filter cartridge 8. Air cleaner 4. Reserve tank cooling water 9. Water separator 5. Fan belt 10.
-
Page 27: Checking After Installation
2-4-2 Checking after installation (1) Check engine oil (Read the instruction manual for the engine furnished separately.) ① Check the level of engine oil by the dipstick. Make sure the oil level is always between H and L. ② When it is below the low limit, supply oil immediately. ③... - Page 28 CAUTION Battery • The battery acid is dilute sulfuric acid. Improper handling will cause unexpected burns. • When the battery acid gets on your clothes or skin, wash it out with a large volume of water immediately. If it gets in your eyes, wash with a large volume of water immediately and consult your doctor.
-
Page 29: Operation
3. OPERATION 3-1 Safety precautions for operation DANGER • When the machine is running, never touch output terminals, internal wiring or other electrical parts. • Do not use the machine in a humid place. An excessive humidity is very dangerous. Never touch the machine if the machine or your body is wet. - Page 30 CAUTION • Avoid overloading the generator. The generator is provided with circuit breakers for overload protection. When a circuit breaker has tripped, reduce the concerned load before re-starting. • Do not connect the output voltage from the machine to facilities wired to the commercial power supply.
-
Page 31: Connecting The Load
3-2 Connecting the load 3-2-1 Precautions in connecting the load • The switchgear, switching equipment, load and generator in the plant must be connected in compliance with local codes of low voltage power installation (1000 or less). • Before starting or before connecting a new load, make sure that the generator is earthed. Use the earthing rod or, if effective, use an existing earthing installation. -
Page 32: Quality, Minimum Section And Maximum Length Of Cables
3-2-3 Quality, minimum section and maximum length of cables • The cable connected to the output terminals of the generator must be selected in accordance with local regulations. The type of cable must be determined by its rated voltage and current, current carrying capacity, installation conditions, stress and ambient temperature. -
Page 33: Connecting The Load
3-2-4 Connecting the load 1. Check whether frequency, voltage and current conform with the ratings of the generator. 2. Install for the load cable, without excessive length, and lay it out in a safe way without forming coils. 3. In case of single-phase load, engage the specified plugs with the specified receptacles (Fig. 8). 70ESEI 125ESEI 1. -
Page 34: Before Starting
5. When connecting output terminals (See Fig. 9.) • Remove the protection cover of output terminals. • Loosen the cable clamp and push the wire ends of the load cable through the clamp and rubber cover. • Connect the wires to the proper terminals: L1/L2/L3/PE, and if required N, for 3-phase load N/L1, N/L2, N/L3 and PE for single-phase load •... - Page 35 3. Checking the fan belt tension • Check the fan belt tension and elongation. By a thumb, depress (approx. 6kg) the middle point of the belt. The deflection must be 10-15 mm. At the same time, check whether the belt is scratched or not.
-
Page 36: Instruction For Fuel Source Changeover Device (Three-Way Valve)
3-3-2 Instruction for Fuel Source Changeover Device (Three-Way valve) (1) Setting Procedure for Separate Tank ① When the machine is shipped from factory, the three way valve is sets as shown in the Fig.10. In the case that fuel source is the mounted fuel tank, run the machine without changing the setting of the piping and valve lever. - Page 37 2. Make sure that the engine warning lamps is extinguished. If alight, stop the engine, check the item for which it is alight and eliminate the cause. • Check the engine indicator for normal readings. 3. Check whether the frequency meter read as shown below or not. Frequency 50-Hz operation 52.5 Hz...
-
Page 38: During Operation
3-5 During operation 1. Periodically check that • Indications of the engine monitor, indicator lamps and meters are normal. • Oil, fuel and cooling water do not spill. • The engine exhaust color is normal. There are no unusual sound and vibration. •... - Page 39 Table of protection device turn OFF indicate by action stop the the circuit warning function warning engine breaker lamp – – set point: 130kPa ※ oil pressure failure (OIL PRESS.) set point: 98.1kPa(70ESEI) – stop set point: 100kPa(125ESEI) set point: 98.1kPa(180ESEI) high jacket water –...
-
Page 40: Remote Control
4. REMOTE CONTROL 4-1 Outline of the operation This machine is equipped with remote function so as to start and stop by the external signals. 4-2 Indications and operation device This machine is equipped with “ LOCAL-REMOTE CHANGE-OVER SWITCH “ and “TERMINAL BLOCK ”... -
Page 41: Stopping
4-4-3 Stopping (1) Stop-signal ( OFF ) is sent from external devices. (2) The engine will stop, and it will confirm stop-condition for T4 sec. If the engine cannot stop by the stop-signal, or if you need to stop the engine during remote operation, turn the LOCAL-REMOTE CHANGE-OVER SWITCH to “... -
Page 42: Fault Diagnosis
(1) In case of shutdown due to action of engine protective devices, turn the starter switch “ OFF ” position to reset these protective devices. When making inspection and remedy on defected part, close the fuel cock, and disconnected the battery cable on negative side of this machine for safety sake. (2) The engine cannot start immediately after the engine stop due to the engine stop confirmation time ( for T4 sec. -
Page 43: Attached Time Chart
4-8 Attached time chart T1 : Preheating time T2 : Cranking time T4 : Stopping time - 40 -... -
Page 44: Fuel, Coolant And Lubricants
5. FUEL, COOLANT AND LUBRICANTS Engine oil selection: For engine oil, use API grade : CD, CE, CF, CF-4, CH-4, CI-4, CI-4 plus or ACEA grade : A3/B3, A3/B4, A5/B5, E2, E3, E4, E5, E7 or JASO grade : DH-1. The brands/types of oil described ISUZU’s instruction manual can be used regardless of specified API or ACEA grade above. - Page 45 This machine is designed to use either Number 1-D or Number 2-D diesel fuel. However, for better fuel economy, use Number 2-D diesel fuel whenever possible. At temperatures less than -7℃, (20 F), Number 2-D fuel may pose operating problems ( see “Cold Weather Operation”...
-
Page 46: Periodic Checkup And Maintenance
6. PERIODIC CHECKUP AND MAINTENANCE 6-1 Safety precautions for periodic checkup and maintenance WARNING • Before checking or maintaining the machine, stop the engine, wait for it to cool down and remove all loads from the machine. Make sure that the machine would not accidentally start. Otherwise, you might be dead or injured by electric shock, burn, catching of hand or clothing, etc. -
Page 47: Periodic Chechup
• Use only the correct tools for maintenance and repair work. After checkup or maintenance, carry out a test run to make sure that the generator, controls, circuit breakers, etc. operate properly. The periodic checkup and maintenance are outlined. Read the relevant section beforehand. -
Page 48: Checking/Every 250 Hours
6-2-2 Checking/every 250 hours (1) Cleaning of air cleaner element This element should be cleaned, regardless of operating time, when the warning lamp of “Air filter blinding” goes on. - Dry dust clings on element - Remove the air cleaner element and clean the element with dry and clean compressed air. -
Page 49: Checking/Every 500 Hours
In determining the specific gravity at a temperature other than 20℃, use the following formula: = St + 0,0007 (t-20) where S : is the calculated specific gravity at 20 ℃ . : is the measured specific gravity : is the battery solution temperature reading. 6-2-3 Checking/every 500 hours Checking/every 250 hours is also required. - Page 50 (4) Replacement of PCV filter element (only 180ESEI) ① Wipe clean around the PCV filter cap taking care so that no foreign particles entry. Remove the PCV filter cap. ② Remove the PCV filter element. ③ Install the new PCV filter element. ④...
-
Page 51: Checking/Every 1000 Hours
(7) Cleaning electromagnetic pump filter Clean up the Fuel Filter Element located into the Fuel Pump, or replace it to new one. Parts number of fuel filter element located into the fuel pump: Model name Parts number Manufacture Parts number of manufacture DCA-70,125,180ESEI Y06020 42517 ISUZU... -
Page 52: Table Of Periodical Maintenance And Checking
6-2-5 Table of periodical maintenance and checking : Check or Clean : Replacement : Remove 〇 ● List of maintenance and inspection daily every every every every 250h 500h 1000h 2 year Checking on oil level and stain of oil ◇... -
Page 53: Troubleshooting
7. TROUBLESHOOTING - 50 -... -
Page 54: Principal Date
8. PRINCIPAL DATA 8-1 Readings on gauges Marking Reading Unit Engine speed 1500 Hour meter Adding up Engine temperature below 95 °C Engine oil pressure Between 2 and 5 x100kPa Battery charging voltage more than 12.5 (70, 125ESEI) 26.0 (180ESEI) Frequency Load current Below max. -
Page 55: General Specifications
8-5 General specifications DCA type 1. Engine Isuzu, type 4JJ1 4HK1 6HK1 No-load speed (50Hz), approx………….min 1575 Load speed (50Hz), approx……………..min 1500 Electrical system……………………………..V Batteries: • Number • Voltage……………………………..……..V • Capacity…………………………………..Ah Oil circuit capacity…………………………..ℓ 17.0 23.0 40.5 Cooling circuit capacity……………………...ℓ 11.8 20.2 27.8... -
Page 56: Conversion List Of Si Units Into Uk/Us Units
DCA type Insulation………………………………..Class Insulation armature winding class…………..Insulation field winding, class……………...…. Sensitivity of residual current relay……….mA Maximum diffusion resistance of earthing rod……………………………..Ω Setting of main circuit breaker………………A 3. Unit Length, approx…………………………..…mm 2400 3100 3500 Width, approx…………………………...….mm 1000 1140 1200 Height, approx…………………………...…mm 1550 1650 1700...
Need help?
Do you have a question about the DCA Series and is the answer not in the manual?
Questions and answers