Table of Contents
Advertisement
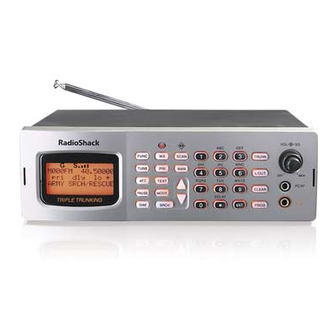
Thank you for purchasing your Triple Trunking Mobile / Base Radio
Scanner from RadioShack. Your scanner scans conventional frequencies
and trunked systems. Please read this user's guide before installing,
setting up and using your new scanner.
What's Included
Scanner
Mounting bracket
Lockwasher (2)
AC adapter
Preprogrammed Frequency Addendum
Triple Trunking
Mobile / Base Radio Scanner
Antenna
DIN sleeve and keys (2)
Rubber feet (3)
DC cable with fuse
www.RadioShack.com
Screw (2)
Rubber washer (2)
Knob (2)
User's Guide
20-163
Advertisement
Table of Contents

Related Manuals for Radio Shack 20-163


Summary of Contents for Radio Shack 20-163
- Page 1 20-163 Triple Trunking Mobile / Base Radio Scanner Thank you for purchasing your Triple Trunking Mobile / Base Radio Scanner from RadioShack. Your scanner scans conventional frequencies and trunked systems. Please read this user’s guide before installing, setting up and using your new scanner.
-
Page 2: Table Of Contents
ontents Contents Scanner Features ..................4 Monitoring ....................34 Scanner Display..................6 Trunking Setup ..................35 Installing Your Scanner................8 Defining a Trunking Bank ................35 Setting Up a Mobile Base .................8 Trunking Modes ..................35 Bracket Mounting ..................8 Motorola Trunking Setup ................36 Dashboard Installation ................9 Fleet Maps....................36 Connecting the Antenna.................10 Base and Offset Frequencies..............38 Powering Your Scanner ................11... -
Page 3: Scanner Features
Scanner Features Scanner Features Scanner Features Mounting bracket DIN sleeve and keys (2) 1-9 / A-Z – Numbers TRUNK – Accesses Squelch and letters. Zero enters trunking functions. special characters. VOLUME L/OUT – Locks out / OFF • /DELAY – Decimal channels, frequencies, point, space, delay or Talk Group IDs. -
Page 4: Scanner Display
Scanner Features Scanner Features Bank Channel Receive Mode Receiving 0 - 9 00 - 99 AM, FM, CT, DC, Frequency MO, ED DC 13.8V Connect power source. Scan mode Manual mode Program mode EXT SP Priority channel Connect an external speaker. -
Page 5: Installing Your Scanner
Installation Installation 1. Use the supplied mounting bracket as a template to mark Installing Your Scanner positions for the two mounting screws. You can mount your triple trunking scanner in your vehicle or use it 2. At the marked positions, drill holes slightly smaller than the as a base station. -
Page 6: Connecting The Antenna
Installation Installation To remove your scanner from the Powering Your Scanner DIN sleeve, insert the two keys You can power your scanner from a wall outlet, or from your straight into the scanner’s front vehicle’s battery. panel and pull the scanner out. Note: You must use a power source that supplies 12V DC and delivers at least 600 mA. -
Page 7: Vehicle (Power Socket)
Installation Installation Vehicle (Power Socket) Headphones and Speakers To power your scanner from a 12V power source in your vehicle, You can plug headphones or a speaker (neither included) into your such as a cigarette-lighter socket, you need a 12V, 600 mA DC scanner. -
Page 8: Keytones And Brightness
Installation Installation Keytones and Brightness Squelch and Attenuator Your scanner features a backlit keypad and display for easy viewing The squelch and attenuator control the scanner sensitivity. If you and sounds a tone each time you press a key. hear a hissing noise, the scanner will remain on the current channel. To set squelch: To set the keytone: 1. -
Page 9: Scanner Setup
Setup Setup Scanner Setup Defining a Channel Go to www.radioreference.com for the latest frequency references. A frequency, expressed in kHz or MHz, is the tuning location of a station. To define a channel: Your scanner saves frequencies to channels and groups the 1. -
Page 10: Copying A Frequency
Setup Setup To delete all saved frequencies in a bank: Copying a Frequency 1. Press PROG. changes to When you copy a frequency, all the channel conditions, including mode, are also copied. 2. Press FUNC. 3. Use the number keys to enter the bank number. “Bank ## To copy a frequency: selected. -
Page 11: Scanner Cloning
Setup Searching Scanner Cloning Searching You can transfer the programmed data to and from another PRO- You can search for transmissions using the preprogrammed search 163 or PRO-164 scanner using a connecting cable which has 1/8- bank, which is divided into eight search bands. inch (3.5mm) stereo (TRS) phone plugs on both ends (not supplied). -
Page 12: Zeromatic
Searching Searching SR3 to SR5 banks contain several groups. To turn off a group, Zeromatic press the group number; the group number disappears. To turn While searching, the scanner stops if a transmission triggers the the group back on, press the group number again. squelch setting. -
Page 13: Signal Stalker Ii
Searching Searching Note: If either entered frequency is incorrect, “Invalid 3. To turn off a bank, press the bank or group number while Signal Freq” appears briefly. Stalker II is active. 6. Press SRCH to start searching. 4. To turn off Signal Stalker, hold the Signal Stalker button ( again. -
Page 14: Saving Found Frequencies
Searching Searching Notes: Saving Found Frequencies • If you lock out all the frequencies in a search bank and only that To save a frequency found during a search: search bank is activated, “ All ranges Locked out!” appears 1. When the scanner stops on a frequency, press FUNC then and the scanner does not search. -
Page 15: Scanning
Scanning Scanning To review all locked out channels: Scanning 1. Press MAN. Scanning sequentially checks all saved channels for activity. You 2. Repeatedly pressing FUNC and then L/OUT to view each must save frequencies into channels to scan. The scanner does not locked-out channel. -
Page 16: Weather Alerts
Scanning Scanning 3. Press MAN. To program a weather channel into priority channel: 4. Press FUNC, then hold PRI until the display blinks. 1. Press WX. 2. Select the weather channel. To modify the Priority channel: 3. Press FUNC and then PRI. 1. -
Page 17: Skywarn
Scanning Scanning 6. Press ENT to store the code. Repeat this process to program 4. Hold ENT for about 2 seconds. The display indicates the type additional FIPS codes. of message, and the scanner sounds an alert or series of beeps. 7. -
Page 18: Monitoring
Scanning Trunking Setup Monitoring Trunking Setup When monitoring, the scanner remains on a single channel. Instead of transmitting on a specific frequency, trunking systems choose one of several frequencies during a 2-way radio Note: Your scanner features a power save circuit that allows transmission and simultaneously transmit a Talk Group ID that the scanner to “sleep”... -
Page 19: Motorola Trunking Setup
Trunking Setup Trunking Setup While scanning, “–” appears for Closed mode and “+” appears for 4. Press FUNC, then press 8. “Size Code Setting” appears, Open mode under the channel storage bank’s number. When the with Block 0 selected. scanner stops on a channel, ”OPEN”... -
Page 20: Base And Offset Frequencies
Trunking Setup Trunking Setup UHF-Hi (806-960 MHz) Base and Offset Frequencies To program 800 MHz Motorola trunking: To receive Motorola VHF and UHF system transmissions, you must 1. Press PROG then TRUNK to enter the ID program mode. program applicable base and offset frequencies. In the 800 MHz trunking band, you can select a base frequency (normal or offset), 2. -
Page 21: Ltr Trunking Setup
Trunking Setup Trunking Setup To search for Talk Group IDs: LTR Trunking Setup 1. Set the bank to Open mode. LTR systems assign each frequency a Home Repeater (HR) number and are frequently programmed with unique ID codes for each 2. -
Page 22: Deleting Talk Group Ids
Trunking Setup Trunking Setup 6. Use the number and decimal point keys to enter the Talk Group 4. Press FUNC then 6. “Clear entire list? Press 1 to clear all, any other key aborts” appears. For ED Talk Group IDs, you can enter either a decimal or AFS 5. -
Page 23: Trunk Scanning
Trunk Scanning Trunk Scanning To set a Talk Group ID delay: Trunk Scanning 1. Press FUNC then •/DELAY while you are programming the In each bank, you can mix conventional channels and frequencies Trunk Group ID. “ENTER key saves. 2.0 seconds” appears. -
Page 24: Turning Off Sub-Banks
Trunk Scanning Additional Information Turning Off Sub-Banks Additional Information To turn off a sub-bank: Scanner Maintenance 1. Press TRUNK repeatedly to select the desired sub-bank. • Handle the scanner carefully; do not drop it. 2. Press FUNC then 1 to turn the sub-bank on or off. •... -
Page 25: Troubleshooting
Additional Information Additional Information 3. To define a text tag for a bank: Troubleshooting • Press PROG. Issue Solution • Press FUNC then press bank number. “Bank X (0 through 9) selected” appears. The scanner does not Make sure the adaptor’s barrel plug is •... -
Page 26: Birdie Frequencies
Additional Information Additional Information 2. Start a search of every frequency range from its lowest Issue Solution frequency to the highest. When the search stops, often without The scanner does not scan. Turn SQ clockwise. any sound, this is a birdie. Cause: 3. -
Page 27: Service And Repair
Additional Information Additional Information In some areas, mobile use of this scanner is unlawful or requires a Service and Repair permit. Check the laws in your area. It is also illegal in many areas to If your scanner is not performing as it should, take it to your interfere with the duties of public safety officials by traveling to the local RadioShack store for assistance. -
Page 28: References
References References Search Bank: SR0 Marine Band; Receive Mode: FM References Freq. (MHz) Freq. (MHz) Freq. (MHz) Appendix A: Glossary 156.0500 157.0500 156.6250 Frequency – The signal (expressed in MHz) used by broadcasting 156.2500 157.1000 156.6750 radios. To find active frequencies, you can use frequency guides 156.3000 157.1500 156.7250... - Page 29 References References Search Bank: SR1 CB Band; Search Bank: SR2 FRS/GMRS/MURS Band Receive Mode: AM Receive Mode: FM, CT, or DC Freq. (MHz) Freq. (MHz) Freq. (MHz) Freq. (MHz) Freq. (MHz) Freq. (MHz) 26.9650 27.1350 27.2950 462.56250 467.68750 151.94000 26.9750 27.1550 27.3050 462.58750...
- Page 30 References References Search bank: SR3 Public Safety band Search bank: SR4 Aircraft Receive Mode: FM, CT, or DC Receive mode: AM, FM Freq. (MHz) Step (kHz) Freq. (MHz) Step (kHz) Group Frequency (MHz) Step (kHz) Group 0 Group 2 108.000-117.99166 8.33 33.420-33.980 453.0375-453.9625...
-
Page 31: Appendix C: Ctcss / Dcs Codes
References References Appendix C: CTCSS / DCS Codes Appendix D: Signal Stalker II Signal Stalker II can search the following bands: You can program any of the following codes: CTCSS Codes: All Band 67.0 Hz 94.8 Hz 131.8 Hz 171.3 Hz 203.5 Hz 69.3 Hz 97.4 Hz... -
Page 32: Appendix E: Talk Group Format
References References PubSafety Band Appendix E: Talk Group Format Motorola Freq. (MHz) Step (kHz) Freq. (MHz) Step (kHz) For Motorola Type I, enter the block number, fleet number and Group 0 Group 2 subfleet number. 33.420-33.980 453.0375-453.9625 6.25 37.020-37.420 458.0375-458.9625 6.25 Fleet No. -
Page 33: Appendix F: Specifications
References References 806.000-823.9875 MHz........... (in 12.5 kHz steps/FM) Appendix F: Specifications 849.000-868.9875 MHz........... (in 12.5 kHz steps/FM) Frequency Coverage: 894.000-939.9875 MHz........... (in 12.5 kHz steps/FM) 940.000-960.000 MHz..........(in 6.25 kHz steps/FM) 25.000-26.960 MHz............(in 10 kHz steps/AM) 1240.000-1300.000 MHz......... (in 6.25 kHz steps/FM) 26.965-27.405 MHz............(in 10 kHz steps/AM) 27.410-29.505 MHz............(in 5 kHz steps/AM) Memory Channels / Banks .............. -
Page 34: Index
References Index Selectivity: Index All AM and FM (except AM 25 – 27.995 MHz)....6 dB +/-8 kHz ..................-50 dB +/-17 kHz Alerts........................30 AM 25 – 27.995 MHz............-6 dB +/-4 kHz Antenna.....................10, 39, 49, 66 .................... -50 dB +/-6 kHz Attenuator..................... - Page 35 Index Index FCC Notice ......................53 Power ......................11, 49 FIPS Code ......................48 Power Save......................34 FIPS code ......................31 Priority Scanning ....................29 Fleet Maps ....................36, 37 Weather Channel...................... 30 Frequencies....................16, 54 Center (Zeromatic)....................23 SAME......................30, 31 Copying........................
- Page 36 Index Fleet Maps ........................ 36 Limited Warranty LTR ..........................40 Modes........................35 This product is warranted by RadioShack against manufacturing defects in material Motorola........................36 and workmanship under normal use for one (1) year from the date of purchase Saving Channels ....................... 43 from RadioShack company-owned stores and authorized RadioShack franchisees Setup .........................
- Page 37 Motorola, Smartnet, ASTRO and Privacy Plus are registered trademarks of Motorola Inc. EDACS is a registered trademark of M/A-COM Inc. LTR is a registered trademark of EF Johnson. 20-163 ©2008. RadioShack Corporation. Printed in China All rights reserved. RadioShack and RadioShack.com GE-07D-3260 are trademarks used by RadioShack Corporation.
Need help?
Do you have a question about the 20-163 and is the answer not in the manual?
Questions and answers