Table of Contents
Advertisement
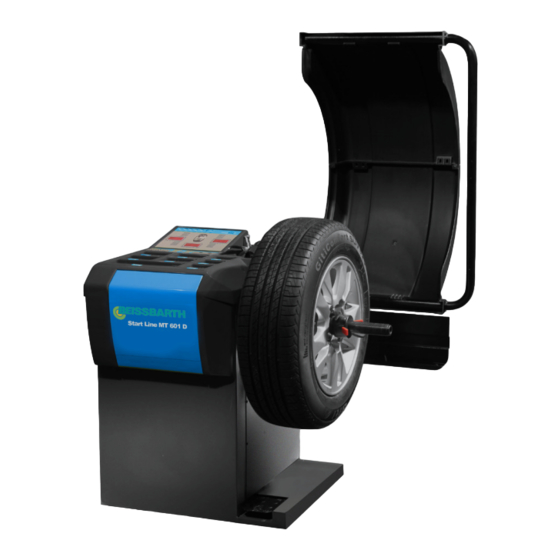
Start Line MT 601 D
de Originalbetriebsanleitung
Radauswuchtmaschine
es Manual original
Máquina de equilibrado de ruedas
en Original instructions
Wheel Balancing Machine
it Istruzioni originali
Equilibratrice per ruote
Radwuchtmaschinen
Wheel Balancers
fr Notice originale
Banc d'équilibrage de roues
pt Manual original
Máquina de balanceamento de rodas
Advertisement
Table of Contents

Subscribe to Our Youtube Channel
Related Manuals for Beissbarth Start Line MT 601 D


Summary of Contents for Beissbarth Start Line MT 601 D
- Page 1 Radwuchtmaschinen Wheel Balancers Start Line MT 601 D de Originalbetriebsanleitung en Original instructions fr Notice originale Radauswuchtmaschine Wheel Balancing Machine Banc d‘équilibrage de roues es Manual original it Istruzioni originali pt Manual original Máquina de equilibrado de ruedas Equilibratrice per ruote...
-
Page 3: Table Of Contents
| Start Line MT 601 D | 23 Contents English Symbols used Balancing the wheel In the documentation Occupied area 1.1.1 Warning notices - Measuring imbalance Structure and meaning Attaching balance weights 1.1.2 Symbols in this documentation 8.3.1 Standard procedures for clip-on weights... -
Page 4: Symbols Used
24 | Start Line MT 601 D | Symbols used Symbols used DANGER – Exposure of live parts on open- ing the MT 601 D! In the documentation Risk of (fatal) injury or heart failure from 1.1.1 Warning notices -... -
Page 5: User Information
User information | Start Line MT 601 D | 25 User information Product description Important notes Intended use Important information on copyright, liability and warran- The MT 601 D is a wheel balancing machine featuring ty provisions, as well as on equipment users and com-... -
Page 6: Device Description
26 | Start Line MT 601 D | Symbols used Device description Fig. 2: Product introduction Item Designation Function Display panel Display of measuring results Control panel Operation of the MT 601 D Shelf Shelf for balance weights and accessories. -
Page 7: Initial Commissioning
Initial commissioning | Start Line MT 601 D | 27 Initial commissioning Warning of damage or wrong lifting gear Risk of injury if MT 601 D falls. Unpack the MT 601 D ¶ Please check hoisting strap before attaching it. -
Page 8: Power Socket
28 | Start Line MT 601 D | Initial commissioning Power socket 2. Attaching the wheel-guard hood and hood bracket. MT 601 D must not be connected to the power supply unless its voltage is the same same as that specified on the rating plate. -
Page 9: Fitting And Removing Flange
Fitting and removing flange | Start Line MT 601 D | 29 Fitting and removing flange Fitting and removing wheel Fitting flange WARNING - wheel may slip! 1. Actuate pedal. Risk of crushing of fingers and other body Flange shaft blocked. -
Page 10: Clamping On Opposing Side
30 | Start Line MT 601 D | Initial commissioning 6.1.2 Clamping on opposing side 6.1.3 Clamping with special flange Choose opposing side for clamping if the wheel is The clamping method is suitable for wheels on badly distorted outside its central holder because... -
Page 11: Program Layout
Program layout | Start Line MT 601 D | 31 Program layout Control buttons Display Fig. 15: Control buttons No. Name Description Enter distance of wheel from MT 601 D by hand. R Arrow upwards, increase value, R Arrow downwards, reduce value. -
Page 12: Keystroke Combination For Changing Between Functions
32 | Start Line MT 601 D | Program layout Keystroke combination for changing Standard program for input of rim between functions data Keystroke combination Description Changing between grams and ounces Automatic start of measurement when closing the wheel-guard hood... - Page 13 Program layout | Start Line MT 601 D | 33 Automatic measurement of distance & diameter Manual input of rim data. 1. Retract the rim-distance gage until the gage head is 1. Pull rim-distance gage onto rim. close to the inner rim, and hold it there.
-
Page 14: Input Of Rim Data For Alus
34 | Start Line MT 601 D | Balancing the wheel Balancing the wheel Input of rim data for ALUS The type of input for tire data depends on the choice WARNING – Incorrectly balanced wheels! of balancing program. To balance a wheel success- Risk of injury due to change in handling charac- fully, please key in the following parameters. -
Page 15: Measuring Imbalance
Balancing the wheel | Start Line MT 601 D | 35 Measuring imbalance 8.3.2 ALUS balancing mode This measurement can be stopped at any time. The position of the adhesive balance weights is de- Press the stop button. termined by the automatic rim distance gage. -
Page 16: Attaching The Clip-On Weights
36 | Start Line MT 601 D | Balancing the wheel Attaching adhesive balance weights 7. Pull out the rim-distance gage. If window B displays "――口" and if the warning tone sounds, the point directly on the head of the rim-distance gage is the Remove all weights using adhesive balance weight balancing position. -
Page 17: Imbalance Minimization
Imbalance minimization | Start Line MT 601 D | 37 Imbalance minimization 10. Adjustment If great wheel imbalance is measured (e.g. static im- Operator error or other reasons may give rise to a balance greater than 50 g), it is advisable to perform fault or malfunction. -
Page 18: 11. Faults
38 | Start Line MT 601 D | Faults 11. Faults If the error message persists, contact customer service. Other possible malfunctions are primarily of a technical nature and are to be checked and if necessary recti- fied by a qualified engineer. Please always contact the Customer Service of the dealer authorized to trade in Beissbarth-workshop equipment. -
Page 19: 12. Service
Service | Start Line MT 601 D | 39 12. Service 12.3 Self-calibration 12.1 Cleaning and Maintenance 12.3.1 Self-calibration of system 1. Press and hold down the C-key then, half a second Before cleaning and servicing, switch off the later, also press the T-key. The indicator panel dis- MT 601 D and disconnect mains plug. -
Page 20: Self-Inspection
40 | Start Line MT 601 D | Faults 12.4 Self-inspection Before maintenance on the pressure sensor, the ma- 1. Press T-key. Displays light up one after the other, chine must be powered down because the computer from left to right. After the system test of the LEDs, PCB may otherwise burn out during removal of the [ ][POS][ ] appears on the display screen. -
Page 21: 13. Decommissioning
Decommissioning | Start Line MT 601 D | 41 13. Decommissioning 14. Technical parameters 13.1 Temporary shutdown 14.1 MT 601 D In the event of lengthy periods of non-use: Function Specification ¶ Unplug the electrical connection. rotational speed 910 rpm 50 Hz 1100 rpm 60 Hz...
Need help?
Do you have a question about the Start Line MT 601 D and is the answer not in the manual?
Questions and answers