Advertisement
Table of Contents
Congratulations on the purchase of your new
800-558-1010
Congratulations on the purchase of your new
Congratulations on the purchase of your new
www.NBF.com
Congratulations on the purchase of your new
PARTS
Congratulations on the purchase of your new
Congratulations on the purchase of your new
Congratulations on the purchase of your new
PARTS
PARTS
PARTS
PARTS
PARTS
PARTS
PARTS
PART A
BACK SET
CHAIR BACK
QTY: 1
QTY:1
BACK SET
BACK SET
QTY:1
QTY:1
SEAT SET
PART B
SEAT CUSHION
QTY:1
SEAT SET
QTY: 1
SEAT SET
QTY:1
QTY:1
ARM RESTS
PART C
QTY:2
ARM RESTS
ARMRESTS (L/R)
QTY: 2
ARM RESTS
QTY:2
QTY:2
SEAT LIFT
SEAT LIFT
QTY:1
PART D
SEAT LIFT
QTY:1
SEAT LIFT
QTY: 1
QTY:1
BASE
BASE
QTY:1
PART E
QTY:1
BASE
BASE
QTY: 1
QTY:1
CASTER
CASTER
QTY:5
PART F
QTY:5
CASTER
QTY: 5
CASTER
QTY:5
SCREWS
SCREWS
QTY:11
QTY:11
PART G
SCREW
SCREWS
QTY: 11
QTY:11
SPANNER
SPANNER
SPANNER
(SAVE FOR FUTURE
(SAVE FOR FUTURE
(SAVE FOR FUTURE
TIGHTENING)
(SAVE FOR FUTURE
TIGHTENING)
TIGHTENING)
(SAVE FOR FUTURE
TIGHTENING)
SPANNER
(SAVE FOR FUTURE
(SAVE FOR FUTURE
CUSTOMER SERVICE HOTLINE
TIGHTENING)
CUSTOMER SERVICE HOTLINE
CUSTOMER SERVICE HOTLINE
800-626-6060
CUSTOMER SERVICE HOTLINE
800-626-6060
800-626-6060
CUSTOMER SERVICE HOTLINE
800-626-6060
CUSTOMER SERVICE HOTLINE
800-626-6060
CUSTOMER SERVICE HOTLINE
800-626-6060
CUSTOMER SERVICE HOTLINE
800-626-6060
800-626-6060
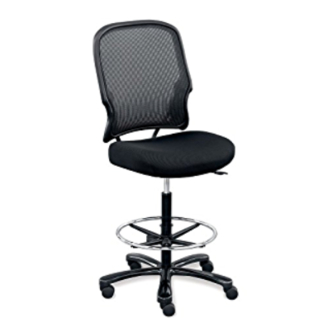
Congratulations on the purchase of your new Signature Series chair!
INSTRUCTIONS
INSTRUCTIONS
INSTRUCTIONS
INSTRUCTIONS
Remove all parts from carton and verify part quantities as indicated on parts list.
Remove all parts from carton and verify part quantities as indicated on parts list.
BACK SET
1
Remove all parts from carton and verify part quantities as indicated on parts list.
Remove all parts from carton and verify part quantities as indicated on parts list.
1
BACK SET
QTY:1
1
BACK SET
1
2
QTY:1
2
QTY:1
BACK SET
2
2
3
QTY:1
3
3
3
4
SEAT SET
4
4
5
4
SEAT SET
QTY:1
SEAT SET
5
QTY:1
5
QTY:1
Attention:MAKE SURE ALL SCREWS ARE FULLY TIGHTENED BEFORE USING CHAIR.
5
SEAT SET
Attention:MAKE SURE ALL SCREWS ARE FULLY TIGHTENED BEFORE USING CHAIR.
QTY:1
Attention:MAKE SURE ALL SCREWS ARE FULLY TIGHTENED BEFORE USING CHAIR.
1
Attention: MAKE SURE ALL SCREWS ARE FULLY TIGHTENED BEFORE USING CHAIR.
1
ARM RESTS
1
ARM RESTS
QTY:2
1
ARM RESTS
QTY:2
QTY:2
ARM RESTS
QTY:2
SEAT LIFT
SEAT LIFT
QTY:1
SEAT LIFT
QTY:1
3
QTY:1
SEAT LIFT
3
3
QTY:1
3
BASE
BASE
QTY:1
BASE
QTY:1
QTY:1
BASE
QTY:1
CASTER
5
5
CASTER
5
QTY:5
CASTER
QTY:5
QTY:5
C
CASTER
5
QTY:5
G (Qty 6)
SCREWS
SCREWS
QTY:11
SCREWS
QTY:11
QTY:11
SCREWS
Warnings
Warnings
QTY:11
1.This product should be only one person at a time.
1.This product should be only one person at a time.
Warnings
2.Do not use the chair unless all screws are securely tightened.
2.Do not use the chair unless all screws are securely tightened.
SPANNER
1. This product should be used by only one person at a time.
3.Check that all screws are tight every three months or as needed.
3.Check that all screws are tight every three months or as needed.
SPANNER
Warnings
2. Do not use this chair unless all bolts, screws and knobs are securely tightened.
SPANNER
4.Dispose of packing material properly.Do not use the plastic cover as
4.Dispose of packing material properly.Do not use the plastic cover as
3. Save spanner wrench. Check that all bolts, screws and knobs are tight every three months or as needed.
1.This product should be only one person at a time.
a head covering.It may cause suffocation.
a head covering.It may cause suffocation.
4. Dispose of packing material properly. Do not use the plastic cover as a head covering.
2.Do not use the chair unless all screws are securely tightened.
SPANNER
5.Do not use the chair as a stepladder.
5.Do not use the chair as a stepladder.
TIGHTENING)
It may cause suffocation.
TIGHTENING)
3.Check that all screws are tight every three months or as needed.
6.Use this chair for its intended purpose only.
6.Use this chair for its intended purpose only.
(SAVE FOR FUTURE
5. Do not use the chair as a stepladder. Use this chair for its intended purpose only.
4.Dispose of packing material properly.Do not use the plastic cover as
7.Use a soft cloth to clean the chair.Do not use water or chemicals on the
7.Use a soft cloth to clean the chair.Do not use water or chemicals on the
TIGHTENING)
a head covering.It may cause suffocation.
aluminum parts.
aluminum parts.
5.Do not use the chair as a stepladder.
6.Use this chair for its intended purpose only.
7.Use a soft cloth to clean the chair.Do not use water or chemicals on the
aluminum parts.
A S S E M BL Y I N S T R U C T I O N
A S S E M B LY I N S T R U C T I O N S
A S S E M BL Y I N S T R U C T I O N
A S S E M BL Y I N S T R U C T I O N
A S S E M BL Y I N S T R U C T I O N
A S S E M BL Y I N S T R U C T I O N
A S S E M BL Y I N S T R U C T I O N
A S S E M BL Y I N S T R U C T I O N
INSTRUCTIONS
Signature Series
INSTRUCTIONS
INSTRUCTIONS
Remove all parts from carton and verify part quantities as indicated on parts list.
INSTRUCTIONS
Remove all parts from carton and verify part quantities as indicated on parts list.
1
Insert the caster into the hole at the bottom of the five star base
Remove all parts from carton and verify part quantities as indicated on parts list.
1
Insert the caster into the hole at the bottom of the five star base
Insert the caster into the hole at the bottom of the five star base
1
Insert the caster into the hole at the bottom of the five star base
2
Insert the the bottom end of the seat lift into the center hole of the base
Remove all parts from carton and verify part quantities as indicated on parts list.
Insert the caster into the hole at the bottom of the five star base
2
Insert the caster into the hole at the bottom of the five star base
Insert the the bottom end of the seat lift into the center hole of the base
Insert the the bottom end of the seat lift into the center hole of the base
1
Insert the caster into the hole at the bottom of the five star base
2
Insert the the bottom end of the seat lift into the center hole of the base
3
Connect the back set and seat set as photo shown,keep the hole of back set,aligned
Insert the bottom end of the seat lift (D) into the center hole of the base (E).
with the hole of seat set.Then fixed back set and seat set with five screws by spanner
Insert the the bottom end of the seat lift into the center hole of the base
Insert the the bottom end of the seat lift into the center hole of the base
3
Connect the back set and seat set as photo shown,keep the hole of back set,aligned
Connect the back set and seat set as photo shown,keep the hole of back set,aligned
2
Insert the the bottom end of the seat lift into the center hole of the base
3
Connect the back set and seat set as photo shown,keep the hole of back set,aligned
with the hole of seat set.Then fixed back set and seat set with five screws by spanner
with the hole of seat set.Then fixed back set and seat set with five screws by spanner
Connect the chair back (A) and seat cushion (B) as shown, aligning the hole in the seat back
4
with the hole of seat set.Then fixed back set and seat set with five screws by spanner
Place the chair body onto the small end of the seat lift
Connect the back set and seat set as photo shown,keep the hole of back set,aligned
Connect the back set and seat set as photo shown,keep the hole of back set,aligned
with the hole in the seat cushion. Using the spanner, connect the seat back to the seat
3
Connect the back set and seat set as photo shown,keep the hole of back set,aligned
with the hole of seat set.Then fixed back set and seat set with five screws by spanner
Place the chair body onto the small end of the seat lift
with the hole of seat set.Then fixed back set and seat set with five screws by spanner
4
Place the chair body onto the small end of the seat lift
4
Place the chair body onto the small end of the seat lift
with the hole of seat set.Then fixed back set and seat set with five screws by spanner
5
Insert armrests into holes located at both sides of the seat.Insert six screws into
Place the chair body onto the small end of the seat lift
Place the chair body onto the small end of the seat lift
the holes from the underside of the seat.Wrench it with spanner.
Insert armrests into holes located at both sides of the seat.Insert six screws into
5
Insert armrests into holes located at both sides of the seat.Insert six screws into
4
Place the chair body onto the small end of the seat lift
5
the holes from the underside of the seat.Wrench it with spanner.
Place the chair body onto the small end of the seat lift (D)
Insert armrests into holes located at both sides of the seat.Insert six screws into
the holes from the underside of the seat.Wrench it with spanner.
Attention:MAKE SURE ALL SCREWS ARE FULLY TIGHTENED BEFORE USING CHAIR.
Insert armrests into holes located at both sides of the seat.Insert six screws into
the holes from the underside of the seat.Wrench it with spanner.
Insert armrests into holes located at both sides of the seat.Insert six screws into
the holes from the underside of the seat.Wrench it with spanner.
Attention:MAKE SURE ALL SCREWS ARE FULLY TIGHTENED BEFORE USING CHAIR.
5
Insert armrests into holes located at both sides of the seat.Insert six screws into
Insert armrests (C) into holes located at sides of seat. Insert six screws into the holes from the
the holes from the underside of the seat.Wrench it with spanner.
Attention:MAKE SURE ALL SCREWS ARE FULLY TIGHTENED BEFORE USING CHAIR.
the holes from the underside of the seat.Wrench it with spanner.
underside of the seat. Tighten screws (G) with spanner.
1
Attention:MAKE SURE ALL SCREWS ARE FULLY TIGHTENED BEFORE USING CHAIR.
1
1
1
E
x5
x5
x5
F
3
3
3
3
A
B
E
G (Qty 5)
5
A
5
5
C
5
B
D
E
Warnings
1.This product should be only one person at a time.
Warnings
Warnings
2.Do not use the chair unless all screws are securely tightened.
1.This product should be only one person at a time.
1.This product should be only one person at a time.
3.Check that all screws are tight every three months or as needed.
2.Do not use the chair unless all screws are securely tightened.
Warnings
2.Do not use the chair unless all screws are securely tightened.
4.Dispose of packing material properly.Do not use the plastic cover as
3.Check that all screws are tight every three months or as needed.
1.This product should be only one person at a time.
3.Check that all screws are tight every three months or as needed.
a head covering.It may cause suffocation.
4.Dispose of packing material properly.Do not use the plastic cover as
2.Do not use the chair unless all screws are securely tightened.
4.Dispose of packing material properly.Do not use the plastic cover as
5.Do not use the chair as a stepladder.
a head covering.It may cause suffocation.
3.Check that all screws are tight every three months or as needed.
a head covering.It may cause suffocation.
6.Use this chair for its intended purpose only.
5.Do not use the chair as a stepladder.
4.Dispose of packing material properly.Do not use the plastic cover as
5.Do not use the chair as a stepladder.
7.Use a soft cloth to clean the chair.Do not use water or chemicals on the
6.Use this chair for its intended purpose only.
a head covering.It may cause suffocation.
6.Use this chair for its intended purpose only.
aluminum parts.
7.Use a soft cloth to clean the chair.Do not use water or chemicals on the
W W W. N B F. C O M
5.Do not use the chair as a stepladder.
7.Use a soft cloth to clean the chair.Do not use water or chemicals on the
aluminum parts.
6.Use this chair for its intended purpose only.
aluminum parts.
7.Use a soft cloth to clean the chair.Do not use water or chemicals on the
aluminum parts.
A R R I S C H A I
A R R I S C H A I
A R R I S C H A I
A R R I S C H A I
A R R I S C H A I
S
A R R I S C H A I
A R R I S C H A I
S
Signature Series
S
Signature Series
Signature Series
chair!
Signature Series
Signature Series
chair!
Signature Series
chair!
2
2
2
2
2
2
2
2
x5
x5
x5
x5
4
4
4
4
4
4
4
4
R
C
C H A I R
2
R
S
R
R
S
R
S
R
R
chair!
S
chair!
chair!
chair!
D
A
B
D
E
Advertisement
Table of Contents

Related Manuals for nbf Signature Series


Summary of Contents for nbf Signature Series
- Page 1 A S S E M BL Y I N S T R U C T I O N Congratulations on the purchase of your new Signature Series chair! Congratulations on the purchase of your new Signature Series chair! Congratulations on the purchase of your new Signature Series chair! www.NBF.com...
- Page 2 A S S E M BL Y I N S T R U C T I O Congratulations on the purchase of your new Signature Series C H A I R E R G O N O M I C F E AT U R E S...
Need help?
Do you have a question about the Signature Series and is the answer not in the manual?
Questions and answers