AFN AFN7500HD User Manual
Hide thumbs
Also See for AFN7500HD:
- Settings and channel manual (8 pages) ,
- Manual (7 pages) ,
- Settings manual (6 pages)
Table of Contents
Advertisement
Advertisement
Table of Contents
Troubleshooting

Related Manuals for AFN AFN7500HD


Summary of Contents for AFN AFN7500HD
- Page 1 AFN7500HD USER MANUAL v1.9.4_9_19...
- Page 2 AFN7500HD User Guide Safety Precautions CAUTION: The lightning flash symbol, within an Warning: The exclamation point within an equilateral triangle, is intended to alert the equilateral triangle is intended to alert the To reduce the risk of electric shock, don’t...
- Page 3 AFN7500HD User Guide by turning the equipment off and on, the user is encouraged to try to correct the interference by one or more of the following measure: 1. Increase the separation between the equipment and receiver. WARNING: The Decoder should not be exposed to dripping or splashed liquids.
- Page 4 AFN7500HD User Guide Power Cord Protection: Place the power supply cord out of the way, where it will not be walked on. Please take special attentions to cords at plugs, convenience receptacles and the point where they exit from the unit.
- Page 5 AFN7500HD User Guide Table of Contents Safety Precautions ........................1 Start Here ............................ 6 Unit and Remote Control Hardware ..................7 Decoder Front Panel ..................7 Decoder Rear Panel ................... 8 Remote Control ....................9 Initial Setup ..........................10 Basic Operations ........................15 Standby and On Modes ..................
- Page 6 AFN7500HD User Guide Getting to Know the Menu ...................... 30 Guide ......................... 30 Library ....................... 32 Live TV ....................... 35 Search ....................... 42 Settings ......................45 Parental Control ................................46 User ....................................61 Installation ..................................70 CA (Conditional Access) ............................... 78 Time ....................................
- Page 7 Your AFN7500HD decoder must be registered and activated prior to use. Register at the “Manage My Decoder” link on http://www.myafn.net More Info? Visit http://www.myafn.net, refer to the AFN Info section for the latest help, manuals, fact sheets, and other useful tips Items in the Decoder Box...
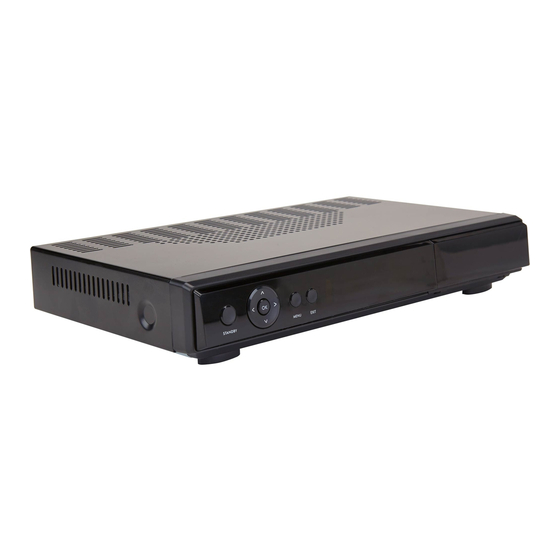
- Page 8 AFN7500HD User Guide Unit and Remote Control Hardware Decoder Front Panel...
- Page 9 AFN7500HD User Guide Decoder Rear Panel Notes: Connect your satellite antenna to ‘LNB In A’. There is currently no reason to connect to “LNB In B’. HDMI provides the best quality output to your television. The USB port is only used for manual firmware upgrades, and cannot be used for additional DVR storage.
- Page 10 AFN7500HD User Guide Remote Control Currently, the Green, Yellow, and Blue buttons next to the Red REC button are not being used for any functions.
- Page 11 United States, European, and United Kingdom wall-mounted power outlets. Next, you’ll need to set up the decoder to acquire the AFN satellite signal using the circular navigation wheel on your decoder’s remote control. The main buttons you’ll use on the remote control are identified below.
- Page 12 AFN7500HD User Guide The first screen you’ll see allows you to select your time zone. A map of all time zones linked to UTC can be found at https://www.timeanddate.com/time/map/...
- Page 13 AFN7500HD User Guide Next, you need to select the correct satellite. The latest decoder settings guides for each satellite AFN uses to deliver content worldwide are available for download at http://www.myafn.net/. At the time of updating this User Guide, this information is also included on page 71 of this manual.
- Page 14 AFN7500HD User Guide From here, you’ll be taken to a progress bar screen. Once the scan is complete, you will then be notified how many services were found.
- Page 15 AFN7500HD User Guide The number of services found will depend on your location and satellite/transponder. If no services are found, please contact the AFN Helpdesk at (951) 413-2339, DSN (312) 348-1339, or via email at sathelpdma@mail.mil for assistance troubleshooting problems you may encounter.
- Page 16 AFN7500HD User Guide Basic Operations Standby and On Modes Your Decoder has four power modes: 1. Standby and Sleep mode: turns off the HDMI, CVBS, and audio outputs. It also disables the remote functions except for the power on and off. The red standby LED illuminates and the LED displays the current time. Internally the 7500 continues to process the signals and all pertinent data processing, including scheduled recordings.
- Page 17 AFN7500HD User Guide Watching and Recording Live TV To watch live TV, press [EXIT] while in any menu. Viewing Program Information While watching a program, press [INFO] to open the information bar. This bar will show the current channel number, the channel ID, the title of the current and next program on the channel, the program’s audio format, and duration of the program.
- Page 18 AFN7500HD User Guide Controlling Playback with Time Shift When watching live TV, pressing [PLAY/PAUSE ►II] will start Time Shift, which allows the user to pause the current program, buffering it to internal storage. This allows the user to control live content.
- Page 19 AFN7500HD User Guide Using the Electronic Program Guide Your Decoder can read metadata from incoming signals, allowing it to generate an Electronic Program Guide (EPG) with detailed information about programs such as name, description, start and finish time, rating, and more. This information is provided live via your satellite connection.
- Page 20 AFN7500HD User Guide Setting a Reminder Press the ‘EPG’ button and navigate to the program you wish to set a reminder for. To select the program, press the [OK] button. On the following menu, select ‘Add Reminder’.
- Page 21 AFN7500HD User Guide Programs with Reminders set will show a bell icon in the upper right of the channel selection box; as seen in the image below.
- Page 22 AFN7500HD User Guide Cancel a Reminder Press the ‘EPG’ button and navigate to the program you wish to cancel a reminder for. To select the program, press the [OK] button. On the following menu, select ‘Cancel Reminder’.
- Page 23 AFN7500HD User Guide Recording Programs Recording a program being viewed Pushing [REC] on the remote during a program will record what is being viewed plus any buffer time. Recorded programs are viewable in the ‘Library’ section of the menu. Recording a program on another channel or future program Press the ‘EPG’...
- Page 24 AFN7500HD User Guide NOTE – Pushing [REC] on the remote while watching a program will cause the decoder to begin recording the live program from that point, provided a recorder is available. The “About to Start” message will display, shortly followed by the started message, shown below.
- Page 25 AFN7500HD User Guide Program Recording Started message...
- Page 26 AFN7500HD User Guide Timer Conflict Attempting to record a third program during the same time period will display the Timer Conflict message. This screen allows the viewer to select which of the three program recordings to cancel.
- Page 27 AFN7500HD User Guide Cancel a Recording Press the ‘EPG’ button and navigate to the program you want to cancel the recording for. To select the program, press the [OK] button.
- Page 28 AFN7500HD User Guide On the following menu, select ‘Cancel Record’.
- Page 29 AFN7500HD User Guide Favorites Figure 4: Favorites Window With your decoder, you can create custom lists of channels called favorites. When watching live TV, you can switch from complete channel list (All TV) to these Favorites to display only specific channels in your TV Channel List and EPG.
- Page 30 AFN7500HD User Guide The menu items are as follows: Create – Create new named lists of favorites All – Shows all favorites across all lists TV – Shows all TV favorites Radio – Shows all Radio favorites Your Lists – Any user created lists will appear following the above.
- Page 31 AFN7500HD User Guide Getting to Know the Menu Select the [Menu] button on the remote to access the menu. Guide Select the [Menu] button on the remote to access the menu and use the [▲/▼] to navigate to ‘Guide’ and press the [OK] button to select.
- Page 32 AFN7500HD User Guide Use the up, down, left, and right arrows to view the program guide. For more information see the Electronic Programming Guide section of this User Guide.
- Page 33 AFN7500HD User Guide Library Select the [Menu] button on the remote to access the menu and use the [▲/▼] to navigate to ‘Library’ and press the [OK] button to select.
- Page 34 AFN7500HD User Guide Navigate to the program in the Library you wish to access and press the [OK] button.
- Page 35 AFN7500HD User Guide On the following menu, you can choose to either ‘Play’ the selected content or ‘Delete’ it. There is also an option to “Resume playback”. If you choose to delete, a confirmation screen will appear to ensure that no content is accidentally deleted.
- Page 36 AFN7500HD User Guide Live TV Select the [Menu] button on the remote to access the menu and use the [▲/▼] to navigate to ‘Live TV’ and press the [OK] button to select. The ‘Live TV’ section of the menu functions as both a path to the live satellite feed and as a program guide that is limited to live...
- Page 37 AFN7500HD User Guide Press the [OK] button to show a listing of live programs.
- Page 38 AFN7500HD User Guide Navigate to a channel and press [OK] to show a channel specific program guide.
- Page 39 AFN7500HD User Guide Select any of the listed programs and press [OK] to show a synopsis along with the option to ‘Watch’ or ‘Record’ the program. If a program is set to record, the ‘Record’ option will be replaced by a ‘Stop Recording’...
- Page 40 AFN7500HD User Guide Before a program starts recording, information will appear to notify the viewer.
- Page 41 AFN7500HD User Guide An Information screen will pop up when the recording starts.
- Page 42 AFN7500HD User Guide Likewise, another overlay will appear when a program has ended recording.
- Page 43 AFN7500HD User Guide Search Select the [Menu] button on the remote to access the menu and use the [▲/▼] to navigate to ‘Search’ and press the [OK] button to select.
- Page 44 AFN7500HD User Guide The search function allows users to search the ‘EPG’, the ‘Library’, or ‘Both’.
- Page 45 AFN7500HD User Guide Select your area of search and press the [OK] button. This will reveal a search menu with a keyboard. Use the keyboard to input your search words and press the ‘Enter’ key on the bottom right of the displayed keyboard.
- Page 46 AFN7500HD User Guide Settings Select the [Menu] button on the remote to access the menu and use the [▲/▼] to navigate to ‘Settings’ and press the [OK] button to select. The following subsections outline the various submenus under the ‘Settings’ menu.
- Page 47 AFN7500HD User Guide Parental Control The Parental Control settings can be found under [Menu] > ‘Settings’ > ‘Parental Control’. The ‘Parental Control’ setting allows a PIN to be set on specified channels in order to view them.
- Page 48 AFN7500HD User Guide There are three submenus under ‘Parental Control’: ‘Channel Lock’, ‘Choose Locked Channels’, and ‘Change PIN’.
- Page 49 AFN7500HD User Guide Channel Lock The ‘Channel Lock’ submenu is used to turn the Parental Controls on or off. If you want to utilize parental controls then ensure Channel Lock is first set to ‘On’.
- Page 50 AFN7500HD User Guide Choose Locked Channels The ‘Choose Locked Channels’ submenu shows a listing of all available channels. Select any channels you wish to lock and press the [OK] button. They must be selected one at a time.
- Page 51 AFN7500HD User Guide Adult Lock ‘Adult Lock’ allows the user to select a rating to be blocked. To block by VCHIP ratings, enter the main menu, select Settings -->Parental Control-->Adult Lock. A list of ratings will appear to choose from, including Off. See the three additional Adult Lock screenshots with "off", "TV-Y7"...
- Page 52 AFN7500HD User Guide Adult Lock Off...
- Page 53 AFN7500HD User Guide Adult Lock TV-Y7...
- Page 54 AFN7500HD User Guide Adult Lock TV-Y7 Checked If a viewer selects a locked program, the "Locked Press OK to disable" screen will appear. If they press OK, the Adult Lock Enter PIN will appear. After entering the PIN code, the program will appear.
- Page 55 AFN7500HD User Guide Locked Press - OK to Disable...
- Page 56 AFN7500HD User Guide Adult Lock Enter PIN...
- Page 57 AFN7500HD User Guide Block Not-Rated Events The ‘Block Not-Rated Events’ options allow the user to block events that are not rated. Many programs, which may contain material deemed questionable by some parents, may not contain embedded VCHIP ratings. This option allows parents to block all programs with no VCHIP ratings if they wish to do so.
- Page 58 AFN7500HD User Guide Block Not-Rated Events On/Off...
- Page 59 AFN7500HD User Guide Select Block Not-Rated Events...
- Page 60 AFN7500HD User Guide Change PIN The ‘Change PIN’ submenu can be used to set a new PIN for the Parental Controls.
- Page 61 AFN7500HD User Guide Prompts will appear to enter the new PIN and confirm it. Warning - if you forget your PIN, you will have to do a factory reset to clear.
- Page 62 AFN7500HD User Guide User The User settings can be found under [Menu] > ‘Settings’ > ‘User’. The ‘User’ menu can be used to adjust the audio and video settings for the AFN Decoder.
- Page 63 AFN7500HD User Guide The following submenus are available: ‘Resolution’, ‘Aspect Ratio’, ‘Aspect Conversion’, ‘Infobar Timeout’, and ‘Digital Audio’.
- Page 64 AFN7500HD User Guide Resolution The Resolution settings can be found under [Menu] > ‘Settings’ > ‘User’ > ‘Resolutions’. The ‘Resolution’ submenu allows the user to specify the preferred resolution they would like to receive. This should match the best setting your Television allows, such as 1080p.
- Page 65 AFN7500HD User Guide Aspect Ratio The Aspect Ratio settings can be found under [Menu] > ‘Settings’ > ‘User’ > ‘Aspect Ratio’. The ‘Aspect Ratio’ submenu allows the user to specify either 4:3 (Legacy SD) or 16:9 (Standard HD and SD - Default) aspect ratio.
- Page 66 AFN7500HD User Guide Aspect Conversion The Aspect Conversion settings can be found under [Menu] > ‘Settings’ > ‘User’ > ‘Aspect Conversion’. The ‘Aspect Conversion’ submenu allows the user to specify how they want to handle the conversion of programs to the set ‘Aspect Ratio’.*...
- Page 67 AFN7500HD User Guide Infobar Timeout The Infobar Timeout settings can be found under [Menu] > ‘Settings’ > ‘User’ > ‘Infobar Timeout’. The ‘Infobar Timeout’ menu allows the user to set how many seconds it takes before the Infobar fades away when watching a program.
- Page 68 AFN7500HD User Guide The options are ‘5’, ‘7’, and ‘10’ seconds.
- Page 69 AFN7500HD User Guide Digital Audio The Digital Audio settings can be found under [Menu] > ‘Settings’ > ‘User’ > ‘Digital Audio’. The ‘Digital Audio’ submenu allows the user to specify the audio format(s) to use.
- Page 70 AFN7500HD User Guide ‘PCM’ will convert all audio to PCM. This will increase compatibility but may lower quality of audio. ‘RAW’ will pass-through the audio embedded in the program. Not all audio formats may be compatible with your TV or audio system.
- Page 71 AFN7500HD User Guide Installation The Installation settings can be found under [Menu] > ‘Settings’ > ‘Installation’. The ‘Installation’ submenu allows the user to set-up or align their AFN Decoder to the satellite.
- Page 72 The Satellite Setup settings can be found under [Menu] > ‘Settings’ > ‘Installation’ > ‘Satellite Setup’. The ‘Satellite Setup’ submenu can be used to connect the AFN Decoder to one of the supported Satellites. Warning, reconfiguring the Satellite could delete your current channel and favorites list.
- Page 73 AFN7500HD User Guide Next, you need to select the correct satellite. Decoder settings guides for each satellite AFN uses to deliver content worldwide are available for download at myafn.net. The list below is current as of June 2018 and is subject to change without notice.
- Page 74 AFN7500HD User Guide After the reset is complete, the new satellite list will update, and the initial screen install will appear. The Select Satellite screen: Your settings may vary depending on where you are located, and on which satellite you are connecting.
- Page 75 AFN7500HD User Guide NOTE - Satellite names appear in the following order on the STB selection: 1. AFN ATL E9B 2. DTS IOR IS906 3. DTS IOR NSS12 4. AFN PAC IS18 5. AFN ATL G16 6. AFN ATL SES5 7.
- Page 76 A progress bar will appear, followed by the number of Services found. Select ‘Continue’ to return to the menu. The Satellite should now be setup. Your actual settings may be different depending upon which satellite you’re using to obtain the AFN signal. Settings guides for all satellites are available on http://www.myafn.net/.
- Page 77 AFN7500HD User Guide Satellite Alignment The Satellite Alignment settings can be found under [Menu] > ‘Settings’ > ‘Installation’ > ‘Satellite Alignment’. The ‘Satellite Alignment’ submenu allows the user to check their alignment. This can be useful to determine cause if service is disrupted.
- Page 78 AFN7500HD User Guide As long as the meter is green and reads over 60, you have a good satellite signal. This does not necessarily mean you are on the AFN satellite. ‘Press [OK] in order to return to the previous menu.
- Page 79 AFN7500HD User Guide CA (Conditional Access) The CA settings can be found under [Menu] > ‘Settings’ > ‘CA’. The ‘CA’ submenu is where you can access the Conditional Access settings.
- Page 80 AFN7500HD User Guide Base Info Base Info can be found under [Menu] > ‘Settings’ > ‘CA’ > ‘Base Info’. This does not reference the base you are on or assigned to. It relates to the STB’s CA (Conditional Access) information.
- Page 81 AFN7500HD User Guide The ‘Base Info’ submenu shows the Smart Card No. and other information related to your Decoder.
- Page 82 AFN7500HD User Guide Purse Info Purse Info can be found under [Menu] > ‘Settings’ > ‘CA’ > ‘Purse Info’.
- Page 83 AFN7500HD User Guide The ‘Purse Info’ submenu is used to display the amount of available credit for purchasing PPV events. For AFN Decoders, no information will be found as it does not utilize this functionality.
- Page 84 AFN7500HD User Guide Time The time settings can be found under [Menu] > ‘Settings’ > ‘Time’. The ‘Time’ submenu allows the user to set the time parameters for their Decoder.
- Page 85 AFN7500HD User Guide The following submenus are available: ‘Timezone’, ‘Sleep Time’, ‘Auto Standby’, ‘Date Format’, ‘Time Format’.
- Page 86 AFN7500HD User Guide Timezone The Timezone settings can be found under [Menu] > ‘Settings’ > ‘Time’ > ‘Timezone’. The ‘Timezone’ submenu allows the user to select their timecode. A map of all time zones linked to UTC can be found at...
- Page 87 AFN7500HD User Guide Sleep Time The Sleep Time settings can be found under [Menu] > ‘Settings’ > ‘Time’ > ‘Sleep Time’. The ‘Sleep Time’ submenu allows the user to set a time period after which the Decoder will go to sleep if there has been no activity on...
- Page 88 AFN7500HD User Guide The options are ‘Off’ followed by 15 minute increments.
- Page 89 AFN7500HD User Guide Auto Standby The Auto Standby settings can be found under [Menu] > ‘Settings’ > ‘Time’ > ‘Auto Standby’. The ‘Auto Standby’ submenu allows the user to set the period of time after which the Decoder goes into Standby mode. Unlike sleep, in...
- Page 90 AFN7500HD User Guide The options are ‘Off’ followed by hour increments.
- Page 91 AFN7500HD User Guide Date Format The Date Format settings can be found under [Menu] > ‘Settings’ > ‘Time’ > ‘Date Format’. The ‘Date Format’ submenu is where the user can define the month, date, and year format that will be used throughout the system.
- Page 92 AFN7500HD User Guide Time Format The Time Format settings can be found under [Menu] > ‘Settings’ > ‘Time’ > ‘Time Format’. The ‘Time Format’ submenu allows the user to select between ‘12 hour’ and ‘24 hour’ time formats.
- Page 93 AFN7500HD User Guide System The System settings can be found under [Menu] > ‘Settings’ > ‘System’.
- Page 94 AFN7500HD User Guide The ‘System’ submenu is where ‘System Info’ can be viewed as well as options to reset the Decoder to ‘Factory Default’ and ‘Change PIN’ for the system PIN number.
- Page 95 AFN7500HD User Guide System Info The System Info can be found under [Menu] > ‘Settings’ > ‘System’ > ‘System Info’. The ‘System Info’ submenu is where all the information for the system such as model numbers and software versions can be viewed.
- Page 96 AFN7500HD User Guide Change PIN The Change PIN settings can be found under [Menu] > ‘Settings’ > ‘System’ > ‘Change PIN’. The ‘Change PIN’ submenu allows the user to change the system PIN that is used for various functions, such as setting up the Satellite.
- Page 97 AFN7500HD User Guide Factory Default The Factory Default settings can be found under [Menu] > ‘Settings’ > ‘System’ > ‘Factory Default’. The ‘Factory Default’ option allows the user to reset their Decoder to the default settings. The service list will be recreated, but the...
- Page 98 AFN7500HD User Guide Timers Select the [Menu] button on the remote to access the menu and use the [▲/▼] to navigate to ‘Timers’ and press the [OK] button to select.
- Page 99 AFN7500HD User Guide If no programs have set Reminders or Recordings, the menu will be empty.
- Page 100 AFN7500HD User Guide If Reminders or Recordings have been set, the programs will appear under the ‘Timers’ menu.
- Page 101 AFN7500HD User Guide From this menu, a Reminder can be deleted. Simply select the program and press the [OK] button. Then, on the following prompt, select ‘Delete’ and press the [OK] button.
- Page 102 AFN7500HD User Guide General Troubleshooting If you run into problems with the Decoder, use the procedures described below to troubleshoot your unit. Under any circumstances, do not open the Decoder cover, as it will void the warranty and could cause electrical shock.
- Page 103 AFN7500HD User Guide No picture The Decoder can’t receive the Check the cable, replace the cable, or signal. connect the cable to the Decoder tightly. Incorrect values of some tuner Set the values of tuner parameters parameters. correctly. Refer to the installation menu.
- Page 104 Solution(s): There is a 10-15 min delay (depending on key change cycle) where the decoder awaits its refresh key from the head end. It may take up to three cycles to receive correctly. Allow up to one hour to authorize. The decoder has not been authorized by AFN.
- Page 105 Initial Channel Scan - on some of the decoders, when doing the initial setup, even if the signal quality is strong (over 60), connect both coax inputs on the back of the AFN7500HD (using a Power Divider) just for the channel scan. Once it finds all the services, and goes...
- Page 106 Where can I find the AFN Channel Lineup or list of satellites? Visit http://www.myafn.net/, refer to the AFN Info section for the latest help, manuals, fact sheets, and other useful tips If I need support, what information do I need to provide? Be ready to provide the decoder serial and NSC ID number, software version number, and satellite settings for your STB.
- Page 107 DTS Atlantic – 7 total - 3 Video and 4 Radio When and how will features be added to the decoder? The AFN7500HD firmware may add new features and bug fixes with each release. New firmware versions will be automatically transmitted over the satellite (OTA).
- Page 108 AFN7500HD User Guide I am having problems recording and on screen it is displaying “No Space Available”. I have very few or no recordings, how do I fix? A Factory Reset should be performed fully (including power cycle) to eliminate this issue. See the previous question for instructions.
- Page 109 AFN7500HD User Guide Technical Specifications SATELLITE TUNER Tuner Type DVB-S and DVB-S2 Frequency Range 250~2150MHz Input Impedance 75Ω LNB Power 400mA Min Input Level Range 65dBm ~ -25dBm Signal Input IEC 169-24, F-Type, Female Demodulation DVB-S (QPSK)/DVB-S2 (QPSK, 8PSK) Symbol Rate...
- Page 110 AFN7500HD User Guide Supported Audio Formats MP1L1, AC3 2.0 (Dolby), AC3 5.1 (Dolby), and AAC/ACC-HE AAC, Dolby Digital, Dolby Digital+ are provided on the output digital ports (SPDIF, HDMI) Subtitles and Closed Caption are Supported CONTROLS Front Panel Keypad and LCD...
- Page 111 AFN7500HD User Guide ENVIRONMENTAL AND CERTIFICATIONS Input Voltage 100~240V Work Temperature 0~40℃ Storage Temperature -40~70℃ Consumption 24W Max Standby Consumption 0.5W Humidity <95% Certification UL, CE, FCC, and RoHs BACK PANEL LNB IN IEC 60169-24 F-Type Female (1) CVBS and (2) Audio L/R S/PDIF (1) Coax &...
Need help?
Do you have a question about the AFN7500HD and is the answer not in the manual?
Questions and answers
Afn decoder will not record
The AFN 7500HD decoder may not record for the following reasons:
1. The decoder upgrade did not fully load.
2. The hard disk drive (HDD) is not recognized.
3. A factory reset may be needed for the decoder to recognize the HDD.
4. The HDD may need to be formatted.
These steps may need to be repeated multiple times before the HDD is recognized.
This answer is automatically generated
Where can I purchase this type of item?
You can buy the AFN7500HD on ShopMyExchange.com for $229 or in Exchange stores in OCONUS. It is also available for purchase at buyafn7500hd.com for $299.
This answer is automatically generated
need phone number.