Table of Contents
Advertisement
Quick Links
Advertisement
Table of Contents

Related Manuals for Sensi PRO


Summary of Contents for Sensi PRO
- Page 1 PRO Installation Smart Thermostat...
-
Page 2: Need Help
Sensi partner program Always be the Contractor-On-Call with your customers. The Sensi app saves your contact information so when your customer needs service, you’re just a tap away. Register at www.sensiregistration.com. -
Page 3: Mobile Device Compatibility
Easy to install and connect Sensi is designed to install like a standard thermostat. It gives you the flexibility to connect to Wi-Fi at installation or let your customer connect it later using the Sensi app. MOBILE DEVICE COMPATIBILITY OPERATING SYSTEM... -
Page 4: Hvac System Compatibility
HVAC SYSTEM COMPATIBILITY SYSTEM TYPE COMPATIBILITY MODIFICATIONS Conventional heating and None cooling • Gas furnace • Air conditioner • Electric furnace • Boiler Heat only Requires a common • Gas furnace wire (c-wire) • Electric furnace • Boiler Cool only Requires a common •... -
Page 5: What's In The Box
(found on the back of the Welcome Guide) Items needed for Wi-Fi connection: • The homeowners compatible iOS or Android device with the Sensi app installed and registered • Your customer’s Wi-Fi network name (SSID) and password QUICK TIP: Ask the homeowner to download the Sensi app and gather their Wi-Fi information while you are installing the thermostat. -
Page 6: Installation
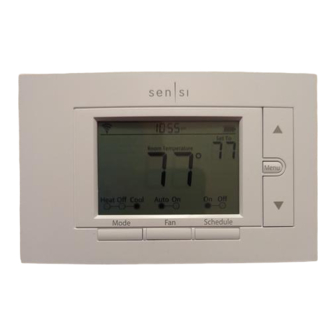
Installation 1. Install Sensi thermostat, referring to these terminal definitions, cross references and wiring diagrams as needed: SENSI CONVENTIONAL HEAT PUMP SYSTEM THERMOSTAT THERMOSTAT SYSTEM Power for heating, 24V † RC, R Power for cooling, 24V † C, X, B**... - Page 9 2. After installation, configure the thermostat to the appropriate system type. Press “Menu” on the thermostat and refer to these menu options as needed: CONFIGURATION MENU ITEMS REFERENCE Display Menu item Default Options Code Wireless Setup — Connect Connects Thermostat to Wi-Fi network Fahrenheit or Celsius Outdoor Equipment...
- Page 10 3. Once the thermostat is installed and properly configured, test the equipment by following these steps: • Turn on power to the system. • Fan Operation • If your system does not have a “G” terminal connection, skip to “Heating System” below. •...
- Page 11 • Heating System • Press the “Mode” button on the thermostat and select the “Heat” position. • Press the up arrow on the thermostat and adjust the setting to 1° above the current room temperature. The heating system should begin to operate and the thermostat will indicate “Heating”...
- Page 12 • Auxiliary System (only for heat pumps with auxiliary) • Press the “Mode” button on the thermostat and select the “Aux” position. This bypasses the heat pump and runs auxiliary-only heat. • Press the up arrow on the thermostat and adjust the setting to 1°...
- Page 13 • Cooling System • Press the “Mode” button on the thermostat and select the “Cool” position. • Press the down arrow and adjust the setting to 1° below the current room temperature. The blower should come on immediately on high speed, followed by cold air circulation. The thermostat will indicate “Cooling”...
- Page 14 • Humidification • Press the “Mode” button on the thermostat and select the “Heat” position. • Press the up arrow on the thermostat and adjust the setting to 1° above the current room temperature. The heating system should begin to operate and the thermostat will indicate “Heating”...
- Page 15 • Dehumidification • Press the “Mode” button on the thermostat and select the “Cool” position. • Press the down arrow and adjust the setting to 1° below the current room temperature. The blower should come on immediately on high speed, followed by cold air circulation. The thermostat will indicate “Cooling”...
-
Page 16: Troubleshooting
Troubleshooting SYMPTOM POSSIBLE CAUSE CORRECTIVE ACTION No Heat/ 1. Blown fuse or 1. Replace fuse or reset breaker No Cool/ tripped circuit 2. Turn switch to ON No Fan breaker 3. Replace door panel in proper (common 2. Furnace power position to engage safety problem) switch to OFF... - Page 17 Constantly heat, cool or or touching other wires. Try fan system resetting the thermostat. Thermostat Thermostat display Display can be adjusted +/-5° using Display & requires adjustment the Temperature Offset in Sensi app. Thermometer Disagree...
- Page 18 If you would like the cycle rate to increase cycle time, choose Slow for the Cycle Rate in the Sensi app. “ Call for 1. Heating or Cooling 1. See corrective action for Service”...
- Page 19 Connecting Sensi to Wi-Fi 1. Ask the homeowner to download the free Sensi app onto their iOS or Android device. 2. Ask the homeowner to follow the prompts to create an account. 3. Once the homeowner has logged in, ask to use their device to connect the thermostat to the Wi-Fi.
- Page 20 Heating or Cooling transformer. CAUTION: E5 Alert If “Call For Service” is displayed on your Sensi thermostat, and E4 or E5 To prevent electrical shock and/ appears where the room temperature or equipment damage, disconnect should be displayed or the backlight...
- Page 21 It provides helpful instructions and information on the following: • Includes their Sensi Security Code for connecting to Wi-Fi • How to connect their Sensi thermostat to Wi-Fi (if this has not already been completed) or connect additional devices • Key features of the thermostat and the app and how they work...
- Page 24 0037-7678003...
Need help?
Do you have a question about the PRO and is the answer not in the manual?
Questions and answers