Table of Contents
Advertisement
Safety Statement Consistency
Dear customers,
Darad Innovation is a company located in Taiwan. Our products sold in the market are developed
based on innovated ideas and structures. The following is the description of the product:
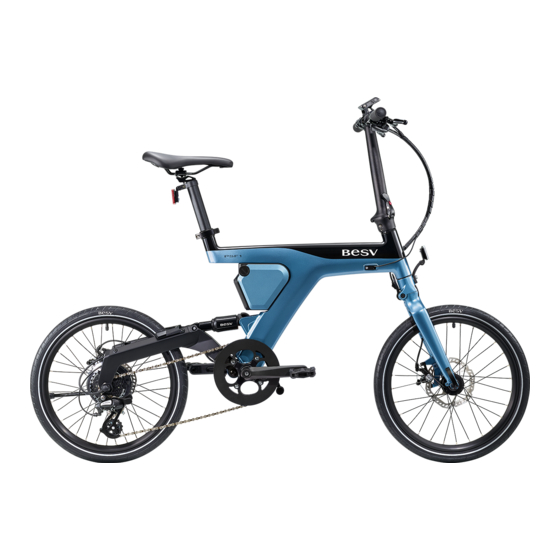
Product: Electric Bike E-Bike
Function: Pedelec
Model: BESV PSF1
This product is designed based on unified European standards and observes applicable and
important EU directives. The EU directives involved are shown below, including any
amendments that are in place:
• 2006/42/EC on machinery, including EN 15194:2009 + AI:2011 + IEC 62133:2002
• EMC Directive 2004/108/EC, including EN 15194:2009 + AI:2011
• 2006/42/EC on machinery, including EN 15194:2017
The battery charger of the product is described as follows:
Batter y charger
Product:
Function: Batter y charger for the electric bike
BESV-072-0360
Model:
The product is designed and manufactured based on EU, USA and Australian Communications and
Media Authority (ASMA) standards, as well as relevant and important directives of EU.
• EU Low-Voltage Directive IEC 60335 and Electromagnetic Compatibility Directive EN 55014
• USA Directive UL 1012 and FCC Part 15B
• Australian RCM Directive AS/NZS CISPR-14
Modification of this bike without our prior approval will render the warranty invalid. PS:
Darad Innovation is short for Darad Innovation Corporation.
1
Advertisement
Table of Contents

Related Manuals for BESV PSF1


Summary of Contents for BESV PSF1
- Page 1 The following is the description of the product: Product: Electric Bike E-Bike Function: Pedelec Model: BESV PSF1 This product is designed based on unified European standards and observes applicable and important EU directives. The EU directives involved are shown below, including any amendments that are in place: •...
- Page 2 Introduction Start Riding It is advised to read this user's manual thoroughly and familiarize yourself with the operations of the bike before riding it for the first time. Please follow the instructions and warning provided in this manual. Failure to do so may lead to damage to the bike or risk of your personal safety. This user's manual provides you quick and accurate understanding of the major functions of your electric bike.
-
Page 3: Production Information
Production Information Darad Innovation recommends you to use the power controller system, gear change system, brake system, drive system and electric bike parts recognized and approved by Darad Innovation. Darad Innovation has a series of rigorous tests and verification processes on these systems and electric bike parts to ensure the reliability, safety and comfort of the product. - Page 4 • Please have a professional distributor authorized by Darad Innovation perform routine checkups on your bike. • Check for signs of cracks, scratches or color change, since any of these are indications that the part may be expired. • Have a professional distributor authorized by Darad Innovation replace the fatigued or worn part(s).
-
Page 5: Correct Use
The e-bike is capable of carrying 95kg (209lbs) including the rider, accessories and luggage. Do not carry more than the total weight allowed. The BESV e-bike is not designed to be a towing vehicle, nor allowed to ride behind a towing vehicle, tow another bike or pull another bike with a bike linking system. - Page 6 Torque sensor on the Bearing of Pedal Cranks The torque sensor that determines the pedaling force may lose its electronic calibration and that leads to the malfunctioning of assisted pedaling. Therefore, keep magnetic and metal objects, such as a hammer, away from the crank bearing. The Serial Number of New Darad Innovation Bike is in the Warranty Card The serial number of your new Darad Innovation bike and its frame number validate your after - sale (warranty) service.
-
Page 7: Component Introduction
Over view Component introduction Saddle Battery Folding Fork Folding Stem Break System Crank Pedal Rear Suspension Rear Suspension Joint Supporting Stand Chain Front Wheel Rear Wheel Motor Kickstand U-shaped Socket Shaft Pull in... - Page 8 Component introduction 1.Left Grip 2.Right Grip 3.Rear Break Lever 4.Rear Break Lever 5.Function Switch 6.HMI Bracket 7.HMI 8.Derailleur Lever HMI introduction 1.Backlight Brightness 2.Information Option 3.Assistant Mode 4.Riding Information 8.Bluetooth-connection indicator 5.Time 6.Battery Remaining Capacity 7. USB-charging indicator 9. USB charging port Instrument Switch Button Information selection/Entry menu Up/Increase...
-
Page 9: Check The Chain And Chain Cover
• Reflectors on the wheel spokes • Yellow reflectors on the pedals For the safety of rider, please go to a BESV-authorized dealer for regular service of the e-bike. Proper Accessories You may need a helmet to ride an electric bike depending on the country you are in. However, Darad Innovation recommends you to wear a helmet that fits you and protective eyewear regardless the requirement of helmet. -
Page 10: Check The Batter Y And Batter Y Lock
Handle the chain as instructed, particularly every time when the rear wheel is removed or installed. Be extra careful in these situations to prevent damage to the chain and chain guard. Check the Batter y and Batter y Lock Check that the battery lock is correctly and completely engaged on the bicycle every time before you ride it, and turn the battery lock to the red “ON.”... - Page 11 ATTENTION Check all below joints are locked to the end correctly 1.Folding Fork Lock 2.Folding Stem Lock 3.Rear Suspension Lock Please make sure that the folding fork joint/folding stem joint must be completely locked to the end correctly. Any extra push and pull will not move it unless the safety lock is properly released according to the correct unlocking steps.
-
Page 12: Instrument Control
Adjust the Saddle, Grips and Brake Levers If you pull the seat post and the seat tube is too far away, the screw clamp may not support the seat post safely. In bad weathers, the seat post will be slacking or damaged. This will lead to a risk of accident and injury. - Page 13 Usage Enters the main screen and provides the user's required riding information including power level, speed, riding distance, battery usage, time, calories, cadence, total mileage, remaining distance, etc Press the button on the left side of HMI to switch the brightness of the screen.
-
Page 14: Function Settings
Function Settings The menu page This page is a menu of all the function settings of system To enter this menu page, please long-press the information button After entering the menu page, you can use "assistance mode +" and "assistance mode –"... - Page 15 Change unit This function is for changing the displayed unit. Move the selection to the unit you want and then press the information button Move the selection to and then press the information button go back main menu page Time Setup ...
- Page 16 • Battery power indication: This provides the information of how much is left in your battery when the system is on. The battery sign on the screen will tell you how much power is left. When you see a full battery and the word FULL, the battery is 100% charged. The following illustration shows how much power is left.
-
Page 17: Riding Manual
Notes for rear luggage carrier (optional) A loaded luggage carrier will alter the characteristics of riding the bike. The ability of riding or braking will be weakened, and the braking distance, as well as the risk of accident, will increase. •... -
Page 18: Brake System
Riding condition Assistance level None Riding on leveled ground / with tail wind Riding on a leveled surface Riding on an up slope or against the winds Riding on a very steep slope or against high winds Brake System The Darad Innovation Electrically Assisted Bikes are all equipped with mechanical disc brake of the same level. -
Page 19: Batter Y Protection Mode
Batter y Protection Mode For any of the following, the battery will switch to the protection mode: • The bike has not be used for two months. • The battery has depleted and not charged within one week. When the battery is in the protection mode, you need to start the battery after a complete charging cycle. -
Page 20: Connect The Charger
• If you detect that the battery becomes very hot, emits a strong odor, starts to deform or performs in an unexpected way while in use, being charged or in storage, please stop using the battery immediately • The battery and charger should be placed on fire-retardant surface while charging is in progress. -
Page 21: Tires And Wheels
• Do not carry a deeply discharged battery on the electric bike. If the electric bike or battery is not expected to be used for an extended period of time, please follow the following instructions: • Do not expose the battery in a storage temperature lower than -20°C (-4°F) or higher than 60°C (140°F). -
Page 22: Maintenance
Repair and Maintenance Cleaning and Maintenance Regular and appropriate maintenance works help maintain the value of your electric bike. It is advised to dispose of the empty package materials and cleaning wipes in an environmentally responsible manner. High-pressure cleaning equipment Do not use high-pressure cleaning equipment to clean the bike. -
Page 23: Troubleshooting
Every 3000km (1864 miles) Action Check and, if necessary, replace the following parts: Headset Repair, maintenance and service at an authorized Wheel hubs distributor Pedals Chain Power controller cables Every year Action Check all bolt and screw connections for tightening torque Check headset brake... - Page 24 Symptom Possible cause/consequence and solution Incorrect version of program • Have an authorized distributor upgrade the program The assistance system is Interference between brake and wheels n o t c o n s i s t e n t w h e n •...
- Page 25 Brake System Symptom Possible cause/consequence and solution The brakes are not inserted. Insert the brakes • There is grease stain on the brake disc or shoes. If the brake disc or shoes are covered in grease, the braking distance will be longer and the risk of accident and injury increases.
- Page 26 Remove/install the Rear Wheel Remove the Rear Wheel When disassembling the rear wheels, turn the car upside down for operation. Disconnect the motor wires, undo the nut, and pull the rear gear change wire downwards. The chain comes loose now, and you can lift the wheel up. The Mechanical brake must not be operated with the wheels removed.
-
Page 27: Technical Information
Set the Light Range Please refer to the requirements of the country you are in for the adjustment of light range. Technical Information Front and Rear Wheels Specifications Tire model DURO DB7023 PD-1 20"x1.5 Tire size (inch) 20"x1.5 Valve type Shrader Tube model 20"x1.75 , butyl...
Need help?
Do you have a question about the PSF1 and is the answer not in the manual?
Questions and answers