JVC UX-GD7 Instructions Manual
Hide thumbs
Also See for UX-GD7:
- Přiručka k obsluze (53 pages) ,
- Instructions manual (52 pages) ,
- Service manual (46 pages)

Related Manuals for JVC UX-GD7


Summary of Contents for JVC UX-GD7
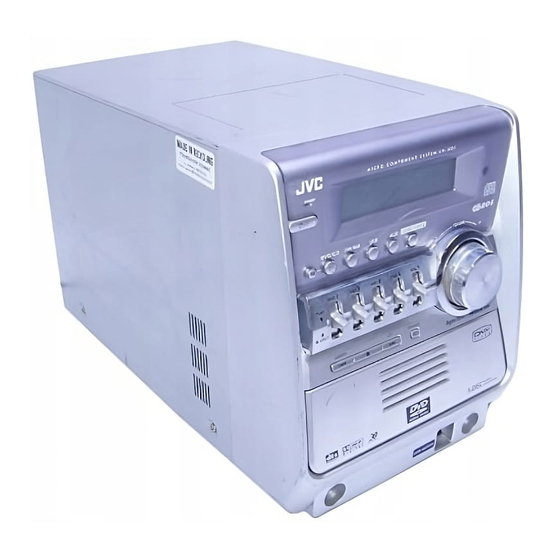
- Page 1 MICRO COMPONENT SYSTEM UX-GD7 —Consists of CA-UXGD7 and SP-UXGD7 D I G I T A L INSTRUCTIONS LVT1348-009A [UG, UX]...
- Page 2 Warnings, Cautions and Others CAUTION— (standby/on) button! Disconnect the mains plug to shut the power off completely (all lamps and indications go off). The button in any position does not disconnect the mains line. • When the unit is on standby, the STANDBY lamp lights in red. •...
- Page 3 Caution: Proper Ventilation To avoid risk of electric shock and fire, and to prevent damage, locate the apparatus as follows 1. Front:No obstructions and open spacing. 2. Sides/ Top/ Back:No obstructions should be placed in the areas shown by the dimensions below. 3.
- Page 4 IMPORTANT FOR LASER PRODUCTS 1. CLASS 1 LASER PRODUCT 2. CAUTION: Do not open the top cover. There are no user serviceable parts inside the Unit; leave all servicing to qualified service personnel. 3. CAUTION: Visible and invisible laser radiation when open and interlock failed or defeated.
-
Page 5: Table Of Contents
CONTENTS Introduction ............2 On-Screen Disc Operations ........26 Precautions ................2 On-screen Bar Information ..........26 How to Read This Manual ..........2 Operations Using the On-screen Bar ........ 27 Operations on the CONTROL Screen ......29 Getting Started ............3 Unique JPEG Operations .......... -
Page 6: Introduction
Introduction • If you are not going to operate the System for an extended Precautions period of time, unplug the AC power cord from the wall Installation outlet. • Install in a place which is level, dry and neither too hot nor If anything goes wrong, unplug the AC power cord and too cold—between 5°C and 35°C. -
Page 7: Getting Started
Getting Started Step 1: Unpack Step 1 :Unpack the package and check the accessories. After unpacking, check to be sure that you have all the following items. The number in parentheses indicates the quantity of each piece supplied. • FM antenna (1) •... -
Page 8: Step 3: Hook Up
Step : Hook Up If you need more detailed information, see page 6. Illustrations of the input/output terminals below are typical examples. When you connect other components, refer also to their manuals since the terminal names actually printed on the rear AM loop antenna (supplied) may vary. - Page 9 For better FM/AM reception Outdoor FM antenna (not supplied) Vynile-covered wire (not supplied) Extend it horizontally. AM loop antenna Keep it connected. Disconnect the supplied FM antenna, and connect to an outdoor FM antenna using a 75 Ω wire with coaxial type connector (IEC or DIN45325). FM antenna (supplied) Extend it so that you can obtain the best reception.
-
Page 10: Changing The Scanning Mode
To assemble and connect the AM loop antenna To set the video output selector To assemble the AM loop antenna You can select the video output to match it to the color system of your TV. NTSC: For an NTSC TV or Multi-color system NTSC PAL: For a PAL TV or... -
Page 11: Before Operating The System
Before Operating the System If a DVD with the improper Region Code numbers is loaded, Playable Disc Types “RGN ERR (REGION CODE ERROR)” appears on the display and playback will not start. This System has been designed to play back the following Caution for DualDisc playback: discs: The Non-DVD side of a “DualDisc”... -
Page 12: Display Indicators
Display Indicators The indications on the display teach you a lot of things while you are operating the System. Before operating the System, be familiar with when and how the indicator illuminates on the display. 1 Disc tray indicators 8 SLEEP indicator •... - Page 13 Indications on the main display while operating a disc While playing back a disc: While disc play is stopped: • DVD Video: • DVD Video: Chapter no. Elapsed playing time Total titles/playlists no. • By pressing SHIFT+0 (DISPLAY), you can see the current title and chapter numbers for a few seconds.
-
Page 14: Daily Operations-Playback
Daily Operations —Playback Turn on the power. The STANDBY lamp on the main unit turns off. • Without pressing AUDIO , the System turns on by pressing one of the source selecting buttons in the Numeric next step. buttons Select the source. DISPLAY Playback automatically starts if the selected source is 1/¡... -
Page 15: Listening To The Radio
Listening to the Radio Remote To preset the stations ONLY To select the AM tuner interval spacing You can preset 30 FM and 15 AM stations. Some countries space AM stations 9 kHz spacing, and other Tune in to a station you want to preset. countries use 10 kHz spacing. -
Page 16: Playing Back A Disc
Playing Back a Disc On-screen guide icons • During playback, the following icons may appear on the • For MP3/JPEG playback, see “Operations on the TV screen: CONTROL Screen” on page 29. At the beginning of a scene containing multi- To insert a disc angle views. - Page 17 For DVD Video/DVD Audio: Remote To locate a particular portion ONLY Show the disc menu. While playing a disc except MP3/JPEG... Select an item on the disc menu. • No sound comes out while searching on DVD Video/ DVD-VR/SVCD/VCD. To return to normal playback, press DVD/CD 3. Remote To locate an item directly ONLY...
- Page 18 For DVD-VR: Select an item on the disc menu. DVD-VR format has the following two ways of playing. • Original program (ORIGINAL PROGRAM): The System can play back items in a DVD-VR disc in the recorded order conventionally. • Playlist (PLAY LIST): The System can play back the playlist edited with the DVD recording equipment.
-
Page 19: Playing Back A Tape
Playing Back a Tape Playing Back from Other Equipment To insert a tape To connect other equipment You can play back type I tapes. By using a stereo mini plug cord (not supplied), you can connect other equipment with analog audio output jacks, Push Insert Close... -
Page 20: Daily Operations-Sound&Other Adjustments
Daily Operations —Sound&Other Adjustments Adjusting the Volume Remote control You can adjust the volume level from level 0 (VOL MIN) to level 31 (VOL MAX). Remote control: Main unit: CANCEL A.STANDBY DISPLAY DIMMER SLEEP CLOCK/ TIMER FADE BASS/TREBLE Remote MUTING ONLY To drop the volume in a moment AUDIO VOL... -
Page 21: Making Dvd Voice Clear-Clear Voice
Making DVD Voice Clear—CLEAR VOICE Changing the Display Brightness—DIMMER Remote Remote ONLY ONLY This function allows you to easily understand the dialog of You can dim the display window. DVD even with the volume turned down. • This function cannot use when the System is on standby. •... -
Page 22: Setting The Clock
To adjust the picture tone Remote Setting the Clock ONLY Select “USER1” or “USER2.” Without setting the built-in clock, you cannot use the Daily • Follow steps 1 and 2 explained on page 17. Timer or Recording Timer (see page 33), and Sleep Timer Select a parameter you want to adjust. -
Page 23: Turning Off The Power Automatically
Turning Off the Power Remote Automatically ONLY To turn off the System after playback is over— Auto Standby A.STANDBY Canceled (at the same time) When Auto Standby is in use, the A.STANDBY indicator lights on the display. When the disc play stops, the A.STANDBY indicator starts flashing. -
Page 24: Unique Disc Operations
Unique Disc Operations Selecting the Sound Track Remote ONLY Remote control For DVD Video: While playing back a chapter containing audio languages, you can select the language to listen to. For DVD Audio: While playing back a track containing audio channels, you can select the audio channel to listen to. For SVCD/VCD/DVD-VR: While playing back a track, you can select the audio channel to play. -
Page 25: Selecting The Subtitle Language
Selecting the Subtitle Language Remote Selecting the View Angle Remote ONLY ONLY For DVD Video: While playing back a chapter containing While playing back a chapter containing multi-view angles, subtitles in different languages, you can select the subtitle you can view the same scene from different angles. language to display on the TV screen. -
Page 26: Selecting Browsable Still Pictures
Select slow-motion speed. Selecting Browsable Still Pictures Remote ONLY While playing back a track linked to browsable still pictures Forward slow motion starts. (B.S.P.), you can select the still picture (turn the page) to be shown on the TV screen. •... -
Page 27: Advanced Disc Operations
Advanced Disc Operations Programming the Playing Order— Remote control Remote Program Play ONLY You can arrange the playing order of the chapters or tracks (up to 99) before you start playback. Before starting playback, activate Program Play. CANCEL Numeric PROGRAM RANDOM buttons Canceled... -
Page 28: Playing At Random-Random Play
Start playback. Playing at Random—Random Play Remote ONLY Playback starts in the order you You can play the chapters or tracks of all loaded discs at have programmed. random. • Random Play cannot be used for some DVDs. Before starting playback, activate Random Play. To skip a step: To pause: To stop:... -
Page 29: Playing Repeatedly
Repeats the discs in all tray or all ALL* Remote Playing Repeatedly programmed tracks. ONLY Repeats the current chapter/track. • You can also select the repeat mode using the on-screen bar (see page 27). GROUP Repeats the current title/group/playlist. Repeat Play 1DISC Repeats the current disc. -
Page 30: On-Screen Disc Operations
On-Screen Disc Operations Remote control On-screen Bar Information You can check the disc information (except for MP3/JPEG) Numeric and use some functions through the on-screen bar. buttons 1 Disc type DVD/CD 3 2 Playback information Indication Meanings Dolby 2 Audio format 0.0ch Channel number 2,3,5,∞... -
Page 31: Operations Using The On-Screen Bar
Remote Operations Using the On-screen Bar ONLY For detailed operations of the following functions, see also “Operations Using the On-screen Bar” on the left. Ex.: Selecting a subtitle (French) for DVD Video: Changing the time information While a disc is selected as the source... You can change the time information in the on-screen bar Display the on-screen bar with the pull-down menu. - Page 32 Time Search Select the repeat mode you want. You can move to a particular point by specifying the elapsed Repeats all discs or all programmed playing time. tracks (not for some DVD Videos). For DVD Video/DVD Audio/DVD-VR: You can specify the elapsed time for the current title/ Repeats a desired portion (see next playlist.
-
Page 33: Operations On The Control Screen
Chapter/Track Search Remote Operations on t he CONTROL Screen ONLY You can search for the chapter (DVD Video/DVD-VR) or The CONTROL screen automatically appears on the TV track (DVD Audio) number to play. screen when you load an MP3 or JPEG. While playing, display the on-screen bar with the pull- You can search for and play the desired tracks through the down menu. -
Page 34: Unique Jpeg Operations
To move the highlight bar between group list and track To skip a track: To pause: To stop list playback: Moves the bar to the track list. To release, press DVD/CD 3. Moves the bar to the group list. To repeat Slide-show During or before playback... -
Page 35: Advanced Tape Operations
Advanced Tape Operations IMPORTANT Remote control It may be unlawful to record or play back copyrighted material without the consent of the copyright owner. Recording on a Tape You can use type I tapes for recording. REV.MODE • To play a tape, see page 15. DVD/CD3 Insert a recordable cassette. -
Page 36: Synchronized Disc Recording
Start recording. To record a “Live” disc It will not be desirable to put 4-second blank portions between the tunes recorded on the tape. To record the entire disc without any interruption recorded, start playing the disc (press DVD/CD 3), then On the main unit pause the disc play (press 8) and go back to the beginning of the current chapter/track (press 4) before... -
Page 37: Timer Operations
Timer Operations Setting the Timer Remote ONLY Remote control Using Daily Timer, you can wake up with your favorite music. You can store three Daily Timer and one Recording Timer settings; however, you can activate only one of the timers at a time. - Page 38 5 Select the volume level. How Recording Timer actually works • You can select the volume level (“1” to “MAX” When Recording Timer has been set, the timer ( and “VOL – –”). If you select “VOL – –,” the indicator and the REC indicator are lit on the display.
-
Page 39: Setup Menu Operations
Setup Menu Operations Operating Procedure Remote ONLY Remote control You can use the Setup Menus only when a disc is selected as the source and its playback is not yet started. Ex.: Selecting “STILL PICTURE” for “FILE TYPE”: Display the Setup Menu. LANGUAGE MENU LANGUAGE ENGLISH... -
Page 40: Language Setup Menu
PICTURE Setup Menu Finish the setting. You can select the desired options concerning a picture or monitor screen. PICTURE Repeat steps 3 to 4 to set other items on the same MONITOR TYPE 4:3 LB PICTURE SOURCE AUTO Setup Menu. SCREEN SAVER Repeat steps 2 to 4 to set other items on another Setup AUDIO... -
Page 41: Audio Setup Menu
PICTURE SOURCE AUDIO Setup Menu You can obtain optimal picture quality by selecting an You can adjust the sound settings of the System. appropriate option—picture source type (either video source or film source). AUDIO DIGITAL AUDIO OUTPUT STREAM/PCM Select one of the following: DOLBY SURROUND DOWN MIX D. -
Page 42: Others Setup Menu
D. (Dynamic) RANGE COMPRESSION You can compress the dynamic range (the difference between the loudest sound and the softest sound) to enjoy a powerful sound even at a low volume level when listening to Dolby Digital software. This is useful at night. •... -
Page 43: Operating The Tv
Operating the TV Operating TV Remote ONLY Remote control You can operate the JVC’s TV using this remote control. To operate the TV To turn on or off To select the input mode (either TV TV/VIDEO the TV: or VIDEO): (at the same time) TV VOL+/–... -
Page 44: Additional Information
Additional Information – Some MP3/JPEG files cannot be played back and will be Learning More about This System skipped. This results from their recording processes and conditions. Getting Started (see pages 3 to 6) – When making MP3 discs, use ISO 9660 Level 1 or Level Changing the Scanning Mode: 2 for the disc format. - Page 45 Advanced Disc Operations (see pages 23 to 25) MP3/JPEG groups/tracks configuration Programming the Playing Order—Program Play: This System plays back the tracks as follows. • If you try to program a 100th track, “MEM FULL (memory full)” appears on the display. •...
- Page 46 Advanced Tape Operations Setup Menu Operations (see pages 31 and 32) (see pages 35 to 38) LANGUAGE Setup Menu: Recording on a Tape: • When the language you have selected for “MENU • The recording level is automatically set correctly. Thus, LANGUAGE,”...
-
Page 47: Maintenance
To remove the speaker grilles Maintenance Holes Projections To get the best performance of the System, keep your discs and mechanism clean. Handling discs • When removing the disc from its case, hold it at the edge while pressing the center hole lightly. •... -
Page 48: Troubleshooting
“NO AUDIO” appears. Troubleshooting ] This System cannot play back illegally produced DVD Audio discs. If you are having a problem with your System, check this list “LR ONLY” appears. for a possible solution before calling for service. ] Some DVD Audio discs prohibit downmixed output. General: When you play back such a disc, this System plays back the left front and right front signals only. -
Page 49: Language Code List
Language Code List Javanese Slovenian Afar Georgian Samoan Abkhazian Kazakh Shona Afrikaans Greenlandic Somali Ameharic Cambodian Albanian Arabic Kannada Serbian Assamese Korean (KOR) Siswati Aymara Kashmiri Sesotho Azerbaijani Kurdish Sundanese Bashkir Kirghiz Swedish Byelorussian Latin Swahili Bulgarian Lingala Tamil Bihari Laothian Telugu Bislama... -
Page 50: Optical Digital Out Signals
OPTICAL DIGITAL OUT Signals DIGITAL AUDIO Output Signals OUTPUT Playback disc STREAM/PCM DOLBY DIGITAL/PCM PCM ONLY DVD Video with 48 kHz, 16/20/24 bit Linear 48 kHz, 16 bit Linear PCM* with 96 kHz, Linear PCM 48 kHz, 16 bit Linear PCM with Dolby Digital Dolby Digital bitstream 48 kHz, 16 bit Linear PCM... -
Page 51: Parts Index
Parts Index Refer to the pages to see how to use the buttons and controls. Remote control 10, 34 24, 34, 39 11, 18, 33, 34 10, 11, 13, 20, 21, 23, 26, 28, 29 16, 18 16, 19 15, 31 16, 19 16, 17 20, 22... -
Page 52: Specifications
General Specifications Power requirement: AC 110 – 127 / 220 – 240 V (adjustable with the voltage selector), Amplifier section 50 Hz/60 Hz Output Power: 140 W (70 W+70 W) at 6 Ω (10% THD) Power consumption: 160 W (at operation) 1.3 W (on standby) Analog input: Dimensions (approx.): 189 mm x 224 mm x 406 mm... - Page 53 U¹u²;« ≤∂ ÆÆÆÆÆÆÆÆÆÆÆÆÆÆÆÆÆÆÆÆÆÆÆ W½«uDÝöà WýUAë ‡ vKŽ ÷dFë öOGAð ≤ ÆÆÆÆÆÆÆÆÆÆÆÆÆÆÆÆÆÆÆÆÆÆÆÆÆÆÆÆÆÆÆÆÆÆÆÆÆÆÆÆÆÆÆÆÆÆÆÆÆÆÆÆÆÆÆÆÆÆÆÆÆÆÆÆÆÆÆÆÆÆÆÆÆÆÆÆ WÄbI*« ≤∂ ÆÆÆÆÆÆÆÆÆÆÆÆÆÆÆÆÆÆÆÆÆÆÆÆÆÆÆÆÆÆÆÆÆÆÆÆÆÆÆÆÆÆÆÆÆÆÆ WýUAë ‡ vKŽ ÷dFë j¹dý UÄuKFÄ ≤ ÆÆÆÆÆÆÆÆÆÆÆÆÆÆÆÆÆÆÆÆÆÆÆÆÆÆÆÆÆÆÆÆÆÆÆÆÆÆÆÆÆÆÆÆÆÆÆÆÆÆÆÆÆÆÆÆÆÆÆÆÆÆÆÆÆÆÆÆÆÆÆÆÆÆÆÆÆÆÆÆÆÆÆÆÆÆ UNO³Mð ≤ ÆÆÆÆÆÆÆÆÆÆÆÆÆÆÆÆÆÆÆÆÆÆÆÆÆÆÆÆÆÆÆÆÆÆÆÆÆÆÆÆÆÆÆÆÆÆÆÆÆÆÆÆÆÆÆÆÆÆÆÆÆÆÆÆÆÆÆÆ VO²Jë «c¼ …¡«dÁ WOHO ≤∑ ÆÆÆÆÆÆÆÆÆÆÆÆÆÆÆÆÆÆÆÆÆÆÆÆÆÆÆÆÆÆÆÆÆÆ WýUAë ‡ vKŽ ÷dFë j¹dý ‰ULF²ÝUÐ qOGA²Ã« ≥ ÆÆÆÆÆÆÆÆÆÆÆÆÆÆÆÆÆÆÆÆÆÆÆÆÆÆÆÆÆÆÆÆÆÆÆÆÆÆÆÆÆÆÆÆÆÆÆÆÆÆÆÆÆÆÆÆÆÆÆÆ “UN'«...
- Page 54 WÄbI*« UNO³Mð ○ ○ ○ ○ ○ ○ ○ ○ ○ ○ ○ • WÁUDë b¹Ëeð pKÝ Ÿe½« ¨WK¹uÞ WOMÄ“ …b* “UN'« qOGAð b¹dð ô p½« WÃUŠ w ÆjzU(« vKŽ …œułu*« WOzUÐdNJë WÁUDë b¹Ëeð Wײ sÄ WOzUÐdNJë “UN'« VOÂdð pÖ bFÐË WOzUÐdNJë...
- Page 55 “UN'« VOÂdð ¡bÐ W½uðdJë sÄ “UN'« ëdš« ∫± …uD)« ○ ○ ○ ○ ○ ○ ○ ○ ○ ○ ○ ∫± …uD)« Æ UI×K*« h× «Ë W½uðdJë `² « œułu*« rÁdë q¦1 ÆWOÃU²Ã« œuM³Ã« œułË sÄ bÂQð ¨W½uðdJë sÄ “UN'« ëdš« bFÐ Æ“UN'«...
- Page 56 “UN'« öO uð ∫≥ …uD)« ○ ○ ○ ○ ○ ○ ○ ○ ○ ○ ○ ○ ○ ○ ○ ○ ○ ○ ○ ○ ○ ○ ○ ○ ○ ○ Æ∂ W×H dE½« ¨d¦Â« WKBHÄ UÄuKFÄ œ—« «–« Włu* qC « ‰U³I²Ý« qł« sÄ Øqšbë...
- Page 57 ○ ○ ○ ○ ○ ○ ○ ○ ○ ○ ○ ○ ○ ○ ○ ○ ○ ○ ○ ○ ○ ○ ○ ○ ○ Włu* Í—UÞô« wz«uNë ©o dÄ® qC « vKŽ ‰uB(« v²Š wz«uNë — Ëœ Ò Æ‰U³I²Ý« XOÝUÂ...
- Page 58 u¹bOHë Ãdš V ²MÄ j³Cà Włu* Í—UÞô« wz«uNë qO uðË lOL−²Ã Włu* Í—UÞô« wz«uNë lOL−²Ã ÆÊu¹eHK²Ã« Êuà ÂUE½ lÄ Â¡ö²Oà u¹bOHë qšœ —UO²š« pMJ1 NTSC NTSC Ë« ÂUE½ Êu¹eHK²Ã ∫ ÆWLE½ô« ‡ œbF²Ä Êu¹eHK²Ã Ë« ÂUE½ Êu¹eHK²Ã ∫ NTSC ÆWLE½ô« ‡ œbF²Ä Êu¹eHK²Ã Włu* Í—UÞô«...
- Page 59 “UN'« qOGAð q³Á qOGA²Kà WKÐUIë U½«uDÝô« Ÿ«u½« ○ ○ ○ ○ ○ ○ ○ ○ ○ ○ ○ … U — ý « ô ð ¨ ¾ W Þ š Ä M … ý  Á U « — Ž K Í...
- Page 60 ÷dFë WýUý UMO³Ä ○ ○ ○ ○ ○ ○ ○ ○ ○ ○ ○ ○ ○ ○ ○ ○ ○ ○ ○ ○ ○ ○ ○ ÆÂUEMë qOGAð ¡UMŁ« …dO¦Â ¡UOý« ÷dFë WýUý vKŽ …œułu*« U½UOÃUÐ pL KFð Ò Æ÷dFë WýUý vKŽ s O³*«...
- Page 61 W½«uDÝô« qOGAð ¡UMŁ« WO Ozdë ÷dFë WýUý vKŽ UMO³*« ½ W ∫ D u « ô Ý O q « ð A G I U · ¡ « ¹ « Ł M U ½ W ∫ D u « ô Ý O q «...
- Page 62 OÄuOë öOGA²Ã« qOGA²Ã« — ÆWOzUÐdNJë WÁUDë q Ë« ± STANDBY “UN'« vKŽ …œułu*« qOGA²Kà œ«bF²Ýô« W³* THDMð Æw Ozdë AUDIO • bŠ« jG{ WDÝ«uÐ “UN'« qG²A¹ ¨ —eë jG{ ÊËbÐ —«—“« ÷dŽ ÆWOÃU²Ã« …uD)« w —bB*« —UO²š« —«—“« ≤ Æ—bB*« d²š« ÂUÁ—ô«...
- Page 63 u¹œ«dë vë ŸUL²Ýô« UD×LKà o³ *« j³Cë ○ ○ ○ ○ ○ ○ ○ ○ ○ ○ ○ Remote ONLY WłuÄ nëuÄ UD×Ä 5Ð nOÃu²Ã« q U —UO²šô Æ WD×Ä ±µ Ë WD×Ä ≥∞ ‡Ã o³ Ä j³{ qLŽ pMJ1 ±...
- Page 64 W½«uDÝô« qOGAð ○ ○ ○ ○ ○ ○ ○ ○ ○ ○ ○ ‡ WýUAë vKŽ ÷dFë qOÃœ «—Uý« WýUý vKŽ öOGA²Ã« r Á dE½« ¨ W½«uDÝ« qOGA²Ã ∫Êu¹eHK²Ã« WýUý vKŽ WOÃU²Ã« «—Uýô« dNEð Ê« sJ1 ¨qOGA²Ã« ¡UMŁ« ” MP3/JPEG •...
- Page 65 ∫ ∫ ∫ ∫ ∫ U½«uDÝô Ò s OFÄ r Á œU−¹ô DVD Video/DVD Audio Remote ONLY ± Æ Æ Æ W½«uDÝ« ¡UM¦²ÝUÐ W½«uDÝô« qOGAð ¡UMŁ« ÆW½«uDÝô« WLzUÁ dNþ« MP3/JPEG ≤ W½«uDÝ« vKŽ Y׳ë ¡UMŁ« u Ãd ¹ ô ÆW½«uDÝô« WLzUÁ vKŽ bM³Ã« d²š« DVD Video/DVD-VR/ •...
- Page 66 ∫ W½«uDÝô ≤ ÆW½«uDÝô« WLzUÁ sÄ bMÐ d²š« DVD-VR ÆqOGA²Kà 5²ÁdÞ W½«uDÝ« pK²9 DVD-VR ∫ wK ô« ZÄU½d³Ã« WI¹dÞ (ORIGINAL PROGRAM) • VOðd²ÃUÐ W½«uDÝ« vKŽ …œułu*« œuM³Ã« qOGAð “UN'« lD² ¹ DVD-VR ÆW¹œUO²Ž« …—uBÐ q − *« Ò ∫ qOGA²Ã« ‰Ëbł WI¹dÞ (PLAY LIST) •...
- Page 67 dš« “UNł sÄ qOGA²Ã« j¹dAë qOGAð ○ ○ ○ ○ ○ ○ ○ ○ ○ ○ ○ ○ ○ ○ ○ ○ ○ ○ ○ ○ ○ ○ dšô« “UN'« qO u²Ã j¹dAë ‰Ušœô “UNł qO uð pMJ1 ¨©o dÄ dOž® u¹dO²Ý dOG fÐUÁ pKÝ ‰ULF²Ý« WDÝ«uÐ Æ...
- Page 68 WOÄuOë öOGA²Ã« Èdšô« UÞu³CÃ«Ë uBë UÞu³{ — uBë …uÁ Èu² Ä j³{ ○ ○ ○ ○ ○ ○ ○ ○ ○ ○ ○ bFÐ sŽ rJײë …bŠË bFÐ sŽ rJײë …bŠË bFÐ sŽ rJײë …bŠË bFÐ sŽ rJײë …bŠË bFÐ sŽ rJײë …bŠË u È...
- Page 69 fl fl …¡U{ô« X Uš ÷dFë WýUý ŸuDÝ dOOGð `{«uë uBë `{«Ë qJAÐ u qLŽ ○ ○ ○ ○ ○ ○ ○ ○ ○ ○ ○ ○ ○ ○ ○ ○ ○ ○ ○ ○ ○ ○ ○ ○ ○ ○ ○ ○ ○ ○ ○ ○ ○ ○...
- Page 70 …—uBë Êuà Wł—œ q¹bF²Ã WŽU ë j³{ ○ ○ ○ ○ ○ ○ ○ ○ ○ ○ ○ Remote ONLY ± qO− ²Ã« XÁRÄ Ë« wÄuOë XÁR*« ‰ULF²Ý« pMJ1 ô ¨WOKš«bë WŽU ë j³{ ÊËbÐ Æ Ë« l{Ë d²š« USER2 USER1 “...
- Page 71 UOJOðUÄuðË« WOzUÐdNJë WÁUDë qB ○ ○ ○ ○ ○ ○ ○ ○ ○ ○ ○ Remote ONLY fl qOGA²Ã« ¡UN²½« bFÐ “UN'« qOGAð ·UI¹ô UOzUIKð qOGA²Kà œ«bF²Ýô« A.STANDBY ¡UGë ©XÁuë fHMЮ Ò s O³*« ¡wC¹ ¨‰ULF²Ý« WÃUŠ w UOzUIKð qOGA²Kà œ«bF²Ýô« l{Ë ÊuJ¹ UÄbMŽ √b³¹...
- Page 72 …b¹dHë W½«uDÝô« öOGAð uBë —U Ä —UO²š« ○ ○ ○ ○ ○ ○ ○ ○ ○ ○ ○ Remote ONLY bFÐ sŽ rJײë …bŠË bFÐ sŽ rJײë …bŠË bFÐ sŽ rJײë …bŠË bFÐ sŽ rJײë …bŠË bFÐ sŽ rJײë …bŠË ∫...
- Page 73 dEM*« W¹Ë«“ —UO²š« wŽdHë Ê«uMFë WGà —UO²š« ○ ○ ○ ○ ○ ○ ○ ○ ○ ○ ○ ○ ○ ○ ○ ○ ○ ○ ○ ○ ○ ○ Remote Remote ONLY ONLY ∫ ∫ ∫ ∫ ∫ W½«uDÝô dEM*« fH½ …b¼UAÄ pMJ1 ¨…œbF²Ä ‡ dEMÄ U¹«Ë“ vKŽ Íu²×¹ qB qOGAð ¡UMŁ« UGKÐ...
- Page 74 ≤ ÷«dF²Ýöà WKÐUIë W²ÐU¦Ã« —uBë —UO²š« ÆW¾OD³Ã« WÂd(« WŽdÝ d²š« ○ ○ ○ ○ ○ ○ ○ ○ ○ ○ ○ Remote ONLY pMJ1 ¨ ÷«dF²Ýöà WKÐUÁ W²ÐUŁ —u lÄ qB²Ä —U Ä qOGAð ¡UMŁ« ÆÂUÄöà W¾OD³Ã« WÂd(« .bIð √b³¹ (B.S.P.) ÆÊu¹eHK²Ã«...
- Page 75 …—uD*« W½«uDÝô« öOGAð qOGA²Ã« VOðdð W−ÄdÐ ○ ○ ○ ○ ○ ○ ○ ○ ○ ○ ○ — bFÐ sŽ rJײë …bŠË bFÐ sŽ rJײë …bŠË bFÐ sŽ rJײë …bŠË bFÐ sŽ rJײë …bŠË bFÐ sŽ rJײë …bŠË ZÄd³*« qOGA²Ã« ○...
- Page 76 ¥ WOz«uAŽ …—uBÐ qOGA²Ã« ÆqOGA²Ã« √bЫ ○ ○ ○ ○ ○ ○ ○ ○ ○ ○ ○ — Æt²−ÄdÐ Ícë VOðd²Ã« w qOGA²Ã« “b³¹ wz«uAFë qOGA²Ã« ○ ○ ○ ○ ○ ○ ○ ○ ○ ○ ○ Remote ONLY ÆWOz«uAŽ …—uBÐ «—U *« Ë« ‰uBHë qOGAð pMJ1 Æ...
- Page 77 …—dJ²Ä …—uBÐ qOGA²Ã« ○ ○ ○ ○ ○ ○ ○ ○ ○ ○ ○ q vKŽ …œułu*« U½«uDÝô« lOLł —«dJð Remote ONLY ÆW−Äd³*« «—U *« lOLł Ë« w½«uBë ALL* ‡ WýUAë vKŽ ÷dFë j¹dý ‰ULF²ÝUÐ —«dJ²Ã« l{Ë —UO²š« UC¹« pMJ1 •...
- Page 78 W½«uDÝöà WýUAë ‡ vKŽ ÷dFë öOGAð WýUAë ‡ vKŽ ÷dFë j¹dý UÄuKFÄ ○ ○ ○ ○ ○ ○ ○ ○ ○ ○ ○ bFÐ sŽ rJײë …bŠË ‰ULF²Ý«Ë © W½«uDÝ« ¡UM¦²ÝUЮ W½«uDÝô« UÄuKFÄ h× pMJ1 MP3/JPEG ÆWýUAë ‡ vKŽ ÷dFë j¹dý ‰öš sÄ nzUþuë iFÐ ÂUÁ—ô«...
- Page 79 U ý W ‡ « à A Ž K v ÷ « à F? d d ¹ j ‰ ý ² F L U Ð U Ý G O q « à ² A ○ ○ ○ ○ ○ ○ ○ ○ ○ ○ ○ ‰ULF²ÝUÐ...
- Page 80 ¥ XÁuë Y×Ð ÆÁb¹dð Ícë —«dJ²Ã« l{Ë d²š« ÆwCIM*« qOGA²Ã« XÁË b¹b% WDÝ«uÐ WMOFÄ WDI½ vë ‰UI²½ô« pMJ1 ∫ W½«uDÝô fOî W−Äd³*« «—U *« q ˫ U½«uDÝô« q —dJ¹ DVD Video/DVD Audio/DVD-VR Æ© U½«uDÝ« iF³Ã ÆwÃU(« qOGA²Ã« ‰ËbłØÊ«uMFKà wCIM*« XÁuë b¹b% pMJ1 DVD Video ∫...
- Page 81 rJײë WýUý vKŽ öOGA²Ã« ○ ○ ○ ○ ○ ○ ○ ○ ○ ○ ○ —U *«ØqBHë Y×Ð Remote CONTROL ONLY rÁ— Ë« © W½«uDÝô® qBHë rÁ— sŽ Y׳ë pMJ1 DVD Video/DVD-VR bMŽ Êu¹eHK²Ã« WýUý vKŽ UOJOðUÄuðË« rJײë WýUý dNEð CONTROL ÆtKOGA²Ã...
- Page 82 —U *« ‰Ëbł Ë WŽuL:« ‰Ëbł 5Ð dOýQ²Ã« ©dCš«® j¹dý p¹dײà ∫qOGA²Ã« ·UI¹ô ∫XÁR*« ·UI¹öà ∫—U *« wD ²Ã Æ—U *« ‰Ëbł vë j¹dAë „dײ¹ —eë jG{« ¨d¹dײKÃ Æ ÆWŽuL:« ‰Ëbł vë j¹dAë „dײ¹ DVD/CD 3 «b¹ö ë ‡ ÷dŽ —«dJ²Ã Æ...
- Page 83 …—uD*« j¹dAë öOGAð ÂU¼ bFÐ sŽ rJײë …bŠË bFÐ sŽ rJײë …bŠË bFÐ sŽ rJײë …bŠË bFÐ sŽ rJײë …bŠË bFÐ sŽ rJײë …bŠË ÊËbÐ ¨WþuH;« ‚uI(« «– œ«u*« qOGAð Ë« qO− ð WOKLŽ ÊuJð Ê« sJ1 ÆWO½u½UÁ dOž WOKLŽ ¨dAMë ‚uIŠ pÃUÄ WI «uÄ j¹dAë...
- Page 84 ¥ ÆqO− ²Ã« √bЫ OŠ Ò W W½«uDÝ« qO− ²Ã “ ” lÞUI*« 5Ð Ê«uŁ ‡ ¥ …b* Wž—U ÂU Á« ‰Ušœ« »džd*« sÄ ÊuJ¹ ô ·uÝ Æj¹dAë vKŽ WK− *« WOIOÝu*« W½«uDÝô« qOGAð √bЫ ¨WK− Ä WFÞUIÄ Í« ÊËbÐ W½«uDÝô« q qO− ²Ã …—uBÐ...
- Page 85 XÁR*« öOGAð XÁR*« j³{ ○ ○ ○ ○ ○ ○ ○ ○ ○ ○ ○ Remote ONLY bFÐ sŽ rJײë …bŠË ÆpOë W³³;« WOMžô« vKŽ ÂuMë sÄ ÷UIO²Ýô« pMJ1 ¨wÄuOë XÁR*« ‰ULF²ÝUÐ lÄË ªqO− ²Ã« XÁR* bŠ«Ë j³{Ë wÄuOë XÁRLKà UÞu³{ WŁöŁ Êeš pMJ1 ÆXÁuë...
- Page 86 Æ uBë …uÁ Èu² Ä d²š« WOKF …—uBÐ qO− ²Ã« XÁRÄ qG²A¹ nOÂ Ë vë ± ® uBë …uÁ Èu² Ä —UO²š« pMJ1 qO− ²Ã« XÁRÄË “MAX” “ ” • XÁR*« s O³Ä ¡wC¹ ¨qO− Ò ²Ã« XÁuÄ j³{ r²¹ Ê« bFÐ …uÁ...
- Page 87 œ«bŽô« WLzUÁ qOGAð UOKLŽ qOGA²Ã« ¡«dł« ○ ○ ○ ○ ○ ○ ○ ○ ○ ○ ○ Remote ONLY bFÐ sŽ rJײë …bŠË …—U² Ä W½«uDÝô« ÊuJð UÄbMŽ jI œ«bŽô« WLzUÁ ‰ULF²Ý« pMJ1 ÆbFÐ √b³¹ rà UNKOGAðË —bBL “STILL PICTURE” nK*«...
- Page 88 ∂ …—uBë œ«bŽ« WLzUÁ Æj³Cë wN½« º PICTURE ÆVÁ«d*« WýUý Ë« …—uBÃUÐ oKF²¹ ULO WÐuKD*« «—UO²šô« —UO²š« pMJ1 PICTURE MONITOR TYPE 4:3 LB PICTURE SOURCE AUTO ∑ SCREEN SAVER Æœ«bŽô« WLzUÁ fH½ vKŽ Èdšô« œuM³Ã« j³Cà ¥ vë ≥ «uD)« bŽ« FILE TYPE AUDIO ÆÈdš«...
- Page 89 uBë œ«bŽ« WLzUÁ …—uBë —bBÄ º AUDIO PICTURE SOURCE Æ“UN'« u UÞu³{ q¹bFð pMJ1 —UO²šô« —UO²š« WDÝ«uÐ sJ1 UÄ qC UÐ …—u …œuł vKŽ ‰uB(« pMJ1 Æ©rK —bBÄ Ë« u¹bO —bBÄ UÄ«® …—uBë —bBÄ Ÿu½ rzö*« — ∫wK¹ UÄ bŠ« d²š« AUDIO Æl{uë...
- Page 90 M U Ä O « à b ¹ * b È j « D. (Dynamic) RANGE COMPRESSION uBÐ ŸU²L²Ýöà © u √b¼«Ë u vKŽ« 5Ð ‚dHë® wJOÄUM¹bë Èb*« jG{ sJ1 w³ÃËœ ZÄU½dÐ vë ŸUL²Ýô« bMŽ iH MÄ u …uÁ Èu² Ä vKŽ v²ŠË r { ÆqOKë...
- Page 91 Êu¹eHK²Ã« qOGAð Êu¹eHK²Ã« qOGAð ○ ○ ○ ○ ○ ○ ○ ○ ○ ○ ○ Remote ONLY bFÐ sŽ rJײë …bŠË ÆÁc¼ rJײë …bŠË ‰ULF²ÝUÐ WŽUM sÄ Êu¹eHKð qOGAð pMJ1 Êu¹eHK²Ã« qOGA²Ã Êu¹eHKð® qšbë l{Ë —UO²šô ·UI¹« Ë« qOGA²Ã ∫© u¹bO Ë«...
- Page 92 WO U{ô« UÄuKF*« “UN'« «c¼ ‰uŠ d¦Â« W dFÄ «c¼ ÆUNMŽ wD ²Ã« r²¹ ·uÝË UHKÄ iFÐ qOGAð sJ1 ô ≠ ○ ○ ○ ○ ○ ○ ○ ○ ○ ○ ○ MP3/JPEG ÆqO− ²Ã« ôUŠË U'UFÄ sŽ Z²M¹ “UN'« VOÂdð ¡bÐ ©∂...
- Page 93 …—uD*« W½«uDÝô« öOGAð ©≤µvë ≤≥ U×HBë dE½«® «—U ÄØ UŽuL−Ä qOJAð MP3/JPEG ∫ZÄd³*« qOGA²Ã« qOGA²Ã« VOðdð W−ÄdÐ ÆwK¹ UL «—U *« “UN'« «c¼ q GA¹ Ò — …d«cë ¡ö²Ä« …—Uý« dNE𠨱∞∞ —U *« W−ÄdÐ XÃËUŠ «–« • Æ÷dFë WýUý vKŽ ©WKÄUÂ...
- Page 94 œ«bŽô« WLzUÁ qOGAð UOKLŽ …—uD*« j¹dAë öOGAð ©¥∏ vë ≥µ U×HBë dE½«® ©≥≤ Ë ≥± U×HBë dE½«® WGKë œ«bŽ« WLzUÁ ∫j¹dAë vKŽ qO− ²Ã« ∫ ∫ ∫ ∫ ∫ LANGUAGE Ë« ¨ WLzUIë WGKà UNðd²š« w²Ã« WGKë X½U «–« ‰öš ¨«cNà ÆUOJOðUÄuðË« W×O× …—uBÐ qO− ²Ã« u Èu² Ä j³{ r²¹ “MENU LANGUAGE”...
- Page 95 W½UOBë ○ ○ ○ ○ ○ ○ ○ ○ ○ ○ ○ UŽUL ë UJ³ý ŸeMÃ Ò W OÃ¬Ë W−Äb*« U½«uDÝô« kHŠ« ¨“UN'« «c¼ sÄ ¡«œ« qC « vKŽ ‰uB×Kà «¡u²½ »uI¦Ã« ÆWHOE½ …—uBÐ ULz«œ qOGA²Ã« W−Äb*« U½«uDÝôUÐ W¹UMFë VI¦Ã« vKŽ jGCë ¡UMŁ« ·«u(« sÄ UNJ Ä ¨WE U(« sÄ W½«uDÝô« Ÿe½ bMŽ •...
- Page 96 Õö ô«Ë ‰UDŽô« sŽ Y׳ë ○ ○ ○ ○ ○ ○ ○ ○ ○ ○ ○ …—Uýô« dNEð Æ Æ Æ Æ Æ “NO AUDIO” …—uBÐ W−²M*« U½«uDÝô« qOGAð “UN'« «c¼ lOD² ¹ ô DVD Audio qł« sÄ wÃU²Ã« ‰Ëb'« h× « ¨“UN'« w ‰UDŽ« Ë« qÂUAÄ œułË WÃUŠ w ÆWO½u½UÁ...
- Page 97 WGKë …dHý ‰Ëbł ○ ○ ○ ○ ○ ○ ○ ○ ○ ○ ○ ○ ○ ○ ○ ○ ○ ○ ○ ○ ○ ○ ○ W¹ËUł WOMO uKÝ W¹—UHŽ WO½«uÄUÝ WOł—uOł W¹“U Ы U½uý WO½U² š«e W¹e½UJ¹d « WOÃUÄu WOJ¹b½öM¹dž...
- Page 98 wLÁdë ÍdB³Ã« Ãd)« «—Uý« ○ ○ ○ ○ ○ ○ ○ ○ ○ ○ ○ ○ ○ ○ ○ ○ ○ ○ ○ ○ ○ ○ ○ OPTICAL DIGITAL OUT Ãd)« «—Uý« DIGITAL AUDIO OUTPUT qOGA²Ã« W½«uDÝ« ONLY DOLBY DIGITAL/PCM STREAM/PCM W½«uDÝ«...
- Page 99 ¡«ełô« ”dN ○ ○ ○ ○ ○ ○ ○ ○ ○ ○ ○ ○ ○ ○ ○ ○ ○ ○ ○ ○ ○ ○ ○ ÆjЫuCÃ«Ë —«—“ô« ‰ULF²Ý« WOHO WO dF* U×HBë vë lł—« bFÐ sŽ rJײë …bŠË ≥π ≥¥ ¨ ±∞...
- Page 100 ÂUŽ UH «u*« ○ ○ ○ ○ ○ ○ ○ ○ ○ ○ ○ ØXÃu ±≤∑ ≠ XÃu ±±∞ œœd²Ä —UOð ∫WOzUÐdNJë WÁUDë U³KD²Ä uBë r CÄ r Á XÃu ≤¥∞ ≠ XÃu ≤≤∞ ¨©ÃU²ÃuHë V ²MÄ WDÝ«uÐ j³CKà qÐUÁ® g¹uAð®...
- Page 101 Mains (AC) Line Instruction (not applicable for Europe, U.S.A., Canada, Australia, and U.K.) VOLTAGE SELECTOR 110-127V SUBWOOFER VOLTAGE SELECTOR 220-240V ANTENNA 110-127V 75Ω 220-240V VIDEO SELECTOR NTSC LOOP OPTICAL DIGITAL OUT VIDEO OUT S-VIDEO SPEAKERS VIDEO COMPONENT IMPEDANCE 6-16Ω CAUTION for mains (AC) line BEFORE PLUGGING IN, do check that your mains (AC) line voltage corresponds with the position of the voltage selector switch provided on the outside of this equipment...
Need help?
Do you have a question about the UX-GD7 and is the answer not in the manual?
Questions and answers