Advertisement
Quick Links
EN
IMPORTANT! Please keep these instructions for future reference. Please read
these instructions before assembly and use of this product.
• Adult assembly is required.
• Allen wrench (included) required for assembly.
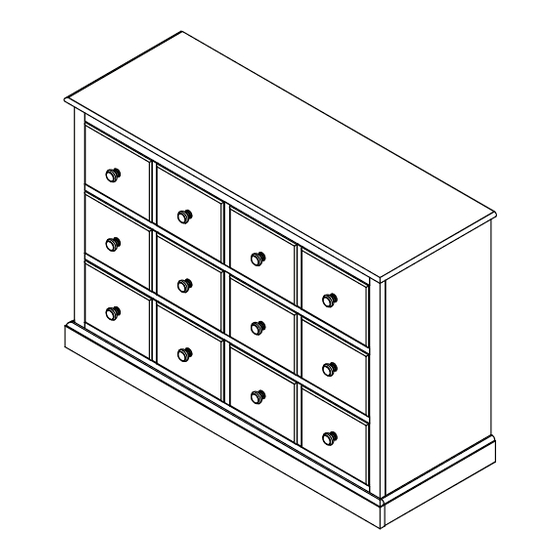
• Product features and decorations may vary from illustrations.
• Do not use power drills or drivers.
• Phillips Head Screwdriver (Not included) required for assembly.
Bulletin NO.: 120310-00-EN
fisher-price.com
Advertisement

Related Manuals for Fisher-Price Signature RTA Dresser


Summary of Contents for Fisher-Price Signature RTA Dresser
- Page 1 IMPORTANT! Please keep these instructions for future reference. Please read these instructions before assembly and use of this product. • Adult assembly is required. • Allen wrench (included) required for assembly. • Product features and decorations may vary from illustrations. •...
-
Page 2: Part List
Part List D. Top Panel x1 A. Left Side Panel x1 B. Right Side Panel x1 C. Divider Frame x1 E1. Top Front Rail x1 E2. Bottom Front Rail x1 E3. Lower Front Rail x2 E4. Front Molding x1 F2. Lower Back Rail x1 F3. - Page 3 Part List HARDWARE AND TOOL DIAGRAM 1-3/4" Allen Head Bolt x24 1" Phillips Head Screw x60 5/8" Phillips Head Screw x39 1-1/8" Allen Head Bolt x20 1" Knob Bolts x12 Plastic Crescent Washer x12 Drawer Knob x12 Wood Dowel x22 Allen Wrench x1 Anti-Tip Kit x 1bag (Instruction and Hardware inside)
- Page 4 Furniture Care Instructions Room Climate Control Wood, when first cut contains more than 50 percent water. When it is prepared for furniture construction it is placed in a Kiln and the mois ture content is brought down to 8 to 10 percent. Wood is porous and responds to its environment.
- Page 5 STOP IF YOU EXPERIENCE ANY ISSUES WITH THIS PRODUCT BEFORE YOU RETURN THIS TO THE RETAILER PLEASE FOLLOW PROCEDURES ON THE BACK PAGE...
-
Page 6: Assembly Step
Assembly Step 1 F1. Top Back Rail x1 E1. Top Front Rail x1 E2. Bottom Front Rail x1 F2. Lower Back Rail x1 F3. Back Thick Panel x1 Wood Dowel x20... - Page 7 Assembly Step 2 E2. Bottom Front Rail x1 E3. Lower Front Rail x2 E1. Top Front Rail x1 C. Divider Frame x1 F1. Top Back Rail x1 F2. Lower Back Rail x1 F3. Back Thick Panel x1 1-1/8" Allen Head Bolt x6 Allen Wrench x1 1-3/4"...
- Page 8 Assembly Step 3 1-3/4" Allen Head Bolt x6 1-1/8" Allen Head Bolt x2 Plastic Crescent Washer x6 Allen Wrench x1 A. Left Side Panel x1...
- Page 9 Assembly Step 4 1-3/4" Allen Head Bolt x6 1-1/8" Allen Head Bolt x2 Plastic Crescent Washer x6 Allen Wrench x1 B. Right Side Panel x1...
- Page 10 Assembly Step 5 1-3/4" Allen Head Bolt x10 1-1/8" Allen Head Bolt x4 Allen Wrench x1 D. Top Panel x1...
- Page 11 Assembly Step 6 1-1/8" Allen Head Bolt x6 Wood Dowel x2 Allen Wrench x1 E4. Front Molding x1...
- Page 12 Assembly Step 7 5/8" Phillips Head Screw x39 Label G1. Top Back Panel x1 (Small) G2. Bottom Back Panel x1 (Large)
- Page 13 Assembly Step 8 H3. Left Drawer x6 H4. Right Drawer x6 H6. Drawer Support x12 H1. Drawer Front x6 1" Phillips Head Screw x60 1" Knob Bolts x12 Drawer Knob x12 H5. Drawer Bottom x6 H2. Drawer Back x6 Note: Grooves on Drawer Sides and Drawer Back should all face inward to allow Drawer Bottom to be inserted.
- Page 14 Assembly Step 9 Anti-Tip Kit x 1bag (Instruction and Hardware inside) Plastic bag Drawer WARNING LABEL Note: Please follow instructions in Anti-Tip Kit when assembly is complete. Plastic bag...
- Page 15 Website: www.bivonaco.com Email: info@bivonaco.com Email: info@bivonaco.com FISHER-PRICE and associated trademarks are owned by and used under license from Mattel. ©2018 Mattel. All Rights Reserved. Manufactured for and dis tributed in the United States & Canada by Bivona & Company®, LLC...
Need help?
Do you have a question about the Signature RTA Dresser and is the answer not in the manual?
Questions and answers