Table of Contents
Advertisement
Quick Links
WARNINGS
• TO AVOID FIRE SHOCK, OR DEATH, TURN OFF POWER AT CIRCUIT BREAKER OR FUSE,
TEST THAT POWER IS OFF BEFORE SERVICING OR WIRING and ensure connections are
made in the same sequence as existing device connections.
• These devices conform to IEC standard 60309-1 and 60309-2. The construction is such that
each device cannot be mated with another IEC device of different specifications (i.e., voltage,
amperage or system rating). For safety purposes, do not use a non-IEC device with these pin
and sleeve devices. The specifications for non-IEC devices are established by the individual
manufacturers, and may not meet IEC standards. IMPROPER MATING OF DEVICES MAY
CAUSE FIRE, SHOCK OR DEATH.
20A and 30A Plug Installation
saddle clamp assembly
contact carrier
saddle
clamp
saddle
clamp screw
quick lock
housing
pin
1.
Unscrew assembly and contact carrier.
2.
Thread wire.
Remove washer from housing, select grommet (Table 1) thread clamp assembly, washer, grommet and
housing onto selected wire (Table 3).
NOTE: If using screwless clamp assembly, select strain relief nut first (Table 2).
OR
strain relief
washer
grommet
nut
3.
Wire
.
Cut and strip cable jacket and conductors (Table 4).
WARNING: TO AVOID FIRE, SHOCK OR DEATH, connections must be made in the same sequence as
existing device connections.
Connect wires (Table 5 and Stripping and Wiring Diagram) and tighten terminal screws. NOTE: Reference
torque value (Table 6). Allen key included.
4.
Reconnect contact carrier.
Tighten assembly screws (Table 6).
5.
Reassemble
.
Slide grommet and washer down and seat firmly into housing. Slide saddle clamp assembly or screwless
clamp assembly onto housing and screw on until quick lock pin fully engages. Tighten clamp screws
(Table 6).
OR
© 2019 Leviton Mfg. Co., Inc.
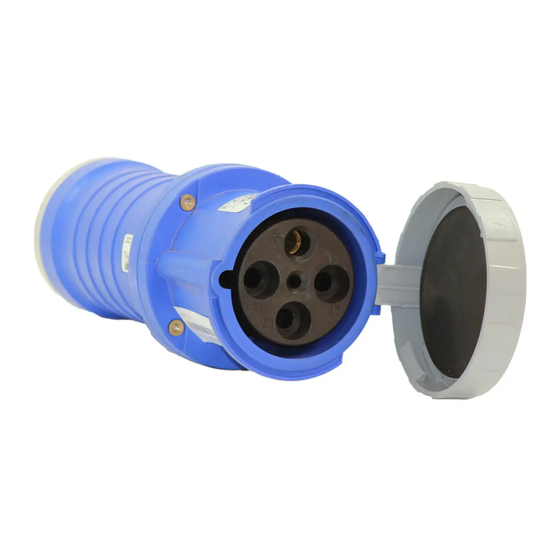
Watertight Pin and Sleeve
Plugs and Connectors
20A, 30A, 60A and 100A
screwless clamp assembly
contact carrier
OR
dust shield
quick lock
housing
pin
assembly
screws
NOTE: Line up key with key notch.
NOTE: fully engaged quick lock pin
CAUTIONS
• Examine devices periodically for any foreign matter that may contaminate the contacts or the insulation material
separating the contacts. Contamination decreases the device's insulation properties. This increases the
potential for arcing and possibly decreases the product's life and may cause fire and/or shock hazard. The
frequency of inspection depends upon the degree of contamination.
• If you are unsure about any part of these instructions, consult an electrician.
• To be installed and/or used in accordance with electrical codes and regulations (Including NEC/CEC, as applicable).
• Use this device only with copper or copper clad wire.
QUICK INSTALL GUIDE
20A and 30A Connector Installation
saddle clamp assembly
saddle clamp
saddle clamp
screw
quick lock
pin
1.
Unscrew assembly and contact carrier.
2.
Thread wire.
Remove washer from housing, select grommet (Table 1) thread clamp assembly, washer, grommet and
housing onto selected wire (Table 3).
NOTE: If using screwless clamp assembly, select strain relief nut first (Table 2).
strain relief
nut
3.
Wire
.
Cut and strip cable jacket and conductors (Table 4).
WARNING: TO AVOID FIRE, SHOCK OR DEATH, connections must be made in the same sequence as
existing device connections.
Connect wires (Table 5 and Stripping and Wiring Diagram) and tighten terminal screws. NOTE: Reference
torque value (Table 6). Allen key included.
4.
Reconnect contact carrier
Tighten assembly screws (Table 6).
5.
Reassemble.
Slide grommet and washer down and seat firmly into housing. Slide saddle clamp assembly or screwless
clamp assembly onto housing and screw on until quick lock pin fully engages. Tighten clamp screws
(Table 6).
screwless clamp assembly
contact carrier
OR
dust shield
quick lock
housing
OR
washer
grommet
.
OR
PK-A3278-10-00-0A
ENGLISH
contact carrier
pin
housing
assembly
screws
NOTE: Line up key with key notch.
NOTE: fully engaged quick lock pin
Advertisement
Table of Contents

Subscribe to Our Youtube Channel
Related Manuals for Leviton 20A


Summary of Contents for Leviton 20A
- Page 1 Watertight Pin and Sleeve Plugs and Connectors PK-A3278-10-00-0A 20A, 30A, 60A and 100A WARNINGS CAUTIONS • TO AVOID FIRE SHOCK, OR DEATH, TURN OFF POWER AT CIRCUIT BREAKER OR FUSE, • Examine devices periodically for any foreign matter that may contaminate the contacts or the insulation material TEST THAT POWER IS OFF BEFORE SERVICING OR WIRING and ensure connections are separating the contacts.
- Page 2 FOR CANADA ONLY For warranty information and/or product returns, residents of Canada should contact Leviton in writing at Leviton Manufacturing of Canada Ltd to the attention of the Quality Assurance Department, 165 Hymus Blvd, Pointe- Claire (Quebec), Canada H9R 1E9 or by telephone at 1 800 405-5320.
Need help?
Do you have a question about the 20A and is the answer not in the manual?
Questions and answers