Table of Contents
Advertisement
User and Installer Handbook
Tapworks Softener Models AD10 & Ultra 15
Thank you for choosing Tapworks to supply your soft
water. We are confident that you will be pleased with your
purchase and would encourage you to read this installation
and instruction handbook thoroughly to ensure maximum
performance from your water softener.
If you should experience any difficulty with your water softener,
please refer to the Troubleshooting Checklist at the back of this handbook.
This will help to prevent unnecessary and expensive callouts.
For service support or technical advice please call our service
desk on 01494 48 48 48.
Please retain this handbook for future reference
Advertisement
Table of Contents

Related Manuals for Tapworks AD10


Summary of Contents for Tapworks AD10
- Page 1 User and Installer Handbook Tapworks Softener Models AD10 & Ultra 15 Thank you for choosing Tapworks to supply your soft water. We are confident that you will be pleased with your purchase and would encourage you to read this installation and instruction handbook thoroughly to ensure maximum performance from your water softener.
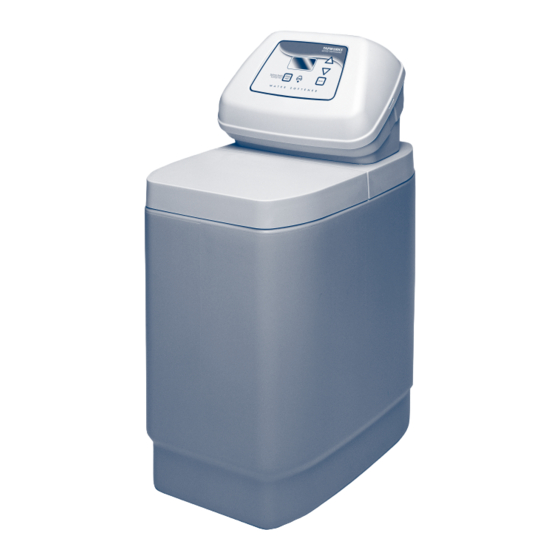
- Page 2 Unpacking Your Water Softener Control Valve Cover & Electronic Faceplate Salt Lid Salt Cabinet Water Softener Valve & Motor Resin Cylinder Brine Well and Cover Overflow Connection Drain Connection Notes 1 Serial Number and Date Code are under the Salt Lid 2 Remove all packaging parts from inside the unit.
- Page 3 Unpacking Your Water Softener (cont) Part Part Description Quantity Number Easy Install Tees G0817 pair Drain/Overflow Tubing 7108118 Overflow Elbow 1103200 Overflow Grommet 9003500 Hose Clips 900431 Water Hardness Test Kit 800005 Transformer 98124612 Adapter Clips 1205500 Adapter ‘O’ Rings 900535 Adapter Elbows ( ⁄...
-
Page 4: Installation Of Your Water Softener
Installation of Your Water Softener PLANNING & SITING THE INSTALLATION HARDWATER TAP The installation of a water softener is relatively easy to carry out, but we Water Authority byelaws require that one tap in the house remains recommend that this work is undertaken by a plumber or an experienced unsoftened. -
Page 5: Drain Hose
C Inlet Valve Minimum system flow 0.06m3/hr D Outlet Valve Maximum system flow 3.18m3/hr If a pressure-reducing valve is required this may be ordered from Tapworks: Quote Part No. 800220 for ⁄ ” or 15mm pipework Quote Part No. 800223 for ⁄... - Page 6 Step By Step Guide To Plumbing The Softener PLUMBING back on. Use the red valve for the inlet, the blue valve for the outlet and the grey valve as the bypass. Before turning the water back on, make sure the Turn off the water supply at the incoming main and begin plumbing as per bypass is open and the inlet and outlet valves are closed.
- Page 7 Step By Step Guide To Plumbing The Softener (cont) FIT THE INLET AND OUTLET ADAPTOR ELBOWS Remove the plastic plug from the outlet port on the water softener valve, if present. Fit the ‘O’ rings to the outer groove of each adaptor elbow. Push the adaptors into the valve inlet as far as they will go.
-
Page 8: Inlet And Outlet Connections
Step By Step Guide To Plumbing The Softener (cont) SECURE THE ADAPTOR ELBOW Snap the two large hold clips into place, from the top down (see top illustration . Be sure they snap firmly into place so that the adaptors will not pull opposite) out. -
Page 9: Electrical Installation
Step By Step Guide To Plumbing The Softener (cont) ELECTRICAL INSTALLATION Should the faceplate fail to display or indicate an error code please check that the connections are as per the diagram below, you will need to remove The water softener works on a 24 volt, 50 Hz electric power supply. the valve cover to do this. - Page 10 Setting Up Your water softener has an advanced volume controlled system, which c) Regeneration is based on patterns established for volumes of water used, allows you to achieve important salt and water savings during regeneration: giving you the maximum conservation of water and salt usage. a) LCD display and user friendly buttons.
-
Page 11: Water Hardness
Programming When the transformer is first plugged in the display will flash 12.00am. WATER HARDNESS NOTE: Each time you press a button on the fascia panel display a beeper sounds. One beep signals that a change is accepted. If the beeper sounds Unit Setting continually then a different button is required to effect the required opera- tion. - Page 12 Programming (cont) To advance or reduce the displayed number to your required setting, use the buttons. HARDNESS Once the required setting is displayed it may be set by pushing the SELECT button once more. SET THE REGENERATION TIME The display will flash 02.00 recharge time, which is the pre-set factory setting.
-
Page 13: Finishing Installation
If you are a regular user of water softeners you will benefit from joining our RECHARGE flashes in the display. After a few minutes a small amount Tapworks Installer Club loyalty scheme. Call 01494 480621 for details. of water will enter the Salt Cabinet. This process will take approximately Thank you for choosing Tapworks. -
Page 14: User Information
User Information TO REGENERATE TONIGHT TO REGENERATE NOW The unit can be programmed to regenerate at the next pre-programmed Alternatively, an automatic regeneration can be initiated at any time. time, regardless of its remaining capacity. This is particularly beneficial to Simply press the TOUCH/HOLD button and hold it down for approximately ensure a sufficient softened water supply for an expected heavy water 3 seconds, until a beep sounds. -
Page 15: Power Cuts
User Information (cont) POWER CUTS Check electrical connections are as per configuration on page 9. If the electrical power to the water softener is interrupted, the time display a Unplug transformer. is blank, but the ‘memory’ built into the electronics will keep the correct time b Check direct connections. - Page 16 Diagnostic Data Transfer Tapworks Water Softeners come fitted with our unique diagnostic data • Simultaneously press the UP and DOWN buttons. transfer system. • A constant beeping pattern is emitted. Our Automated Service Evaluation System enables your water softener to •...
-
Page 17: Troubleshooting
Troubleshooting If you are experiencing poor water flow, please check all plumbing first, Page Checklist Solution as it is extremely rare for a softener to cause flow rate problems. Save money by ensuring an engineer is not called out PROBLEM: Hard Water or, Intermittently Hard Water unnecessarily. - Page 18 Troubleshooting (cont) Page Page Checklist Solution Checklist Solution PROBLEM: Excessive Salt Usage PROBLEM: Electronic Faceplate 1 Check the Hardness. 1 Is the faceplate blank? 1 Reduce the unit setting if incorrect. 1 Check the power is turned on and all conections are secure. PROBLEM: No Water in Cabinet or Very Low 2 Is the display stuck on one function? 2 Turn the power off for ten seconds...
-
Page 19: Water Level
Guarantee, Service & General Information General information All Tapworks Domestic Water Softeners are fully covered by one year parts and labour guarantee against manufacturing SALT defect from the date of purchase. Salt is used as the regenerate (cleansing agent) for your water softener’s This guarantee does not effect the statutory rights of the consumer. -
Page 20: General Information
This will be caused by new pipework and should local stockist about the benefits of a Tapworks Drinking Water System. disappear after a short time. Simply wipe away any deposit.
Need help?
Do you have a question about the AD10 and is the answer not in the manual?
Questions and answers