Blaupunkt London MP37 Operating And Installation Instructions
Hide thumbs
Also See for London MP37:
- Operating and installation instructions (200 pages) ,
- Operating and installation manual (52 pages) ,
- Operating instructions manual (16 pages)

Related Manuals for Blaupunkt London MP37


Summary of Contents for Blaupunkt London MP37
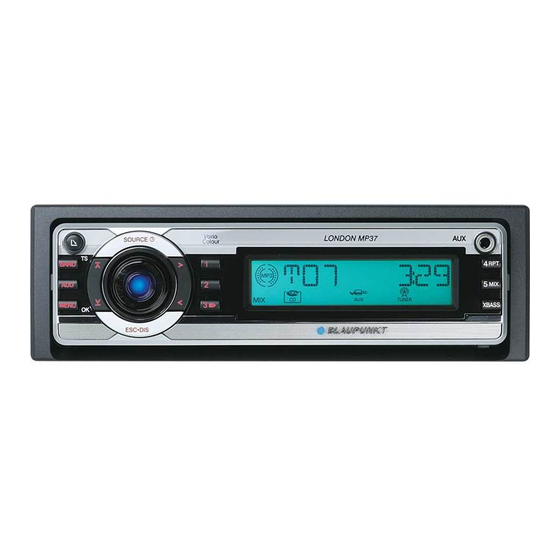
- Page 1 Radio CD MP3 WMA London MP37 7 647 573 510 Operating and installation instructions Mode d’emploi et de montage Instrucciones de manejo e instalación Instruções de serviço e de montagem...
- Page 3 Controls ; MENU/OK button button to open the fl ip-release con- Short press: Calls up the menus for ba- trol panel. sic settings and confi rms settings. 2 On/Off button Ending the scan function. Short press: Switches the device on. Long press: Starts the Scan function.
-
Page 4: Table Of Contents
Contents About these instructions ....6 CD mode ......... 16 Symbols used........6 Switching to CD mode ....16 Use as directed ........ 6 Selecting tracks ......17 Declaration of conformity ....6 Fast track selection ......17 Fast searching (audible) ....17 For your safety ........ - Page 5 Contents CD-changer mode ......23 External audio sources ..... 32 Switching to CD-changer mode ..23 Switching the rear AUX input on/off .. 32 Selecting CDs ........ 23 Specifi cations ......... 33 Selecting tracks ......23 Amplifi er ........33 Fast searching (audible) ....
-
Page 6: About These Instructions
Declaration of conformity • Always pass on the device to third par- The Blaupunkt GmbH declares that this ties together with these instructions. car sound system complies with the basic In addition, observe the instructions of the requirements and the other relevant regula- devices used in conjunction with this de- tions of the directive 1999/5/EG. -
Page 7: For Your Safety
For your safety In operation For your safety • Operate the device only if traffi c situa- The device was manufactured according to tion permits it! Stop at a suitable loca- the state of the art and established safety tion to perform more extensive opera- guidelines. -
Page 8: Disposal Of Old Unit (Eu Countries Only)
You cannot switch the device on/off using the remote control! You can fi nd out from your Blaupunkt dealer or on the Internet at www.blaupunkt.com which remote controls can be used with your car sound system. -
Page 9: Warranty
• Never drop the control panel. Service • Never expose the control panel to di- In some countries, Blaupunkt offers a repair rect sunlight or other heat sources. and pick-up service. • Avoid direct skin contact with the Information about the availability of this control panel’s electrical contacts. -
Page 10: Attaching The Control Panel
Detachable control panel Notes: Switch-off time (OFF TIMER) • The device is switched off after a After opening the control panel, the device time preset by you. For instructions, is switched off after an adjustable time. You please read the section "Switch-off can set this time from 0 to 30 seconds. -
Page 11: Switching On/Off
Switching on/off Volume Switching on/off Adjusting the volume There are various ways of switching the de- You can adjust the volume in increments vice on/off: from 0 (off) to 66 (maximum). To increase the volume, Switching on/off using button 2 turn the volume control 4 clockwise. -
Page 12: Quickly Reducing The Volume (Mute)
(Mute). structions. Briefl y press button 2. You can fi nd out from your Blaupunkt dealer "MUTE" appears on the display. which navigation systems can be used with your car sound system. -
Page 13: Switching The Confi Rmation Beep On/Off
Volume Radio mode Note: Radio mode You can use the volume control 4 to adjust the volume of telephone calls Adjusting the tuner and navigation announcements whilst To ensure proper functioning of the tuner, you are listening to them. the device must be set for the region in which it is being operated. -
Page 14: Switching To Radio Mode
Radio mode Switching to radio mode Tuning into stations manually You can also tune into stations manually. If you are in CD, CD changer or AUX mode, To change the set frequency in small incre- press the BAND/TS button = ments, or button 8. -
Page 15: Storing Stations
Radio mode Storing stations Listening to stored stations Select the memory bank or waveband. Storing stations manually Press one of the station buttons 1 - 5 Select the desired memory bank FM1, FM2, FMT or the AM waveband. The stored station is played if it can be re- Tune into the desired station. -
Page 16: Setting The Scanning Time
To ensure proper functioning, use only CDs with the Compact-Disc logo. Copy-protected CDs can cause playback problems. Blaupunkt cannot guarantee the proper functioning of copy-protected CDs! Besides being able to play audio CDs on this device, you can also play CDs containing MP3/WMA music fi... -
Page 17: Selecting Tracks
CD mode The drive draws in the CD automatically. Fast searching (audible) You must not hinder or assist the drive as it To fast search backwards or forwards, draws in the CD. press and hold down the or button Gently close the control panel whilst 8 until fast searching backwards/for- exerting a little pressure until you feel wards begins. -
Page 18: Repeating Tracks (Repeat)
CD mode Cancelling Scan and continuing listening Confi guring the display to a track You can choose from various display op- To end the scanning process, tions in CD mode: press the MENU button ;. • Track number and playing time The currently scanned track will then con- •... -
Page 19: Ejecting A Cd
CD mode MP3/WMA mode Ejecting a CD MP3/WMA mode button 1. Press the You can also use this car sound system to play CD-Rs and CD-RWs that contain MP3 The control panel opens out towards you. music fi les. You can also play WMA fi les. >... - Page 20 MP3/WMA mode This device supports as many subdirecto- If you like your fi les to be in the correct or- ries as your burner software can create de- der, you should use burner software that spite the fact that the maximum directory places fi...
-
Page 21: Switching To Mp3 Mode
MP3/WMA mode Switching to MP3 mode Note: Artist, track and album name are MP3 mode is activated in the same way as a component of the MP3 ID tag of normal CD mode. For further information, version 1 and can only be displayed if please read the section entitled "Switching they were stored with the MP3 fi... -
Page 22: Selecting Tracks/Fi Les
MP3/WMA mode correct the number of directories for To play the tracks contained in all the direc- the display. This number might there- tories on the inserted MP3 CD in random fore no longer be identical to the order, number of directories that you actu- press the 5 MIX button 5 for longer ally created. -
Page 23: Repeated Playback Of Individual Tracks Or Entire Directories - Repeat
MP3/WMA mode CD changer mode Repeated playback of individual CD-changer mode tracks or entire directories Note: – REPEAT Information on handling CDs, inserting To play the current track repeatedly, CDs and operating the CD changer can briefl y press the 4 RPT button 5. be found in the operating instructions supplied with your CD changer. -
Page 24: Repeating Individual Tracks Or Whole Cds (Repeat)
CD-changer mode Repeating individual tracks or Cancelling MIX Briefl y press the 5 MIX button 5. whole CDs (REPEAT) "MIX OFF" appears briefl y on the display To repeat the current track, and the MIX symbol disappears. briefl y press the 4 RPT button 5. "RPT TRCK"... -
Page 25: Confi Guring The Display
CD changer mode Clock - Time Confi guring the display Clock – Time You can choose from various display op- Displaying the time tions in CD changer mode: • CD number and track number To briefl y display the time, •... -
Page 26: Displaying The Time Continuously When The Device Is Off And The Ignition Is On
Clock - Time Sound button 8 to switch Press the Sound between the modes. You can adjust the sound settings (bass, When you have fi nished making your middle and treble) separately for each changes, source (radio, CD, CD changer, AUX, and press the MENU button ;. -
Page 27: Adjusting The Middle
Sound Note: Adjusting the treble If an Equaliser preset (POP, ROCK, You can select 1 of 4 treble frequencies CLASSIC) is selected, the manual in- (10 kHz, 12 kHz, 15 kHz, 17 kHz). In addi- crease of the bass level does not result tion, you can adjust the level between -7 and in an audible change starting at a cer- +7 for the selected treble frequency. -
Page 28: Setting The Left/Right Volume Distribution (Balance)
Sound Preamplifi er output Setting the left/right volume Preamplifi er output distribution (balance) (Preamp-Out/Sub-Out) To adjust the left/right volume distribution You can use the preamplifi er outputs (balance), (Preamp-Out) of the car sound system to press the AUD button <. connect external amplifi... -
Page 29: Adjusting The Sub-Out Cutoff Frequency
Preamplifi er output X-BASS Adjusting the sub-out cutoff X-BASS frequency X-Bass allows you to increase the bass at You can select 1 of 4 settings: 0 Hz (linear), low volume. 80 Hz, 120 Hz and 160 Hz. The selected X-Bass setting is effective for Press the AUD button <. -
Page 30: Equaliser Presettings (Presets)
Equaliser presettings Display Equaliser presettings Adjusting the display (Presets) settings This device features an equaliser in which Adjusting the display brightness the settings for the music genres "ROCK", "POP" and "CLASSIC" are already pro- If your car sound system is installed as de- grammed. -
Page 31: Setting The Display Illumination Colour
Display Setting the display illumination Selecting a display illumination during a colour scan colour Press the MENU button ;. For the display illumination, you can mix a button : repeat- Press the colour from the RGB spectrum (red green edly until "COL SCAN" appears on the blue) or select a colour during a colour display. -
Page 32: External Audio Sources
An adapter cable is needed to con- nect an external audio source via the rear AUX input. You can obtain this ca- ble (Blaupunkt no.: 7 607 897 093) from your Blaupunkt dealer. • The rear AUX input must be activated in the menu. -
Page 33: Specifi Cations
Technical data FM frequency response: Specifi cations 35 - 16,000 Hz Amplifi er Output power: 18 W RMS x 4 ch @ 14.4 V @ 4 ohm @ 1% THD Frequency response: 20 - 20,000 Hz Tuner Frequency ranges USA: Pre-amp out 87.5 - 107.9 MHz 4 channels:... -
Page 34: Installation Instructions
Blaupunkt dealer, your vehicle connexion et en cas de dommages manufacturer or our telephone hot- consécutifs. - Page 35 Supplied Mounting Hardware Available as an optional accessory Materiel de montage fourni Disponible en option Ferretería de montaje suministrada De venta como accesorios especiales Elementos de fi xação fornecidos Disponíveis como acessórios opcionais 7 607 621 . . . Installation kits Kits de montage Juegos de montaje Kits de montagem...
- Page 36 1-20 1 2 V ca. 10 mm Removal / Démontage / Desmontaje / Desmontagem / 0°- 30° +/– 10° +/– 10° 8 613 150 002...
- Page 37 1 2 V...
- Page 38 Aut. antenna FB +12V / RC +12V +12V Amplifier 10 Ampere Somme Suma 300 mA Soma No connection Speaker out RR+ Radio Mute Speaker out RR- Sub-Out Speaker out RF+ Permanent +12V Speaker out RF- Aut. antenna Speaker out LF+ Illumation Speaker out LF- Kl.15/Ignition...
- Page 39 Preamp./Sub./Center - out cable Relais Amplifi er 1 3 5 Kl. 15 +12V 2 4 6 Radio Mute Sub-Out 4 Ohm 4 Ohm 4 Ohm 4 Ohm 1 2 V Subject to changes! Sous réserve de modifi cations! Modifi caciones reservadas! Sob reserva de alterações!
Need help?
Do you have a question about the London MP37 and is the answer not in the manual?
Questions and answers