Sign In
Upload
Download
Table of Contents
Contents
Add to my manuals
Delete from my manuals
Share
URL of this page:
HTML Link:
Bookmark this page
Add
Manual will be automatically added to "My Manuals"
Print this page
×
Bookmark added
×
Added to my manuals
Manuals
Brands
Zodiac Manuals
Swimming Pool Filter
Chlor Perfect
Instructions for installation and use manual
Zodiac Chlor Perfect Instructions For Installation And Use Manual
Hide thumbs
Also See for Chlor Perfect
:
Instructions for installation and use manual
(15 pages)
1
2
3
4
Table Of Contents
5
6
7
8
9
10
11
12
13
14
15
16
17
18
19
20
21
page
of
21
Go
/
21
Contents
Table of Contents
Bookmarks
Table of Contents
Table of Contents
❶ Specifi Ca� Ons
I Descripti on
I Technical Specifi Cati Ons
I Dimensions and Marking
❷ Installa� on
I Preparing the Pool
I Hydraulic Connecti Ons
I Electrical Connecti Ons
❸ Use
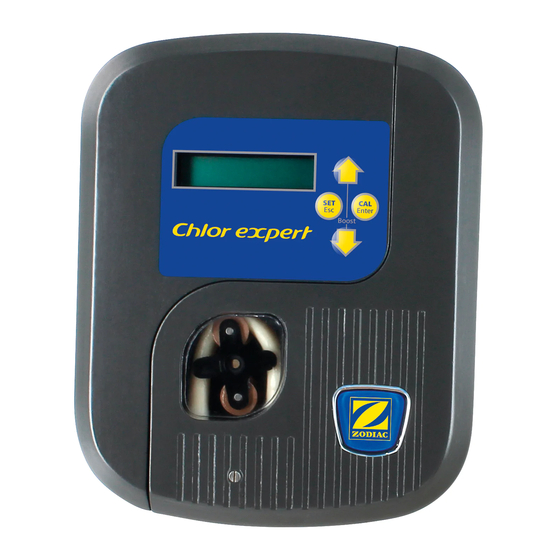
I Control Box Presentati on
I Checks before Commissioning
I Calibrati Ng the Sensor
I Priming the Peristalti C Pump
I "Boost" Mode
I Setti Ngs
❹ Maintenance
I Changing the Peristalti C Tube
I Winterizing
❺ Troubleshoo� Ng
I Appliance Behaviour
I Displays
Advertisement
Quick Links
1
I Descripti on
2
I Preparing the Pool
3
I Control Box Presentati on
4
❺ Troubleshoo� Ng
Download this manual
H0435000.G - 2019/11
Instruc� ons for installa� on and use - English
Redox regulati on
Translation of the original instructi ons in french
More documents on:
www.zodiac.com
EN
Table of
Contents
Previous
Page
Next
Page
1
2
3
4
5
Advertisement
Table of Contents
Need help?
Do you have a question about the Chlor Perfect and is the answer not in the manual?
Ask a question
Questions and answers
Related Manuals for Zodiac Chlor Perfect
Water Filtration Systems Zodiac Chlor perfect Instructions For Installation And Use Manual
(15 pages)
Lighting Equipment Zodiac Chlor expert Instructions For Installation And Use Manual
(74 pages)
Swimming Pool Filter Zodiac eXO Manual Addendum
(4 pages)
Swimming Pool Filter Zodiac Chlor Clever Instructions For Installation And Use Manual
(21 pages)
Swimming Pool Filter Zodiac C Series Owner's Manual
(11 pages)
Swimming Pool Filter Zodiac pH Perfect Owner's Manual And Warranty
(20 pages)
Swimming Pool Filter Zodiac Gen Chlor Instructions For Installation And Use Manual
(21 pages)
Swimming Pool Filter Zodiac pH expert Instructions For Installation And Use Manual
Automatic ph regulator doser (19 pages)
Swimming Pool Filter Zodiac ClearWater LM2 Manual
(10 pages)
Swimming Pool Filter Zodiac DuoClear Troubleshooting Manual
(20 pages)
Swimming Pool Filter Zodiac EI2 Expert 18SWC EU VS Instructions For Installation And Use Manual
(18 pages)
Swimming Pool Filter Zodiac Nature2 Express Owner's Manual
For inground pools and aboveground pools (8 pages)
Swimming Pool Filter Zodiac TRi PRO Instructions For Installation And Use Manual
(43 pages)
Swimming Pool Filter Zodiac eXPERT Instructions For Installation And Use Manual
Salt water chlorinator (416 pages)
Swimming Pool Filter Zodiac pH expert Instructions For Installation And Use Manual
(164 pages)
Swimming Pool Filter Zodiac BOREAL Instructons For Installaton And Use
(12 pages)
This manual is also suitable for:
Chlor expert
Chlor clever
Gen chlor
Table of Contents
Print
Rename the bookmark
Delete bookmark?
Delete from my manuals?
Login
Sign In
OR
Sign in with Facebook
Sign in with Google
Upload manual
Upload from disk
Upload from URL


Need help?
Do you have a question about the Chlor Perfect and is the answer not in the manual?
Questions and answers