Table of Contents
Advertisement
Advertisement
Table of Contents

Related Manuals for Denlar D1000 Series


Summary of Contents for Denlar D1000 Series
- Page 1 10 Denlar Dr., Chester, CT 06412 LAB-110073 Rev. 2.7...
- Page 2 DISCLAIMER: DENLAR Fire Protection shall not be liable for errors contained in this Manual or for incidental, consequential damages in connection with the furnishing, performance or use of this information. DENLAR Fire Protection makes no warranty of any kind with regard to this information, including, but not limited to the implied warranties of merchantability and fitness for a particular purpose.
-
Page 3: Table Of Contents
TABLE OF CONTENTS INSTALLATION: System Anatomy Page 3 Sample Elevations Page 4 Preparing the Installation location Page 5-7 NFPA101 - Front/Rear Fan Installation Page 8-9 Range Element Disconnect Install Page 10-11 Handicap Accessible Controls Page 12-13 Installing the D1000 Page 14 Fire Alarm System Connections Page 15 Manual Pull Station Installation... -
Page 4: System Anatomy
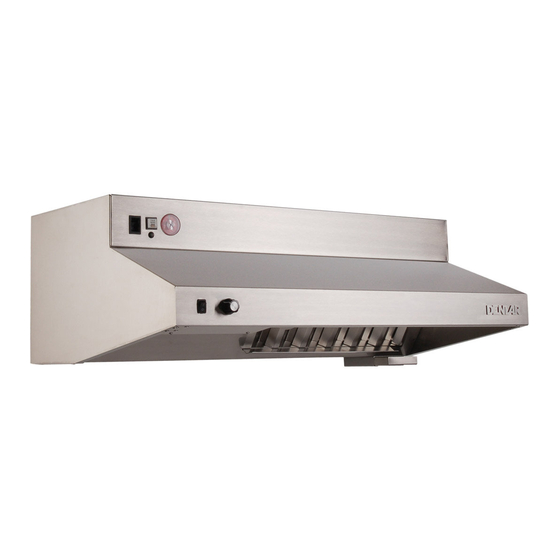
SYSTEM ANATOMY Reset Switch Quarter Turn Screw (on recirculating models) to remove vent D1000 Installation and Service Manual Home LAB-110073 Rev. 2.7... -
Page 5: Sample Elevations
SAMPLE ELEVATIONS D103X-F D103X-D-IF Sample Discharge Ducted Cabinet 7” Duct Plug ‘N’ Play Cabinet Plenum Ready Supply Cable to Fan Range Hood Rang 120VAC Air Flow Hood Power Input 120VAC Power Input Air Flow 120 VAC Power Disconnect 120 VAC Power Disconnect D103X-R D103X-D-RF... - Page 6 In order to allow the installation of the NFPA101 compliant version of the D1000-F/R, which uses an additional Fan Box as shown attach the fan box to the bracket, and then proceed. NOTE # 5 COMPONENTS A. DENLAR D1000 (30” or 36”) B. Range (for reference purposes (gas, electric or dual element, dual receptacle) C.
- Page 7 PREPARING THE INSTALL LOCATION D1030 24" 30" D1036 30" 36" Installation Heights Note # 6 Mounting Bracket NFPA101 “F” & “R” Rev Install See Pages 8 & 9 for details 5 7/8” 4” 28 5/8” ” 1 5/8” 10 5/16”” 1/16”...
- Page 8 PREPARING THE INSTALL LOCATION 1. Determine the mounting location of the power disconnect (contactor box or gas solenoid valve) and mounting bracket, if not already done. 2. Run the 14/2 MC wire from the junction box through the wall to the power disconnect location. Run 12/2 MC wire for the 120VAC input power supply from the junction box to the 120VAC connection.
- Page 9 NFPA101 FRONT/REAR (F/R) DISCHARGE INSTALLATION The NFPA101 compliant calibration of the DENLAR D1000 was engineered to comply with the requirements of the NFPA Life Safety Code, related to residential cooking appliances used in non- production cooking environments. Due to the...
- Page 10 NFPA101 FRONT/REAR DISCHARGE INSTALLATION If installing under cabinets, keeping the fan Conduit box flush to the underside will guarantee Coupler correct spacing. Otherwise, center and Fitting mark the installation area according to the mounting bracket prior to hanging. 1. Insert/attach the top portion of the MPK conduit through the fan box.
-
Page 11: Range Element Disconnect Install
RANGE ELEMENT DISCONNECT INSTALLATION GAS POWER DISCONNECT 110-120VAC Power Disconnect Output from SOLENOID VALVE-GD Hood- Electrical Connection ” NPT ¾ The gas solenoid has two female ¾” NPT pipe threads. Be sure to note the arrow indicating the direction of the flow marked on the body of the valve. - Page 12 RANGE ELEMENT DISCONNECT INSTALLATION GAS POWER DISCONNECT ELECTRIC POWER DISCONNECT DUAL ELEMENT POWER DISCONNECT (INTEGRATED ELECTRIC AND GAS) D1000 Installation and Service Manual Home LAB-110073 Rev. 2.7...
- Page 13 HANDICAP ACCESSIBLE CONTROLS (ADA) COMPONENTS Handicap Accessible Controls • ADA Wire Harness Assembly o (1) Metal 2-Gang Enclosure o (2) Toggle Switches (white) o (15’) Three Conductor Cable inside of a Non-Metallic Tubing with a Ground o (1) Gray or Green Eight Position Male Connector (Plug-N-Play) o (1) 2-Gang White Switch Cover o (2) Mounting Brackets o (1) Junction Box with four wire multi-conductor...
-
Page 14: Handicap Accessible Controls
HANDICAP ACCESSIBLE CONTROLS WIRING DIAGRAM D1000 Installation and Service Manual Home LAB-110073 Rev. 2.7... -
Page 15: Installing The D1000
INSTALLING THE D1000 1. Line unit up to the secured D1000 mounting 2. On the tank, remove the safety pin-identified with the yellow flag “caution” from the trigger bracket and seat lower tabs into slots in the back of the hood. on top of the extinguisher bottle. -
Page 16: Fire Alarm System Connections
FIRE ALARM CONNECTIONS The D1000 has three fire alarm connections (discrete switches), each independent from each other. Two are controlled by the PLC and one is mechanical. • A connection is made to one output (Y#) and one common (C#) at the PLC. The output labeled YO is triggered by a fault from HiTemp, 190̊F, pressure switch or hose switch. -
Page 17: Manual Pull Station Installation
MANUAL PULL STATION (MPK) INSTALLATION STEP 1: INSTALLING CONDUIT Mount the pull box in an appropriate location according to local building codes. The MPK suplied with twenty-five feet of wire rope cable and three elbow pulleys as our listing requires. •... - Page 18 MANUAL PULL STATION (MPK) INSTALLATION CABLE TRAVELING/DISCHARGE MECHANICS Positioning the Hood • Lowering the hood form Normal Operating Position (NOP) to 45⁰ Service Position (SP) ▪ The stainless-steel rope travels 3.5 inches when lowering the hood from NOP to 45⁰ SP •...
-
Page 19: Ducting And Airflow
DUCTING AND AIRFLOW The ductwork and fittings used for outside venting must be carefully selected to ensure that the static pressure is in line with the fan parameters. The ducting is provided by other and should be specified by the HVAC contractor on the job as each local requirement may differ. -
Page 20: Electrical Schematic
ELECTRICAL SCHEMATIC D1000 Installation and Service Manual Home LAB-110073 Rev. 2.7... - Page 21 D1000 SCHEMATIC TABLE Schematic ID Component Name Component Location Description Fuse 1 Top Center of Hood Main Electrical Panel 1 Amp Fast Acting Fuse to Protect PLC 2 Amp Time Delay Fuse for Non- NFPA 101 Fuse 2 Top Center of Hood Main Electrical Panel Model or 4 Amp Time Delay Fuse for NFPA 101 Fan Model 0.5 Amp Fast Acting Fuse for Gas or Electrical...
- Page 22 SERVICE POSTION & SERVICE MODE LOWERING THE HOOD INTO SERVICE POSITION • Shut the unit off with the power switch on the front of the hood. • Remove the grease tray and filter from the hood • Determine if a Pull Station is Connected •...
-
Page 23: Tank And Link Replacement
TANK AND LINK REPLACEMENT REMOVING AND INSTALLING A TANK WARNING: Rubber gloves and safety • Begin with the hood in the service position, service mode should be ON, and both the maintenance key and safety pin should be in place in order to prevent an glasses should be worn during service accidental discharge or inspection of the tank. -
Page 24: Troubleshooting The D1000 System
TROUBLESHOOTING THE D1000 SYSTEM D1000 OPERATING SYSTEM-PLC DRIVE FUNCTIONS PROGRAMMABLE LOGIC CONTROLLER (PLC) LED Indicators NOTE: See pages19-20 for the wiring diagram and schematic table. HOW THE ENVIRONMENTAL MONITORING SYSTEM WORKS The PLC operating system is designed to enhance the functionality of the unit and the safety of the cooking environment. The system relies on the input of a set of three thermostats to control the fan and shutoff... -
Page 25: Self-Monitoring System
SELF-MONITORING SYSTEM LOW PRESSURE HOW TO TEST FUNCTION: • Unplug one of the wire terminal connections attached to the pressure switch. • The status LED turns from green to orange blinking with the buzzer. • Power for gas solenoid or electrical disconnect turns OFF. •... - Page 26 SELF-MONITORING SYSTEM LOW TEMPERATURE SWITCH HOW TO TEST FUNCTION: • Use heat gun on either the left or right low thermostat. Be careful not to apply heat to the fusible link. • The fan turns ON • The fan remains ON for 3 minutes after temperature falls below 150’F HIGH TEMPERATURE AND LOW TEMPERATURE SWITCH HOW TO TEST FUNCTION: •...
-
Page 27: Maintenance
MAINTENANCE HOW THE D1000 WORKS The D1000 is a fully integrated fire suppression range hood system. It functions as a standard ventilation range hood with the capability to suppress fires on the cooktop. The D1000 is designed for use over 30”and 36” residential ranges, in “not for profit” cooking environments. - Page 28 MAINTENANCE CLEANING THE HOOD • To remove cooking debris and grease build up, clean the unit thoroughly using a mixture of mild detergent and warm water. Take care not to splash water onto the electrical system, as this could damage the hood. •...
- Page 29 MAINTENANCE 10 YEAR MAINTENANCE Hydrostatic testing and new liquid agent, or tank replacement is recommended at ten-year intervals. The manufacture date is identified on the top of the tank. This should be performed at the manufacturer’s facilities. Material Safety Data Sheets are available at denlarhoods.com WARNING: Rubber gloves and safety glasses should be worn during...
-
Page 30: Operating The Hood
OPERATING THE HOOD OPERATING THE MAIN POWER The D1000 hood has a main Power ON/OFF switch. • Prior to operating the hood ensure that the main power switch is in the ON (I) position The main power switch is in the upper panel of the hood on the left side (see Page 21) THE RESET SWITCH Every time the hood loses Power the reset switch needs to be activated. -
Page 31: After An Actuation
AFTER AN ACTUATION CLEAN-UP Kitchen surfaces should be cleaned immediately after a system discharge due to the fire-suppressing agent’s alkaline nature. • Allow the system to cool before attempting to clean • Ensure all fuel or electrical sources to the equipment to be cleaned are OFF •... - Page 32 AFTER AN ACTUATION RESETTING THE POWER DISCONNECT Gas Disconnect • Extinguish any open flames and make sure all burners are in the OFF position. Turn off any electric or mechanical devices capable of igniting gas to reduce the risk of explosion due to leaking gas •...
-
Page 33: Common Parts List
D1000 COMMON PARTS LIST Model Description 30-Inch-Wide - Front Vented, Recirculating Design, 18 GA, 304 Stainless Steel Hood with Internal Fan, PLC Environmental Monitoring & Fire D1030-F Suppression System 30-Inch-Wide - Rear Vented, Rear Duct Connection, 18 GA, 304 Stainless Steel Hood with Internal Fan, PLC Environmental Monitoring & Fire D1030-R Suppression System 30-Inch-Wide - Top Vented, Vertical Duct Connection, 18 GA, 304 Stainless Steel Hood with External Fan, PLC Environmental Monitoring &... - Page 34 ADDITIONAL INFORMATION CONTACT INFORMATION DENLAR Fire Protection 10 Denlar Dr. Chester, CT 06412 P: 860-526-9846 F: 860-526-9585 denlarhoods.com SERVICE 860-526-9846 option 2 service@denlarhoods.com SALES 860-526-9846 option 1 sales@denlarhoods.com WARRANTY INFORMATION Specific warranty statement can be found at denlarhoods.com within the product pages or by contacting us via e-mail at info@denlarhoods.com...
Need help?
Do you have a question about the D1000 Series and is the answer not in the manual?
Questions and answers