Hifonics Vulcan Series Installation Manual
Hide thumbs
Also See for Vulcan Series:
- Owner's manual (32 pages) ,
- User manual (29 pages) ,
- Installation manual (8 pages)
Advertisement
Available languages
Available languages
Quick Links
Advertisement

Related Manuals for Hifonics Vulcan Series


Summary of Contents for Hifonics Vulcan Series
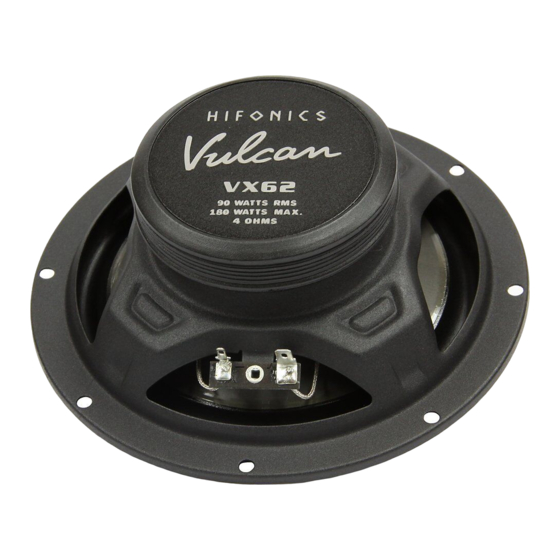
- Page 1 INSTALLATION VX42 VX52 VX62 VX693 VX5.2C VX6.2C VX6.2W VX6.2T...
- Page 2 DEUTSCH EINBAUHINWEISE Der erste Schritt bei der Installation der Lautsprecher sollte die sorgfältige Planung sein. Folgen Sie einfach diesen Vorschlägen um das bestmögliche Resultat zu erreichen. 1. Wählen Sie eine Position für die einzelnen Komponenten, bei der das Signal am besten ohne Hindernisse im Fahrgastraum verteilt wird.
- Page 3 DEUTSCH VX5.2C, VX6.2C ANSCHLUSSDIAGRAMM (muss jeweils für die linke und rechte Fahrzeugseite vorgenommen werden) Tiefmitteltöner Frequenzweiche Zum Verstärker TW+ WF- + rot markiert Hochtöner + rot markiert WICHTIG: Bitte achten Sie unbedingt auf die korrekte Polarität (+ oder –) aller Anschlüsse und Verbindungen.
- Page 4 DEUTSCH HOCHTÖNEREINBAU HOCHTONPEGELANPASSUNG TWEETER LEVEL -3dB -6dB Wählen Sie zwischen „0dB“, -“3dB“ oder „-6dB“ mit dem Pegelregler. Mit „0dB“ bleibt der Pegel unverändert.
- Page 5 DEUTSCH VX6.2T ANSCHLUSSDIAGRAMM (muss jeweils für die linke und rechte Fahrzeugseite vorgenommen werden) Hochtöner Frequenzweiche Zum Verstärker + rot markiert + rot markiert WICHTIG: Bitte achten Sie unbedingt auf die korrekte Polarität (+ oder –) aller Anschlüsse und Verbindungen.
- Page 6 DEUTSCH VX42, VX52, VX62, VX693, VX6.2W ANSCHLUSSDIAGRAMM Tiefmitteltöner Tiefmitteltöner Links Rechts Verstärker Verstärker Links Rechts WICHTIG: Bitte achten Sie unbedingt auf die korrekte Polarität (+ oder –) aller Anschlüsse und Verbindungen.
-
Page 7: Installation Notes
ENGLISH INSTALLATION NOTES The first step of installing a speaker system is thorough planning. Choose a suitable lo- cation for your speaker components carefully. Follow these suggestions to ensure proper imaging and maximum performance: 1. Choose a location that offers the least amount of obstruction between the components and your ears. Pay also attention to the position of the seats, headrests and other constructional systems in the interior space of the car. 2. Try to mount the speakers on the same arrangement. They should be installed at the same height and directly across from each other. Do not mount one speaker higher, lower, further forward or further backward from the opposite speaker. 3. The tweeter should always be installed as close as possible to the midbass speaker. 4. Always take a look behind the chosen mounting locations to ensure that there is proper clearance for the rearside of the speakers and avoid obstructions such as window tracks, wire harnesses, gas tank etc. -
Page 8: Wiring Diagram
ENGLISH VX5.2C, VX6.2C WIRING DIAGRAM (must be made for right and left side of the vehicle) Midbass Woofer Crossover To Amplifier TW+ WF- + red marked Tweeter + red marked NOTE: Please pay attention to the correct polarity (+ or -) for all terminals and connections. -
Page 9: Tweeter Mounting
ENGLISH ENGLISH TWEETER MOUNTING TWEETER LEVEL ADJUSTMENT TWEETER LEVEL -3dB -6dB Turn the controller and choose between „0 dB“ - „-3 dB“ or „-6dB“. With „0dB“ the level remains unchanged. - Page 10 ENGLISH VX6.2T WIRING DIAGRAM (must be made for right and left side of the vehicle) Tweeter Crossover To Amplifier + red marked + red marked NOTE: Please pay attention to the correct polarity (+ or -) for all terminals and connections.
- Page 11 ENGLISH VX42, VX52, VX62, VX693, VX6.2W WIRING DIAGRAM Midbass Woofer Midbass Woofer Left Right Amplifier Amplifier Left Right NOTE: Please pay attention to the correct polarity (+ or -) for all terminals and connections.
- Page 12 Audio Design GmbH Am Breilingsweg 3 · D-76709 Kronau/Germany Tel. +49(0)7253 - 9465-0 · Fax +49(0)7253 - 946510 www.audiodesign.de © Audio Design GmbH, All Rights Reserved...
Need help?
Do you have a question about the Vulcan Series and is the answer not in the manual?
Questions and answers