Table of Contents
Advertisement
Quick Links
R R ace
ace
A A pplication
pplication
D D ropper
ropper
1. General Note
2. Basic Maintenance
3. Saddle Height Adjustment
4. RAD Seatpost removal
5 . Cable Replacement and Seatpost Installation
6. Cable Housing Replacement and Seatpost Installation
7. Contact Information
1
Technical Manual
Guideline for the basic maintenance of the
Race Application Dropper seatpost
Advertisement
Table of Contents

Related Manuals for BMC Race Application Dropper


Summary of Contents for BMC Race Application Dropper
- Page 1 A A pplication pplication D D ropper ropper Technical Manual Guideline for the basic maintenance of the Race Application Dropper seatpost 1. General Note 2. Basic Maintenance 3. Saddle Height Adjustment 4. RAD Seatpost removal 5 . Cable Replacement and Seatpost Installation 6.
-
Page 2: General Note
General Note Important Notice Every maintenance operation not expressly listed on this document should be performed by BMC or by a BMC service center not to void warranty. Operating Pressure: -Max 3 Bars/Psi -Recommended 2 Bars/Psi Torque settings: -Seatpost clamp: 4 Nm... -
Page 3: Basic Maintenance
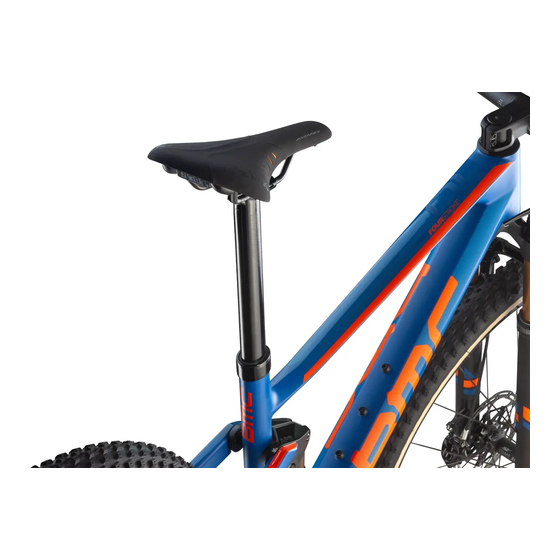
Basic Maintenance To extend the life of your RAD seatpost we recommend to clean the seatpost exterior after each and every ride or race. Recommended periodic maintenance: - Dust Wiper cleaning: every 25 Hours of riding - Seatpost cleaning: every 50 Hours of riding 2.1 Tools required Microfiber Cloth Grease... - Page 4 Air Vavle Seatpost Shaft Dust Wiper Seattube section that needs to be greased RAD Seatpost Cleaning: 1. Remove the RAD seatpost from the frame as of described in chapter 4 2. Remove the dust wiper 3. Clean the seatpost shaft and the dust wiper using a microfiber cloth and cleaner fluid 4.
-
Page 5: Saddle Height Adjustment
Saddle Height Adjustment 3.1 Tools required Allen Keys Measuring Tape Torque Wrench Time Required 3 minutes 3.2 Saddle Height Reference Table Saddle height is measured from the center of bottom bracket to top of the saddle Min Saddle Max Saddle Adjustment Size Height... - Page 6 3.3 Step by Step Instructions 1. Loosen the seatpost bolt (4mm allen key). 2. Adjust saddle height according to the reference table. Tip: feed cable if you raising the saddle height. 3. Tighten the seatpost boltscrew at 4 Nm using a 4mm torque wrench.
- Page 7 RAD Seatpost removal 4.1 Tools required Allen keys Cable Cutter Temps Required 5 minutes 4.2 Step by Step Instructions 1. Remove the remote lever from the handlebar by unthreading the collar screw. 2. Unthread the seatpost screw and remove it completely to avoid damage to the seatclamp when removing.
- Page 8 4. Position the seatpost as shown in the picture. 5. Loosen the pinch screw on the remote lever using a 2mm allen key. 6. Cut the cable end and remove the cable from the lever. 7. Tip: make sure the cable is free from crimps to avoid damaging the cable hous- ing.
-
Page 9: Cable Replacement
8. The seatpost can now be removed. 9. The cable housing should remain in the frame. Cable Replacement 5.1 Tools required Temps Required 5 minutes Cable Cutter Shifter Cable & Cable housing Allen Keys Grease Cable grease Silicon Lube... - Page 10 5.2 RAD Seatpost parts Dust Wiper Seatclamp Sleeve Bolts (located on both sides) Seatclamp Sleeve Seatclamp...
- Page 11 5.3 Cable Replacement and Seatpost Installation 1. Remove the RAD seatpost as shown in chapter 3. 2. Locate two clearly marked bolts on the upper section of the seatclamp sleeve. 3. Loosen the bolts on the seatclamp sleeve with a 1.5 mm allen key. 4.
- Page 12 5. Loosen the pinch bolt with a 2.5 mm allen key. 6. Pull the cable out of the housing and out of the sleeve. 7. Prepare a new cable by cutting a standard shifter at its head. 8. Make sure to have a clean cut with no crimps before installation.
- Page 13 9. Push the cable through the seatclamp sleeve and tighten the pinch bolt using a 2.5 mm allen key (2 Nm). 10. Position the clamp sleeve and tighten the two bolts until they are flush. 11. Add some silicon lube or cable grease in the cable housing to improve the cable durability.
- Page 14 13. Add grease on the seatpost 14. Pull now the cable making sure the cable housing end is correctly posi- tioned against the RAD seatpost. 15. Install the cable on the remote lever and tighten the pinch bolt according to the torque settings indicated on the lever itself.
- Page 15 17. Push the seatpost in the seattube until the seatclamp screw is visible through the opening. 18. Grease the seatclamp screw re-install it. Tighten it to 4 Nm once the correct saddle height has been set using a torque wrench. 19.
- Page 16 Cable Housing Replacement and Seatpost Installation 6.1 Tools required Allen Keys Cable Cutter Shifter Cable & Cable housing Grease Cable grease Silicon Lube Temps Required 10 minutes 6.2 Cable Housing Replacement and Seatpost Installation Before starting this operation procced to remove the RAD seatpost as shown in the dedicated chapter and section of the tutorial video, remove the old cable housing.
- Page 17 2. Cut a new cable housing and make it is long enough to allow complete and free handlebar rotation. 3. Insert the cable housing using the lower cable port. 4. Pick the cable housing at the opening be low the shock and guide it up the seat tube.
- Page 18 7. Add grease on the RAD seatpost. 8. Pull now the cable making sure the cable housing end is correctly positioned against the RAD seatpost. 9. Install the cable on the remote lever and tighten the pinch bolt according to the torque settings indicated on the lever itself.
-
Page 19: Contact Information
14. Re-install the cover and the shock, respect the torque settings indicated on the bolts. Contact Information Please contact us if you need further assistance with your RAD seatpost: BMC Customers: https://www.bmc-switzerland.com/int-en/support/contact/contact/ BMC Retailers: https://b2b.bmc-switzerland.com/de-de/contact-us...
Need help?
Do you have a question about the Race Application Dropper and is the answer not in the manual?
Questions and answers