
Related Manuals for Circutor DHB-102


Summary of Contents for Circutor DHB-102
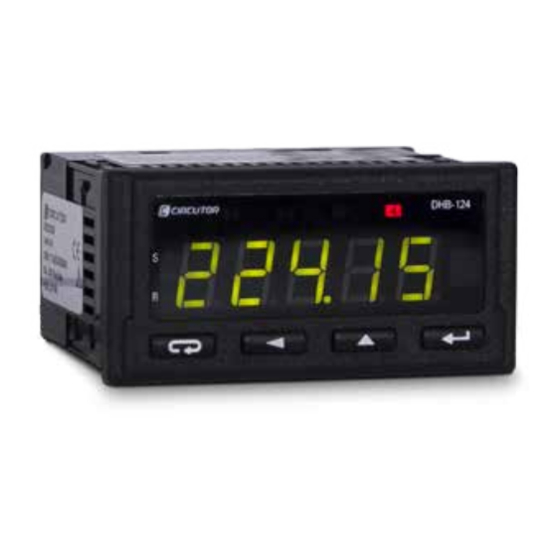
- Page 1 Impulse, frequency and time meter DHB-102 DHB-124 INSTRUCTION MANUAL (M042B01-03-17A)
- Page 2 DHB-102 DHB-124 Instruction Manual...
-
Page 3: Safety Precautions
CIRCUTOR, SA reserves the right to modify features or the product manual without prior notifi cation. DISCLAIMeR CIRCUTOR, SA reserves the right to make modifi cations to the device or the unit specifi ca- tions set out in this instruction manual without prior notice. -
Page 4: Table Of Contents
3�3�2�- LIST Of TeRMINALS, DHB-124 MODeL� �������������������������������������������������������������������������������������� 10 3�4�- CONNeCTION DIAgRAM ����������������������������������������������������������������������������������������������������������������������� 11 3�4�1�- CONNeCTION Of AN NpN-Type SeNSOR, DHB-102 AND DHB-124 MODeLS� ����������������������� 11 3�4�2�- CONNeCTION Of A pNp-Type SeNSOR, DHB-102 AND DHB-124 MODeLS� �������������������������� 11 3�4�3�-CONNeCTION Of A STANDARD SeNSOR wITH ReeD ReLAy/ReLAy OUTpUT, DHB-102 AND DHB-124 MODeLS�... -
Page 5: Revision Log
DHB-102 DHB-124 RevISION LOg Table 1: Revision log� Date Revision Description 09/14 M042B01-03-14A Initial Version 08/15 M042B01-03-15A Global revision Changes in the following sections: 02/16 M042B01-03-16A 3.3.1.-3.3.2.-4.5. Changes in the following sections: 06/17 M042B01-03-17A Note: The images of the units are for illustrative purposes only and may differ from the original unit. -
Page 6: 1�- Verification Upon Reception
- LCD Display, which displays all the parameters. - 3 inputs, fully programmable. - 2 analogue outputs, fully programmable. (DHB-124 model) - 1 alarm relay, fully programmable (DHB-102 model). - 3 alarm relays, fully programmable (DHB-124 model). - RS-485 communications, MODBUS RTU©. (DHB-124 model). -
Page 7: 3�- Unit Installation
DHB-102 DHB-124 3�- UNIT INSTALLATION 3.1.- PRELIMINARY RECOMMENDATIONS In order to use the unit safely, it is critical that individuals who handle it follow the safety measures set out in the standards of the country where it is being used, use the personal protective equipment necessary, and pay attention to the various warnings indicated in this instruction manual. -
Page 8: 3�2�- Installation
DHB-102 DHB-124 3.2.- INSTALLATION The unit is installed on a panel. The thickness should not exceed 6 mm. Drill panel at 92 +0.6 +0.6 Terminals, opening roofs or removing elements can expose parts that are haz- ardous to the touch while the unit is powered. Do not use the unit until it is fully installed. -
Page 9: 3�3�- Unit Terminals
DHB-102 DHB-124 3.3.- UNIT TERMINALS 3�3�1�- List of terminals, DHB-102 model� Table 2:List of terminals on the DHB-102� Unit terminals 1: S/S +, Start/Stop metering 10: w3 -, Auxiliary meter input (downstream meter) 11: 24v DC(+), Power supply output for an external... -
Page 10: 3�3�2�- List Of Terminals, Dhb-124 Model
17: Auxiliary power supply 36: AL4, Alarm 4 relay output (NO) 29 30 31 32 33 34 35 36 DHB-102 / DHB-124 figure 3:Terminal of the DHB-124� Note: The input, output, power supply and RS-485 communications lines are galvanically sep- arated from each other. -
Page 11: 3�4�- Connection Diagram
- W1 + W1 + 24V Power Supply - 24V figure 5: Connection of a sensor with pNp-type output, DHB-102 and DHB-124 models� The value of the control voltage range must be between 5 ... 24 V in Instruction Manual... -
Page 12: Dhb-124 Models
+ 24V Power Supply Reed relay / Relay figure 6: Connection of a sensor with a Reed Relay/Relay-type output, DHB-102 and DHB-124 models� The value of the control voltage range must be between 5 ... 24 V in Instruction Manual... -
Page 13: 4�- Operation
DHB-102 DHB-124 4�- OpeRATION 4.1.- INPUTS The unit features 3 meter inputs: w1, Main meter input, terminals 5 and 6 of Table 2 and Table 3 w3, Input from the auxiliary meter to the main meter, when the unit is working in Me- ter or Encoder mode. -
Page 14: 4�2�- Display
DHB-102 DHB-124 4.2.- DISPLAY The display is divided into 2 areas: Measurement data area Unit of measurement area figure 7: Areas of the DHB-1xx display Measurement data area, for viewing the value of the parameter measured or calculat- ed by the unit. -
Page 15: 4�3�- Button Functions
DHB-102 DHB-124 Example: In a frequency measurement you can program the display to be green when the fre- quency is below 50 Hz, orange when it is between 50 Hz and 70 Hz, and red for frequencies above 70 Hz. See section “4.7.4 Display”. -
Page 16: 4�4�- Regression Of Non-Linear Equations
DHB-102 DHB-124 4.4.- REGRESSION OF NON-LINEAR EQUATIONS Normally, an instrument's measurement is given by the equation for a line; in other words, there are two pairs of points that provide the measurement. However, it may be the case that two points are not sufficient to adjust the signal's operation. -
Page 17: 4�5�- Alarms
DHB-102 DHB-124 4.5.- ALARMS The DHB-102 unit has: 1 alarm relay, Alarm 1, terminals 13 and 14 of , with normally open (NO) con- Table 2 tact. 3 alarms, Alarm 2, 3 and 4, fully programmable but not linked to any relay. - Page 18 Alarm Alarm activated DHB-102 DHB-124 activated Alarm deactivated Alarm Measured Alarm deactivated value deactivated Alarm Alarm Measured output Measured output value value Alarm Alarm output output Alarm Alarm activated activated Alarm Alarm activated Alarm activated Alarm deactivated deactivated Measured Alarm...
-
Page 19: 4�6�- Start/Stop And Reset Inputs
START/STOp input. (Terminals 1 and 2 of Table 2 Table 3 This input lets you start and stop the meter. 29 30 31 32 33 34 35 36 DHB-102 / DHB-124 S/S + S/S - + 24V Power START/STOP Input... -
Page 20: 4�7�- Configuration
DHB-102 DHB-124 4.7.- CONFIGURATION. The unit has various setup menus where you can configure: The parameters of the main meter, w1. The parameters of the additional meter, w2. The parameters for non-linear equation regressions. The display. The alarms. The outputs (DHB-124 model). - Page 21 DHB-102 DHB-124 The DHB-1xx does not record programming changes until the configuration is complete. If the unit is reset before finishing the configuration or if no button is pressed for 30 seconds, the con- figuration will not be stored in the memory.
-
Page 22: 4�7�1�- Main Meter Parameters
DHB-102 DHB-124 4�7�1�- MAIN MeTeR pARAMeTeRS This menu is used to configure the parameters of the main meter, w1. Press the button to access the first configuration parameter. figure 16:Main meter screen 4�7�1�1�- Type Of INpUT This screen is used to select the type of input for the unit's main meter ( ). - Page 23 DHB-102 DHB-124 To move to the next parameter on the menu, press the button. When the button is pressed, the unit goes to the main screen of the main meter parame- ters menu ( figure 16 Default value: Impulse meter.
- Page 24 DHB-102 DHB-124 4�7�1�3�- CONveRSION CONSTANT Note: Parameter applicable to input types: Impulse meter, Frequency, Tachometer, Period and Encoder. This screen is used to configure the constant that will be multiplied or divided by the value measured by the meter ( figure 19 The screen flashes between the symbol and the configured value.
- Page 25 DHB-102 DHB-124 4�7�1�4� MINIMUM DURATION TIMe Of THe LOw LeveL Of INpUT IMpULSe Note: Parameter applicable to input types: Impulse meter, Frequency < 10 kHz, Tachome- ter, Period and Encoder. This screen is used to configure the minimum duration time, in milliseconds, of the low level of input impulse, t-L1.
- Page 26 DHB-102 DHB-124 4�7�1�5� MINIMUM DURATION TIMe Of THe HIgH LeveL Of INpUT IMpULSe Note: Parameter applicable to input types: Impulse meter, Frequency < 10kHz, Tachometer, Period and Encoder. This screen is used to configure the minimum duration time, in milliseconds, of the high level of input impulse, t-H1.
- Page 27 DHB-102 DHB-124 4�7�1�6� eNABLINg THe exTeRNAL INpUTS Note: Parameter applicable to input types: Impulse meter, Working time meter and Encod- This screen is used to configure enabling the external RESET and START/STOP inputs. (“ 4.6.- ") START/STOP and RESET INPUTS The screen flashes between the symbol and the configured value.
- Page 28 DHB-102 DHB-124 4�7�1�7� AUTOMATIC ReSeT Of THe MeTeRS / MeASURINg TIMe Note: Parameter applicable to input types: Impulse meter, Frequency < 10kHz, Tachometer, Period, Working time meter and Encoder. If you select an input type of: - Impulse meter, working time meter or encoder�...
- Page 29 DHB-102 DHB-124 Range: Impulse meter, working time meter and encoder type: -19999 ... 99999. frequency < 10 kHz and Tachometer type: 0.5 ... 20 s. period type: 0.5 ... 11 s. Long period type: 0.5 ... 3600 s. Default value: 99999.
- Page 30 DHB-102 DHB-124 4�7�1�9� MATHeMATICAL fUNCTIONS Note: Parameter applicable to input types: Impulse meter, Frequency, Tachometer, Period and Encoder. A mathematical function can be applied to the value measured by the meter to change the value shown on the display. The screen flashes between the symbol and the configured value ( figure 25 figure 25:Mathematical function screen�...
-
Page 31: 4�7�2� Auxiliary Meter Parameters
DHB-102 DHB-124 4�7�2� AUxILIARy MeTeR pARAMeTeRS This screen is used to configure the parameters of the auxiliary meter (w2). Press the button to access the first configuration parameter. figure 27:Auxiliary meter screen� 4�7�2�1� CURReNT vALUe This screen shows the current value of the auxiliary meter (w2). - Page 32 DHB-102 DHB-124 When you see the option you want, validate by pressing the button. The unit goes back to the screen shown in figure 29 To move to the next parameter on the menu, press the button. When the button is pressed, the unit goes to the main screen of the auxiliary meter pa-...
- Page 33 DHB-102 DHB-124 4�7�2�4� MINIMUM DURATION TIMe Of THe LOw LeveL Of INpUT IMpULSe This screen is used to configure the minimum duration time, in milliseconds, of the low level of input impulse, t- The screen flashes between the symbol and the configured value. ( figure 31 figure 31: Minimum duration time of the low level of input impulse screens�...
- Page 34 DHB-102 DHB-124 To jump to the next digit, press the button. Once at the desired value, validate by pressing the button. You can now select the position of the decimal point, which will be flashing. To select the position of the decimal point, press the button.
- Page 35 DHB-102 DHB-124 4�7�2�7� AUTOMATIC MeTeR ReSeT This parameter is used to program the value at which the meter will go to 0. In some cases, once this value is exceeded the meter will not go to 0, see Table 9 Table 9:value after automatic meter reset�...
- Page 36 DHB-102 DHB-124 4�7�2�8� MeTeR ReSeT This screen is used to reset the auxiliary meter ( figure 35 figure 35:Auxiliary meter reset screen� To edit the parameter, press the button. The options are: The auxiliary meter is not reset. Reset the auxiliary meter.
-
Page 37: 4�7�3 Regression Of Non-Linear Equations
DHB-102 DHB-124 4�7�3 RegReSSION Of NON-LINeAR eQUATIONS Note: Menu applicable to input types: Impulse meter, Frequency, Tachometer, Period and Encoder. This menu is used to configure the parameters to carry out regressions of non-linear equations (see section "4.4.- REGRESSION OF NON-LINEAR EQUATIONS”). - Page 38 DHB-102 DHB-124 4�7�3�2 MeASUReD vALUeS (xi) This screen is used to configure the value X1 (measured value) corresponding to the first point in the equation. The screen flashes between the symbol and the configured value ( figure 39 figure 39:Measured values configuration screens.
- Page 39 DHB-102 DHB-124 You can now select the position of the decimal point, which will be flashing. To select the position of the decimal point, press the button. Validate by pressing the button. The unit will go back to the screen shown in...
-
Page 40: 4�7�4 Display
DHB-102 DHB-124 4�7�4 DISpLAy This menu is used to configure the display features. Press the button to access the first configuration parameter. figure 42:Display setup menu 4�7�4�1� MINIMUM pOSITION Of THe DeCIMAL pLACe IN THe DISpLAy vALUe Note: Menu applicable to input types: Impulse meter, Frequency, Tachometer, Period and Encoder. - Page 41 DHB-102 DHB-124 To edit the options, press the button. The colour options are: Green. Orange. Red. To move from one option to another, press the button repeatedly. When you see the option you want, validate by pressing the button. The unit goes back to the screen shown in...
- Page 42 DHB-102 DHB-124 When you see the option you want, validate by pressing the button. The unit goes back to the screen shown in figure 45 To move to the next parameter on the menu, press the button. When the button is pressed, the unit goes to the main screen of the display menu ( figure Default value: Orange.
- Page 43 DHB-102 DHB-124 4�7�4�5� LOweR COLOUR LIMIT This screen is used to configure the value of the lower colour limit. The screen flashes between the symbol and the configured value ( figure 47 figure 47:Lower colour limit screens� To edit the parameter, press the button.
- Page 44 DHB-102 DHB-124 To select the position of the decimal point, press the button. Validate by pressing the button. The unit goes back to the screen shown in figure 48 To move to the next parameter on the menu, press the button.
- Page 45 DHB-102 DHB-124 4�7�4�8�- OveRfLOw This screen is used to configure the value above which overflow signals will be shown on the display The screen flashes between the symbol and the configured value ( figure 50 figure 50:Overflow screens. To edit the parameter, press the button.
-
Page 46: 4�7�5�- Alarm 1
DHB-102 DHB-124 4�7�5�- ALARM 1 This menu is used to configure the parameters of alarm 1. Press the button to access the first configuration parameter. figure 52:Alarm relay 1 configuration screen 4�7�5�1�- MeTeR This screen is used to select the meter for which the alarm is to be applied. - Page 47 DHB-102 DHB-124 4�7�5�2�- ALARM Type This screen is used to select the alarm functionality (see section “ ”). 4.5.- ALARMS The screen flashes between the symbol and the configured value ( figure 54 figure 54:Alarm types screens To edit the parameter, press the button.
- Page 48 DHB-102 DHB-124 To modify the value of the selected digit, press the button repeatedly. To jump to the next digit, press the button Once at the desired value, validate by pressing the button. You can now select the position of the decimal point, which will be flashing.
- Page 49 DHB-102 DHB-124 4�7�5�5�- CONNeCTION AND DISCONNeCTION DeLAy This screen is used to configure the connection and disconnection delay for the alarm. The screen flashes between the symbol and the configured value ( figure 57 figure 57:Connection/disconnection delay screens To edit the parameter, press the button.
-
Page 50: 4�7�6� Alarm 2
See section “4.7.5.- ALARM 1” 4�7�7� ALARM 3 This menu is used to configure the parameters of alarm 3. This alarm is not linked to a relay in the DHB-102 model. See section “4.7.5.- ALARM 1” 4�7�8� ALARM 4 This menu is used to configure the parameters of alarm 4. -
Page 51: 4�7�9�- Outputs (Dhb-124 Model)
DHB-102 DHB-124 4�7�9�- OUTpUTS (DHB-124 model) This menu is used to configure the unit's outputs. Press the button to access the first configuration parameter. figure 60:Output configuration screen 4�7�9�1�- ANALOgUe OUTpUT: MeTeR (DHB-124 model) This screen is used to select the meter for which the analogue output is to be applied The screen flashes between the symbol and the configured value. - Page 52 DHB-102 DHB-124 To edit the parameter, press the button. The following types can be selected: Voltage 0 ... 10 V. Current 0 ... 20 mA. Current 4 ... 20 mA. To move from one option to another, press the button repeatedly.
- Page 53 DHB-102 DHB-124 4�7�9�4�- ANALOgUe OUTpUT: fULL-SCALe vALUe (DHB-124 model) This screen is used to configure the display value you wish to have at the end of the analogue output (10 V or 20 mA, depending on the type of output selected).
- Page 54 DHB-102 DHB-124 19200 bauds. 38400 bauds. 57600 bauds. 115200 bauds. To move from one option to another, press the button repeatedly. When you see the option you want, validate by pressing the button. The unit goes back to the screen shown in...
- Page 55 DHB-102 DHB-124 The unit goes back to the screen shown in figure 66 To move to the next parameter on the menu, press the button. When the button is pressed, the unit goes to the main screen of the outputs menu (...
-
Page 56: 4�7�10� Service
DHB-102 DHB-124 4�7�10� SeRvICe This menu is used to configure the unit's service parameters. Press the button to access the first configuration parameter. figure 69:Services screen 4�7�10�1�- DefAULT CONfIgURATION Screen used to reset the unit to its default configuration. The screen flashes between the symbol and the configured value (... - Page 57 DHB-102 DHB-124 4�7�10�2� pASSwORD This screen is used to enter a password to access the unit's setup menus. The screen flashes between the symbol and the configured value ( figure 71 figure 71:password screens� To edit the parameter, press the button.
- Page 58 DHB-102 DHB-124 4�7�10�4� DISpLAyINg THe UNIT Of MeASUReMeNT Screen used to light up the LED that indicates the units measured if the label is attached to the unit. See section “4.2.- DISPLAY” The screen flashes between the symbol and the configured value ( figure 73 figure 73:Unit of measurement display configuration screen.
- Page 59 DHB-102 DHB-124 Do not perform the test Start the display test. To stop, press the button. When the test stops, the unit will go back to showing the option by default. To move from one option to another, press the button repeatedly.
-
Page 60: 4�8�- Configuration Examples
DHB-102 DHB-124 4.8.- CONFIGURATION EXAMPLES. Below are three examples of possible programming options. Example 1 : Programming the unit to work with a flow meter with a relay output with the following parame- ters: Impulse constant: 1K - 4.3956 dm /impulse = 0.0043956 m... - Page 61 DHB-102 DHB-124 Example 2 : Programming the analogue output. If we wish to configure a 4...20 mA output proportional to the flow, 4 mA - 0 m /h, 20 mA - 125 /h, the configurations would be: P_An The analogue output will be applied to the main meter, w1 : Inp1 ...
-
Page 62: 4�9�- Communications (Dhb-124 Model)
DHB-102 DHB-124 4.9.- COMMUNICATIONS (DHB-124 model) The DHB-124 units have an RS-485 serial communication output with the MODBUS RTU® communications protocol 4�9�1 CONNeCTIONS� The RS-485 standard enables direct communications of 32 units with a single 1200 m long serial link (speed of 9600 bauds). -
Page 63: 4�9�3- Modbus Memory Map
DHB-102 DHB-124 4�9�3- MODBUS MeMORy MAp. Modbus addresses are in decimal format. Table 10:Type of values in the Modbus memory MAp� Address Type of value Description 4000-4049 integer (16 bits) Value given in a 16-bit record. Value given in two consecutive 16-bit records. - Page 64 DHB-102 DHB-124 MAIN MeTeR (w1) Address Symbol Description Conversion constant Address 1 Address 2 Cons1 -19999 ... 99999 7228-7229 7614 Address 1 Address 2 Minimum duration time of the low level of input impulse t_L1 0 ... 60000 s 7230-7231...
- Page 65 DHB-102 DHB-124 ADDITIONAL MeTeR (w2) Address Symbol Description Conversion constant Address 1 Address 2 Cons2 -19999 ... 99999 7236-7237 7618 Address 1 Address 2 Minimum duration time of the low level of input impulse t_L2 0 ... 60000 s 7238-7239...
- Page 66 DHB-102 DHB-124 RegReSSION Of NON-LINeAR eQUATIONS Address Symbol Description Address 1 Address 2 Expected value for point no. 4 -19999 ... 99999 7258-7259 7629 Address 1 Address 2 Measured value for point no. 5 -19999 ... 99999 7260-7261 7630 Address 1 Address 2 Expected value for point no.
- Page 67 DHB-102 DHB-124 RegReSSION Of NON-LINeAR eQUATIONS Address Symbol Description Address 1 Address 2 Expected value for point no. 15 -19999 ... 99999 7302-7303 7651 Address 1 Address 2 Measured value for point no. 16 -19999 ... 99999 7304-7305 7652 Address 1 Address 2 Expected value for point no.
- Page 68 DHB-102 DHB-124 DISpLAy Address Symbol Description Lower colour value Description CoLdo 4010 green orange Middle colour value Description CoLbe 4011 green orange Upper colour value Description CoLUp 4012 green orange Address 1 Address 2 Lower colour change limit. CoLLo 19999 ... 99999...
- Page 69 DHB-102 DHB-124 ALARMS Address Symbol Description Connection and disconnection delay (alarm 1) dLy1 4015 0 ... 900 s Alarm 1 LED value Description Led1 4016 Interlocking of the alarm LED disabled Interlocking of the alarm LED enabled Address 1 Address 2...
- Page 70 DHB-102 DHB-124 ALARMS Address Symbol Description Alarm 3 LED value Description Led3 4024 Interlocking of the alarm LED disabled Interlocking of the alarm LED enabled Address 1 Address 2 Alarm 3 low value PRL3 -19999 ... 99999 7216-7217 7608 Address 1...
- Page 71 DHB-102 DHB-124 OUTpUTS (DHB-124 model) Address Symbol Description Type of analogue output value Description typa 4030 Voltage output 1...10 V Current output 0...20 mA Current output 4...20 mA RS-485 baud rate value Description 4800 bauds 9600 bauds bauds 4031 19200 bauds...
- Page 72 DHB-102 DHB-124 SeRvICeS Symbol Address Description Password value Description 4036 No password 1 ... 60000 Password range Current time Format: hh.mm Time 4037 hh: hours (0 ... 23) mm: minutes (0...59) Displaying the unit of measurement value Description unit 4038...
- Page 73 DHB-102 DHB-124 STATUS Of THe UNIT Address Symbol Description Unit status. Describes the current status of the unit. Events may only be deleted Description position Bit15 Not used Bit14 Not used Bit13 Not used Bit12 Not used Bit11 Not used...
-
Page 74: 5�- Technical Features
DHB-102 DHB-124 5�- TeCHNICAL feATUReS Model: DHB-102 Model: DHB-124 Code Auxiliary power supply Code Auxiliary power supply M22022 85 ... 253 V ~ / 85 ... 253 V M22021 85 ... 253 V ~ / 85 ... 253 V M220210020000 20 ... - Page 75 DHB-102 DHB-124 Analogue outputs (DHB-124 model) Current voltage Nominal output range 0-20 mA or 4-20 mA 0 ...10 V Minimum load resistance ≤ 500 Ω ≥ 500 Ω Relay outputs DHB-102 DHB-124 Quantity Maximum voltage, open contacts 250 V ~ Maximum current 0.5 A...
- Page 76 DHB-102 DHB-124 figure 77: Dimensions of the DHB-1xx� Instruction Manual...
-
Page 77: 6�- Maintenance And Technical Service
• CIRCUTOR accepts no liability due to the possible damage to the unit or other parts of the installation, nor will it cover any possible sanctions derived from a pos- sible failure, improper installation or “improper usage”... -
Page 78: 8�- Ce Certificate
DHB-102 DHB-124 8�- Ce CeRTIfICATe Instruction Manual... -
Page 79: Appendix A: Display Messages
DHB-102 DHB-124 AppeNDIx A: DISpLAy MeSSAgeS The error screens shown in may appear after the unit is switched on or while it is Table 21 measuring. Table 21:error messages error messages Overflow of the measured value above its range, or of the indication previously programmed. - Page 80 CIRCUTOR, SA Vial Sant Jordi, s/n 08232 -Viladecavalls (Barcelona) Tel.: (+34) 93 745 29 00 - Fax: (+34) 93 745 29 14 www.circutor.es central@circutor.com...
Need help?
Do you have a question about the DHB-102 and is the answer not in the manual?
Questions and answers