Table of Contents
Advertisement
Advertisement
Table of Contents

Related Manuals for Markforged MARK TWO


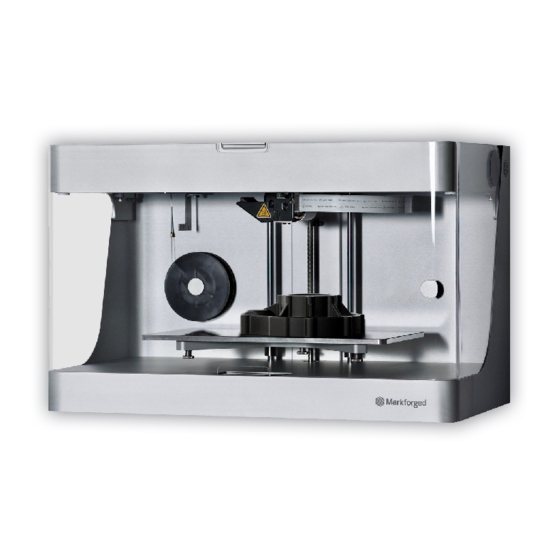
Summary of Contents for Markforged MARK TWO
- Page 1 DESKTOP PRINTER SERVICE MANUAL DESKTOP PRINTER SERVICE MANUAL...
- Page 2 For the latest PDF version of this document, visit our support website. Copyright © 2019 Markforged, Inc. All rights reserved. Changes are periodically made to the information herein which will be incorporated in revised editions of this publication.
-
Page 3: Table Of Contents
DESKTOP PRINTER SERVICE MANUAL TABLE OF CONTENTS SERVICE NOTES CHECKING ELECTRONICS CONNECTIONS VERIFY CONNECTIONS TO BEAGLEBONE AND MOTHERBOARD VERIFY USB CONNECTIONS REPLACING THE FIBER EXTRUDER REPLACING THE PLASTIC EXTRUDER A1095 EXTRUDER REPLACEMENT A3648 EXTRUDER REPLACEMENT REPLACING THE XY STEPPER MOTORS REPLACING THE PRINT HEAD REPLACING THE MOTHERBOARD REPLACING THE PRINT VISOR... -
Page 4: Service Notes
NOTE ON FIBER CAPABILITY This Service Manual covers all models of Markforged Desktop Series printers. If your printer model is not fiber-capable, some of the sections in this Service Manual may not apply. Such sections will be marked with the icon to the left. - Page 5 DESKTOP PRINTER SERVICE MANUAL NOTE ON HARDWARE DIFFERENCES Markforged Gen 2 composite printers can be identified by the large updated product label on the back panel. PRESERVING FACTORY CALIBRATION Note that the plastic extruder and print head are factory-calibrated; do NOT adjust or disassemble in any way unless specifically instructed to do so by Markforged Support.
-
Page 6: Checking Electronics Connections
DESKTOP PRINTER SERVICE MANUAL CHECKING ELECTRONICS CONNECTIONS Qualified service personnel only. See Service Notes (p.4). Note: Take care not to discard any hardware you remove during this procedure, as you may need it during the reinstallation. PREPARE YOUR PRINTER FOR INSPECTION It may sometimes be necessary to verify that connections between the printer’s circuit boards are firm and secure. - Page 7 DESKTOP PRINTER SERVICE MANUAL...
-
Page 8: Verify Usb Connections
DESKTOP PRINTER SERVICE MANUAL VERIFY USB CONNECTIONS Verify that the connection from the USB hub to the BeagleBone is secure. Verify that the connection from the bottom of the USB hub is secure. If there is a connection between the USB hub and the motherboard, verify that it is secure at both ends. If there is a USB cable attached to the motherboard, verify that it is secure at both ends. -
Page 9: Replacing The Fiber Extruder
DESKTOP PRINTER SERVICE MANUAL REPLACING THE FIBER EXTRUDER Note: Take care not to discard any hardware you remove during this procedure, as you will need it during the reinstallation. Tools ● Wire cutters ● Tape, if there is none adhered to the side of the fiber spool ●... - Page 10 DESKTOP PRINTER SERVICE MANUAL Using the 2.5mm hex key, loosen the four screws that secure the fiber extruder to the printer chassis. Note: The bracket on the extruder has keyhole slots that enable the extruder to slide out without the screws being removed. Disconnect the 3-wire connector from the PCBA on the top of the fiber extruder.
-
Page 11: Replacing The Plastic Extruder
DESKTOP PRINTER SERVICE MANUAL REPLACING THE PLASTIC EXTRUDER Note: Take care not to discard any hardware you remove during this procedure, as you will need it during the reinstallation. The procedure for replacing a plastic extruder depends on the model of the extruder currently installed in your printer. - Page 12 DESKTOP PRINTER SERVICE MANUAL Use the 2mm hex key to loosen the socket head cap screw from the fiber feed tube on the fiber extruder. Note: Do not unscrew it all the way. It should require no more than one full turn to loosen. After detaching the fiber feed tube from the fiber extruder, slide the fiber feed tube all the way through the channel at the bottom of the plastic extruder toward the back of the printer.
- Page 13 DESKTOP PRINTER SERVICE MANUAL Unclip the white wire clip that connects wires between the plastic extruder and the printer. Remove the plastic extruder from the printer. Take care not to remove the supporting bracket. Replace A1095 extruder Place the new plastic extruder in the bracket on the printer chassis where the old extruder sat. Re-attach the wires between the extruder and the printer by reconnecting the white 4-wire connectors.
- Page 14 DESKTOP PRINTER SERVICE MANUAL A3648 EXTRUDER REPLACEMENT Remove A3648 extruder Completely unload print material. For more information, see Unloading Plastic Unloading Fiber, if applicable, in the User Guide. Cool the print head (Menu > Utilities > Manual Control > Temperature Control > Cool).
- Page 15 DESKTOP PRINTER SERVICE MANUAL Pass the fiber feed tube through the channel at the bottom of the plastic extruder, toward the back of the printer. Unscrew the thumbscrew connecting the plastic Bowden tube to the plastic extruder. Press in on the push-to-connect fitting to remove the plastic feed tube from the plastic extruder.
- Page 16 DESKTOP PRINTER SERVICE MANUAL Using the 2.5mm hex key, remove and set aside the two screws securing the extruder to the rail. Unclip the cable from the wire-management clip on the front face of the extruder, then disconnect the 4-pin cable from the socket on the black inward face of the extruder.
- Page 17 DESKTOP PRINTER SERVICE MANUAL Disconnect the 6-pin cable from its connector on the front face of the extruder. Remove the plastic extruder and set it aside. Replace A3648 extruder Connect the 6-pin cable to its corresponding connector on the front face of the new plastic extruder.
- Page 18 DESKTOP PRINTER SERVICE MANUAL Connect the 4-pin cable to the socket on the black inward face of the new extruder. Secure the cable using the wire-management clip on the front face of the extruder. Install the extruder on the rail, pushing it back against the case until the mounting holes line up. Use the 2.5mm hex key to install the two screws, securing the extruder to the rail.
- Page 19 DESKTOP PRINTER SERVICE MANUAL Pass the fiber feed tube through the channel on the bottom of the new extruder. Reinsert the fiber feed tube into the slot on the fiber extruder, then use the 2mm hex key to tighten the top right screw securing the fiber feed tube in place.
- Page 20 DESKTOP PRINTER SERVICE MANUAL REPLACING THE XY STEPPER MOTORS Your printer’s motion system operates via two stepper motors, one in each of the two leftmost corners of the gantry. Perform the procedure below to replace one of these motors. Replacing a stepper motor is a process that requires small movements and finesse. Be careful not to break any wires or other components in the printer during this process.
- Page 21 DESKTOP PRINTER SERVICE MANUAL Disconnect the 4-wire connector that attaches to the stepper motor. Note: You may need to use pliers to remove the 4-wire connector. Be careful not to let the base of the extruder sever the wires. Remove the XY stepper motor from your printer. XY STEPPER MOTOR REPLACEMENT Secure the belt around the pulley of the new XY stepper motor.
-
Page 22: Replacing The Print Head
DESKTOP PRINTER SERVICE MANUAL REPLACING THE PRINT HEAD Note: Take care not to discard any hardware you remove during this procedure, as you will need it during the reinstallation. Tools ● 2.5mm hex key ● USB drive from accessory kit PRINT HEAD REMOVAL Completely unload materials from your printer. - Page 23 DESKTOP PRINTER SERVICE MANUAL Slide the ribbon cable clip away from the print head and the circuit board. Gently squeeze the tabs at the top and bottom of the ribbon cable connector to release it from the board. Allow the cable to hang freely.
- Page 24 DESKTOP PRINTER SERVICE MANUAL While supporting the print head with your hand, use the 2.5mm hex key to remove the two screws connecting the print head to the print head base. Carefully pull the print head off of the print head base. PRINT HEAD REPLACEMENT Carefully place the new print head onto the print head base and hold it in place.
- Page 25 DESKTOP PRINTER SERVICE MANUAL While supporting the print head with your hand, use the 2.5mm hex key to tighten the two screws that connect the print head to the print head base. Reinsert the ribbon cable into its connector until both tabs snap into place, then slide the cable clip back onto its bracket.
- Page 26 DESKTOP PRINTER SERVICE MANUAL Select the Storage tile from the menu options. Select the Print From Storage tile from the menu options. Select the file from the USB drive and press Print to update the offsets for the print head. Note: This print file may require specific materials to be loaded but will not actually print anything.
-
Page 27: Replacing The Motherboard
Painter’s tape (or similar tape that will not leave residue on the printer) Note on terminology The motherboard is referred to elsewhere in Markforged documentation as the Victoria Board. MOTHERBOARD REMOVAL Unload and remove all print material from the printer. For more information, see... - Page 28 DESKTOP PRINTER SERVICE MANUAL Carefully unplug all nine connections from the motherboard. Note: The ribbon cable (the broad white cable at bottom right in the photo below) connects to a socket on the underside of the motherboard. Using the 2.5mm hex key, remove the four screws connecting the motherboard to the printer and set them aside.
- Page 29 DESKTOP PRINTER SERVICE MANUAL Reinstall the ten screws that connect the bottom plate to the printer. Turn the printer upright and place it on a flat, stable surface. Remove and discard the tape holding the lid and visor shut. Reinstall the print bed. Reinstall the Wi-Fi antenna / Ethernet cable.
- Page 30 DESKTOP PRINTER SERVICE MANUAL Select the Storage tile from the menu options. Select the Print From Storage tile from the menu options. Select the file from the USB drive and press Print to update the offsets for the print head. Note: This print file may require specific materials to be loaded but will not actually print anything.
-
Page 31: Replacing The Print Visor
DESKTOP PRINTER SERVICE MANUAL REPLACING THE PRINT VISOR Note: Take care not to discard any hardware you remove during this procedure, as you will need it during the reinstallation. Tools ● 4mm hex key PRINT VISOR REMOVAL Use the 4mm hex key to loosen the two bolts that secure the visor to the printer frame. Remove the bolts and washers from the printer and set them aside. - Page 32 DESKTOP PRINTER SERVICE MANUAL PRINT VISOR REPLACEMENT Slide the visor onto the printer, aligning the circular slots on both the visor and the printer. Slide the spacers with the slots on the printer frame. Insert and align all other connection parts according to the image below. Reattach the visor caps on each side.
-
Page 33: Replacing The Tensioner Assembly
DESKTOP PRINTER SERVICE MANUAL REPLACING THE TENSIONER ASSEMBLY Note: Take care not to discard any hardware you remove during this procedure, as you will need it during the reinstallation. Tools ● 3mm hex key ● 2.5mm hex key TENSIONER ASSEMBLY REMOVAL Power off your printer. - Page 34 DESKTOP PRINTER SERVICE MANUAL Using the hex key, push the shaft pin through the pulley and remove the pulley from the belt. When you remove the pin and pulley, you will have five separate pieces: ● One pin ● One pulley (with old bearings still installed) ●...
- Page 35 DESKTOP PRINTER SERVICE MANUAL TENSIONER ASSEMBLY REINSTALLATION Note: Reinstalling the two washers in an incorrect orientation can damage the system. Make sure to align each washer with its convex (rounded) face inward, flush against the bearing. Align the two washers with their convex faces flush against the pulley, then wrap the belt around the pulley with its ribbed side facing inward.
- Page 36 DESKTOP PRINTER SERVICE MANUAL Reinstall the tensioner assembly and use the 2.5mm hex key to securely tighten the remaining two screws. Adjust the belt tension. For more information, see Adjusting Belt Tension in the User Guide.
-
Page 37: Replacing The Touchscreen
DESKTOP PRINTER SERVICE MANUAL REPLACING THE TOUCHSCREEN Qualified service personnel only. See Service Notes (p.4). It may be necessary to replace the printer touchscreen if it becomes damaged or experiences a failure. Note: Take care not to discard any hardware you remove during this procedure, as you will need it during the reinstallation. - Page 38 DESKTOP PRINTER SERVICE MANUAL Disconnect the four black cables from the BeagleBone. Disconnect the grey cable from the motherboard rather than from the BeagleBone. Use the 2mm hex key to remove the four black screws securing the BeagleBone / touchscreen assembly to the printer casing and set them aside.
- Page 39 DESKTOP PRINTER SERVICE MANUAL Pull the BeagleBone case away from the prongs that secure it to the touchscreen. If necessary, gently rock the BeagleBone from left to right to loosen it. TOUCHSCREEN REPLACEMENT Connect the replacement touchscreen to the BeagleBone, using the markings on the touchscreen board to properly align the connectors.
- Page 40 DESKTOP PRINTER SERVICE MANUAL Use the 2mm hex key to install two screws into the holes in the corners of the touchscreen that are covered by the tabs of the metal BeagleBone cover. Ensure that the screws pass through the spacers. Note: To avoid damaging the touchscreen, do not over-tighten the screws.
-
Page 41: Replacing The Beaglebone
DESKTOP PRINTER SERVICE MANUAL REPLACING THE BEAGLEBONE Qualified service personnel only. See Service Notes (p.4). Note: Take care not to discard any hardware you remove during this procedure, as you will need it during the reinstallation. Tools ● 2mm hex key ●... - Page 42 DESKTOP PRINTER SERVICE MANUAL The touchscreen and BeagleBone are located at the center of the front face of the printer, furthest away from you. The motherboard is located near the rear face of the printer, closest to you. Note: The metal cover over the BeagleBone may be black, silver, or orange; the color has no bearing on these instructions.
- Page 43 DESKTOP PRINTER SERVICE MANUAL Using wire cutters or a similar tool, cut the black zip ties that hold the wires connecting the motherboard to the BeagleBone. Note: Be careful not to cut the wires. Pull the BeagleBone and aluminum cover straight off the touchscreen assembly. Note the two white spacers that sit under the tabs on either side of the aluminum cover.
- Page 44 DESKTOP PRINTER SERVICE MANUAL Reattach the 3-wire connector at the end of the grey cable to the motherboard. Using a small zip tie, secure the wires connecting the motherboard to the BeagleBone. Align the two white spacers with the holes in the touchscreen assembly, then use the 2mm hex key to install the two screws that secure the aluminum cover to the printer casing.
- Page 45 DESKTOP PRINTER SERVICE MANUAL Replace the bottom panel and securely fasten it using the ten Phillips screws you removed earlier. Carefully turn the printer upright. Remove and discard the tape holding the lid and visor shut. Reinstall the print bed. Reinstall the Wi-Fi antenna / Ethernet cable.
-
Page 46: Replacing The Ribbon Cable
DESKTOP PRINTER SERVICE MANUAL REPLACING THE RIBBON CABLE Qualified service personnel only. See Service Notes (p.4). Replacing the ribbon cable is a lengthy, delicate procedure. When removing the ribbon cable from your printer, it is important to prevent any other wires from being damaged. This process requires small movements and can lead to damage to your printer if care is not taken. - Page 47 DESKTOP PRINTER SERVICE MANUAL Using the 2mm hex key, remove the four screws and the corresponding lock washers and set them aside. Remove the fan screen and set it aside. With the printer still upside down, use the 2mm hex key to remove the 14 screws (indicated below) from the back plate of the printer. ...
- Page 48 DESKTOP PRINTER SERVICE MANUAL Tilt the printer backward such that the visor can be opened wide enough for you or a partner to reach into the print chamber. Move the wire cover up and away from the top of the printer to loosen it. (In the image below, the arrow points toward the bottom plate of the printer, facing up during the procedure.) Find the spot where the ribbon cable adheres to the back wall of the printer and peel the cable free of the adhesive.
- Page 49 DESKTOP PRINTER SERVICE MANUAL Push the back plate away from the printer to create a gap wide enough to pass the ribbon cable through. Slide the ribbon cable through the new gap toward the opening for the fan. Feed the ribbon cable through the fan opening into the print chamber. ...
- Page 50 DESKTOP PRINTER SERVICE MANUAL Slide the cable clip away from the print head, then gently squeeze the tabs on the ribbon cable connector to disconnect the ribbon cable from the print head. Remove the ribbon cable from the printer. RIBBON CABLE REPLACEMENT Using the old cable as a reference, fold the new cable in exactly the same position along the length of the cable.
- Page 51 DESKTOP PRINTER SERVICE MANUAL Attach the new cable to the back wall of the printer, using the adhesive left over from the previous cable. Slide the cable cover back into place in the printer. Insert the clip on the new ribbon cable into the port on the bottom of the motherboard. ...
- Page 52 DESKTOP PRINTER SERVICE MANUAL Reinstall the fan screen, as well as the four screws that hold it in place. Ensure that all parts of the printer are properly aligned and reinstall the fourteen screws into the back plate. Replace the bottom plate of the printer and reinstall the ten screws that hold it in place. ...
- Page 53 DESKTOP PRINTER SERVICE MANUAL Tape the visor closed to prevent it from accidentally opening. Turn your printer over onto its bottom plate and ensure that it is placed in its operating location. Remove and discard the tape holding the lid and visor shut. Reinsert the ribbon cable into its connector on the print head until both tabs snap into place, then slide the cable clip back onto its bracket.
-
Page 54: Replacing The Z-Axis Lead Screw
DESKTOP PRINTER SERVICE MANUAL REPLACING THE Z-AXIS LEAD SCREW Qualified service personnel only. See Service Notes (p.4). Note: Take care not to discard any hardware you remove during this procedure, as you will need it during the reinstallation. Tools ● 2.5mm hex key ●... - Page 55 DESKTOP PRINTER SERVICE MANUAL Disconnect the 4-wire connector from the Z-axis stepper motor on the underside of the printer. Note: You may need to use pliers to remove the connector. Be careful not to sever the wires. Using the 2.5mm hex key, remove and set aside the four bolts in the bottom of the printer’s interior. Turn the lead screw counterclockwise to remove it from the print stage, then pull the stepper motor and lead screw out of the bottom of the printer.
- Page 56 DESKTOP PRINTER SERVICE MANUAL Using the 2.5mm hex key, reinstall the four screws in the bottom of the interior of the printer. Replace the bottom plate of the printer and use the Phillips screwdriver to reinstall the ten screws that hold it in place. ...
-
Page 57: Disabling The Wi-Fi Adapter
DESKTOP PRINTER SERVICE MANUAL DISABLING THE WI-FI ADAPTER Qualified service personnel only. See Service Notes (p.4). Note: Take care not to discard any hardware you remove during this procedure, as you may need it later on. Tools ● Phillips #1 screwdriver ●... - Page 58 DESKTOP PRINTER SERVICE MANUAL Unplug the Wi-Fi module (white in the photo below) from the USB hub in the base of the printer. Reinstall the bottom plate of the printer and the ten screws that hold it in place. Carefully turn the printer upright. Remove and discard the tape holding the lid and visor shut.
Need help?
Do you have a question about the MARK TWO and is the answer not in the manual?
Questions and answers