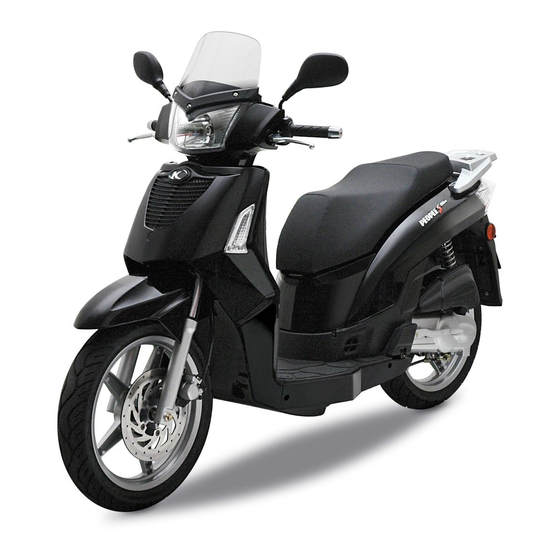
KYMCO PEOPLE S 125 Owner's Manual

KYMCO PEOPLE S 125 Owner's Manual

Hide thumbs Also See for PEOPLE S 125:

Advertisement

WARNING
To avoid damage from the electronic fuel injection system, do not remove or install the
battery when the ignition switch is in the "
" position.
The long-term storage of the vehicle could cause fuel and engine oil deterioration and
probably get into a non-start situation.
Service more frequently when operating in severe conditions such as dusty area, high
speed riding, frequent start and stop or extreme riding habit.
Make sure to keep away from any flammable materials such as dry grasses or leaves,
avoid them in contact with the exhaust pipe or muffler when parking the vehicle.
WARNING

Advertisement

Table of Contents
loading

Summary of Contents for KYMCO PEOPLE S 125

  • Page 1 WARNING To avoid damage from the electronic fuel injection system, do not remove or install the battery when the ignition switch is in the " " position. The long-term storage of the vehicle could cause fuel and engine oil deterioration and probably get into a non-start situation.
  • Page 2 This Owner’s Manual contains important information on safety, operation and maintenance of KYMCO PEOPLE S 125/150. Anyone who is going to ride should carefully read and understand the contents of this manual before riding. For personal safety, understand and follow all of the warnings contained in this Owner’s Manual and the labels attached on vehicle.
  • Page 3 Vehicle Identification Number (VIN) Engine Serial Number (ESN) Record the Vehicle Identification Number① or ②, Engine Serial Number③, in the blanks above for a reference to assist you in ordering parts from the authorized KYMCO dealer or in case the vehicle is stolen.
  • Page 4: Table Of Contents

    TABLE OF CONTENTS SECTION 1–SAFETY INTRODUCTION..SECTION 4–MAINTENANCE....Forward............Maintenance Schedule......Scooter Safety..........Engine Oil..........Accessories & Modifications....... Engine Oil Replacement......Locations of Parts & Controls..... Transmission Fluid Change ....Air Filter Element Change ..... SECTION 2–CONTROLS & FEATURES... Throttle Operation ......... Ignition Switch..........
  • Page 5: Section 1-Safety Introduction

    Due to improvements or other changes, there may be slightly different from the vehicle. KYMCO reserves the right to make product and publication changes at any time without notice or obligation.
  • Page 6: Scooter Safety

    SCOOTER SAFETY Keep the vehicle in safe condition IMPORTANT SAFETY INFORMATION For safe riding, it's important to inspect the It will be used longer and pleasure if you take vehicle before every ride and perform all responsibility for your safety and understand the recommended maintenance.
  • Page 7 SCOOTER SAFETY PROTECTIVE CLOTHING For your safety, always wear an approved scooter The recommended riding gears: or scooter helmet, eyes protection, boots, gloves, ①Wear gloves long pants, and a long-sleeve shirt or jacket during a ②Clothes should be fit properly ride.
  • Page 8: Accessories & Modifications

    The addition of unsuitable accessories can lead to unsafe operation. It is not possible for KYMCO to test each accessory on the market or combinations of all the available accessories; however, the KYMCO dealer can assist you in selecting quality accessories and then install them correctly.
  • Page 9: Locations Of Parts & Controls

    LOCATION OF PARTS & CONTROLS 1 Rear Brake Lever 2 Headlight 3 Front Left Turn Signal Light 4 Fuel Filler Cap 5 Helmet Hook 6 Side Stand(with cut off feature) 7 Seat 8 Engine Number 9 Air Cleaner Rear Left Turn Signal Light Tail/Brake Light Luggage Box ▆...
  • Page 10 LOCATION OF PARTS & CONTROLS Reflector Right Turn Signal Light Muffler Oil Filler Cap/dipstick Center Stand Rear Passenger Foot Peg Right Turn Signal Light Front Brake Lever Electric Starter Button Ignition Switch Vehicle Identification Number (VIN) ▆ NOTE: Your scooter may differ slightly in appearance from the images in this manual.
  • Page 11 LOCATION OF PARTS & CONTROLS Right Rearview mirror Left Rearview mirror Right Turn Signal Light Left Turn Signal Light Battery ▆ NOTE: Your scooter may differ slightly in appearance from the images in this manual.
  • Page 12: Section 2-Controls & Features

    SECTION 2 - CONTROLS&FEATURES IGNITION SWITCH With the ignition key in the " " position (the To operate the ignition switch and it s functions: engine is not running), turn the counterclockwise “ ” Position: from the " " to the " "...
  • Page 13: Security Shutter

    CONTROLS & FEATURES SECURITY SHUTTER To open the ignition switch security shutter : Push the shut button on the ignition switch panel to close the security shutter. To shut the ignition switch security shutter : Insert the specific key until the notch aligned with the pin Turn clockwise to open the security shutter.
  • Page 14: Instruments

    CONTROLS & FEATURES INSTRUMENTS MODE Button ADJ Button...
  • Page 15 Need immediate inspection by the ⑩ USB Charging Indicator: Plug electronic authorized KYMCO dealer. device in,the indicator will be ON when it ▆NOTE: Open the ignition switch, The CLEP indicator is charging,it will be OFF when it is not will illuminate always.
  • Page 16 CONTROLS & FEATURES Service Indicator Reset: After you change the engine oil ,you need to reset the Service Indicator. 1.Push MODE button, the multifunction display will change (ODO→Trip→Oil service) repeatedly in sequence. 2.Choose Oil service mode,press MODE button and ADJ button at the same time for 2 seconds and the display will turns to 0.0,the service indicator is reset.
  • Page 17 CONTROLS & FEATURES Adjust clock The setting procedure: 1. Turn the ignition switch to the ON position. 2. Push the MODE button t o toggle between ODO mode,trip mode and oil service. Choose ODO mode. ▆ digital clock can be only adjusted in ODO NOTE: The mode.
  • Page 18: Usb Power Supply

    CONTROLS & FEATURES Accessory Socket This vehicle is equipped with the accessory USB power socket which provides a function to charge the mobile phone with capacity compliance as below. ˙To use the accessory USB power supply, turn on the ignition switch, and then start the engine. ①...
  • Page 19: Right-Hand Handlebar Switch

    CONTROLS & FEATURES Right handlebar switch Passenger foot pegs Starter button ② Your scooter is equipped with additional pegs Press starter button " " and pull brake lever for use when you are carrying a passenger. in the meantime to actuate the starter motor. 1.
  • Page 20: Left-Hand Handlebar Switch

    CONTROLS & FEATURES Left handlebar switch Turn signal switch ①: Push to signal other drivers for an intention to make turn or change lane. The turn signal light is blinking while the switch is pushed left or right. for left turn. "...
  • Page 21: Fuel Recommendation

    CONTROLS & FEATURES Fuel level inspection / Refilling If the low fuel indicator blinks, quickly refill the fuel tank with the specified unleaded gasoline. Fuel tank filler: To refuel, do the following: 1. Turn the ignition key clockwise to open the fuel tank filler cover.
  • Page 22: Seat

    CONTROLS & FEATURES Seat To unlock the seat With the ignition key at the " " position (the engine is running), push the key in and turn it counterclockwise from " " to the " " position. With the ignition key in the " "...
  • Page 23: Helmet Holder And Hook

    CONTROLS & FEATURES HOOK Helmet Holder If you need to use the front hook,press button To use the helmet holders,open the seat and the hidden hook will come out. hang the helmet on the holder hook,then lock the seat securely. Maximum cargo weight: HOOK FRONT......3KG WARNING...
  • Page 24: Suspension

    CONTROLS & FEATURES Suspension Each shock absorber assembly is equipped with a spring preload adjusting ring. Adjust the spring preload as follows. To increase the spring preload and thereby harden the suspension, turn the adjusting ring on each shock absorber assembly in direction (a). To decrease the spring preload and thereby soften the suspension, turn the adjusting ring on each shock absorber assembly in direction (b).
  • Page 25: Side Stand

    ●Put the side stand up and start the engine. ② ●Lower the side stand . The engine should stop as doing. ▆ NOTE: If the side stand system does not operate as described, see your KYMCO dealer for service.
  • Page 26: Section 3-Operation

    Check operation; make sure there is no the motorcycle and check its condition. If you brake fluid leakage. detect any problem, be sure to deal with it, or have the KYMCO dealer to fix it. 4. Tires: Check condition and inflation pressure. WARNING 5.
  • Page 27: Break-In

    OPERATION Break-In Avoid constant low speed The first 1600km (1000 miles) of riding is Operate the engine at constant low speed very important to the life of usage. Proper even of light load may cause the running break-in operation during this period will part a fit-in problem.
  • Page 28: Starting The Engine

    OPERATION Starting the engine Always follow the proper starting procedure described here and on the following pages. CAUTION To protect the catalytic converter in the engine's exhaust muffler, avoid idling too long and do not use leaded gasoline. CAUTION To prevent damage to the starter motor, do not operate the starter motor for more than 5 seconds at a time.
  • Page 29 OPERATION 3. Squeeze the left (rear) brake lever to connect electric power for ready to start engine . 4. Press the starter button ① with the throttle closed, releases it at once as the engine starts. 5. Keep the throttle closed while warming up the engine.
  • Page 30: Section 4-Maintenance

    It will also involved in a crash, be sure to have the help reduce air pollution and maximize fuel KYMCO dealer inspect all major parts, economy. even if you are able to make some repairs.
  • Page 31: Maintenance Schedule

    Maintenance should be performed according to the design standards and specifications by the authorized KYMCO dealer. Be serviced by the KYMCO dealer, unless you have the proper tools, service data and are technically qualified.
  • Page 32 MAINTENANCE WHICHEVER FREQUENCY ODOMETER READING (NOTE1) COMES FIRST X 1000 km REFER X 1000 mi ITEM PAGE MONTH AIR CLEANER SPARK PLUG THROTTLE OPERATION VALVE CLEARANCE FUEL LINE CRANKCASE BREATHER ENGINE OIL ENGINE OIL SCREEN ENGINE IDLE SPEED TRANSMISSION OIL DRIVE BELT Inspect every 5000km,replace every 20000km...
  • Page 33 MAINTENANCE WHICHEVER FREQUENCY ODOMETER READING (NOTE1) COMES FIRST X 1000 km REFER X 1000 mi ITEM PAGE MONTH CLUTCH SHOE WEAR BRAKE FLUID Replace at every10000km or every year BRAKE PAD WEAR BRAKE SYSTEM BRAKE LIGHT SWITCH STEERING BEARINGS HEADLIGHT AIM NUTS,BOLTS,FASTENERS WHEEL/TIRES CVT FILTER...
  • Page 34: Engine Oil

    MAINTENANCE Engine oil Engine oil recommendation Engine oil level inspection Use a high quality 4-stroke engine oil to ensure Check the engine oil level each day before longer life. Choose oil with the classification API SL or higher. riding. The oil level must be between the high line Engine oil viscosity: SAE 15W-40 ①...
  • Page 35: Engine Oil Replacement

    MAINTENANCE Engine oil replacement ● Start engine and keep idling for a few minutes. Engine oil quality is the major factor that affects ● Stop the engine and stand the scooter on level engine life. Change your scooter's engine oil as specified in the maintenance schedule.
  • Page 36: Transmission Fluid Change

    MAINTENANCE Transmission Gear Oil change 1. Stand the scooter by the center stand. ① 2. Remove the gear oil drain bolt ② 3. Remove the gear oil filler bolt , and then slowly rotate the rear wheel to drain the gear oil off. 4.
  • Page 37: Air Filter Element Change

    MAINTENANCE Air cleaner filter element The air cleaner filter element should be serviced at regular intervals by the KYMCO dealer. (1)Remove the screws ① from the air cleaner cover. (2)Remove the air cleaner cover. (3)Remove the bolts from air cleaner element , replace it with a new one②...
  • Page 38: Throttle Operation

    2. Measure the throttle free play as shown at right. Throttle free play: 2.0 - 6.0 mm (0.08-0.24 in) ▆ NOTE:If your scooter’s throttle free play requires adjustment,contact you KYMCO dealer for service.
  • Page 39: Spark Plug

    After cleaning, check to adjust the spark plug gap to specified limit by using a spark plug gap thickness gauge. The spark plug should be replaced periodically. Recommend to consult with the KYMCO dealer when choosing an alternative spark plug instead. Recommended spark plug:CR8E(NGK) 0.7~0.8 mm...
  • Page 40: Brake Fluid Level Inspection

    MAINTENANCE Brake fluid Brake fluid level inspection With the scooter in an upright position, check the front and rear fluid level. Change the brake fluid at the time specified in the maintenance schedule. The fluid level should be above the lower level ①...
  • Page 41: Abs

    ABS SYSTEM Limitations of ABS ABS system is the equipment that ABS does not apply the brakes prevents wheel lockup in case of an automatically. It needs to apply the emergency braking, thus is capable brakes at the right time and with the to keep stability when applying right amount of braking force.
  • Page 42: Brake Pad Inspection

    MAINTENANCE Brake Pad Inspection Inspect the thickness of brake pad to verify if there is enough lining to brake properly. If the wear indicated groove at the brake pad is no longer visible, this means that the brake pad is worn and requires replacement. Before riding, apply braking several times to reach the proper lever stroke and firm feel on braking action that will ensure the...
  • Page 43: Battery

    ●Remove the screws on the front cover ② ●Remove the plastic clip ●Remove the front cover. ▆ NOTE: If your battery seems weak and/or the electrolyte is leaking to cause hard start or other electrical troubles, contact the KYMCO dealer immediately.
  • Page 44 MAINTENANCE Battery Remove WARNING ●Disconnect the negative (-) terminal Electrolyte is toxic and dangerous since it ●Disconnect the positive (+) terminal contains sulfuric acid, which causes severe ● Remove the disabled battery. burns. Avoid any contact with skin, eyes or ●To reinstall is the reverse sequence of removal..
  • Page 45: Fuse

    Fuse should be system. inserted according to this sticker. WARNING Fuse Specifications ∎ Never use a fuse of different rating. 10A*1 15A*1 25A*1 ∎ If the new fuse blows in a short time, consult the KYMCO dealer immediately. Good Blown...
  • Page 46: Tires

    MAINTENANCE Tires Tire pressure WARNING Insufficient tire pressure not only advances wear but also affects the riding stability. Under- Fail to follow the instruction below may result inflated tires make turning not smooth and over- in an accident due to tire failure. The rider’s inflated tires decrease the contact area with the personal safety is dependent on the ground, which can lead to skid and loss of...
  • Page 47: Tires Inspection

    An improperly repaired, installed, or balanced tire can cause you to lose control of your scooter or shorten tire life. Ask the authorized KYMCO dealer, or a qualified tire shop to perform tire repair, replacement, and balancing due to the proper tools and experience are required.
  • Page 48: Clean The Vehicle

    MAINTENANCE Cleaning Washing your scooter Clean your scooter regularly to protect the 1.Rinse the scooter thoroughly with cool surface finishes and inspect for damage, wear, water to remove any loose dirt. and oil, coolant or brake fluid leakage. 2. Clean the scooter with a sponge or soft Avoid cleaning products that are not specifically cloth using cool water.
  • Page 49: Crankcase Blow-By Drain

    Crankcase Blow-by Drain ① The air cleaner has a drain tube that is for draining the oil condensed fluid from the crankcase. When the fluid has accumulated to a certain amount in the transparent drain tube, remove the ② clip , drain the fluid into a container, and then reinstall in place.
  • Page 50: Storage

    MAINTENANCE STORAGE Removal from Storage Take necessary steps to be in good condition for next use after long storage. ●Remove cover from the vehicle ●Check the battery voltage or charge it if ●Perform any necessary periodic maintenance necessary, and then install it in the vehicle. or repairs before storage ●Fill the fuel tank with fuel.
  • Page 51: Emission Control

    EMISSION CONTROL Crankcase Emission Control System The scooter is equipped with a closed crankcase system. Blow-by gas is recycled into the combustion chamber via the intake system. This arrangement is to prevent blow-by gas from spreading to the atmosphere. Exhaust Emission Control System The exhaust emission from the scooter is controlled by combustion management, fuel delivery, ignition setting and exhaust system.
  • Page 52: Maintenance Record

    MAINTENANCE RECORD DATE MILEAGE SERVICE PERFORMED&NOTES...
  • Page 53 MAINTENANCE RECORD DATE MILEAGE SERVICE PERFORMED&NOTES...
  • Page 54: Specifications

    SPECIFICATIONS OF 150 Dimensions Chassis Overall length ........... 2085 mm Tire size, front........100/80–16 Overall width..........700 mm Tire size, rear........120/80–14 Overall height ........... 1170 mm Brake (front) ........ABS Wheel base..........1390 mm Brake (rear) ..........ABS Seat height ..........800 mm Dry weight..........
  • Page 55 SPECIFICATIONS OF 125 Dimensions Chassis Overall length ........... 2085 mm Tire size, front........100/80–16 Overall width..........700 mm Tire size, rear........120/80–14 Overall height ........... 1170 mm Brake (front) ........ABS Wheel base..........1390 mm Brake (rear) ..........ABS Seat height ..........800 mm Dry weight..........

This manual is also suitable for:

People s 150

Table of Contents