Advertisement
Quick Links
Advertisement

Related Manuals for Makeblock Dragon Knight


Summary of Contents for Makeblock Dragon Knight
- Page 1 Dragon Knight Installation Manual...
-
Page 2: Building Instruction
Building Instruction 4×8×4mm Copper Bushing (1) M4×8mm Screw (2) MEDS150 Servo Motor Bracket (2) M4 Nut (2) M4×8mm Screw (2) Smart Servo (1) - Page 3 4×8×4mm Copper Bushing (1) M4×8mm Screw (1) M4×8mm Screw (2) Smart Servo (1)
- Page 4 M4×8mm Screw (1) M4×8mm Screw (2) Smart Servo Mounting Bracket (1) 0824 - 032 Beam (1) M4×8mm Screw (2) Plastic Spacer 4 x 7 x 2 (2)
- Page 5 The direction of the two servo M4×8mm Screw (2) M4×16mm Screw (5) gears should be consistent with the figure. Plastic Spacer 4 x 7 x 2 (2) Dragoon Foot (2) Footpad (1) Nylon Lock Nut 4mm (5) Repeat steps 1 ~ 14 to complete the construction of the remaining three legs of the Dragoon.
- Page 6 The Smart Servo gear driver M4×8mm Screw (9) module switch should be Smart Servo Driver (1) installed at the tail of the Plastic Rivet (4) dragoon. Tail Head Dragoon front M4×16mm Screw (2) M4×8mm Screw (2) 0824 - 016 Beam (1) Me Ultrasonic Sensor (1) M4 Nut (2)
- Page 7 Dragon Knight main M4×8mm Screw (12) body installation Me Auriga (1) direction is consistent Dragoon main part (1) with the other main body bracket. Insert white terminal of black servo line.
- Page 8 Before installing the cover, please connect the Bluetooth module. Me Auriga power connector should toward Dragon Knight tail. Thread a black servo line into place. M4×8mm Screw (2) 0824 - 016 Beam (1) M4×8mm Screw (2) M4 Nut (2) M4×8mm Screw (1) Me Touch Sensor (1)
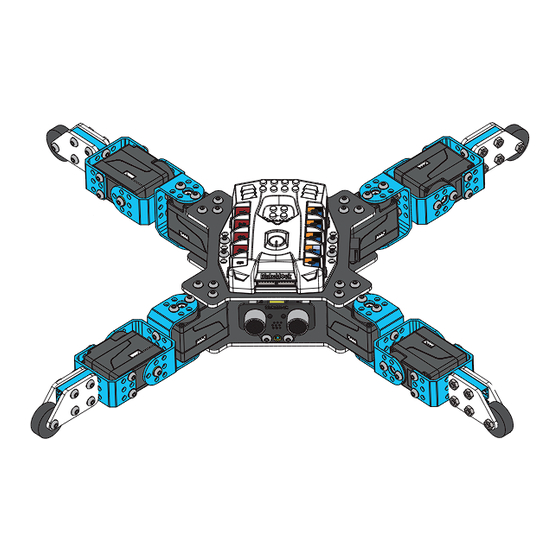
- Page 9 Velcro (1) AA Battery Holder(1) Building Complete! Servo No.4 Servo No.5 Servo No.6 Servo No.3 Servo No.8 Servo No.1 Servo No.7 Servo No.2...
-
Page 10: Wiring Instruction
Wiring Instruction Servo No.4 Servo No.1 Complete the wiring with instruction below. Me Touch should IN (Red) be connected to IN (Red) Auriga port 9. Me Ultrasonic Sensor should be connected IN (Red) Servo No.3 Servo No.2 to Auriga port 10. IN (Red)... - Page 11 Makeblock Co., Ltd. Technical support: tec-support@makeblock.com www.makeblock.com @Makeblock @Makeblock @Makeblock...
Need help?
Do you have a question about the Dragon Knight and is the answer not in the manual?
Questions and answers