Table of Contents
Advertisement
Quick Links
CIRC COLLECTION
FLUSH BOTH SUPPLY LINES BEFORE INSTALLATION
.
AFTER FLUSHING , SHUT OFF BOTH SUPPLY LINES.
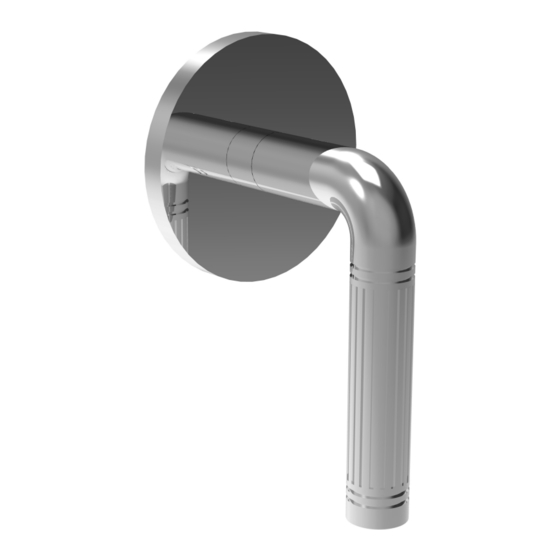
'CZ' STYLE HANDLE TRIM FOR 2 WAY 3 WAY AND VOLUME CONTROL
MINIMUM HOLE SIZE FOR THE HANDLE TRIMS IS 1 5/8" AND MAXIMUM OF 1 3/4"
Finishes: Santec Polished Chrome, Polished Nickel and Satin Nickel nishes carry a Lifetime
1.
Limited warranty against manufacturing defects and tarnish to the original purchaser with the
exclusion of kitchen drain assemblies which , due to the nature of their use, are not warranted. Santec
recommended custom nishes carry a ten (10) years limited warranty against manufacturing
defects and tarnish to the original purchaser with the exclusion of kitchen and pop - up drain
assemblies w hich, due to the nature of their use, are not warranted.
2.
Cartridges: Santec Cartridges carry a lifetime limited warranty against manufacturing defects for the
life of the product to the original purchaser.
3.
Parts : Santec parts carry a Ten (10) year limited warranty against manufacturing defects, to the
original purchaser.
1. INSTALLED CORNER VALVE WITH SPLINE STEM
4.
Warranty exclusions and limitations : This warranty does not cover: damage due to negligence,
accident, abuse, improper installation, or improper maintenance such as, but not limited to: heat from
soldering during installation, the use of plumbers putty, damage from tools used during installation,
the use or exposure to chemicals or cleaning products either abrasive or non abrasive or the use of
2- Install the valve onto the wall with 2" space
any cleaning tool or product other than a soft, clean cloth. This warranty does not cover: changes in
between the center of the valve inlet and the
the nish or in the product due to normal wear or aging and does not cover any product or parts
finished wall.
which have been altered or used in a manner not typical for the product. This warranty does not
Screw the handle flange with the flange washer
cover and Santec will not be held liable for damage to products caused by the freight carrier
onto the handle bell and tighten it firmly.
and a claim should be made immediately to the freight carrier should this occur. This warranty
does not cover any cost involved in the installation, repair, or replacement of any Santec product or
3- Screw the handle bell, flange and washer onto
part. This warranty does not cover and Santec will not be held liable for any loss, damages, or
the all thread, press them firmly against the wall
expenses, incidental or consequential whatsoever, originating from the purchase, installation, use,
and mark the position. Remove the handle bell,
repair, failure, or replacement of any Santec product or part, as allowed by law. The product or
flange and washer and cut off the excess thread.
components of the covered product will either be repaired, re nished or replaced, at the sole
Reinsert the handle bell, flange and washer onto
discretion of Santec. Santec reserves the right to examine any product claimed defective prior to
any warranty claim being accepted or processed, at its sole discretion. This warranty gives you
the all thread.
speci c legal rights and you may have other rights which may vary from state to state.
E ective 10/01/03 - Replaces and supersedes any previously issued warranty.
4 - Insert the handle onto the stem. Measure the excess
For clear coated or enamel color nishes:
between the handle bell and the handle.
Take off the handle and cut the excess stem.
We recommend that all faucets, drains, etc. be
gently wiped dry with a soft cloth after use to avoid
5 - Reinsert the handle onto the stem. Using the Allen Key
water spotting and water deposit buildup. A mild
liquid hand soap, such as Ivory may be used
provided, tighten the handle set screw firmly.
occasionally if desired. Use of a non-abrasive
carnauba wax will add protection to the nish and
should be used if the faucets will not be dried after
TEST FOR PROPER FUNCTION BEFORE CLOSING WALLS!
use. Santec Orobrass kitchen products are clear
coated.
6 - Apply the finish trim.
Santec has obtained applicable code (standards) listings generally available on a national basis for products of this type.
It is the responsibility of the installer/owner to determine speci c local code compliance prior to installation of the product.
Santec makes no representation or warranty regarding, and will not be responsiblefor any code compliance.
Some products listed in this catalog may not be approved for use in the state of Massachusetts, check with your Local Authority
or Licensed Plumber to assure code compliance.
KEEP THIS INSTRUCTION BOOKLET FOR FUTURE REFERENCE
SANTEC LIFETIME LIMITED WARRANTY
FINISH CARE INFORMATION
ITEM NUMBER
ALL THREAD
2" ~ 2
"
nished wall
1/8
c e nte r of IN port
FLANGE WASHER
HANDLE BELL WITH FLANGE
For non-clear coated and specialty nishes:
We recommend that all faucets, drains, etc. be
gently wiped dry with a soft cloth after use to avoid
water spotting and water deposit buildup. Use of a
non-abrasive carnauba wax is required
occasionally.
DT-CZ-TM
YY-CZ-TM
STEM
HANDLE AND ALLEN KEY
ALL THREAD
STEM
PAGE 04
PAGE 02
PAGE 01
Advertisement
Table of Contents

Subscribe to Our Youtube Channel
Related Manuals for Santec CIRC CZ


Summary of Contents for Santec CIRC CZ
- Page 1 Finishes: Santec Polished Chrome, Polished Nickel and Satin Nickel nishes carry a Lifetime Limited warranty against manufacturing defects and tarnish to the original purchaser with the exclusion of kitchen drain assemblies which , due to the nature of their use, are not warranted. Santec INSTALLATION INSTRUCTION...
- Page 2 Finishes: Santec Polished Chrome, Polished Nickel and Satin Nickel nishes carry a Lifetime Limited warranty against manufacturing defects and tarnish to the original purchaser with the EXTENSION exclusion of kitchen drain assemblies which , due to the nature of their use, are not warranted. Santec ALL THREAD INSTALLATION INSTRUCTION...
- Page 3 INSTALLATION INSTRUCTIONS 5 - Replace the handle onto the stem. Tighten the handle set screw firmly. 6 - Apply the finish trim. ITEM NO. PART NUMBER DESCRIPTION QTY. PH4005 Circ RT Flange PM-1111 Valve Extension PM-099 Teflon Washer SA240 Stem Extension PM-139 # M4 screw Circ Mira/Hero Lever...
- Page 4 Take off the handle and cut the excess stem. Access should be provided to the roman tub valves for future service or repair to valves and piping. Under no circumstances will Santec Faucet, Inc. be liable for any costs associated with the removal of materials for future access to the tub valves or piping for service or repair.
Need help?
Do you have a question about the CIRC CZ and is the answer not in the manual?
Questions and answers