Advertisement
Table of Contents
- 1 Setting up the Lamp Stand, Extending of the Center Column Segment and the Tripod Legs
- 2 Height Adjustment
- 3 Installation of Equipment on the Tripod
- 4 Components Lamp Stand
- 5 Instructions for Use and Care of the Tripod
- 6 Technical Specifications
- 7 Scope of Delivery
- 8 Our Warranty Promise
- Download this manual
E
MINI LAMP STAND 40 CM
2
By purchasing this product you have acquired a high-quality, versatile and
practice-oriented lamp stand / studio stand with long-term quality.
We hope you enjoy using our product
Your team from WALSER
Setting up the lamp stand, extending of the center column segment and the
tripod legs
Loosen the locking screw of the tripod lock (5). Pull the tripod legs (8) outwards
and press the tripod star (6) downwards. This spreads the legs. Set the desired
angle of the tripod legs. Fix the tripod legs by tightening the tripod lock screw (5).
Proceed when folding the stand in the reverse order.
WARNING! Risk of squiering fingers through the struts of the
tripod legs (7).
Height adjustment
The tripod is equipped with a telescopic center column that can be extended. The
locking clamps of the center column (3) are fixed by the tripod locks (4). To adjust
the height of the tripod, loosen the tripod locks (4) by turning counterclockwise.
Set to the desired height and tighten the screws again. Press the center column
elements down to check that all locks are fixed correctly. The stand is now ready
to use.
Installation of equipment on the tripod
Using the adapter on the top, you can attach devices such as studio flashes, led
lights, softboxes, poles etc. to this stand. Loosen the mounting screw of the bra-
cket. Insert the holder of your device from above into the tripod adapter (1) and fix
the holder screw.
On the upper end of the mounting adapter (1) a 1/4 inch thread can be used. You
can also attach suitable equipment here.
1
4
3
5
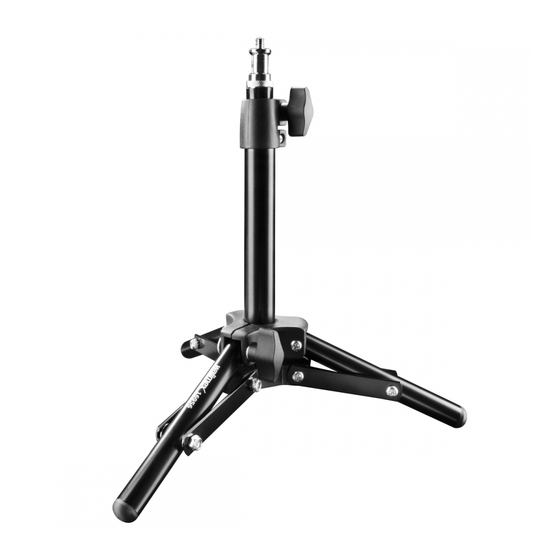
Components lamp stand
1 Fixation adapter
9
2 Telescope center column
3 Locking clamp
4 Tripod locks
5 Locking screw lamp stand angle adjustment
6 Tripod star
7 Tripod leg struts
8 Tripod legs
2
6
8
7
Advertisement
Table of Contents

Subscribe to Our Youtube Channel
Related Manuals for Walimex Pro 16956


Summary of Contents for Walimex Pro 16956
- Page 1 By purchasing this product you have acquired a high-quality, versatile and practice-oriented lamp stand / studio stand with long-term quality. We hope you enjoy using our product Your team from WALSER Setting up the lamp stand, extending of the center column segment and the tripod legs MINI LAMP STAND 40 CM Loosen the locking screw of the tripod lock (5).
- Page 2 To highlight our exceptional service level, we offer a 2 year warranty for this Walimex pro product. This warranty is only valid in combina- with a large central column extension. Due to the design-heavy head of a lamp tion with your purchase receipt.
Need help?
Do you have a question about the 16956 and is the answer not in the manual?
Questions and answers