Table of Contents
Advertisement
Quick Links
Advertisement
Chapters
Table of Contents

Related Manuals for Kortho GraphicJet X Series


Summary of Contents for Kortho GraphicJet X Series
- Page 1 MANUAL GraphicJet X-series English Edition: H550 AE Rev.: 001...
- Page 2 In light of continuous development and improvement, Korthofah BV reserves the right to modify the specifications without prior notice. The figures printed in this manual may slightly differ from the Kortho GraphicJet. Information in this document is subject to change without notice.
-
Page 3: Preface
A notice with useful information for the user in relation to the product. It attends the user to possible problems. Note: Gives the user suggestions and helps the work to be carried more rapidly. kortho H550 AE KGJ X18 Rev.: 001... -
Page 4: Glossary
In this manual, the substrate the printer prints on, e.g. a box, package etc. Sensor: A product detection device connected to the control unit, usually a photocell. Substrate: This is the material of a product to print on, e.g. cardboard, wood, paper, packaging foil. kortho KGJ X18 H550 AE Rev.: 001... -
Page 5: Table Of Contents
SAFETY Control unit......................... 4-1 4.1.1 General information ..................4-1 4.1.2 Power supply ....................4-1 4.1.3 Precautions before power-up ................4-2 4.1.4 Precautions when opening the control unit ............4-2 Anti-static precautions ....................... 4-3 kortho H550 AE KGJ X18 Rev.: 001... - Page 6 Setting the print request parameters ..............7-8 Spit parameter settings ...................... 7-9 7.5.1 Setting the spit parameters ................7-9 7.5.2 Setting the ink low and ink out outputs ............7-10 User settings ........................7-11 kortho KGJ X18 H550 AE Rev.: 001...
- Page 7 Poor print quality ......................9-23 9.5.1 General issues ....................9-23 9.5.2 Common print results ..................9-24 MAINTENANCE 10.1 Quick and regular checks ....................10-1 10.2 Nozzle maintenance ......................10-1 10.3 Yearly maintenance ......................10-2 kortho H550 AE KGJ X18 Rev.: 001...
- Page 8 Appendix C Part lists & illustrations ..................C-1 Appendix D Connections ...................... D-1 Appendix E NiceLabel driver tutorials .................. E-1 Appendix F Quick reference ....................F-1 Appendix G Error list ......................G-1 kortho viii KGJ X18 H550 AE Rev.: 001...
- Page 9 H550 AE KGJ X18 Rev.: 001...
-
Page 11: Introduction
Ensure the control unit of the printer is switched off. Please read the SAFETY section and the MSDS of the ink used for more information. The MSDS can be downloaded form the Kortho website (www.kortho.com). Intended Use The GraphicJet X18-series are industrial printers and are designed to print directly on substrates e.g. -
Page 12: Specifications
The ambient temperature must be between 5 °C and 38 °C, with a relative humidity between 10% and 90% (non condensing). Use only Kortho GJ inks and solvents for this printer. Make sure the ink and solvent used match. kortho... -
Page 13: Control Unit
(non condensing). 1.4.3 Ink The Kortho inks have been developed for use in conjunction with the GraphicJet X-series printhead to print onto a range of substrates. The inks are either oil based, used on porous substrates like cardboard, or solvent based, used on non porous substrates like PVC water pipes. -
Page 14: Label Features
By using the USB thumbdrive labels can only be copied to the print memory. Storage capacity: 46MB (approximately 445 labels of the maximum label size). This memory can be used for storage of: Labels b. Graphics Fonts kortho KGJ X18 H550 AE Rev.: 001... -
Page 15: Life Span
The printer should be installed on a low vibration location. It is recommended that the coding unit is protected from shock and vibration, as this will have severe impact on the printed label quality and printhead life. kortho H550 AE KGJ X18... - Page 16 INTRODUCTION kortho KGJ X18 H550 AE Rev.: 001...
-
Page 17: Technical Description
After printing a label the printer is in stand-by mode again and awaiting the next print request signal. After receiving the next print request signal the time and date items will be updated after which the system will print the completely updated label. kortho H550 AE KGJ X18... -
Page 18: Coding Unit
Serial number label for Coding Unit Prime bulb with tube Reservoir mounting clamp Flexible conduit to printhead housing Built-in spirit leveller (not shown – positioned behind the clamp) Fig. 2.3 Ink reservoir, parts kortho KGJ X18 H550 AE Rev.: 001... -
Page 19: Fig. 2.4 Printhead Housing, Parts
The difference between de X18 and X18+ is the printhead used and the fact that the X18+ is equipped with 2 filters instead of one. The printheads are easy to recognize, as the printhead of the X18 is black and the printhead of the X18+ is red/orange. kortho H550 AE KGJ X18... -
Page 20: Control Unit
Print request (e.g. photocell) Input/Output Printhead A Encoder LAN connector Mains power switch (including main fuses) RS232 (optional) Printhead B (optional) BCD connector (optional) Print safety photocell (optional) Fig. 2.7 Control unit, connections kortho KGJ X18 H550 AE Rev.: 001... -
Page 21: Sensors
The encoder is used to measure the movement of the product to print on. This measurement is used to calculate the correct print speed at which the printer will print. Spring clamp Spring Encoder support Encoder connector Lever limiter Encoder lever Encoder Encoder wheel Rubber O-ring (2x) Fig. 2.9 Encoder kortho H550 AE KGJ X18 Rev.: 001... -
Page 22: Label Design
PC, like NiceLabel. 2.5.2 NiceLabel Labels can also be created by using NiceLabel or any other windows based program using the Kortho printer driver for NiceLabel. When using this driver in combination with the NiceLabel software one can use the full options this software program offers including variable text and data field. -
Page 23: Print Process Description
The channels are filled with ink and a pressure wave inside the ink is generated due to the distortion of the PZT walls. The height and width of the chambers do not alter; they simply just shift to one side. This kortho H550 AE KGJ X18 Rev.: 001... -
Page 24: Ink System
The touch panel consists of a capacitive touch screen and a TFT panel. The screen can also be operated with gloves on (supplied with the ink). A stylus for capacitive touc screens can also be used if required. kortho KGJ X18 H550 AE Rev.: 001... -
Page 25: Menu Structure
One can select another keyboard by either using the relevant buttons or by swiping over the round indicators at the bottom of the screen. kortho H550 AE KGJ X18... -
Page 26: Fig. 3.4 First Keyboard Screen
Fig. 3.5. Fig. 3.5 Arabic keyboard To use the keyboards superscript alphanumerics: Touch and hold the desired key. Drag your finger to the left or right to select the character of choice. kortho KGJ X18 H550 AE Rev.: 001... -
Page 27: Fig. 3.6 First Keyboard Screen, Alternative Alphanumerics
To enter this screen either swipe over the round indicators at the bottom of the screen or touch the special functions button in the first screen to enter the fourth screen and touch FX. kortho H550 AE KGJ X18 Rev.: 001... -
Page 28: Fig. 3.8 Third Keyboard Screen, Commonly Used Text
The text in a button can be deleted or modified later on. A text placed by using the third keyboard screen will be treated as normal text, so the text can be deleted or modified if required. kortho KGJ X18 H550 AE... -
Page 29: Fig. 3.10 Programming Third Keyboard Screen Buttons, Entering Text
Fourth keyboard screen, edit text and use cursor controls To return to the first screen touch the aBc button. To return to the second screen touch the 12? button. To return to the third screen touch the FX button. kortho H550 AE KGJ X18 Rev.: 001... -
Page 30: System Information
Numeric keyboard 3.5.4 System information The firmware versions installed on the control unit can be displayed on screen by pressing System Info in the Information menu. Fig. 3.13 Entering the System information screen kortho KGJ X18 H550 AE Rev.: 001... -
Page 31: Menu Structure
Ink out level Rollover hour Spit interval Cancel Ink out Inhibit level Spit lines LED 1 Trigger level Fig. 3.14 Standard menu structure Refer to Appendix E for a full-scale sheet of the menu structure. kortho H550 AE KGJ X18 Rev.: 001... - Page 32 PRINT PROCESS DESCRIPTION kortho 3-10 KGJ X18 H550 AE Rev.: 001...
-
Page 33: Safety
Verify that no significant potential difference exists between the single-phase protective earth of the printer and the frame ground of the host machine. The wire colour code for the supply cable is: BROWN for Line (L) BLUE for Neutral (N) GREEN/YELLOW for Protective Earth (PE) kortho H550 AE KGJ X18 Rev.: 001... -
Page 34: Precautions Before Power-Up
The BCD cable (X07) (option) The RS232 communication cable (X05). (option) 10. The print safety photocell cable (X08) (option) 4.1.4 Precautions when opening the control unit Attention label Fig. 4.3 Attention label for opening control unit kortho KGJ X18 H550 AE Rev.: 001... -
Page 35: Anti-Static Precautions
When at risk for contact with the ink or solvent: Wear chemical resistant gloves. Use safety goggles or face shield in case of splash risk. Wear suitable protective clothing as protection against splashing or contamination with ink or solvent. kortho H550 AE KGJ X18 Rev.: 001... -
Page 36: First Aid Measures
Use only the Kortho GJ ink type that is noted on the inkservervoir (Fig. 4.4 A), this because other ink is probably not chemical compatible with the materials used in the GraphicJet X18 and the ink that is already present in the inkreservoir. -
Page 37: Transport & Storage
Avoid shocks and vibrations during the transport to reduce the risk of generating air bubbles in the printhead or in the ink tubing. In this case, you have to prime the printhead and ink tubes at the new location. For short distance and at the most two day travel: kortho H550 AE KGJ X18 Rev.: 001... -
Page 38: Pre-Storage Procedure
6. Extract or prime the remaining solvent from the ink reservoir (same as instruction 1 but read solvent instead of ink). 7. Verify whether the ink reservoir is empty. 8. Place a dust cover or bag over the coding unit. For storage prior to distribution: kortho KGJ X18 H550 AE Rev.: 001... -
Page 39: Ink And Solvent
Wear appropriate protective equipment when handling this material (see Section 8 of the MSDS). Always wash hands thoroughly after handling and before eating, drinking, or using tobacco products. kortho H550 AE KGJ X18 Rev.: 001... -
Page 40: Transport Information
Refer to the latest Material Safety Datasheet for more detailed and accurate information. Keep the ink bottle and solvent bottle tightly closed in a dry place, between 5 °C and 38 °C, and away from strong, oxidizing agents. This is valid for all kind of transport. kortho KGJ X18 H550 AE... -
Page 41: Installation
Coding unit, see section 6.2.1. Control unit, see section 6.2.2. 6.1.3 Optional parts Encoder. Standard interface cable. Alarm beacon. Extra support parts: shaft, clamp, pole and mounting block. kortho H550 AE KGJ X18 Rev.: 001... -
Page 42: Unpacking
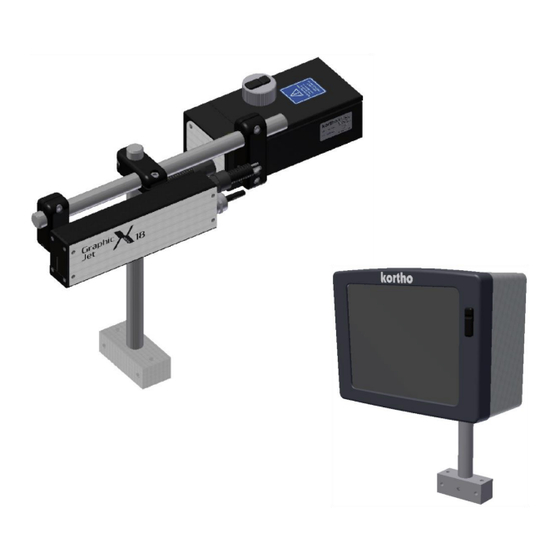
The coding unit consist of three main parts, the Inksystem that holds the ink used for printing, the printhead that makes the actual print and the support set. Ink system Printhead Support set Fig. 6.2 Coding unit X18 kortho KGJ X18 H550 AE Rev.: 001... -
Page 43: Control Unit
Support set (optional) Fig. 6.3 Control unit TsC20 6.2.3 Encoder (Optional) The encoder is used for measuring the line speed and controlling the print speed accordingly. Encoder support Encoder Fig. 6.4 Encoder with support kortho H550 AE KGJ X18 Rev.: 001... -
Page 44: Ink Set
INSTALLATION 6.2.4 Ink set The standard ink set consists of: For oil based inks: two (2) bottles with 200ml Kortho ink. For solvent based inks: four (4) bottles with 100ml Kortho ink. Five (5) pairs protection gloves. -
Page 45: Ink Reservoir Orientation
1. Rotate the printhead housing so that the plane of the front-plate is positioned parallel to the substrate and perpendicular to the direction of the product. 2. Position the printhead housing at the desired print position. Datum-A is now fixed. kortho H550 AE KGJ X18... -
Page 46: Radial Printhead Rotation
Fig. 6.10 to Fig. 6.12 shows some examples with a radial rotation of the printhead. To change the position of the ink reservoir, refer to subsection 6.3.2. Fig. 6.10 Printhead radial rotation 0°, standard support, clamp down, reservoir position I kortho KGJ X18 H550 AE Rev.: 001... - Page 47 INSTALLATION Fig. 6.11 Printhead radial rotation 45°, standard support, clamp down, reservoir position III Fig. 6.12 Printhead radial rotation 90°, standard support, clamp down, reservoir position II kortho H550 AE KGJ X18 Rev.: 001...
-
Page 48: Fig. 6.13 Printhead Radial Rotation Graph
and the support shaft. With the printhead clamp down, clamp clamp kortho KGJ X18 H550 AE Rev.: 001... -
Page 49: Axial Printhead Rotation
(=10mm in Fig. 6.14). Look at the curves in the graph Fig. 6.16 for a height-AB at a given axial rotation angle. Every curve in the graph Fig. 6.16 have their own values. clamp Fig. 6.15 Printhead axial rotation -45°, clamp up, reservoir position III, kortho H550 AE KGJ X18 Rev.: 001... -
Page 50: Fig. 6.16 Printhead Axial Rotation Graph
[mm]) with these equations: is the axial rotation angle of the printhead housing. is the dimension C in Fig. 6.14 and Fig. 6.15. kortho 6-10 KGJ X18 H550 AE Rev.: 001... -
Page 51: Radial And Axial Printhead Rotation
8. Check with the aid-strip if the horizontal plane of the first nozzle is 13.8 mm below datum-B. Beware: After the first refill of the ink reservoir the printhead may start ‘bleeding’ ink. Stop this ‘bleeding’ by lowering the ink reservoir by about 1 mm. kortho 6-11 H550 AE KGJ X18... -
Page 52: Positioning The Sensors
Keep the photocell distance (C in Fig. 6.18) within the maximum operating range of the photocell, which is approximately 400 mm. The operating range also depends on product properties like colour, reflection etc. Take precautions so that the product cannot damage the photocell. kortho 6-12 KGJ X18 H550 AE Rev.: 001... -
Page 53: Encoder (Optional)
(the cable between the coding unit an control unit should not be extended). 4. Mount the control unit on the determined location. Refer to Appendix B, Dimensions Control unit for the dimensions of the mounting holes. kortho 6-13 H550 AE KGJ X18... - Page 54 10. Connect the control/data cable, between the control unit and the coding unit (X02/X06 - fixed length). 11. Connect the LAN cable (LAN - optional). 12. Connect the BCD cable (X07 – optional). 13. Connect the RS232 cable (X05 – optional). 14. Connect the mains supply (X09). kortho 6-14 KGJ X18 H550 AE Rev.: 001...
-
Page 55: Commissioning
5. Set the parameters in the Printer submenu, refer to section 8.6.2. 6. Set the parameters in the Signal submenu, refer to section 8.6.3. 7. Set the parameters in the Network submenu, refer to section 8.6.4. kortho H550 AE KGJ X18... -
Page 56: Filling The Ink System
5. Take an ink bottle and cut off the end, which is indicated with a ring, of the spout top (Fig. 7.4). CAUTION: Use ONLY Kortho GJ ink in 200 ml bottles, see also the indicator on the reservoir. Fig. 7.4 Cut ink bottle open 6. -
Page 57: Fig. 7.5 Ink Reservoir Opened
9. Remove the empty ink bottle and avoid spilling ink. Clean the reservoir opening with a clean paper tissue. 10. Close the ink reservoir by screwing the screw cap (Fig. 7.7 ) back on. Hand tight is sufficient. kortho H550 AE KGJ X18... -
Page 58: Tuning The Speed Related Parameters
Proceed with this section only if the instructions of the sections 7.1 and 7.2 are carried out successfully. 7.3.1 Preparing for the first test print 1. Switch on the control unit. 2. Touch the Settings icon 3. Touch the Signal button (Fig. 7.8). kortho KGJ X18 H550 AE Rev.: 001... -
Page 59: Fig. 7.8 Settings Menu
(local) for printhead A or B. All other menu’s and parameters are the same (global) for printhead A and B. Note: If there are two printheads connected to the control unit one has to select the test label for each individual printhead. 9. Touch Test. kortho H550 AE KGJ X18 Rev.: 001... -
Page 60: Tuning The Test Print With The Encoder Disabled
If the overall length of the test print is longer than 100 mm, increase the speed parameter. If the end of the test print is missing, decrease the delay parameter or use a longer sample product. kortho KGJ X18 H550 AE... -
Page 61: Tuning The Test Print With The Encoder Enabled
Sample G r a phic J et X18 15:45 23-03-2004 ww w .kortho.com < > copyright © 2002 Fig. 7.11 Test label printed at correct speed setting 11. Repeat the instructions 9 and 10 until the test label is printed on the correct position of the product with a length of 100 mm. -
Page 62: Changing The Print Rotation Angle
At a continuous print request setting, the delay parameter can be used to define the distance between each print. Setting the Print request Touch the Settings icon. Touch the Signal button. Set the Print request input to High or Low. kortho KGJ X18 H550 AE Rev.: 001... -
Page 63: Spit Parameter Settings
(spitting) at predefined intervals. The disadvantages of using printhead spitting are: The pollution of the direct surroundings. The waste of ink . Fig. 7.15 Settings - Print menu kortho H550 AE KGJ X18 Rev.: 001... -
Page 64: Setting The Ink Low And Ink Out Outputs
After the set amount of prints is reached the printer stops printing and the Low ink output will be set. kortho 7-10 KGJ X18 H550 AE Rev.: 001... -
Page 65: User Settings
Alternatively create a Report file, see section 9.2.5 and store it in a place were it can be found when needed e.g. the main label folder on the label design PC. Keep the values nearby, when calling the helpdesk of your local distributor. kortho 7-11 H550 AE KGJ X18 Rev.: 001... - Page 66 Coding unit B, serial number Production plant Production line Type of substrate (product) / Ribbon type Production / print rate Cycles / min Ambient temperature (min, max) °C (min) / °C (max) Fig. 7.17 Printer information kortho 7-12 KGJ X18 H550 AE Rev.: 001...
-
Page 67: Operation
Main menu 5. Check whether the printer is ready to print, the LED indicator on screen should show a green light. 6. Access the desired menu function by pressing the appropriate function icon or button. kortho H550 AE KGJ X18... -
Page 68: Operational
NiceLabel driver, see subsection 2.5. These labels can contain operator input fields, which should be filled out by the operator at the start of the print session. Refer to subsection 3.5.3 for the available keyboard options. kortho KGJ X18 H550 AE... -
Page 69: Text Item Input Menu
4. To delete characters, select the characters that need to be deleted and touch Backspace. Alternatively, place the cursor behind the characters that need to be deleted and touch Backspace to remove character by character. 5. Touch Enter to confirm the Operator input. kortho H550 AE KGJ X18 Rev.: 001... -
Page 70: Date Advance Input Menu
The number displayed on screen is the last value entered on the system by the operator. The very first time the label is selected, it will show the start value entered in the label design software. Fig. 8.5 Number start value input menu kortho KGJ X18 H550 AE Rev.: 001... -
Page 71: Label Management
6. The operator input screen will appear if the label selected requires the input of data, see section 8.3. 7. Enter the required data and touch Enter, the system will return to the Main screen. The name of the selected label will be shown in the status bar, behind Label. kortho H550 AE KGJ X18... - Page 72 6. The screen will switch to the explorer screen of the print memory. Fig. 8.8 Copy label menu, print memory 7. Touch the label folder to which the labels need to be copied to (The printer initially has one folder called Labels). kortho KGJ X18 H550 AE Rev.: 001...
-
Page 73: Moving A Label
2. Touch the Management button and two further buttons will appear, Move and Delete. Fig. 8.10 Move label menu 3. Touch the label file or folder which needs to be moved in the lower window. 4. Touch Move, the following screen will appear. kortho H550 AE KGJ X18 Rev.: 001... -
Page 74: Deleting A Label
2. Touch the Management button and two further buttons will appear, Move and Delete . Fig. 8.12 Delete label menu 3. Touch the label file or folder that needs to be deleted in the lower window. 4. Touch Delete, the following screen will appear. kortho KGJ X18 H550 AE Rev.: 001... -
Page 75: Editing A Label
Select the label that needs to be edited in the lower window. Fig. 8.14 Select a label for editing Touch the Select Button and the Create label menu will open showing the selected label. kortho H550 AE KGJ X18 Rev.: 001... -
Page 76: Creating A Label
There is a Create label function available to make it possible to create a label on the control unit. Touch the Print icon. Touch the Create label button, the Create label screen will appear on screen. kortho 8-10 KGJ X18 H550 AE Rev.: 001... - Page 77 Enter the required text through the keyboard. Time: Font : select the font type from the font list. Format: select the required time format from the option list. kortho 8-11 H550 AE KGJ X18 Rev.: 001...
- Page 78 Touch Ok to save the label. d. The system will return to the Create label screen. 12. To calculate the ink consumption per print: Touch the Ink calculator icon. Fig. 8.17 Ink calculator screen kortho 8-12 KGJ X18 H550 AE Rev.: 001...
-
Page 79: Showing A Preview
5. Touch Preview again to show a 1:1 picture. 6. Touch Preview again to show the 1:8 picture again. When the label is larger than the screen, one can use the touchscreen to drag the preview around. kortho 8-13 H550 AE KGJ X18 Rev.: 001... -
Page 80: Filling The Ink Reservoir
3. Clean and remove any dust from the top of the ink reservoir. 4. Take an ink bottle and cut off the end, which is indicated with a ring, of the spout top (Fig. 8.19). CAUTION: Use ONLY Kortho GJ inks in 200 ml bottles. Fig. 8.19 Cut ink bottle open 5. -
Page 81: Purging The Printhead
Touch the Test menu. Hold paper tissues in front of the printhead to collect ink. Touch the Purge ink – Test button to start the purge process. Keep the button activated to continue purging. kortho 8-15 H550 AE KGJ X18... -
Page 82: Priming The Printhead
Fig. 8.23 Printhead housing at horizontal position 4. Fit the prime bulb to the opening of the vent knob (Fig. 8.24) of the ink reservoir. kortho 8-16 KGJ X18 H550 AE Rev.: 001... -
Page 83: Adjusting Printer Settings
9. Rotate the printhead housing back to the print position. 10. The printer is now ready to print. Adjusting printer settings 1. Touch the Settings icon. The following status screen is shown. Fig. 8.25 Settings menu kortho 8-17 H550 AE KGJ X18 Rev.: 001... -
Page 84: System Settings
3. Touch the arrow up or arrow down to adjust the time. 4. Touch the arrow left or arrow right to change the month and year. Alternatively touch the month or year to activate the selection option. kortho 8-18 KGJ X18 H550 AE Rev.: 001... - Page 85 The language set as Date language is used to print the Months and Day of the week (e.g. when set to English: Monday, Mon, January, Jan. When set to Dutch: Maandag, Maa, Januari, Jan). 1. Touch the Date language button. kortho 8-19 H550 AE KGJ X18 Rev.: 001...
- Page 86 The default setting is Off, which means the date will turn over to the next day at 24:00. If e.g. the date needs to change at 03:00, the Rollover hour needs to be set to 3. Fig. 8.31 Rollover hour selection menu kortho 8-20 KGJ X18 H550 AE...
-
Page 87: Printer Settings
If the Low ink prints is set to a relatively high value, there is an apparent risk that air is able to enter the ink tubing and printhead. This will cause the ink-system to malfunction. The ink reservoir should be refilled as soon as possible to prevent print failure. kortho 8-21 H550 AE KGJ X18 Rev.: 001... -
Page 88: Signal Settings
High or active Low. Alarm output active The output signal tells the host machine that an error has occurred which requires user attention. This signal can be set to be active High or active Low. kortho 8-22 KGJ X18 H550 AE... -
Page 89: Network Settings
PC (label design) and printer can take place. To make sure the settings will match the network settings, always ask the network administrator for help while integrating the printer into the company network. kortho 8-23 H550 AE KGJ X18... -
Page 90: Label Settings
Enter the desired value (do not forget to enter the decimal points). Confirm with Enter. The new settings will be active within 15 seconds. 8.6.5 Label settings To change the label settings of the printer touch the Label button. kortho 8-24 KGJ X18 H550 AE Rev.: 001... - Page 91 Mirror + 180º Fig. 8.38 Orientation setting Rest counters The system counters, which can be used in the label, can be reset to their start value (default value defined in the label). kortho 8-25 H550 AE KGJ X18 Rev.: 001...
-
Page 92: Print Settings
This value sets the number of labels to print. When the set value has been reached, the printer will stop the printing process and the General alarm output will be activated to indicate that the batch is complete. When set to zero the current label will print indefinitely. kortho 8-26 KGJ X18 H550 AE Rev.: 001... - Page 93 The spit interval is switched off when set to zero. See also chapter 7.5.1. Spit lines The amount of pixel columns that will be spitted every set interval. The amount of lines can be set between 1 and 5. See also chapter 7.5.1. kortho 8-27 H550 AE KGJ X18...
- Page 94 OPERATION kortho 8-28 KGJ X18 H550 AE Rev.: 001...
-
Page 95: Diagnostics / Troubleshooting
Test label menu 2. Touch the Load button to load the test label. This label contains items like text, date, number and barcode. 3. The Test label loaded message will be displayed on screen. kortho H550 AE KGJ X18 Rev.: 001... -
Page 96: Fonts
Touch the Fonts button located at the left side of the screen. The following status screen is shown. Fig. 9.4 Font menu List fonts This function lists all fonts currently installed in the printer. These fonts are available to be used in the onboard label creator. kortho KGJ X18 H550 AE Rev.: 001... - Page 97 2. Touch the font that needs to be removed. 3. Touch the Delete button to remove the font from the printer, the following screen will be displayed. kortho H550 AE KGJ X18...
- Page 98 Add fonts menu 3. Select the folder containing the font files in the top menu. 4. Select the font in the bottom menu. 5. Touch the Copy button to copy the font to the printer. kortho KGJ X18 H550 AE Rev.: 001...
-
Page 99: Test
This function can be used to make test prints to verify and to optimize the print quality. This can be done with the current label but it is better to use a Test label, see section 9.1.1. Touch Test to enter the menu that contains the print test functions. Fig. 9.10 Test menu kortho H550 AE KGJ X18 Rev.: 001... -
Page 100: Printer
Speed Touch +/- to alter the print speed. Alternatively touch the value shown and enter the Speed value through the numerical keyboard. At the right print speed the Kortho test label has a length of 100mm. Print Touch the Test button to make a single print. - Page 101 WinOS Version - the build version of the image that is used to flash the user interface hardware. Touch the Ok button to return to the Diagnostics-Printer menu. System Touch the System button to show information about the system. Fig. 9.14 System information screen kortho H550 AE KGJ X18 Rev.: 001...
- Page 102 Korthofah BV or a local distributor, which is designated by Korthofah BV. Cancel Touch the Cancel button to return to the Diagnostics main menu. kortho KGJ X18 H550 AE Rev.: 001...
-
Page 103: Diagnostics
The external inputs can be checked using a service tool or attached peripheral device. To test the external inputs: 1. Select IO Feedback and activate the attached peripheral device (sensor or other device) or 2. Use a service device to activate the inputs. Fig. 9.17 IO feedback screen kortho H550 AE KGJ X18 Rev.: 001... -
Page 104: Graphics
Fig. 9.18 Graphics menu List graphics This function lists all graphics currently installed in the printer. These graphics are available to be used in the onboard label creator. Fig. 9.19 Graphics menu kortho 9-10 KGJ X18 H550 AE Rev.: 001... - Page 105 This function make sit possible to add fonts to the printer. 1. Mount a USB thumbdrive containing the font files. 2. Touch the Add graphics button and the content of the USB thumbdrive will be shown. kortho 9-11 H550 AE KGJ X18 Rev.: 001...
- Page 106 7. Press Ok to leave the screen and to return to the Copy menu. 8. Another graphic can be deleted or alternatively touch Cancel to return to the Service and Diagnostics main menu. Cancel Touch Cancel to retrun to the Servie and diagnostics menu. kortho 9-12 KGJ X18 H550 AE Rev.: 001...
-
Page 107: Information
Printer ID – the printer ID as defined by the user. Print count - the total number of prints made with the current label, without changing to another label in between. Touch the Ok button to return to the Information menu. kortho 9-13 H550 AE KGJ X18... -
Page 108: Health
4. Touch the Enter button to save the backup. 5. If the name alreadt exists a file overwrite message will be displayed. Touch Yes and the backup file will be overwritten. Touch No and the backup operation will be cancelled. kortho 9-14 KGJ X18 H550 AE Rev.: 001... - Page 109 8. Touch Ok to confirm and to return to the previous menu. 9. Remove the USB thumbdrive, it will contain a folder named “KorthoBackup_<xxx>” (<xxx> being the name one has entered at step 3). kortho 9-15 H550 AE KGJ X18...
-
Page 110: System Info
To generate a report: 1. Insert a USB thumbdrive and wait wait for 4 seconds so it can be detected and mounted. 2. Touch the Report button. 3. Enter a suitable <name> for the report. kortho 9-16 KGJ X18 H550 AE... - Page 111 6. While creating the report file a timer icon will be shown on screen. Fig. 9.34 Creating report in progress 7. Wait until the message that the Report Saved appears on screen. kortho 9-17 H550 AE KGJ X18 Rev.: 001...
-
Page 112: Upgrade
USB thumbdrive. Otherwise there is a chance that the wrong version will be installed. 2. Touch the Upgrade button, the following screen will be displayed. Fig. 9.36 Upgrade files detected screen 3. Touch the Yes button to start the upgrade process. kortho 9-18 KGJ X18 H550 AE Rev.: 001... -
Page 113: Fault Finding
Check the fuses in the power entry module (X1). Check the fuses on the power supply board Check whether internal mains wiring is connected properly. Check whether 48VDC is present and the processor board wiring is connected properly. kortho 9-19 H550 AE KGJ X18 Rev.: 001... - Page 114 LED is orange. showing low. Printer is showing LED is orange View the error/warning list for more information (Diagnostics - an error or warning Printer – Errors). message. kortho 9-20 KGJ X18 H550 AE Rev.: 001...
-
Page 115: Coding Unit
Make sure the specs of the encoder match the required system specs. Check whether the encoder is in constant contact with the substrate and if there is no slip between the encoder wheel and kortho 9-21 H550 AE KGJ X18... -
Page 116: Print Request Signal Sensor
Check whether the lever spring is set to provide enough not turn. correct length. tension. Encoder wheel slips. Verticale white lines Check whether the encoder mounting bracket is securely in the printout. mounted. kortho 9-22 KGJ X18 H550 AE Rev.: 001... -
Page 117: Error/Warning Messages
Check whether the encoder is in constant contact with the substrate and if there is no slip between the encoder wheel and the substrate. The actual speed is fluctuating too much. Make sure the substrate is moving at a stable speed. kortho 9-23 H550 AE KGJ X18... -
Page 118: Common Print Results
9.5.2 Common print results Correct print result kortho 1234567890 Sample G r a phic J et X18 15:45 23-03-2004 ww w .kortho.com < > copyright © 2002 Fig. 9.40 Print result is correct Ink starvation kortho 1234567890 Sample G r a phic... - Page 119 Remedy: increase the speed parameter or use an encoder. kortho G r a phic J et X18 ww w .kortho.com copyright © 2002 Fig. 9.45 Test image printed with variable product speed The product speed was at period A too slow and at period B too fast. Remedy: avoid product speed variations or use an encoder.
-
Page 121: Maintenance
Take a clean cloth, if necessary with some solvent, and gently wipe off all excessive ink and particles from the printhead housing. Take care that the excessive ink and particles are NOT wiped in the grooves of the nozzle plates. kortho 10-1 H550 AE KGJ X18 Rev.: 001... -
Page 122: Yearly Maintenance
Use only Kortho GJ ink as this is ink is 100% compatible with all materials used in the coding unit. ... -
Page 123: Close The Printhead Housing
Data cable Low ink connector Ink filter Ink tube PIB screws Printhead screws Printhead Fig. 10.3 Replace printhead parts Disconnect the data cable (1) and low ink connector (2) from the PIB. kortho 10-3 H550 AE KGJ X18 Rev.: 001... -
Page 124: Replacing The Piezo Printhead
15. Remove the nozzle protection cover. Do not touch the nozzle plate! 16. Place the printhead an PIB in position, place the printhead and PIB screws but do not tighten them. kortho 10-4 KGJ X18 H550 AE Rev.: 001... -
Page 125: Replacing The Ink Filter
Close the printhead housing. Refer to subsection 10.4.3. Prime the excessive air from the system, refer to subsection 10.4.4. The printer is now ready to print. 10.5 Updating system software The system software can be updated, see section 9.2.6. kortho 10-5 H550 AE KGJ X18 Rev.: 001... - Page 126 MAINTENANCE kortho 10-6 KGJ X18 H550 AE Rev.: 001...
-
Page 127: Dismantling & Disposal
Treat the printed circuit boards, the touch screen, the net-entree and power supplies as electronic waste. 11.1.5 Sensor devices 1. Treat the photocell as electronic waste. 2. Treat the encoder as electronic waste. kortho 11-1 H550 AE KGJ X18 Rev.: 001... -
Page 128: Ink And Solvent
The ink and solvent should be treated separately according to the method as mentioned in the most recent MSDS. The remaining materials must also be delivered to waste recycling companies. kortho 11-2 KGJ X18 H550 AE... -
Page 129: Index
1-3, 3-2, 3-3, 4-2, 6-1, 6-14, 9-7, 9-16, 9-19, 9-20, 9-21, 9-22 maintenance 1-1, 1-5, 5-6, 5-7, 10-1, 10-2 memory 1-4, 3-1, 7-11, 8-7 label 1-4, 8-5, 8-6, 8-9, 9-20 print 1-1, 1-4, 8-5, 8-6, 8-7 menu structure 3-2, 3-9 kortho H550 AE KGJ X18 Rev.: 001... - Page 130 2-6, 4-2, 6-1, 7-5, 7-8, 8-1, 8-2, 8-6, 8-9, 8-10, 8-13, 8-19, 8-23, 9-3, 9-4, 9-5, 9-8, 9-11, 9-18 temperature 1-2, 1-3, 1-4, 5-7, 7-10, 9-7 touch screen 3-2, 11-1 transport 5-5, 5-8 kortho KGJ X18 H550 AE Rev.: 001...
- Page 131 3-1, 6-12, 7-8, 7-9, 8-23 request 2-1, 3-1, 4-2, 6-1, 6-12, 6-14, 7-8, 7-9, 8-1, 8-2, 8-20, 8-26, 8-27 voltage 1-3, 3-1, 4-1, 4-2, 9-7, 9-8, 9-19 waste 3-2, 5-6, 5-7, 7-9, 8-17, 11-1 kortho H550 AE KGJ X18 Rev.: 001...
- Page 132 Fig. 7.8 Settings menu ..........................7-5 Diagnostics – Testlabel menu ......................7-5 Fig. 7.9 Diagnostics – Test menu ....................... 7-6 Fig. 7.10 Fig. 7.11 Test label printed at correct speed setting ..................7-7 kortho KGJ X18 H550 AE Rev.: 001...
- Page 133 System information screen ......................9-7 Fig. 9.15 Error-Warning list ..........................9-8 Fig. 9.16 Diagnostics menu ........................... 9-9 Fig. 9.17 IO feedback screen ........................9-9 Fig. 9.18 Graphics menu ..........................9-10 Fig. 9.19 Graphics menu ..........................9-10 kortho H550 AE KGJ X18 Rev.: 001...
- Page 134 Fig. 9.45 Test image printed with variable product speed ................. 9-25 Fig. 10.1 Cleaning the nozzle plate ......................10-1 Fig. 10.2 Removing the printhead cover ..................... 10-3 Fig. 10.3 Replace printhead parts ....................... 10-3 kortho KGJ X18 H550 AE Rev.: 001...
-
Page 135: Appendix A Specifications
5 °C – 38 °C Relative humidity 10% – 90% (non condensing) Interface USB port Ethernet connection Optically isolated inputs: print request, inhibit, trigger Optically isolated outputs: general alarm, busy, low ink, ink out, 2 spare outputs kortho H550 AE KGJ X18 Rev.: 001... - Page 136 Depending on the label design program. Genaraly in jpg, pgn or bmp format (black/white). Dynamic: Number, date, time and shiftcode. Operator input: Text, start value of a counter/number, offset of a date. Label download: Through Ethernet or a USB thumbdrive. kortho KGJ X18 H550 AE Rev.: 001...
- Page 137 APPENDIX A, SPECIFICATIONS Storage capacity: 46MB (approximately 445 labels of the maximum label size). This memory can be used for storage of: d. Labels Graphics Fonts kortho H550 AE KGJ X18 Rev.: 001...
-
Page 139: Appendix B Dimensions
Appendix B Dimensions Coding unit ..........................B-2 Control unit ..........................B-3 Standard bracket ........................B-4 kortho H550 AE KGJ X18 Rev.: 001... - Page 140 APPENDIX B, DIMENSIONS Coding unit and Bracket Dimensions are metric [mm] kortho KGJ X18 H550 AE Rev.: 001...
- Page 141 APPENDIX B, DIMENSIONS Control unit Dimensions are metric [mm] kortho H550 AE KGJ X18 Rev.: 001...
- Page 142 APPENDIX B, DIMENSIONS Control unit and Bracket Dimensions are metric [mm] kortho KGJ X18 H550 AE Rev.: 001...
-
Page 143: Appendix C Part Lists & Illustrations
Appendix C Part lists & illustrations Coding unit X18 ......................... C-2 Control unit TsC20 – X18 ......................C-4 Standardbracket control unit TsC20 ..................C-6 kortho H550 AE KGJ X18 Rev.: 001... - Page 144 810864 Printhead KGJ 167144 M. ink tube 5/3,0 transparant 817584 Head PCB X18 317504 Base support 817765 Cross clamp D=20 X18 317517 Bracket shaft 817778 Cable alimentation X18 - 3M 321045 Sealing level switch 18P kortho KGJ X18 H550 AE Rev.: 001...
- Page 145 APPENDIX C, PART LISTS & ILLUSTRATIONS Coding unit X18 kortho H550 AE KGJ X18 Rev.: 001...
- Page 146 168458 Cable touchscreen TscC20, 8 pins 818032 Cable safety earth TsC20 168461 Cable touchscreen TsC20, 40 pins 818045 Cable power/CPU board TsC20 323132 Flap USB TsC26 818061 Cable USB connector, L=152 326419 Cover TsC20 kortho KGJ X18 H550 AE Rev.: 001...
- Page 147 APPENDIX C, PART LISTS & ILLUSTRATIONS Control unit TsC20 – X18 kortho H550 AE KGJ X18 Rev.: 001...
- Page 148 APPENDIX C, PART LISTS & ILLUSTRATIONS Standard bracket control unit TsC20 818115 Standard bracket controller TsC20 Line Part no. Description Line Part no. Description 326492 Bracket shaft TsC20 326505 Base support TsC20 kortho KGJ X18 H550 AE Rev.: 001...
- Page 149 APPENDIX C, PART LISTS & ILLUSTRATIONS Standard bracket control unit TsC20 kortho H550 AE KGJ X18 Rev.: 001...
- Page 150 APPENDIX C, PART LISTS & ILLUSTRATIONS kortho KGJ X18 H550 AE Rev.: 001...
- Page 151 Control unit Connector Plate ...................... D-2 X3 Schematic diagram (input) ....................D-3 X3 Schematic diagram (output) ....................D-4 X3 Circuit diagram (input) ......................D-5 X3 Circuit diagram (output) ......................D-6 X3 Schematics diagram User ....................D-7 kortho H550 AE KGJ X18 Rev.: 001...
-
Page 152: Appendix D Connections
DB 9-ways, socket RS232 DB 9-ways, socket Printhead B DB 25-ways, socket BCD connector DB 15-ways, socket Print safety photocell DB 9-ways, socket Mains power switch with 2 fuses 2,5A (s) LAN connector RJ45, socket kortho KGJ X18 H550 AE Rev.: 001... -
Page 153: X3 Schematic Diagram (Input
APPENDIX D , CONNECTIONS X3 Schematic diagram (input) kortho H550 AE KGJ X18 Rev.: 001... -
Page 154: X3 Schematic Diagram (Output
APPENDIX D , CONNECTIONS X3 Schematic diagram (output) kortho KGJ X18 H550 AE Rev.: 001... -
Page 155: X3 Circuit Diagram (Input
APPENDIX D , CONNECTIONS X3 Circuit diagram (input) kortho H550 AE KGJ X18 Rev.: 001... -
Page 156: X3 Circuit Diagram (Output
APPENDIX D , CONNECTIONS X3 Circuit diagram (output) kortho KGJ X18 H550 AE Rev.: 001... -
Page 157: X3 Schematics Diagram User
APPENDIX D , CONNECTIONS X3 Schematics diagram User This Diagram can be used to note the specific user settings. kortho H550 AE KGJ X18 Rev.: 001... - Page 159 Installation of the driver ......................E-9 Download a label through USB ..................E-10 Sending a label on a network ....................E-11 Introduction ........................E-11 Installation of the driver ...................... E-11 Sending a label on a network .................... E-11 kortho H550 AE KGJ X18 Rev.: 001...
-
Page 160: Appendix E Nicelabel Driver Tutorials
This means that the driver (and with that the Kortho printers) can be controlled by all common Windows systems. Most ERP systems are also capable of printing to a Windows driver. This means that one could control all Kortho printers in a production plant by using 1 central ERP system (SAP, Microsoft Dynamics NAV etc.). -
Page 161: Installation Of The Driver
To install the driver : 1. Unzip the downloaded file. 2. Start the installation by executing the program PrnInst.exe. 3. Click Next. 4. Accept the conditions and click Next. 5. Select the desired printer and click Next. kortho H550 AE KGJ X18 Rev.: 001... - Page 162 Optionally enter a Name for the port (So that the port is easily recognized, for example: X18_line). Enter the Port number (With a Kortho printer this is always 14322, this is the control unit’s fixed number). Click OK (A printer port will be created).
- Page 163 11. Open the printer configuration screen in Windows. This is found in Windows “Start” or in “Start > Configuration screen”. The printer is added as shown below: 12. Right click on the printer and select Printer properties. kortho H550 AE KGJ X18...
-
Page 164: Configuration Of The Driver
1. Open the printer configuration screen in Windows. This is found in Windows “Start” or in “Start>Configuration screen”. 2. Right click on the printer and select Properties. 3. Select the tab Etik. Type. 4. Click New (Nieuw). kortho KGJ X18 H550 AE Rev.: 001... - Page 165 10. Click New (NIeuw) again to add another label definition or click OK to close the screen. When designing a label in a designing program one can selec t the printer “Kortho X18_Line 1” and after that “X18 Label” as a label/tag/paper size (name depends on the label design program). The program will take the printers parameters of the selected label/tag/paper size into consideration.
- Page 166 Summary The Kortho GraphicJet X18 can be installed on any Windows PC/Laptop in the same way a “normal” desktop printer is installed. After installation the printer can be chosen amongst the other (desktop) printers currently in use on the PC/Laptop.
-
Page 167: Downloading A Label Through Usb
5. Select the desired printer and click Next. 6. Select FILE:, change the printer name (optional) and click Complete (Voltooien). The driver is now installed on your PC/laptop and can be used to generate Printfiles. kortho H550 AE KGJ X18... -
Page 168: Download A Label Through Usb
3. Save the new label design. 4. Insert a USB thumbdrive into the PC/laptop. 5. Select File – Print to print the label. 6. Choose the location of the USB thumbdrive to save the Printfile. kortho E-10 KGJ X18 H550 AE... -
Page 169: Sending A Label On A Network
To guarantee a good print result it is important that the label is designed for the printer to which one would like to download the label. 5. Select the amount of prints that need to be made. kortho E-11 H550 AE KGJ X18 Rev.: 001... - Page 170 APPENDIX E, NICELABEL DRIVER TUTORIALS 6. Select Print and the printer will start printing the selected label. kortho E-12 KGJ X18 H550 AE Rev.: 001...
- Page 171 APPENDIX E , NICELABEL DRIVER TUTORIALS kortho E-13 H550 AE KGJ X18 Rev.: 001...
-
Page 173: Appendix F Quick Reference
Appendix F Quick reference kortho H550 AE KGJ X18 Rev.: 001... - Page 174 APPENDIX F, QUICK REFERENCE kortho KGJ X18 H550 AE Rev.: 001...
-
Page 175: Appendix G Error List
The total size of the multi-label is too large. Reduce the label size. Maximum number of labels reached. Remove a label before adding a new one. The ink level is low. Refill ink. There is no label loaded to print. Load a label. kortho H550 AE KGJ X18 Rev.: 001... - Page 176 Could not update Printhead. Could not download label to printhead. Could not download font. File not found. Label area too large Print head has reset Could not download file Label contains no printable data kortho KGJ X18 H550 AE Rev.: 001...
- Page 177 APPENDIX G, ERROR LIST kortho H550 AE KGJ X18 Rev.: 001...
- Page 178 bv korthofah P.O. box: 3040 2222 AG, Katwijk The Netherlands...
Need help?
Do you have a question about the GraphicJet X Series and is the answer not in the manual?
Questions and answers