Advertisement
Advertisement

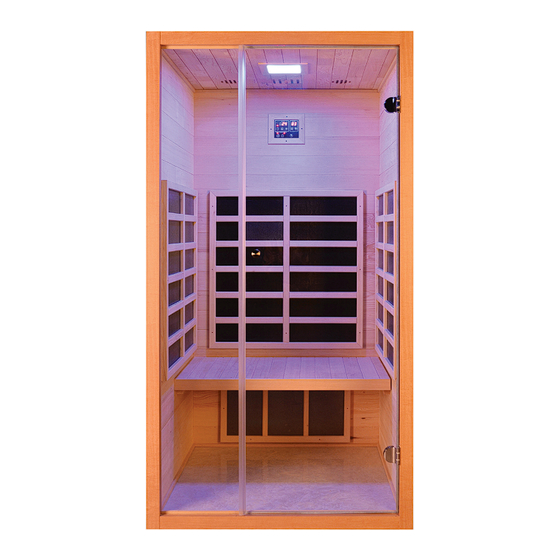
Related Manuals for Alpine Saunas OSLO


Summary of Contents for Alpine Saunas OSLO
- Page 1 OSLO INDOOR INFRARED SAUNA Installation & Owners Manual...
-
Page 3: Table Of Contents
CONTENTS Important Safety & Operational Cautions..........Parts Check........................Installation Requirements..................Assembly Instructions .................... Control Panel Operation..................Recommendations for Use................... Cleaning & Maintenance..................Troubleshooting...................... -
Page 4: Important Safety & Operational Cautions
IMPORTANT SAFETY & OPERATIONAL CAUTIONS PLEASE READ ENTIRE MANUAL THROUGH BEFORE PROCEEDING WITH INSTALLATION. SAFETY 1. Read and follow all instructions carefully. 2. When installing and using this electrical equipment, basic safety precautions should always be followed. 3. Do not allow children to use the sauna unless they are closely supervised at all times. - Page 5 CAUTIONS 1. DO NOT use any type of cleaning agents on the interior of the sauna. 2. DO NOT stack or store any object on top of or inside the sauna. 3. If the power supply cord becomes damaged ensure power is off, cable is unplugged and retailer is contacted.
-
Page 6: Parts Check
PARTS CHECK This sauna uses pre-installed latches to help piece it together so minimal tools are required other than a phillips screwdriver. Installation Parts Roof Screws: 4pc 4*40mm Bench Seat Screws: 2pc 4*40mm Floor Panel Roof Panel Bench Seat Left Side Panel Back Panel Right Side Panel Front Panel (with Glass Door) -
Page 7: Installation Requirements
INSTALLATION REQUIREMENTS 1. Your sauna can be plugged into a regular house socket but will draw close to 10A. Try to plug into a socket on an electrical circuit that is not shared with other large appliances. 2. Install the sauna on a hard, level surface. 3. -
Page 8: Assembly Instructions
ASSEMBLY INSTRUCTIONS Simply place the floor panel on a flat level surface. Note: This model includes wooden floor panel (tiled pattern floor panel pictured in instructions) - Page 9 Place the back panel up against the rear side of the floor tile.
- Page 10 ASSEMBLY INSTRUCTIONS Place one of the side panels up against the side of the floor tile and latch to the back panel. Latch back wall to side wall. (Latches on the outside of the sauna.)
- Page 11 Place the remaining side panel up against the floor tile and latch to the back panel. Latch back wall to side wall.
- Page 12 ASSEMBLY INSTRUCTIONS Place the Bench Seat inside the sauna on the provided supports. Screw the bench seat into the left and right supports using 2x 4*40mm screws. Use two of the 4*40mm screws to screw the bench seat into the side supports in the locations marked above.
- Page 13 Place the Front Panel onto the sauna and secure with the latches side latches. Latch back wall to side wall.
- Page 14 ASSEMBLY INSTRUCTIONS Simply lift the Roof Panel onto the top of the sauna. Pass the heater cables through the provided slots before securing the fit. Fix the roof to the side panels with the remaining 4*40mm screws. Use 4*40mm screws to screw the roof panel into the side panels in the locations marked above.
- Page 15 Install the door handle by feeding through the threaded screw, adding the washers and tightening on the two opposite handle pieces.
- Page 16 ASSEMBLY INSTRUCTIONS Plug in the heater and electrical cables (A, B, C) into the control box on top of the sauna roof piece as per diagram below:...
-
Page 17: Control Panel Operation
CONTROL PANEL OPERATION Overview of Control Panel... - Page 18 CONTROL PANEL OPERATION BASIC OPERATION 1. Powering on Plug the main power cord into the wall outlet. Press the “Power” button once. The control panel should beep and is now operable, but the heaters are not on by default. 2. Turning on the Heaters Press “Power”...
- Page 19 PROGRAMMING THE CONTROL PANEL Temperature Adjustment Temperature can be set between 25 - 70°C. Press temp “UP/DOWN ARROWS” to adjust temperature. Temp value will increase or decrease by 1 degree at a time (hold down the buttons to speed up the increments). 5 seconds without adjustment will exit the temp adjustment mode.
- Page 20 CONTROL PANEL OPERATION Pre-Setting (Turning on the Sauna at a Desired Time) To pre-set a time for the sauna to turn on and start heating follow these steps: 1. Press “SET” once. 2. Use both the TEMP (to change hours) and TIME (to change minutes) “UP/DOWN ARROWS”...
-
Page 21: Recommendations For Use
RECOMMENDATIONS FOR USE Set up the desired session temperature and time using the control panel. Allow approximately 20-30 minutes for the sauna to warm up before beginning a session. Hydrate yourself. Enjoy the sauna. We recommend a session time of 30-45 minutes. -
Page 22: Cleaning & Maintenance
CLEANING & MAINTENANCE Before using your infrared sauna for the first time, clean the inside of the sauna with a damp cloth. If the smell of the sauna is strong at first, that is normal and please open the door while the sauna is working. The smell will diminish over time. -
Page 23: Troubleshooting
TROUBLESHOOTING If reading through this manual and following the instructions has not resolved your issue, please contact Alpine Spas: EMAIL service@alpinespas.co.nz OR PHONE: 0800 99 33 88 SELECT TECHNICAL SUPPORT FROM THE OPTIONS Support is available Monday to Friday: 9.00am - 5.00pm...
Need help?
Do you have a question about the OSLO and is the answer not in the manual?
Questions and answers