Advertisement
Table of Contents
Wylde Overdrive Manual notes
Greeting
Congratulations on your purchase of your new MXR Wylde Overdrive Pedal! MXR is a
pioneer of distortion box technology and MXR effects are chosen by guitarists the world
over for their bullet-proof construction and spectacular tone. Please take a minute to read
through this manual so you can get the most out of your Wylde Overdrive.
Description
• Powerful, cutting overdrive with great definition
• Output and Gain controls for any tone at any volume
• Single Tone control makes overall sound shaping simple
Power
The MXR Wylde Overdrive uses one 9-volt battery, which is accessed through the
bottom of the pedal. The Wylde Overdrive can also be powered by the Dunlop ECB03
adapter (ECB03E in Europe), a 9-volt DC regulated AC adapter. Plug polarity is positive
on the barrel and negative on the center. Note: A 9-volt battery must be installed to
operate the Wylde Overdrive unless an AC adapter is used.
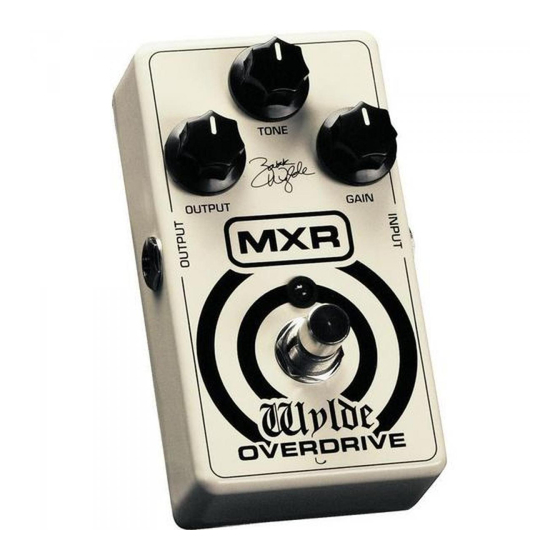
Call outs
(a) Output controls overall effect volume (inactive in bypass mode)
(b) Tone shapes overall EQ
(c) Gain controls overall amount of distortion
(d) Footswitch toggles effect on/bypass (red LED indicates on)
Directions
Advertisement
Table of Contents

Subscribe to Our Youtube Channel
Related Manuals for mxr Wylde Overdrive


Summary of Contents for mxr Wylde Overdrive
- Page 1 The MXR Wylde Overdrive uses one 9-volt battery, which is accessed through the bottom of the pedal. The Wylde Overdrive can also be powered by the Dunlop ECB03 adapter (ECB03E in Europe), a 9-volt DC regulated AC adapter. Plug polarity is positive on the barrel and negative on the center.
- Page 2 To begin using your MXR Wylde Overdrive, run a cable from your guitar to the Wylde Overdrive’s input jack and run another cable from the Wylde Overdrive’s output jack to your amplifier. For starters, set all of the Wylde Overdrive’s controls to their 12 o’clock position and turn the effect on by hitting the footswitch (red LED on).
Need help?
Do you have a question about the Wylde Overdrive and is the answer not in the manual?
Questions and answers