Advertisement
Français
Important
• Lisez attentivement ces instructions en regardant les
illustrations avant d'utiliser l'appareil.
• Evitez de mettre votre réveil en contact avec de l'eau.
• Le cordon d'alimentation de votre appareil ne peut pas être
remplacé: si le cordon est endommagé, l'appareil ne doit pas
être utilisé.
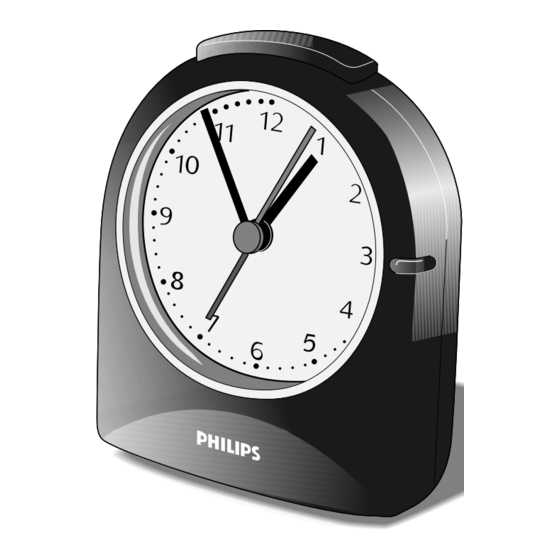
Description générale
(fig. 1)
A
Cadran
B
Bouton de réglage de l'heure (a SET)
C
Bouton de réglage de l'alarme (g ALARM SET)
D
Bouton de commande de l'alarme marche/arrêt
(g ALARM ON - OFF)
E
Témoin lumineux de mise en marche/arrêt de l'alarme
Pour le type HR 5289 uniquement :
F
Bouton de répétition d'alarme (/ 4 MIN.)
G
Bouton de remise sous tension (POWER RESET)
Réglage de l'heure de réveil
2
3
4
- Poussez le bouton de commande de l'alarme (D) vers le haut
(position "ON") (fig. 2).
- Branchez l'appareil (fig. 3).
Type HR 5288: Le témoin lumineux de l'alarme (E) s'allume.
Type HR 5289: Le témoin lumineux de l'alarme (E) clignote.
Appuyez sur le bouton de remise sous tension (G) (fig. 4). Le témoin
lumineux reste allumé.
5
6
- Tournez le bouton de réglage de l'heure (B) dans le sens de la flèche
pour régler l'heure normale du jour (fig. 5).
- Tournez le bouton de réglage de l'alarme (C) dans le sens de la flèche
pour régler l'heure de réveil (fig. 6).
7 7
8
- Si vous voulez que l'alarme sonne à l'heure réglée, laissez le bouton de
commande (D) en haut (fig. 7).
Si vous ne voulez pas que l'alarme sonne, poussez le bouton de
commande vers le bas (fig. 8).
Comment arrêter la sonnerie de l'alarme
• Poussez le bouton de commande (D) vers le bas (fig. 8). Le témoin
lumineux (E) s'éteint. Ceci vous indique que la fonction alarme est
arrêtée.
Pour permettre à l'alarme de sonner à nouveau, remettez le bouton de
commande (D) en haut.
• (Type HR 5289 uniquement) Appuyez sur le
9
bouton de répétition de l'alarme (F) pour
interrompre le signal d'alarme pendant
4 minutes (fig. 9). Au bout de 4 minutes,
l'alarme sonnera à nouveau automatiquement.
Témoin lumineux de mise en marche/arrêt de
l'alarme
• Le témoin lumineux de mise en marche/arrêt
de l'alarme (E) s'allume si l'alarme est en position marche, c'est-à-dire le
bouton de commande de l'alarme (D) en haut. A l'heure sélectionnée,
l'alarme sonnera.
• Type HR 5289 uniquement : Le témoin lumineux de mise en
marche/arrêt de l'alarme (E) clignote après avoir branché l'appareil, ainsi
qu'après une coupure d'électricité. Le témoin lumineux vous avertit que
le réveil n'est pas à l'heure correcte (et que l'alarme ne sonnera pas à
l'heure sélectionnée).
Réglez l'heure exacte du jour et appuyez sur le bouton de remise sous
tension (G) (fig. 4). Ensuite, le témoin lumineux reste allumé.
Deutsch
Wichtig
• Lesen Sie bitte die Gebrauchsanweisung durch, und sehen Sie
sich dabei die Abbildungen an, bevor Sie den Wecker in
Gebrauch nehmen.
• Sorgen Sie dafür, daß kein Wasser in den Wecker eindringt.
• Das Netzkabel des Geräts kann nicht ersetzt werden. Nehmen
Sie das Gerät außer Betrieb, wenn es in ingendeiner Hinsicht
beschädigt ist.
Allgemeine Beschreibung
(Abb. 1)
A
Anzeigefeld
B
Drehschalter "Zeit" (a SET)
C
Drehschalter "Weckzeit" (g ALARM SET)
D
Wahlschalter "Wecken an/aus" (g ALARM ON - OFF)
E
Kontrollampe "Wecken an/aus"
Nur Type HR 5289:
F
Weckwiederholung (/ 4 MIN.)
G
Wecker einstellen (POWER RESET)
Den Wecker einstellen
2
3
4
- Schieben Sie den Wahlschalter (D) nach oben (Abb. 2).
- Stecken Sie den Stecker in die Steckdose (Abb. 3).
Type HR 5288: Die Kontrollampe (E) "Wecken an/aus" leuchtet auf.
Type HR 5289: Die Kontrollampe (E) "Wecken an/aus" blinkt.
Drücken Sie (G) "Wecker einstellen" (Abb. 4). Die Kontrollampe (E)
"Wecken an/aus" leuchtet dann kontinuierlich.
5
6
- Drehen Sie den Schalter (B) "Zeit" in Pfeilrichtung, und stellen Sie die
aktuelle Uhrzeit ein (Abb. 5).
- Drehen Sie den Schalter (C) "Weckzeit" in Pfeilrichtung, und stellen Sie
die gewünschte Weckzeit ein (Abb. 6).
7 7
8
- Soll der Wecker anschließend zur eingestellten Weckzeit ertönen, so
schieben Sie den Wahlschalter (D) "Wecken an/aus" nach oben
(Abb. 7).
- Soll der Wecker zur eingestellten Weckzeit zunächst nicht ertönen, so
schieben Sie den Schalter (D) nach unten (Abb. 8).
Wecksignal ein- und ausschalten
• Schieben Sie den Schalter (D) nach unten (Abb. 8). Die Kontrollampe
(E) "Wecken an/aus" erlischt. Damit ist die
9
Weckfunktion ausgeschaltet. Um die
Weckfunktion wieder einzuschalten, schieben
Sie den Schalter (D) wieder nach oben (Abb.
7).
• Nur Type HR 5289: Drücken Sie (F) "Weck-
wiederholung", wenn das Wecksignal nach
4 Minuten wiederholt werden soll (Abb. 9).
Nach Ablauf dieser Zeit ertönt das Signal
erneut.
Die Kontrollampe "Wecken an/aus"
• Beide Typen: Die Kontrollampe (E) "Wecken an/aus" leuchtet nur bei
eingeschalteter Weckfunktion. Der Wahlschalter (D) "Wecken an/aus"
steht dann in der oberen Position. Zur eingestellten Weckzeit ertönt
dann das Wecksignal.
• Nur Type HR 5289: Die Kontrollampe (E) "Weckfunktion an/aus" blinkt,
nachdem das Gerät neu an das Netz angeschlossen worden ist, oder
nach einem Stromausfall.
Dadurch werden Sie gewarnt, daß der Wecker nicht die aktuelle Zeit
anzeigt und Sie somit auch nicht zur eingestellten Zeit geweckt werden.
Stellen Sie dann die aktuelle Zeit neu ein, und drücken Sie den
Schalter (G) "POWER RESET". Die Kontrollampe leuchtet wieder, ohne
zu blinken.
Nederlands
Belangrijk
• Bekijk de illustraties en lees de gebruiksaanwijzing voordat u
de wekker in gebruik neemt.
• Zorg ervoor dat de wekker niet in contact komt met water.
• Het snoer van dit apparaat kan niet worden vervangen. Als het
snoer is beschadigd, kan het apparaat niet meer worden
gebruikt.
Algemene beschrijving
(fig. 1)
A
Wijzerplaat
B
Instelknop "Tijd" ( a SET )
C
Instelknop "Wektijd" ( g ALARM SET)
D
Keuzeknop "Wekker Aan /Uit" ( g ALARM ON - OFF)
E
Controlelampje "Wekker Aan /Uit"
alleen voor type HR 5289 :
F
"Sluimer" toets ( / 4 MIN.)
G
"Opnieuw instellen" toets (POWER RESET)
Instellen
2
3
4
- Schuif keuzeknop (D) omhoog ("ON") (fig. 2).
- Steek de stekker in het stopcontact (fig. 3).
Type HR 5288: Het controlelampje "Wekker Aan/Uit" gaat meteen
branden.
Type HR 5289: Het controlelampje "Wekker Aan/Uit" (E) gaat eerst
knipperen. Druk op de "Opnieuw instellen" toets (fig. 4). Het controle-
lampje brandt dan continu.
5
6
- Draai aan instelknop "Tijd" (B) in de richting van de pijl om de gewone
kloktijd in te stellen (fig. 5).
- Draai aan instelknop "Wektijd" (C) in de richting van de pijl om het
tijdstip in te stellen waarop u gewekt wilt worden (fig. 6).
7 7
8
- Als u wenst dat op de ingestelde tijd inderdaad het weksignaal klinkt,
laat keuzeknop (D) in de hoogste stand staan (fig. 7).
Indien u wenst dat het weksignaal niet zal klinken, drukt u
keuzeknop (D) in (fig. 8).
Hoe zet u het weksignaal af?
• Keuzeknop (D) indrukken (fig. 8). Het controlelampje "Wekker Aan/Uit"
(E) gaat uit. Dit betekent, dat de wekfunctie is
uitgeschakeld.
9
Het geluidssignaal zal pas weer kunnen klinken,
nadat u de keuzeknop in de hoogste stand heeft
teruggezet.
• (Alleen bij type HR 5289) "Sluimer" toets (F)
indrukken om het geluid voor 4 minuten uit te
schakelen (fig. 9). Na deze tijd begint het
weksignaal automatisch opnieuw.
Controlelampje "Wekker Aan/Uit"
• Beide types: Het controlelampje "Wekker Aan/Uit" (E) brandt alleen
wanneer de wekfunctie is ingeschakeld. De keuzeknop (D) staat dan in
de hoogste stand. Op de ingestelde tijd zal het weksignaal klinken.
• Alleen bij type HR 5289: Het controlelampje knippert als u het klokje
aansluit, en ook wanneer er een stroomstoring is geweest.
Het lampje waarschuwt u dat het klokje niet de juiste tijd aanwijst (en dat
de wekker dus ook niet op het juiste moment zal aflopen).
Stel dan de juiste tijd in en druk op toets "Opnieuw instellen" (fig. 4). Het
lampje brandt daarna weer continu.
Italiano
Importante
• Prima di usare la sveglia, leggete attentamente le istruzioni e
osservate le illustrazioni.
• Tenete la sveglia lontana dall'acqua.
• Il cavo di alimentazione di questo apparecchio non può essere
sostituito: se si dovesse rovinare, l'apparecchio non potrà più
essere utilizzato.
Descrizione generale
(fig. 1)
A
Quadrante
B
Tasto impostazione "Ora" (a SET)
C
Tasto impostazione "Allarme Ora" (g ALARM SET)
D
Selettore funzione "Allarme acceso/spento"
(g ALARM ON - OFF)
E
Spia luminosa "Allarme acceso/spento"
Solo per il modello HR 5289:
F
Pulsante "Snooze" (Arresto temporaneo della suoneria) (/ 4 MIN.)
G
Pulsante "Reset" (POWER RESET)
Regolazione della sveglia:
2
3
4
- Spostate il tasto funzione "Allarme acceso /spento" (D) verso l'alto
(posizione "ON") (fig. 2).
- Inserite la spina nella presa di corrente (fig. 3).
Modello HR 5288: si accenderà subito la spia luminosa "Allarme
acceso/spento (E).
Modello HR 5289: la spia luminosa "Allarme acceso/spento" inizierà a
lampeggiare.
Premete il pulsante "Reset" (G) (fig. 4). La spia rimarrà accesa.
5
6
- Girate il tasto di impostazione "Ora" (B) nella direzione della freccia per
impostare l'ora (fig. 5).
- Girate il tasto di impostazione "Allarme Ora" (C) nella direzione della
freccia per impostare la sveglia all'ora desiderata (fig. 6).
7 7
8
- Se volete che la suoneria entri in funzione all'ora stabilita, posizionate il
selettore di funzione "Allarme acceso/spento") (D) verso l'alto (fig. 7).
Se non volete che la suoneria entri in funzione, premete il selettore di
funzione "Allarme acceso/spento" (D) verso il basso (fig. 8).
1
D
B
A
Come fermare la suoneria
• Premete il selettore funzione (D) verso il basso (fig. 8).
La spia luminosa "Allarme acceso/spento" (E) si spegnerà, per indicare
che la funzione di suoneria è stata annullata.
Per fare in modo che la suoneria riprenda a
9
funzionare, posizionate il selettore funzione (D)
verso l'alto.
• (Solo per il modello HR 5289) Premete il
pulsante "Snooze" (/
/ 4 MIN.) per
interrompere la suoneria per 4 minuti (fig. 9).
Trascorsi 4 minuti, la suoneria riprenderà
automaticamente a funzionare.
Spia luminosa "Allarme acceso/spento"
• Entrambi i modelli: la spia luminosa "Allarme acceso/spento" (E) si
accende soltanto quando è attivata la funzione di sveglia.
Il selettore di funzione "Allarme acceso/spento) (D) sarà allora orientato
verso l'alto. All'ora prestabilita per la sveglia, la suoneria entrerà in
funzione.
• Solo per il modello HR 5289: la spia luminosa "Allarme acceso/spento"
(E) inizierà a lampeggiare dopo aver attaccato l'apparecchio ad una
presa di corrente e anche dopo un guasto elettrico.
La spia vi informerà che sul quadrante non viene riportata l'ora esatta
(e che la suoneria non entrerà in funzione all'ora desiderata).
Impostate l'ora esatta e premete il pulsante "Reset" (G) (fig. 4). A questo
punto la spia rimarrà accesa.
Español
Importante
• Antes de usar el aparato, lean cuidadosamente estas
instrucciones conjuntamente con las ilustraciones.
• No permitan que el despertador entre en contacto con el agua.
• El cable de red de este aparato no puede ser reemplezado.
Si el cable de red es dañado, el aparato debe ser desechado.
Descripción general
(fig. 1)
A
Esfera.
B
Mando para ajustar la "Hora" (a SET ).
C
Mando para ajustar la "Hora de la Alarma" (g ALARM SET).
D
Selector paro/ marcha de la función "Alarma"
(g ALARM ON - OFF).
E
Lámpara piloto del paro / marcha de la función "Alarma".
Solo para el tipo HR 5289 :
F
Mando para repetir la "Alarma" (/ 4 MIN.).
G
Mando de rearme (POWER RESET).
Ajuste de la hora (alarma)
2
3
4
- Deslicen hacia arriba (posición "ON") el selector paro/marcha (D) de la
función "Alarma" (fig. 2).
- Conecten la clavija en la base de enchufe (fig. 3).
Tipo HR 5288: La lámpara piloto del paro/marcha de la función "Alarma"
(E) se encenderá inmediatamente.
Tipo HR 5289: La lámpara piloto del paro/marcha de la función "Alarma"
(E) empezará a parpadear. Presionen el mando de rearme (G) (fig. 4).
La lámpara piloto se iluminará entonces de forma continua.
5
6
- Para fijar la hora normal del día, giren el mando para ajusta la "Hora" (B)
en la dirección de la flecha (fig. 5).
7 7
8
- Para fijar la alarma a la hora que deseen, giren el mando para ajustar la
"Hora de la Alarma" (C) en la dirección de la flecha (fig. 6).
- Si desean que la señal de alarma suene realmente a la fijada hora de la
alarma, permitan que el mando del selector (D) permanezca en la
posición superior (fig. 7).
Si desean que la señal de alarma no suene, presionen el mando del
selector (D) hasta la posición inferior (fig. 8).
Como parar el sonido de la alarma.
• Presionen el mando del selector (D) hasta la posición inferior (fig. 8). La
lámpara piloto del paro/marcha de la función "Alarma" (E) se apagará,
indicando que la función "Alarma" está
desconectada.
9
Para hacer posible que la señal de alarma
suene de nuevo, el mando del selector (D) debe
deslizarse, de nuevo, a la posición superior.
• Tipo HR 5289 solo: Presionen el mando para
repetir la alarma (F) para interrumpir la señal de
alarma durante 4 minutos (fig. 9). Después de
ese período, la señal sonora empezará, de
nuevo, automáticamente.
Lámpara piloto del paro / marcha de la función " Alarma ".
• Ambos tipos: Lámpara piloto del paro/marcha de la función "Alarma" (E)
solo se iluminará si la función "Alarma" está conectada. El mando del
selector paro/marcha de la función "Alarma" está entonces en la
posición superior. La señal de la alarma sonará a la hora fijada.
• Tipo HR 5289 solo: La lámpara piloto del paro/marcha de la función
"Alarma" (E) parpadeará después de conectar el aparato a la red y,
también, después de un fallo de la electricidad.
La lámpara piloto les avisa de que el reloj no marca la hora correcta (y e
que la señal de la alarma no sonará a la hora fijada ).
Ajusten a la hora correcta del día y presionen el mando de rearme
(POWER RESET) (G) (fig. 4) después de lo cual la lámpara piloto se
iluminará, de nuevo, de formas continua.
F
HR 5288/89
C
G
E
;
English
Important
• Read these instructions carefully in conjunction with the
illustrations before using the appliance.
• Do not allow the alarm clock to come into contact with water.
• The mains cord of this appliance cannot be replaced. If the cord
is damaged, the appliance should be discarded.
General description
(fig. 1)
A
Dial
B
Setting knob "Time" ( a SET )
C
Setting knob "Alarm time" ( g ALARM SET)
D
Selector "Alarm function On/Off" ( g ALARM ON - OFF)
E
Pilot light "Alarm function On/Off"
for type HR 5289 only:
F
"Snooze" knob ( / 4 MIN.)
G
"Reset" knob (POWER RESET)
Setting the (alarm) time
2
3
- Slide selector "Alarm function On/Off" (D) upwards (position "ON")
(fig. 2).
- Insert the mains plug into a wall socket (fig. 3).
Type HR 5288: Pilot light "Alarm function On/Off" (E) will come on right
away.
Type HR 5289: Pilot light "Alarm function On/Off" (E) will start blinking.
Press "Reset" knob (G) (fig. 4). The pilot light will then illuminate
5
6
continuously.
- Turn setting knob "Time" (B) in the direction of the arrow to set the
normal time of day (fig. 5).
- Turn setting knob "Alarm time" (C) in the direction of the arrow to set the
alarm for the desired alarm time (fig. 6).
7 7
8
- If you wish the alarm signal to sound at the set alarm time, just let the
selector knob (D) remain in the "up" position (fig. 7).
If you wish the alarm signal not to sound, press the selector knob (D)
into the "down" position (fig. 8).
How to stop the alarm sound
• Press the selector knob (D) into the "down"
position (fig. 8). Pilot light "Alarm function
On/Off" (E) will go out. This indicates that the
alarm function is switched off.
To enable the alarm signal to sound again the
selector knob (D) must be slid back to the "up"
position.
• (Type HR 5289 only) Press "Snooze" button
(F) to stop the alarm signal for 4 minutes
(fig. 9). After this period the sound signal starts
again automatically.
Pilot light "Alarm function On/Off"
• Both types: Pilot light "Alarm function On/Off" (E) will only illuminate if
the alarm function is switched on. Then selector knob "Alarm function
On/Off" (D) is in the "up" position. At the set alarm time the alarm signal
will sound.
• Type HR 5289 only: Pilot light "Alarm function On/Off" (E) will blink after
connecting the appliance to the mains power and also after an electricity
breakdown.
The pilot light warns you that the clock does not tell the correct time (and
that the alarm signal will not sound at the set alarm time).
Set the correct time of day and press the "Reset" knob
(POWER RESET) (G) (fig. 4). After this, the pilot light will illuminate
continuously again.
For U.K. only:
Fitting a different plug
This appliance is fitted with a BS 1363 13 Amp. plug.
Should you need to replace the plug, connect the wires as follows:
Brown wire to the Live (L) terminal of the new plug.
Blue wire to the Neutral (N) terminal of the new plug.
Always fit the same value of fuse as that originally supplied with your
appliance.
Only use BS 1362 approved fuses.
As a guide only: Appliances under 700 W can have a 3 Amp. fuse (red)
and all others should have a 13 Amp. fuse (brown).
When disposing of an old plug (particularly the moulded type which has
been cut from the mains cord) always remove the fuse as the plug could
be dangerous if ever inserted in a live socket.
4222 001 22531
4
9
Advertisement
Table of Contents

Related Manuals for Philips HR5289/00


Summary of Contents for Philips HR5289/00
- Page 1 Die Kontrollampe "Wecken an/aus" Français • Beide Typen: Die Kontrollampe (E) "Wecken an/aus" leuchtet nur bei eingeschalteter Weckfunktion. Der Wahlschalter (D) "Wecken an/aus" Important steht dann in der oberen Position. Zur eingestellten Weckzeit ertönt • Lisez attentivement ces instructions en regardant les dann das Wecksignal.
- Page 2 • (Kun type HR 5289) Alarmen kan også stoppes Português ved at trykke på "slumreknappen" (F) (fig.9). Efter 4 min. vil alarmsignalet lyde igen. Importante Sådan virker kontrollampen for • Por favor leia as instruções com todo o cuidado e veja as "Alarmfunktion tændt/slukket": gravuras antes de utilizar o relógio despertador.
Need help?
Do you have a question about the HR5289/00 and is the answer not in the manual?
Questions and answers