
Related Manuals for Living & Co Takiwira


Summary of Contents for Living & Co Takiwira
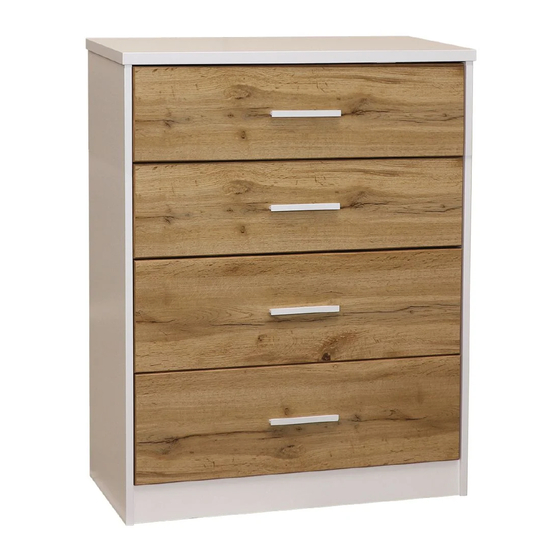
- Page 1 Tākiwira 4 Drawer Tallboy 78cm 102cm 39.6cm INSTRUCTION MANUAL Maximum recommended weight is 15kgs per drawer Job no.
-
Page 2: Assembly Details
Assembly Details Floor Area 3m x 4m Required Assembly Space Approximate Assembly Time 1 Person Assembly Tools Required AFTER SALES SUPPORT www.compacfurniture.co.nz or 0800 100 858... -
Page 3: Care And Maintenance
Tips before you start 1. For the protection of your furniture, we recommend that the product is placed on a protected surface during assembly to prevent damage 2. Please check that all parts are present before you start the assembly of your furniture 3. -
Page 4: Parts List
Parts List PART MEASUREMENTS NOTES 780 x 396 x 25mm Laminate on one side. LH End 994 x 390 x 15mm Laminate on both sides. RH End 994 x 390 x 15mm Laminate on both sides. Toeboard 723 x 80 x 15mm Laminate on one side. - Page 5 Cam Installation & Operation Guide The Cam and Connecting Bolt system is used to put your unit together. Below is an explanation of how this system works. Drawer Slides Guide Your pack will contain two sets of Metal Drawer Slides. These are bundled together with adhesive tape.
- Page 6 Assembly STEP 1: Top To begin assembly, lay the top finished side down on a clean and clear surface • Screw four Connecting Bolts into the holes as shown • Using the Pan head screw, attach the Safety Strap as shown by screwing it first through the •...
- Page 7 STEP 3: RH End • Repeat the previous step with the RH End. Connecting Bolt Large Cam Drawer Slide Screw Dowel Dowel Drawer Slide Screw Drawer Slide Screw Connecting Bolt (Screw through the hole in) Connecting Bolt Connecting Bolt Connecting Bolt STEP 4: Rails Your pack will contain 4 boards the same size.
- Page 8 STEP 5: Attach Rails to LH End • Lay the LH End finished side down on a clean surface that is free of anything that may damage the woodgrain finish. A clean carpeted floor is the most ideal for this. •...
- Page 9 STEP 6: Attach RH End • Turn the LH End with the Rails and Toeboard attached onto its back edge. Fit the RH End to the Rails and Toeboard as shown in the drawing below. • Lock the RH End to the Rails and Toeboard by tightening all the Cams in the Rails and •...
- Page 10 STEP 8: Back Panel • Turn the Tallboy onto its front edge. Make sure the surface is clear and free of anything that may damage the laminate finish. • Slide the Back Panel in place (please ensure that the end with the predrilled holes part way down the panel is at the top) •...
- Page 11 Assemble the Drawers Your Tākiwira Tallboy will have one shallow top drawer and four deeper bottom drawers. All Drawers are constructed in the same manner and consist of the same parts. Please follow steps 9 – 11 four times to assemble the four drawers.
- Page 12 STEP 10: Assemble the Drawer Lay the Drawer Front finishes side down on a smooth, clean surface. • Attach the LH and RH Drawer Sides by fitting them into place over the Connecting Bolts installed in • the Drawer Front. Turn the Small Cams in a clockwise direction to lock the Drawer Sides in place.
- Page 13 STEP 11: Attach the Drawer Slides Turn the drawer upside-down as shown and attached the Drawer Slides (DL and DR) with the four • woodscrews as shown below. Ensure that the ends of the slides without the wheels are hard up against the back of the Drawer Front.
- Page 14 STEP 12: Attach the Handle and Insert the Drawers Attach the Bar Handles to the Drawer Front using the screws provided • • Fit the drawers into the Tallboy. Make sure that the rollers at the back of the drawer go behind the front rollers in the cabinet and into the channel of the drawer slide.
- Page 15 STEP 12: Attach the Handle and Insert the Drawers Compac Furniture strongly recommends using a safety strap on all furniture, especially if small children are around. Secure your unit to the wall using the Safety Strap and a screw suitable for your wall (not supplied). We recommend you screw into a stud.
-
Page 16: Warranty
WARRANTY We pride ourselves on producing a range of quality products that are both packed with features and completely reliable. We are so confident in our products, we back them up with a five-year warranty. Now you too can relax knowing that you are covered.
Need help?
Do you have a question about the Takiwira and is the answer not in the manual?
Questions and answers