Table of Contents
Advertisement
Quick Links
Advertisement
Table of Contents

Related Manuals for NAD T 778


Summary of Contents for NAD T 778
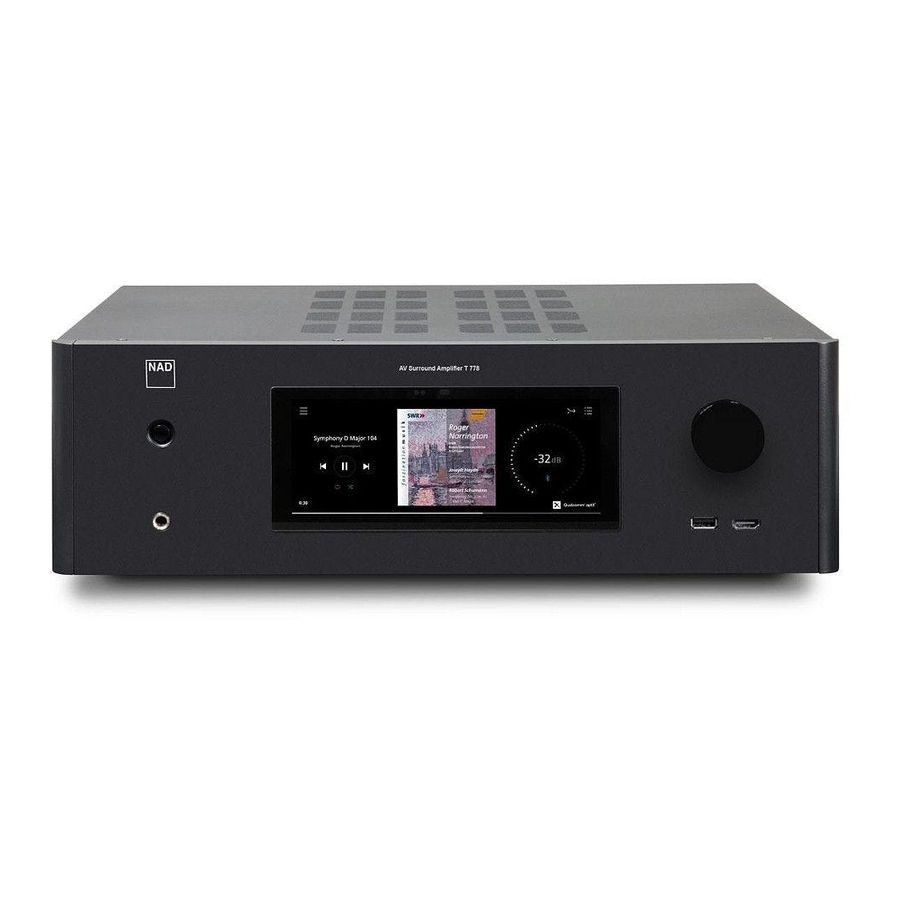
- Page 1 T 778 ® AV Surround Amplifier Owner’s Manual...
-
Page 2: Important Safety Instructions
IMPORTANT SAFETY INSTRUCTIONS 1. Read instructions - All the safety and operating instructions should NOTE TO CATV SYSTEM INSTALLER be read before the product is operated. This reminder is provided to call the CATV system installer’ s attention to Section 820-40 2. - Page 3 However, there is no The model and serial number of your new T 778 are located on the back of guarantee that interference will not occur in a particular installation. If this the cabinet.
-
Page 4: Table Of Contents
REAR PANEL ........... . . 7 CONFIGURING T 778 - MENU VIA FRONT PANEL DISPLAY ..26 MENU OPTIONS . -
Page 5: Introduction
SAVE THE PACKAGING Please save the box and the packaging that came with the T 778. Should you move or need to transport your T 778, this is the safest container to use. We’ve seen too many otherwise perfect components damaged in transit for lack of a proper shipping carton. -
Page 6: Identification Of Controls
• • If Zone 2 is ON and STANDBY button is pressed to switch the T 778 Send out remote control commands by directing or pointing HTR 8 to standby mode, the front panel display will be extinguished but towards the display panel. -
Page 7: Rear Panel
NOTES using a Moving Magnet cartridge. • NAD is not responsible for any malfunction of the T 778 and/or the • If your turntable includes a ground/earth lead, it can be connected internet connection due to communication errors or malfunctions to the Ground Terminal (item 8). - Page 8 • Use this ground terminal to connect to ground a phono or Connect also the T 778’s IR OUT 1 (and/or IR OUT 2, IR OUT 3) to the turntable source for PHONO input. IR IN of a compatible device.
-
Page 9: Operation
AND MAKING CHANGES” to navigate through the menu options and their “Tone Defeat” gives one the choice of varying or completely bypassing the sub-menu selections. tone control section of the T 778. If “Off” (“Tone Active” in the front panel display) is selected, the Tone Control circuits are active. NOTE The individual configurations set forth at “DSP Options”... -
Page 10: Zone Controls
ZONE 2 output port in the rear panel regardless of the Main STANDBY button until the STANDBY LED turns amber. Zone settings. For example, while the T 778 is at Source 1 mode, you can • Zone 2 is audio only and not associated with any video input sources. -
Page 11: System Info
SYSTEM INFO (*) Fan speed and fan status are displayed. Your T 778 needs to be updated if the “System Info” item in the Main Menu changes to “System Info*”. The “*” beside “System Info*” indicates that there is Software Upgrade available for your T 778. Select “System Info*” to initiate the upgrade process. -
Page 12: Configuring T 778 - Setup Menu Via On-Screeen Display
T 778 will not pass through any CEC message. Audio and video will not be streamed from a CEC-enabled HDMI source to a CEC- The Setup Menu allows one to customize the operation of the T 778 to the enabled TV (with both devices connected via T 778). -
Page 13: Ir Channel
“1100”. Press [OFF]. If the T 778 goes to standby mode, press IR CHANNEL [ENTER] to accept the library code number and exit library mode. With both T 778 and HTR 8 set to “IR Channel 1”, the C 368 can now be remotely controlled independent of the T 778. NOTE Performing Factory Reset for T 778 or HTR 8 will restore “IR Channel”... - Page 14 ANALOG AUDIO understanding of Preset settings). The T 778 has three analog audio inputs (Audio 1, Audio 2 and Phono) that can be variably assigned to each Source. If it is desired not to assign the particular Source a Preset setting, select “None”.
-
Page 15: Speaker Setup
Preset system. Consequently, multiple speaker settings can be stored for easy recall as different types of recordings or listening modes require. It is quite practical to perform the T 778 level setup routines “by ear, ” and careful work will produce acceptably accurate results. However, the use... -
Page 16: Speaker Distance
The supplied measurement microphone can be connected to either To produce the same SPL meter reading (or subjective loudness), use the the MIC or USB input of your computer or the USB input of the T 778. • remote’s [D/F] keys to adjust each speaker. -
Page 17: Adjusting The Volume
The T 778 will power-up from Standby mode at whatever master volume setting was last used; however, if the prior setting was greater than –20 dB, the T 778 will power up at –20 dB. This prevents inadvertently beginning a session at excessive volume. -
Page 18: Amplifier Setup
Surround: If the detected audio is of Dolby Surround format, you can are - Main, Zone 2 and Source Setup. Main: +12V DC is available at the assigned Trigger Out when T 778 is at default it to one of the following settings - Dolby Surround, Stereo powered state. -
Page 19: Listening Modes
LISTENING MODES All analog signals remain in the analog domain without analog-to-digital The T 778 offers distinct listening modes, tailored for different types of conversions. At Analog Bypass, the DSP circuitry is bypassed but full tone recording or program material. With a two-channel (Stereo) source, the control functions remain. -
Page 20: Dolby Setup
OPERATION CONFIGURING T 778 - SETUP MENU VIA ON-SCREEEN DISPLAY DOLBY SETUP ENHANCED STEREO Dynamic Range Control: You can select the effective dynamic range Please refer to the same description of ENHANCED STEREO under (subjective range from soft to loud) for playback of Dolby Digital “LISTENING MODES”. - Page 21 OPERATION CONFIGURING T 778 - SETUP MENU VIA ON-SCREEEN DISPLAY BluOS Source Front View • Cover Art and Meta Data: display album/title art, station ID symbol, Default front panel display at BluOS Source icon and other information like album name, song title, artist name, title of the show, show host, current title of song being played back, etc.
-
Page 22: A/V Presets
Listening Modes: Dolby Surround/Neural:X/None A/V PRESETS The T 778’s simple but powerfully flexible system of “A/V Presets” allows DSP Options: Lip Sync Delay/0ms you to customize virtually every aspect of your audio-video playback, and recall them with a single key-press. - Page 23 OPERATION CONFIGURING T 778 - SETUP MENU VIA ON-SCREEEN DISPLAY 2 With the above settings, scroll to “A/V Presets” from the SETUP MENU Tone Controls: Tone Defeat/Off page. Use [S] to access “A/V Presets” menu. Front Panel Display Setup: Set “BluOS Source Front View” to “Cover Art and Meta Data”...
- Page 24 OPERATION CONFIGURING T 778 - SETUP MENU VIA ON-SCREEEN DISPLAY 6 At “A/V Presets” page, set “Preset: 2” to the following conditions - use DSP Options: 5ms [D/F] to select “Yes” or “No” and press [ENTER] to confirm selection and move to the next setting.
-
Page 25: System And Upgrade
Main Menu $ Tone Controls $ Tone Defeat $ On SYSTEM FACTORY RESET MQA® is a trademark of MQA Limited. Select “System Factory Reset” to initiate restoring T 778 (except BluOS) to its factory default settings. At System Factory Reset menu, select “Factory Reset” to start factory reset process. -
Page 26: Configuring T 778 - Menu Via Front Panel Display
“CONFIGURING T 778 - MAIN MENU VIA ON-SCREEEN DISPLAY” Use your finger to touch, swipe and navigate through the front panel or “CONFIGURING T 778 - SETUP MENU VIA ON-SCREEEN DISPLAY”. For display items. Touch or swipe (left, right, upwards or downwards) to select information about a particular item below, refer to its corresponding item or configure an item. - Page 27 OPERATION CONFIGURING T 778 - MENU VIA FRONT PANEL DISPLAY ZONE CONTROLS SOURCE SETUP SYSTEM INFO SPEAKER SETUP SETUP MENU ZONE SETUP When Setup Menu is selected, the following parameters can be accessed and configured via front panel display. •...
-
Page 28: Making The Most Out Of Your Bluos Source
OPERATION CONFIGURING T 778 - MENU VIA FRONT PANEL DISPLAY MAKING THE MOST OUT OF YOUR BluOS SOURCE LISTENING MODE SETUP Download the BluOS Controller App from the respective App stores of Apple iOS devices (iPad, iPhone and iPod), Android devices, Kindle Fire and Windows or Mac desktops. -
Page 29: Using The Htr 8 Remote Control
Contains pre-programmed library of NAD remote codes. The NAD HTR 8 is ready to operate the T 778 right out of the box, but it is really eight remotes in one. Each of the 8 DEVICE SELECTOR keys at the top of the handset can call up a new “page” of remote control codes to be transmitted by the remaining keys. -
Page 30: Punch Through
Device Select “page” to another, so that, for example, the AMP [SURR automatically from a single keypress. You might use a macro to automate MODE] function might still control the T 778 when the DVD DEVICE SELECTOR a simple command sequence, such as, “Turn on the DVD player and then page is active. -
Page 31: Key Illumination Timeout
USING THE HTR 8 REMOTE CONTROL FACTORY RESET Example: Record a Macro to the [0] key to turn ON the T 778, turn ON the DVD Player, Select Input 1 (Source 1) and commence disc playback of The HTR 8 can be reset to its factory state, deleting all learned commands, connected Source 1 device (as in the DVD player) copied and punched-through keys, macros, and other setup information;... -
Page 32: Loading Code-Libraries
LOADING CODE-LIBRARIES SEARCH MODE The HTR 8 can store a different library of default NAD codes for each of its If none of the codes from the table, when entered, turns on the DEVICE SELECTOR “pages”. If the original default library does not control... -
Page 33: Usb Interface
1 ON/OFF: Switch ON/OFF the Zone feature. 2 SOURCE [ d/f ]: Select the active input of the NAD T 778 that will be sent out to the corresponding rear panel ZONE 2 output port. 3 MUTE: Temporarily switch OFF or restore the Zone Volume level. -
Page 34: Reference
** Compatibility to latest versions is subject to future software update. *** Gross dimension includes feet, volume knob and extended rear panel terminals Specifications are subject to change without notice. Check out www.NADelectronics.com for updated documentation or latest information about T 778. - Page 36 All rights reserved. NAD and the NAD logo are trademarks of NAD Electronics International, a division of Lenbrook Industries Limited. No part of this publication may be reproduced, stored or transmitted in any form without the written permission of NAD Electronics International.
Need help?
Do you have a question about the T 778 and is the answer not in the manual?
Questions and answers