ATEN KVMP CS1822 User Manual
2/4-port usb3.0 4k hdmi switch
Hide thumbs
Also See for KVMP CS1822:
- User manual (62 pages) ,
- User manual (18 pages) ,
- User manual (25 pages)
Table of Contents
Advertisement
Quick Links
Advertisement
Table of Contents

Related Manuals for ATEN KVMP CS1822


Summary of Contents for ATEN KVMP CS1822
- Page 1 CS1822 / CS1824 2/4-Port USB3.0 4K HDMI ™ KVMP Switch User Manual www.aten.com...
-
Page 2: Emc Information
CS1822 / CS1824 User Manual EMC Information FEDERAL COMMUNICATIONS COMMISSION INTERFERENCE STATEMENT: This equipment has been tested and found to comply with the limits for a Class A digital device, pursuant to Part 15 of the FCC Rules. These limits are designed to provide reasonable protection against harmful interference when the equipment is operated in a commercial environment. -
Page 3: User Information
Japan 81-3-5615-5811 Korea 82-2-467-6789 North America 1-888-999-ATEN ext 4988 1-949-428-1111 User Notice All information, documentation, and specifications contained in this manual are subject to change without prior notification by the manufacturer. The manufacturer makes no representations or warranties, either expressed or implied, with respect to the contents hereof and specifically disclaims any warranties as to merchantability or fitness for any particular purpose. -
Page 4: Package Contents
CS1822 / CS1824 User Manual Package Contents CS1822 1 CS1822 2-Port USB3.0 4K HDMI KVMP™ Switch 2 HDMI 2.0 Cables* 2 USB 3.0 Cables 2 Audio Cables 1 Power Adapter 1 User Instructions** CS1824 ... -
Page 5: Table Of Contents
CS1822 / CS1824 User Manual Contents EMC Information ..........ii User Information . - Page 6 Alternate Port Switching Keys....... 21 ATEN Default EDID Mode........21 Buzzer Control .
-
Page 7: About This Manual
CS1822 / CS1824 User Manual About this Manual This User Manual is provided to help you get the most from your CS1822 / CS1824 unit. It covers all aspects of installation, configuration and operation. An overview of the information found in the manual is provided below. Chapter 1, Introduction, introduces you to the CS1822 / CS1824. -
Page 8: Conventions
For information about all ATEN products and how they can help you connect without limits, visit ATEN on the Web or contact an ATEN Authorized Reseller. Visit ATEN on the Web for a list of locations and telephone numbers: International http://www.aten.com... -
Page 9: Introduction
Hotkeys, and the mouse port-switching functionality, the CS1822 / CS1824 offers serial commands to help switch ports and configure device settings. ATEN default EDID Mode is available for smooth power-up, high-quality display and eliminates monitor compatibility issue. -
Page 10: Features
Supports superior video quality – 4K UHD (3840 x 2160 @ 60 Hz) and 4K DCI (4096 x 2160 @ 60Hz) ATEN default EDID mode – smooth power-up, high quality display and resolution optimization to eliminate compatibility issue ... - Page 11 Chapter 1. Introduction 2. Connect an RJ-11-to-DB9 cable for the KVM switch to receive RS-232 commands. Please refer to the CS1822 / CS1824 RS-232 Commands document. 3. HD audio through HDMI channel cannot be switched independently. 4. PC keyboard combinations emulate Mac keyboards. Mac keyboards only work with their own operating system.
-
Page 12: Requirements
Linux Cables To guarantee video quality, we recommend using only ATEN HDMI KVM cables. Two (CS1822) or four (CS1824) cables are provided with this package. Note: The quality of the display is affected by the quality of the cables.We recommend the total length from the source to the monitor to not exceed 6 meters (3 meters between the PC and the KVM switch. -
Page 13: Components
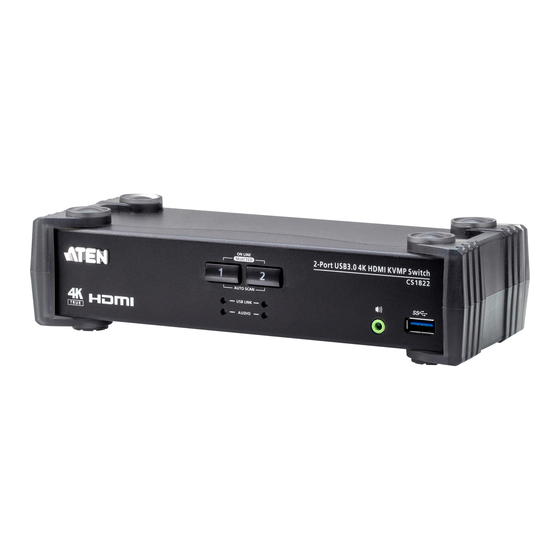
Chapter 1. Introduction Components CS1822 Front View CS1824 Front View Component Description Port Selection For manual port selection (see Manual Switching, page 13): Pushbuttons Press a port selection pushbutton for longer than two seconds to bring the KVM, USB hub, and audio focus to the computer attached to its corresponding port. - Page 14 CS1822 / CS1824 User Manual Component Description Port LEDs The LEDs will light to indicate its mode and status: Lights DIM ORANGE to indicate that the computer attached to the corresponding port is connected (online). Changes to BRIGHT ORANGE to indicate that the computer attached to its corresponding port is the one that has the KVM focus (Selected).
- Page 15 Chapter 1. Introduction Component Description RJ-11 Serial Port Connect an RJ-11 to DB-9 cable to this port for RS-232 serial commands. Console Ports Section The cables from your HDMI monitor, USB keyboard, USB mouse, speakers and USB peripherals* plug in here. Each connector is marked with an appropriate icon to indicate itself.
-
Page 16: Buzzer Behavior
CS1822 / CS1824 User Manual Buzzer Behavior Sound Description 1 beep Changing port Activating auto-scan mode Pausing/resuming auto-scan Enabling/disabling audio mixer Invalid command 1 long beep Powering on the unit Resetting the unit ... -
Page 17: Hardware Setup
Chapter 2 Hardware Setup 1. Important safety information regarding the placement of this device is provided on page 37. Please review it before proceeding. 2. Make sure that power to all the devices you will be installing has been turned off. You must unplug the power cords of any computers that have the Keyboard Power On function. - Page 18 CS1822 / CS1824 User Manual 6. Using the HDMI cable, plug the HDMI connector into an available HDMI socket on the KVM port section of the switch. Plug the USB 3.0 cable and speaker cable into their corresponding sockets. 7. At the other end of the cables from step 5, plug the HDMI cable, USB 3.0 cable and speaker cable into their respective ports on the computer.
-
Page 19: Installation Diagram
Chapter 2. Hardware Setup Installation Diagram... - Page 20 CS1822 / CS1824 User Manual This Page Intentionally Left Blank...
-
Page 21: Basic Operation
Chapter 3 Basic Operation Manual Switching There are three convenient methods to switch between the computers: Manual – by pressing the port selection pushbuttons on the front panel, Mouse – by clicking the scroll wheel of the mouse, and Hotkey – by entering combinations on the keyboard. -
Page 22: Hotkey Switching
CS1822 / CS1824 User Manual 2. Mouse switching is disabled by default. See Hotkey Setting Mode (HSM), page 20, to enable mouse switching. 3. Mouse switching is only supported when Mouse Emulation is enabled. Hotkey Switching For Hotkey port selection: All port switches from the keyboard begin by pressing the Scroll Lock key twice. -
Page 23: Alternative Manual Port Selection Settings
Chapter 3. Basic Operation Alternative Manual Port Selection Settings When Hotkey Setting Mode has been activated, pressing [S] will invoke the alternative front panel pushbutton manual port selection functions, as explained below: Press a port selection pushbutton once to bring the KVM, audio and USB focus to the computer attached to its corresponding port. - Page 24 CS1822 / CS1824 User Manual This Page Intentionally Left Blank...
-
Page 25: Hotkey Operation
Chapter 4 Hotkey Operation The CS1822 / CS1824 provides an extensive, easy-to-use, Hotkey function that makes it convenient to control and configure your KVM installation from the keyboard. Hotkeys provide asynchronous (independent) switching of the KVM, USB hub and audio focus. If you wish, you can give one computer the KVM console focus, another the USB hub focus and the other two the audio focus. -
Page 26: Going Directly To A Port
CS1822 / CS1824 User Manual Going Directly to a Port Hotkey Action [Scroll Lock] [Scroll Lock] [n] Brings the KVM, USB hub, and audio focus to the [Enter] computer attached to the port corresponding to the specified Port ID. [Scroll Lock] [Scroll Lock] [n] Brings only the KVM focus to the computer attached [K] [Enter] to the specified port. -
Page 27: Auto Scanning
Chapter 4. Hotkey Operation Auto Scanning The CS1822 / CS1824’s Auto Scan feature automatically cycles the KVM focus through the computer ports at regular intervals. This allows you to monitor the computer activity without having to take the trouble of switching from port to port manually. -
Page 28: Hotkey Setting Mode (Hsm)
CS1822 / CS1824 User Manual Hotkey Setting Mode (HSM) Hotkey Setting Mode (HSM) is used to set up your CS1822 / CS1824 switch configuration. All operations begin with invoking Hotkey Setting Mode. To invoke HSM do the following: 1. Press and hold down [Num Lock]. 2. -
Page 29: Alternate Hsm Invocation Keys
[Scroll Lock] [Scroll Lock] method, go through the steps above. ATEN Default EDID Mode Enable ATEN default EDID mode for smooth power-up, high-quality display and use of the best resolutions to eliminate monitor compatibility issue. To enable/disable ATEN default EDID mode, do the following: 1. -
Page 30: Firmware Upgrade Mode
CS1822 / CS1824 User Manual Firmware Upgrade Mode To enter Firmware Upgrade Mode, do the following: 1. Invoke HSM (see page 20). 2. Key in: upgrade 3. Press [Enter]. The front panel LEDs flash to indicate Firmware Upgrade Mode is in effect. Note: To exit Firmware Upgrade Mode, you must power off the switch. -
Page 31: List Switch Settings
Chapter 4. Hotkey Operation port’s keyboard operating platform configuration so that the PC compatible keyboard emulates the Mac or Sun keyboard. The procedure is as follows: 1. Bring the KVM focus to the port you want to set. 2. Invoke HSM (see page 20). 3. -
Page 32: N-Key Rollover Keyboard Supporting Function
CS1822 / CS1824 User Manual N-Key Rollover Keyboard Supporting Function Enabling N-key Rollover allows up to 15 simultaneous keystrokes. To enable/ disable N-key Rollover, do the following: 1. Invoke HSM (see page 20). 2. Press [K] [Enter]. Power-on Detection To turn on/off power-on detection, do the following: 1. -
Page 33: Usb Reset
Chapter 4. Hotkey Operation Note: This second audio source follows the KVM and can be selected using pushbutton, hotkey, and mouse wheel. Double Focus Audio Mixing Mode This mode fixes two audio sources and mixes them as the audio output. 1. -
Page 34: Hsm Summary Table
CS1822 / CS1824 User Manual HSM Summary Table After invoking HSM (see page 20), key in one of the following keys to perform the corresponding function: Function [F1] Sets the keyboard and mouse to SPC mode so that it can work under special operating systems as a standard (104 key) keyboard and mouse. - Page 35 Chapter 4. Hotkey Operation Function [V] [Enter] Enables/disables ATEN default EDID mode. Enables/disables Mouse Port Switching. When enabled, click the mouse wheel twice to switch ports. Mouse emulation must be enabled. [X] [Enter] Enables/disables Hotkey Port Switching. [Esc] or Quits setting mode.
- Page 36 CS1822 / CS1824 User Manual This Page Intentionally Left Blank...
-
Page 37: Keyboard Emulation
Chapter 5 Keyboard Emulation Mac Keyboard The PC compatible (101/104 key) keyboard can emulate the functions of the Mac keyboard. The emulation mappings are listed in the table below. PC Keyboard Mac Keyboard [Shift] Shift [Ctrl] Ctrl [Ctrl] [1] [Ctrl] [2] [Ctrl] [3] [Ctrl] [4] [Alt]... -
Page 38: Sun Keyboard
CS1822 / CS1824 User Manual Sun Keyboard The PC compatible (101/104 key) keyboard can emulate the functions of the Sun keyboard when the control key [Ctrl] is used in conjunction with other keys. The corresponding functions are shown in the table below. PC Keyboard Sun Keyboard [Ctrl] [T]... -
Page 39: The Firmware Upgrade Utility
1. From a computer that is not part of your KVM installation, go to the ATEN Support & Download site and choose the model name that relates to your device (CS1822 / CS1824) to get a list of available Firmware Upgrade Packages. -
Page 40: Starting The Upgrade
CS1822 / CS1824 User Manual Starting the Upgrade To upgrade your firmware: 1. Run the downloaded Firmware Upgrade Package file – either by double clicking the file icon, or by opening a command line and entering the full path to it. The Firmware Upgrade Utility Welcome screen appears: Note: The screens shown in this section are for reference only. - Page 41 6. The Firmware Upgrade Utility 3. Click Next to continue. The Firmware Upgrade Utility main screen appears: CS1822_1824 [MAIN].. The Utility inspects your installation. All the devices capable of being upgraded by the package are listed in the Device List panel. 4.
- Page 42 CS1822 / CS1824 User Manual 5. After you have made your device selection(s), Click Next to perform the upgrade. The firmware [Ver 1.0.] is not newer than the current firmware [Ver 1.0.090] in device CS1822_1824 [MAIN]: 000 Continue the upgrade? [Yes/No] If you enabled Check Firmware Version, the Utility compares the device’s firmware level with that of the upgrade files.
-
Page 43: Upgrade Succeeded
6. The Firmware Upgrade Utility Upgrade Succeeded After the upgrade has completed, a screen appears to inform you that the procedure was successful: CS1822_1824 [MAIN].. CS1822_1824 [MAIN] CS1822_1824 [MAIN] CS1822_1824 [MAIN]000:OK Click Finish to close the Firmware Upgrade Utility. After a successful completion, the switches exit Firmware Upgrade Mode, and reset themselves. -
Page 44: Upgrade Failed
CS1822 / CS1824 User Manual Upgrade Failed If the Upgrade Succeeded screen doesn’t appear, it means that the upgrade failed. Repeat the upgrade procedure to try again. -
Page 45: Appendix
Appendix Safety Instructions Read all of these instructions. Save them for future reference. This device is for indoor use only. Follow all warnings and instructions marked on the device. Do not place the device on any unstable surface (cart, stand, table, etc.). If the device falls, serious damage will result. - Page 46 CS1822 / CS1824 User Manual purpose of the grounding-type plug. Always follow your local/national wiring codes. Do not allow anything to rest on the power cord or cables. Route the power cord and cables so that they cannot be stepped on or tripped over. ...
-
Page 47: Technical Support
Support Documentation Software Updates Telephone Support 1-888-999-ATEN ext 4988 1-949-428-1111 When you contact us, please have the following information ready beforehand: Product model number, serial number, and date of purchase. Your computer configuration, including operating system, revision level, expansion cards, and software. -
Page 48: Specifications
CS1822 / CS1824 User Manual Specifications Function CS1822 CS1824 Computer Connections Port Selection Pushbutton, Hotkey, RS-232 Commands, Mouse* Connectors Console Keyboard 1 x USB Type A Female Ports Mouse 1 x USB Type A Female Video 1 x HDMI Female (Black) Speakers 2 x 3.5mm Audio Jack Female (Green;... -
Page 49: Troubleshooting
Appendix Troubleshooting Overview Operation problems can be due to a variety of causes. The first step in solving them is to make sure that all cables are securely attached and seated completely in their sockets. In addition, updating the product’s firmware may solve problems that have been discovered and resolved since the prior version was released. -
Page 50: Limited Warranty
ATEN will provide a repair service, without charge, during the Warranty Period. If a product is detective, ATEN will, at its discretion, have the option to (1) repair said product with new or repaired components, or (2) replace the entire product with an identical product or with a similar product which fulfills the same function as the defective product. - Page 51 Appendix...
- Page 52 All other brand names and trademarks are the registered property of their respective owners. ATEN International Co., Ltd., 3F, No. 125, Sec. 2, Datung Rd., Sijhih District, New Taipei City 221, Taiwan Phone: 886-2-8692-6789 Fax: 886-2-8692-6767 TECHNICAL SUPPORT CENTER: 886-2-8692-6959...
Need help?
Do you have a question about the KVMP CS1822 and is the answer not in the manual?
Questions and answers