Advertisement
Quick Links
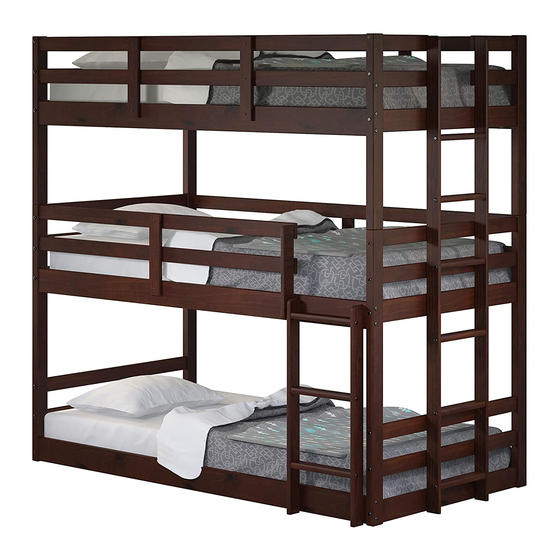
ASSEMBLY INSTRUCTIONS
1555 TRIPLE BUNK BED
Thank you for purchasing this quality product.
Be sure to check all packing materials carefully
for small parts which may have come loose
inside the carton during shipment. Separate,
identify and count all parts and hardware.
Compare with the parts list to be sure all parts
are present.
´´DO NOT TIGHTEN SCREWS
UNTIL COMPLETELY ASSEMBLED´´
SIZE OF MATTRESS AND FOUNDATION (SUPPORT)
This bed is designed to use a twin mattress ( 37 ½"- 38 ½"x 74 - 75") and bunkie board (37 ½"x 74"). The
total thickness must not exceed
foundation.
Note:There must be at least 5" inches from top surface of mattress to top edge or guardrails.
REPLACEMENT PARTS.
Replacement parts, including additional guardrails, may be obtained from place of purchase or original
distributor.
TO OBTAIN PARTS, PLEASE CONTACT:
1- Follow the information on the warning label appearing on the upper bunk end structure and on the carton.
Do not remove warning label from bed.
2- Always use the recommended size mattress or mattress support, or both, to help prevent the likelihood
of entrapment or falls.
3- Surface of mattress must be at least 5 inchess below the upper edge of guardrails.
4- Do not allow children under 6 years of age to use the center and upper bunk.
5- Prohibit more than one person on Center and Upper bunk.
6- Periodically check and ensure that the guardrail, ladder and other components are in their proper position,
free from damage, and that all connectors are tight.
7- Do not allow horseplay on or under the bed and prohibit jumping on the bed.
8- Always use the ladder for entering and leaving the Center and Upper bunk.
9- Do not use substitute parts. Contact distributor or dealer for replacement parts.
10- Use of a night light may provide added safety precaution for a child using the Center and Upper bunk.
11- If the bunk bed will be placed next to a wall, the guardrail that runs the full length of the bed should
be placed against the wall to prevent entrapment between the bed and the wall.
12- Always use guardrails on both long sides of the Center and Upper bunk.
13- The use of water or sleep flotation mattresses is prohibited.
14- Keep these instructions for future reference.
15- Strangulation Hazard - Never attach or hang items to any part of the bunk bed that are not designed for
use with the bed: for example, but not limited to, hooks, belts, and jump ropes, etc.
IMPORTANT: PLEASE READ INSTRUCTIONS BEFORE STARTING THE ASSEMBLY
8"
inches. Do not use mattress without the proper bunkie board or safe
DONCO TRADING COMPANY- FORT WORTH, TEXAS
SAFETY WARNINGS!
Advertisement

Related Manuals for Donco 1555


Summary of Contents for Donco 1555
- Page 1 Replacement parts, including additional guardrails, may be obtained from place of purchase or original distributor. TO OBTAIN PARTS, PLEASE CONTACT: DONCO TRADING COMPANY- FORT WORTH, TEXAS SAFETY WARNINGS! 1- Follow the information on the warning label appearing on the upper bunk end structure and on the carton.
- Page 2 ASSEMBLY INSTRUCTIONS 1555 TRIPLE BUNK BED OPTIONS LEFT SIDE LADDER RIGTH SIDE LADDER Thank you for purchasing this quality product. Be sure to check all packing material carefully for small parts which may have come loose inside the carton during shipment. Separate, identify and count all parts and hardware.
- Page 3 Part List: 1555 TRIPLE BUNK BED WARNING LABELS NOT REMOVE ! POST NUMBER HERE Identifying the Hardware/part list- Identify the hardware using the illustrations below. 1/4" Half Moon 7,0 x 100 Screw 1/4 x 80 Screw 4,0 x 30 Screw...
- Page 4 WARNING LABELS H O L H I T H R A I S I D E O T T N T B F R O A I L S D E R K S I B A C A N D T O P H O L H I T H...
- Page 5 BOTTOM BED Headboard INSIDE Hex Screwdriver Note: Please make sure that # on post matches the # on the middle panel. 7,0 x 100 Screw BOTTOM BED Footboard INSIDE Hex Screwdriver Note: Please make sure that # on post matches the # on the middle panel. 7,0 x 100 Screw...
- Page 6 Hex Screwdriver 7,0 x 80 Screw 1/4" Half Moon 1/4 x 80 Screw HOLES HOLES Hex Screwdriver 1/4" Half Moon 1/4 x 80 Screw...
- Page 7 Hex Screwdriver 7,0 x 80 Screw Hex Screwdriver 7,0 x 60 Screw...
- Page 8 BOTTOM LADDER Hex Screwdriver 7,0 x 60 Screw Hex Screwdriver 7,0 x 60 Screw...
- Page 9 2 3/4" Please follow the drawings on left side to assembly the slats kit and make sure the spacer tape stays up. 2 3/4" 4,0 x 30 Screw...
- Page 10 E E E 2 3/4" Please follow the drawings on left side to assembly the slats kit and make sure the spacer tape stays up. 2 3/4" 4,0 x 30 Screw...
- Page 11 4,0 x 30 Screw 10x100 Wood Dowel...
-
Page 12: Warning Labels
TOP BED Headboard INSIDE Hex Screwdriver Note: Please make sure that # on post Note: Please make sure that # on post 7,0 x 100 Screw matches the # on the middle panel. matches the # on the middle panel. TOP BED Footboard 10 8... - Page 13 12 12 12 12 Hex Screwdriver 7,0 x 80 Screw 1/4" Half Moon 1/4 x 80 Screw...
- Page 14 2 3/4" Please follow the drawings on left side to assembly the slats kit and make sure the spacer tape stays up. 2 3/4" 4,0 x 30 Screw...
- Page 15 4,0 x 30 Screw TOP LADDER Hex Screwdriver 7,0 x 60 Screw...
- Page 16 OPTIONAL RIGHT OPTIONAL RIGHT SIDE LADDER SIDE LADDER PLEASE USE SAFETY STEP LADDER TO ASSEMBLY THE LADDER Hex Screwdriver 7,0 x 60 Screw Not included...
- Page 17 OPTIONAL LEFT SIDE LADDER PLEASE USE SAFETY STEP LADDER TO ASSEMBLY THE LADDER Hex Screwdriver 7,0 x 60 Screw Not included...
Need help?
Do you have a question about the 1555 and is the answer not in the manual?
Questions and answers