Atari 1200XL Field Service Manual
Home computer
Hide thumbs
Also See for 1200XL:
- Field service manual (58 pages) ,
- Owner's manual (20 pages) ,
- Users handbooks (347 pages)

Subscribe to Our Youtube Channel
Related Manuals for Atari 1200XL


Summary of Contents for Atari 1200XL
- Page 1 Printed in U.S. America Atari, Incorporated FD100217 February 1983 Rev. by jer/eightbitter 2014...
- Page 2 Atari believes that the information described in this manual is accurate and reliable, and much care has been taken in its preparation. However, no responsibility, financial or otherwise, shall be accepted for any consequences arising out of the use of this material.
-
Page 3: Table Of Contents
TESTING Overview Equipment Needed Self Test MEMORY TEST Screen AUDIO VISUAL TEST Screen KEYBOARD TEST Screen ALL TESTS Using the SALT 2.05 Diagnostic Cartridge COLOR BAR TEST ANY VIDEO TEST GRAY BAR TEST DISPLAY OPTIONS RAM TEST 1200XL Home Computer... - Page 4 1-14 1-13 Cartridge Interface Pin Assignments 1-15 SALT Header SALT Menu COLOR BAR Test Screen ANY VIDEO Test Screen GRAY BAR Test Screen Display Option Screen RAM TEST Screen 1200XL Console and RF Shield 1200XL Home Computer Field Service Manual...
-
Page 5: Introductionv
This Field Service Manual is organized in six sections: • THEORY OF OPERATION - Overview of how the 1200XL works and what its basic assemblies look like. • SCHEMATICS AND SILKSCREENS - Electrical drawings and layouts of the 1200XL printed circuit board. -
Page 6: Theory Of Operation
SECTION 1 THEORY OF OPERATION The Atari 1200XL is an enhanced version of the existing Atari computer systems. It can be used with any existing Atari peripheral devices which are compatible with the 400 /800 computer, although not all are necessary. -
Page 7: User Interface
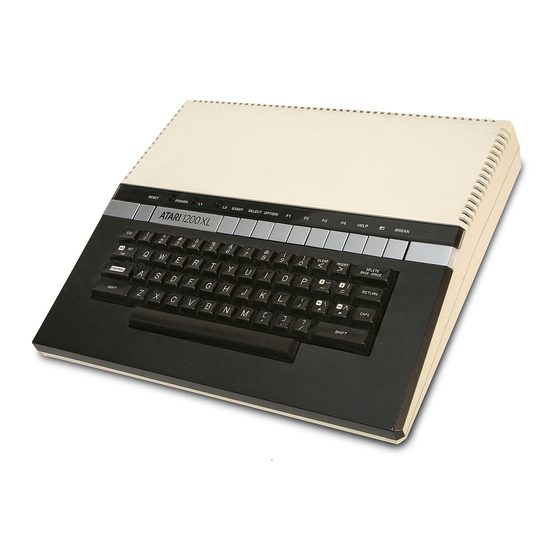
Figure 1-2. 1200XL Back View. User Interface The Atari 1200XL is a general purpose microcomputer which uses a 6502 (modified) microprocessor. The 1200XL console is the central processing unit for its respective system. The left side panel (refer to Figure 1-1) contains the power ON/OFF switch, one cartridge slot and two controller jacks. -
Page 8: Mechanical Description
BREAK - Used for interrupt of program. Mechanical Description The 1200XL computer console contains a single motherboard which houses all the chips of the system and provides connectors for interfacing external modules to the console. It includes the CPU, RAM, ROM Operating System and power supply, and includes all functions except for the keyboard and LED display. -
Page 9: Xl Functional Block Diagram
Figure 1-3. 1200XL Functional Block Diagram. 1200XL Home Computer Field Service Manual... -
Page 10: Digital Hardware
• True indexing Stack pointer • Two interrupt levels 64K address range • Integral clock circuit • Single +5 volt DC power Requirement Figure 1-4 is an illustration of the 6502 (modified) CPU Pin Assignments. 1200XL Home Computer Field Service Manual... -
Page 11: Alphanumeric Television Interface Controller
The ANTIC Display Processor is a custom display microprocessor with an instruction set customized for graphics generation. It also has the ability to control bus and RAM REFRESH. Figure 1-5 is an illustration of the ANTIC Display Processor pin assignmens. 1200XL Home Computer Field Service Manual... -
Page 12: Graphics Television Interface Adaptor (Gtia)
Its primary task is to generate color and luminance signals from the display information bit stream it receives from the ANTIC Display Processor. Figure 1-6 is an illustration of the GTIA pin assignmens. 1200XL Home Computer Field Service Manual... -
Page 13: Pot Keyboard Integrated Circuit (Pokey)
The POKEY is a Custom Large Scale Integrated Circuit (LSI) chip. It is used for audio generation, Serial Input/Output (SIO) control, controller interface scan and keyboard scan. Figure 1-7 is an illustration of the POKEY pin assignmens. 1200XL Home Computer Field Service Manual... -
Page 14: Peripheral Interface Adaptor (Pia)
Figure 1-6. POKEY pin assignments Peripheral Interface Adaptor (PIA) The PIA is a general purpose Input/Output (I/O) chip. Figure 1-7 is an illustration of the PIA pin assignmens. 1200XL Home Computer Field Service Manual... -
Page 15: Pia Pin Assignments
Figure 1-8. PIA pin assignments 1200XL Home Computer Field Service Manual 1-10... -
Page 16: Memory (Rom And Ram)
Memory (ROM and RAM) The 1200XL operating system is resident to two 8K X 8 ROMs. The ROMs input CPU address lines AO through A12 and the chip selects from the address decoding circuitry and generates data on CPU data lines DO through D7. RAM is organized as 8-64K x 1 chips, one for each data line. -
Page 17: Serial Input/Output (Sio Interface)
Serial Input/Output (SIO) Interface The Atari 1200XL communicates with peripheral devices over an asynchronous serial port (19.2K Baud RAte Max). Data is transmitted and received as 8 bits of serial data (LSB sent first) preceded by a logic zero start bit and succeeded by a logic one stop bit. The serial data out is transmitted as positive logic. -
Page 18: Keyboard Interface
Figure 1-9. SIO Interface Pin Assignments (looking into jack on unit) Keyboard Interface Figure 1-10 is an illustration of the keyboard interface pin assignments. The 1200XL keyboard uses a 15-pin Molex Connector, which provides inputs to POKEY, GTIA (SO,S1,S2) and CPU (Reset). Figure 1-10. Keyboard Interface Pin Assignments. -
Page 19: Controller Jack Interface
Controller Jack Interface The 1200XL provides two controller jack interfaces. Both are functionally and electrically identical. The controller jacks are 9-pin D-type connectors. Figure 1-11 is an illustration of the controller jack pin assignments. 1. (Joystick) Forward Input 6. Trigger Input 2. -
Page 20: Cartridge Interface
Cartridge Interface The cartridge interface is a 30 pin edge connector. Figure 1-13 is an illustration of the cartridge interface pin assignments. Figure 1-13. Cartridge Interface Pin Assignments (from left side of 1200XL) 1200XL Home Computer Field Service Manual 1-15... -
Page 21: Schematics And Silkscreens
SECTION 2 SCHEMATICS AND SILKSCREENS The schematics and silkscreens for the 1200XL, originally they were attached to the cover of this manual, but due to the poor condition of copies have been redesigned and presented in this chapter. Minor variations in design may be encountered depending upon the production date of the console. - Page 22 1200XL Home Computer Field Service Manual...
- Page 23 1200XL Home Computer Field Service Manual...
- Page 24 1200XL Home Computer Field Service Manual...
- Page 25 1200XL Home Computer Field Service Manual...
- Page 26 1200XL Home Computer Field Service Manual...
- Page 27 1200XL Home Computer Field Service Manual...
- Page 28 1200XL Home Computer Field Service Manual...
- Page 29 1200XL Home Computer Field Service Manual...
- Page 30 1200XL Home Computer Field Service Manual 2-10...
- Page 31 1200XL Home Computer Field Service Manual 2-11...
- Page 32 1200XL Home Computer Field Service Manual 2-12...
-
Page 33: Testing
SECTION 3 TESTING OVERVIEW This section describes the procedures available for testing the 1200XL. They are: • Self Test • Using SALT 2.05 Diagnostic Cartridge EQUIPMENT NEEDED • a 1200XL console with accessories a TV set, properly adjusted • • a SALT 2.05 Diagnostic Cartridge... -
Page 34: Memory Test Screen
The channel number changes for each according to the sound channel in use. Voice #1-4 under the staff and treble clef indicates the channel in use. There is a slight pause between each voice. 1200XL Home Computer Field Service Manual... -
Page 35: Keyboard Test Screen
1200XL. Only the tests discussed in the following paragraphs are applicable. Procedure: 1. Connect the 1200XL console to the TV set as shown in the Operators Manual. 2. Turn on the computer and TV set. 3. Insert the SALT 2.05 Diagnostic Cartridge in the cartridge slot. -
Page 36: Salt Header
Press the command letter then RETURN to select a test. Figure 3-2. SALT Menu A number of tests on this menu are not applicable to the 1200XL and should be disregarded. They are: 1200XL Home Computer... -
Page 37: Color Bar Test
• PRODUCTION TEST RESET is used to take you from a test back to the SALT Header. The tests applicable to the 1200XL are discussed on the following pages. COLOR BAR TEST This test verifies and allows for adjustment to the color circuitry. Enter the command letter C and press RETURN to activate this test. -
Page 38: Any Video Test
From the left to right, the shade of color on the horizontal bar should change. On the right of the bar, two Vs should be displayed, right side up; one in normal video and the other in inverse video. Figure 3-4. Any Video Test Screen 1200XL Home Computer Field Service Manual... -
Page 39: Gray Bar Test 3-G
"flashing" of color or shifting of the gray bars. Figure 3-5. Gray Bar Test Screen DISPLAY OPTIONS This function, which is not a test, displays a diagnostic matrix when used in conjunction with the RAM TEST. Figure 3-6. Display Options Screen 1200XL Home Computer Field Service Manual... -
Page 40: Ram Test Screen
Test Counter Figure 3-7. RAM Test Screen. Only the D row is applicable for the 1200XL. Use the information below to identify the defective RAM. Each red 1 from matrix row D indicates a failing chip. Use the information_ below to identify each chip location. - Page 41 Defective RAM Identifier Bad Bit Column Chip No. 1200XL Home Computer Field Service Manual...
-
Page 42: Symptom Checklist
U24, L11, L12 or Games (Adjust Audio Figure 4-1) Console (Game) Switches U19, U23 Replace will not Function ROM Test Failed U12, U13, U14. U18, U22 Replace RAM Test Failed U1-U9, U7, U14, U22 Replace 1200XL Home Computer Field Service Manual... - Page 43 Figure 4-1. 1200XL and RF Shield 1200XL Home Computer Field Service Manual...
-
Page 44: Adjustments & Replacements
6. Place bottom cover with right side up on bench. 7. Insert cartridge connector into PCB/shields assembly. 8. Hold the assembly together, and position within bottom cover assembly. Be sure that screw holes are aligned. 9. Attach with six screws. 1200XL Home Computer Field Service Manual... -
Page 45: Keyboard Removal/Replacement
• Set SW3 to Channel 3 position. Adjust modulator to 61.25 MHz. SOUND ADJUSTMENT See Figure 4-1, Page 4-2. Adjustment can be made through top or bottom cover. COLOR ADJUSTMENT See Figure 4-1, Page 4-2. Adjustment can be made through top or bottom cover. 1200XL Home Computer Field Service Manual... -
Page 46: 1200Xl Parts List
SECTION 5 1200XL PARTS LIST MAJOR ASSEMBLIES LINE NO. DESCRIPTION PART NO. Final Assembly (unpackaged) CA060276 Top Cover Assembly CA060278 PCB-RFI Shield Assembly CA061074 Bottom Cover Assembly CA060277 Cartridge Conn Panel C060096 Antenna Switch Box CA010112 Power Adaptor CA017964 LOCATION DESCRIPTION PART NO. - Page 47 SECTION 5 1200XL PARTS LIST LOCATION DESCRIPTION PART NUMBER A1,2 Voltage Regulator (78M05) 5V C014348 Modulator C060618 Main Socket IC (24 pin) C014386-08 Alternate for P/N C014386-07-1 Main Diode (1N914) 31-1N914 Alternate for P/N C060607-2 PCB/RFI SHIELD ASSEMBLY CA061074 Cap. Ceramic Axial 68pF...
- Page 48 SECTION 5 1200XL PARTS LIST LOCATION DESCRIPTION PART NUMBER Q1,7,8,11,12,14-16, Transistor (2N3904) 34-2N3904 18,19 Q2,4,9,10,17 Transistor (2N3906) 33-2N3906 Transistor (MPSA55) C014809 Transistor (2N3563) NPN 34-2N3563 Resistor 1 /4 W 39k Ω 14-5393 Resistor 1/4W 680Ω 14-5681 R3,4,6,7,26,27,30, Resistor 1/4W 3k Ω...
- Page 49 SECTION 5 1200XL PARTS LIST LOCATION DESCRIPTION PART NUMBER R149 Resistor 1/4W 2.4k Ω 14-5242 R162 Resistor 1/4W 150Ω 14-5151 R176 ~ Resistor 1/4W 47k Ω 14-5473 R179 Resistor 1/4W 390Ω 14-5391 R182 Resistor 1/4W 6.2k Ω 14-5622 R 186 Resistor 1 /4 W 240Ω...
-
Page 50: Service Bulletins
The following are brief descriptions of each classification: FIELD CHANGE ORDER A Field Change Order describes hardware or software changes to ATARI products and instructs how to implement these changes. This identifies a failure mode which affects reliability and describes a procedure to correct the failure. This procedure must be performed on all units serviced or repaired.
Need help?
Do you have a question about the 1200XL and is the answer not in the manual?
Questions and answers