
Related Manuals for ACD SE Series


Summary of Contents for ACD SE Series
- Page 1 Administration Manual Second Edition of ACD Windows CE Devices Version: 2.00 © Copyright ACD Gruppe This document may not be duplicated or made accessible to third parties without permission. WinCEGeräte_Handbuch_Administration_v2 00_en...
-
Page 2: Table Of Contents
Desktop information ....................6 1.2.5 Sysinfo - device information at a glance ..............6 Device types - function and variations ................ 7 1.3.1 List of ACD Windows CE devices ................7 1.3.2 Switching on and off ....................7 Boot process ....................... 8 1.4.1 Startup screen ...................... - Page 3 2.6.7 Bluetooth ........................40 2.6.8 PPP connection ......................50 2.6.8.1 PPP modem connection .................... 50 2.6.9 RNDIS ........................53 Communication applications ..................54 2.7.1 FTP (Windows CE device as a server) ..............54 2.7.1.1 Setting the password ....................54 2.7.1.2 Setting the root directory and other parameters ............54 2.7.2 FTP (Windows CE device as client) ................
-
Page 4: Overview
Windows CE functions as well as practical instructions for common recurring administrative tasks. The objective is to provide users with what they need to know in order to customise ACD Windows CE devices to suit a specific customer application. This manual does not cover specific application settings;... -
Page 5: Permanent Storage Of Folders And Files
OS monolithic kernel architecture. These relevant aspects will be touched on briefly below. 1.2.2 Permanent storage of folders and files On ACD Windows CE devices from the SE series, the entire root file system (with the exception of the \temp folder) is flash-based, i.e. persistent. Depending on its particular... -
Page 6: Desktop Information
1.2.5 Sysinfo - device information at a glance The Sysinfo utility to be found under Start / Programs / ACD provides a quick overview of the system resources stored on the device. Information retrieved by this program may be required by Support to provide concrete help and advice. -
Page 7: Device Types - Function And Variations
1.3 Device types - function and variations 1.3.1 List of ACD Windows CE devices Device Appli- Flash name cation Operating system Processor Clock rate memory memory M210SE Mobile Windows CE 6.0 PXA 166 800 MHz 256 MB 512 MB M215SE Mobile Windows CE 6.0... -
Page 8: Boot Process
ACD can provide information on how to create and display a customised boot screen. 1.4.1 Startup screen The boot screen is then replaced by a startup screen. The startup screen displays by default the ACD logo but can be customised to display an image provided in a compatible format by the customer... -
Page 9: Interrupting Program Startup
1.4.4 Interrupting program startup To prevent the user accessing the system level, software applications are usually launched automatically in full screen mode. Some of the programs are configured with key sequences in order to close the application. If this is not the case, the system level can only be accessed by changing or re-naming the startup files. An alternative is to use a key combination at the start that prevents the execution of user programs. -
Page 10: Stopboot.acd
1.4.4.1 stopboot.acd Another way to stop programs booting is if the device is configured with an empty stopboot.acd file: • under \Flashdisk • or on the SD card (root directory) 1.4.5 Startup configuration The StartConfig program is a configuration program for Windows CE devices. It is used to activate and configure the programs that are launched when the device boots. - Page 11 In the program list, you can select a new option from a list of standard programs. The limited standard list containing the most common programs is displayed first. It is also possible to display an "extended list" of programs. A special rule applies here to AutoApp: In this case, either an Autoapp.exe file or an Autoapp.bat file is opened exclusively.
- Page 12 When editing the startup configuration list of known programs, only one of the two radio buttons "Start" and "Start and wait" will be displayed. Only the enabled setting is displayed. When editing the startup configuration list of "unknown" programs, both radio buttons are displayed for selection.
-
Page 13: Device Functions
2 Device functions 2.1 Battery In MDT devices, a battery is used to supply the entire device with power. ACD ensures that applications are provided with all the relevant internal information required to operate the battery. 2.1.1 Changing the battery When the battery is replaced, the large capacitors are used to manage backup functions for the clock and power supply. -
Page 14: Touchscreen
2.2 Touchscreen The screen is the central readout on the ACD devices. This screen features a touch-sensitive surface. The surface responds to brief touches and gestures on the screen using a stylus (pen) or finger (taps) just like when left-clicking with the mouse: the icon is highlighted (by tapping once) or opened (by tapping twice). -
Page 15: Acdstatview - Status Icons
2.2.2 ACDStatView - status icons Current status information can be displayed with the help of the AcdStatView program using the Status icons. The information is visualised in a graphic icon. The statuses you want to display (such as size, position and other options) can be transferred to the application using command line parameters (see parameters). -
Page 16: Battery Indicator
2.2.2.2 Battery indicator The battery status is displayed with the following statuses: Battery status excellent Battery status good Battery status weak Battery status critical Battery charging No information available 2.2.2.3 Status indicator – small format With the "small" parameter, signal / battery indicators can be displayed in a status bar format. They are particularly suitable for integrating into existing applications where the display only needs to be marginally reduced in size. -
Page 17: Program Parameters
2.2.2.5 Program parameters Parameters Definition Status indicator -s=connection Displays connection status (valid IP) (adapter: -a) -s=akku Shows / closes battery status (if 'close' is enabled) -s=signal Shows / closes field strength (if ‘close’ is enabled) Shows time in analogue format -s=clockanalog Shows time in digital format -s=clockdigi... -
Page 18: Acdstatview Examples
2.2.2.6 ACDStatView examples Displays battery and WLAN status as a floating icon (sliding): AcdStatView -s=akku -v=topmost -x=100 -y=0 -w=20 -h=16 –slide AcdStatView -s=signal -v=topmost -x=120 -y=0 -w=20 -h=16 -slide WinCEGeräte_Handbuch_Administration_v2 00_en 18 / 84... -
Page 19: Keyboard
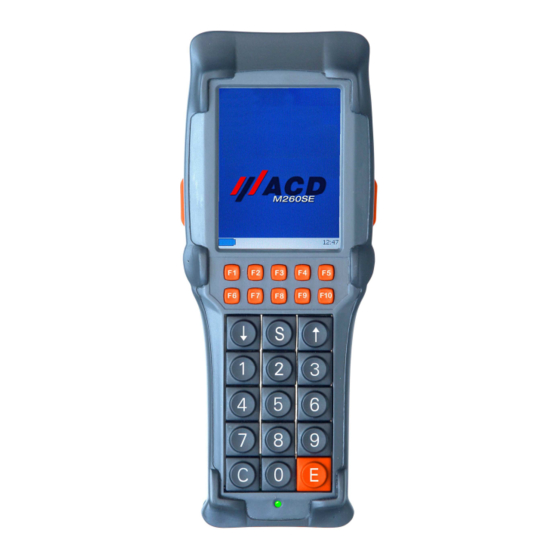
2.3 Keyboard ACD MDT devices are activated or switched on/off with a combination of several keys, see Chapter 1.3.2 on page 7. ACD Windows CE devices feature keyboards (or keypads) that are optimised to the specific application. They are divided into two separate levels. A second "keyboard layer" is also available that can be temporarily activated just like with a shift key function (not on M260SE with alphabetic keyboard). - Page 20 Key identifiers for device keys The identifiers for the existing device keys are identical for all devices. The table below provides an overview of these identifiers. Identifier A key on the first keyboard level (without shift) A shift key (second keyboard level) Key one Shift key two k_f1...
-
Page 21: One-Finger Shift
2.3.3 Alphabetic keyboard Entering letters using the keyboard is a common feature used for text messaging on mobile phones. ACD Windows CE devices also support this option. The "T9" word recognition algorithm is not used. - Page 22 To configure the alphanumeric mode, the keyb.ini file is edited in the [AlphaKBExtension] section. To activate the function, enter a parameter with the AlphaModeSwitchTime settings option: [AlphaKBExtension] AlphaModeSwitchTime = 800 Optional configuration options: Function [AlphaKBExtension] Identifier for AlphaMode section AlphaModeSwitchTime Time in ms;...
-
Page 23: Keyboard Lock
2.3.4 Keyboard lock Press and hold down the F4 key to lock the keyboard (M260SE alphabetic keyboard: key with key icon). The keyb.ini file contains the following functions to manage the keyboard lock in [KeyLock]: Function [KeyLock] Identifier for KeyLock section KeyLockTime Time in ms until keyboard lock/unlock. -
Page 24: Scanner Module
Application developers can use the scanner API that offers them more control over the integrated scanner. The scanner API is provided by ACD. As the scanner module cannot be operated on both types at the same time, it is not possible to simultaneously use both operating modes. -
Page 25: Internal Scanner (Scandrv Scanner Driver)
Double-tap the barcode icon in the task bar to launch the configuration tool. Other ways to start the configuration tool is either from Start / Programs / ACD / System / Configure ScanDrv or by launching the program directly: ScanDrv.exe -config WinCEGeräte_Handbuch_Administration_v2 00_en... -
Page 26: The Scandrv Configuration Tool
2.4.3.2 The ScanDrv configuration tool The main window is divided into 2 sub-panels. A tree view (similar to Explorer) is displayed in the upper panel where you can select the ScanDrv.ini default configuration file settings or a new or selected configuration file. - Page 27 The toolbar The toolbar icons have some of the same functions that have already been explained in the Menu section. A new default configuration is created. A configuration file is no longer assigned. Open An existing configuration file can be opened from a File Open dialogue box. Save This option is used to save the configuration file you have entered and modified (if applicable).
- Page 28 The ScanDrv configuration options The various configuration masks can be displayed in the tree view in the bottom sub-panel. No more information on these configuration options will be provided here. The configuration tool is primarily used to set the authorised/blocked barcode types and their minimum and maximum lengths.
- Page 29 Keyboard insertion: Scanner API: WinCEGeräte_Handbuch_Administration_v2 00_en 29 / 84...
-
Page 30: External Scanner (Extscan2Keyce Program)
This is done with the ExtScan2KeyCE license application that is installed if necessary on the MDT device. An installation pack is available from ACD for subsequent installations. At the MDT devices, the external laser scanner is connected to the RS232 interface of the vehicle mounting. -
Page 31: Exiting The Configuration And Program
ScanDrv icon.) There are two ways to exit ExtScan2keyCE: • Enter the password 2801 in the first tag of the configuration dialogue box. • Select Start / Programs / ACD / System / Close ExtScan2KeyCE. WinCEGeräte_Handbuch_Administration_v2 00_en 31 / 84... -
Page 32: The Configuration Tool
2.4.4.2 The configuration tool On this tab, you can define whether the scan data to be inserted into the keyboard is prefixed with up to 2 characters and/or suffixed with up to 2 characters. Characters that are configured by default are: TAB ( 0x09 ) CR ( 0x0d ) LF ( 0x0a ) -
Page 33: Rfid Read/Write Module
Mifare Standard 1 KB transponder card. The serial number is inserted for the ICode SLI transponder card. Application developers can directly use the RFID-API. This is provided by ACD and supports all the transponders listed in the table above. As the RFID read/write module cannot be operated from both terminals at the same time, it is not possible to simultaneously use both operating modes. - Page 34 More detailed information is available in the Rfid2KeyCE_SoftwareDoku document. In the RFID2Key.ini file, you can select the transponder card you require by selecting the transponder card ICode SLI or Mifare. The RFID data is inserted into the keyboard or into the dialogue fields accordingly. Virtual keys are inserted to read data from a transponder card (Mifare) in a continuous data flow from a specific address on the card.
- Page 35 This tab is used to set all authentication keys (A, B) for the separate sectors of a Mifare transponder card. In this tab, you can select the data insertion function, in the screenshot on the right "virtual keys". The Data Insertion section is greyed out.
- Page 36 This tab allows you to add and delete unique IDs and captions from separate dialogues and their input fields. This window can only be enabled if the keyboard insertion mode "Mask / Fields" was selected first. This tab allows you to test Rfid2KeyCE settings, in the example on the right the "Virtual Keys"...
- Page 37 Symbol Comment A transponder card could be detected A transponder card could not be detected A transponder card could be selected A transponder card could not be selected The validity ID of a transponder card is correct The validity ID of a transponder card is incorrect A transponder read/write action was executed correctly A transponder read/write action was not executed correctly The application is defined in the INI file and is focused...
-
Page 38: Communication
On the M260SE, the virtual COM6 interface is also created. The existing serial interfaces can be used directly by applications. ACD applications use for example the direct RS232 communication with the ZMODEM protocol. Network and Dial-up Connections can also be installed for indirect serial communication, e.g. via an ActiveSync connection. -
Page 39: Ethernet
2.6.4 Ethernet Mobile devices can be connected to a LAN when inserted into docking stations with an Ethernet module. Device LAN connection via Comments The LAN connection is activated on both devices by M210SE DS210 docking station inserting into the docking station. The additional with Ethernet module MOSUSBCE1 profile appears in the Network Connections M215SE... -
Page 40: Wireless Lan (Wlan)
2.6.6 Wireless LAN (WLAN) If the Windows CE devices contain wireless cards, they can be connected to an existing WLAN: • Configure the WLAN network profile with valid TCP/IPparameters, as described in Chapter 2.6.5. • Installing a wireless profile. This can be done with the Wireless Zero Configuration Tool (WZC) from Microsoft or with the wireless card manufacturer's proprietary configuration tool. - Page 41 The PAN profile (Personal Area Network) Double-click the profile you require (PAN in the screenshot on the right, the "Bluetooth network connection") and enable Trusted. If the PAN profile is not recognised, Bluetooth must be enabled at the requested communication partner. The PAN profile may also have to be enabled.
- Page 42 Type the same PIN on the PC as you entered before. Finish the Bluetooth assistant. Check the Active option in the Bluetooth Manager on the Windows CE device. WinCEGeräte_Handbuch_Administration_v2 00_en 42 / 84...
- Page 43 A red checkmark indicates that the profile is activated. PAN is connected automatically. If not, double-click the Bluetooth network icon and click the Connect button. Network settings can be configured in the Windows CE device under Start / Settings / Network and Dial-up Connections / BTPAN1.
- Page 44 The COM port must be opened from a program, in this case a hyper terminal. On the Windows CE device, the icon for SPP is a blue ActiveSync icon. The device is authenticated as described above for the PAN profile. A checkmark next to the Active option indicates that the process is complete.
- Page 45 Enter the virtual COM port (incoming SPP server) on the PC under the ActiveSync connection settings. On the Windows CE device at Start / Settings / Control Panel / PC Connection Properties, select the preconfigured Bluetooth connection. Manually start ActiveSync by selecting Start / Programs / Communication / Active Sync Serial.
- Page 46 GPRS connection via Bluetooth (DUN profile: Dial Up Network) First activate Bluetooth and GPRS on the mobile phone. On the Windows CE device, a mobile phone is the icon for the DUN profile. The device is authenticated as described above for the PAN profile.
- Page 47 Set the Port Settings as shown in the screenshot on the right. Enter the following dial string: +CGDCONT=1,"IP","APN". The APN or access point name is for example web.vodafone.de. Click OK to finish and click Next to continue to the Phone Number dialogue box.
- Page 48 Go to Start / Settings / Network and Dial-up Connections and double-click the profile you have created bt_gprs. In the example, no User Name or Password must be entered for the provider vodafone. Click the Dial Properties button. Set Location to Home then click the Edit... button.
- Page 49 In the bt_gprs profile under Start / Settings / Network and Dial-up Connections, click the Connect button to connect GPRS to Bluetooth and the mobile phone. You can now access the Internet from a suitable program such as a browser. WinCEGeräte_Handbuch_Administration_v2 00_en 49 / 84...
-
Page 50: Ppp Connection
2.6.8 PPP connection The PPP communication protocol (Point-to-Point) is installed on the Windows CEdevices. It is used to initialise and authenticate a TCP/IP connection, for example via a modem to the Internet or on a local server. 2.6.8.1 PPP modem connection The mobile devices' docking stations can have analogue or ISDN modems. - Page 51 Configure the interface parameters. Set Flow Control to None. Depending on the telephone connection, the automatic recognition of the dial tone must be disabled. To do this, on the Call Options tab under Special Modem Commands, add the character string "X3"...
- Page 52 Entering other parameters: Click Start / Settings / Network and Dial-up Connections. Start the PPP profile (double-tap the icon). Enter user name, password and domain. Enable the Save password checkbox. Click the Dial Properties button to configure other settings, if necessary.
-
Page 53: Rndis
The only hardware you require to do this is the docking station and a USB A-B cable. In terms of software, a driver must be installed on the PC. The files required for Windows XP are available from ACD. They are preinstalled under Windows 7 (keyword Microsoft Windows Mobile Remote Adapter). -
Page 54: Communication Applications
'cd "Microsoft Remote Display Control"' must be entered in order to open this directory. 2.7.1.1 Setting the password The user has the default password acd when the device is delivered. Go to Start / Settings / Control Panel / Password to reset the password. Then save the registry. -
Page 55: Ftp (Windows Ce Device As Client)
To run a script file, simply double-tap the script file in an Explorer window. FTPsimple also includes a set of standard as well as ACD proprietary commands. Click the "help" command in the console window to display the list of commands. When errors are shown, their error number and error text are usually displayed as well. -
Page 56: Activesync
An ActiveSync connection can be set up across several interfaces. The list below shows how ActiveSync can be used with the ACD device interfaces. 2.7.3.1 ActiveSync connection via USB The docking station is connected to the PC with a USB A-B cable. -
Page 57: Activesync Connection Via Irda On M210Se And M215Se
2.7.3.2 ActiveSync connection via IrDA on M210SE and M215SE When using a laptop as the remote station, the IrDA interface must be activated and authorised as an interface in the Mobile Device Center. When a PC is used as a remote station, an infrared adapter must be connected to the PC with a serial or USB connection and activated. -
Page 58: Vnc
Then launch a suitable VNC client on the PC and connect to the device. The device can be conveniently ACD recommends TightVNC (V 1.2.x) or UltraVNC. administered from the PC. 2.7.4.1 The VNC server The free Efon VNC server is operated on the MDT devices from the second edition. -
Page 59: Web Browser
The Start Page and other parameters are configured outside the browser in the Internet Options of the Control Panel or as parameters in the StartConfig program. IESimple can be started manually: Start / Programs / ACD / IEFullscreen. To run the program when booting the device, it has to be integrated into the startup configuration (StartConfig) (See chapter 1.4.5). -
Page 60: Other Configuration Options
On the Connection tab, the "normal” mode in WLAN or LAN is already preconfigured. Define a proxy server and a port to communicate with a remote Web and application server over the Internet. After configuration, persistently save the registry. 2.7.5.2 Other configuration options The browser can be used to run and operate Web applications where masks can be viewed even if they do not fit into the space in a display of Windows DE devices. -
Page 61: The Configuration File
2.7.5.3 The configuration file The IESIMPLE.INI configuration file, which is scanned when the program is launched, is stored in the \Flashdisk\System\Ini folder. Customised settings that differ from the default configuration can be changed here. The configuration file is used primarily to enable additional browser commands (GoHome, Find etc.) and execute them with function keys that have been mapped accordingly. -
Page 62: Remote Desktop Client
2.7.6 Remote desktop client An RDP client is installed on Windows CE devices to set up a Remote Desktop Connection in the operating system. 2.7.6.1 Create a RDP profile under Windows CE 6.0 Go to Start / Programs / RDP Client or Start / Programs / Remote Desktop Connection to access the client. - Page 63 When the session is restarted, an additional checkbox appears in the logon window to temporarily save the password. To save the password beyond a cold boot, the Save Registry option must be enabled once the device is connected. In the next warning window, enable the Don’t show this warning …...
- Page 64 If the registry was saved and the system re-booted, a security prompt is displayed after the session is restarted although the highlighted section is not visible. To ignore this message on further starts, enable the Allow access.. option. Leave the checkbox activated.
-
Page 65: "How-To": Problems And Solutions
USB connection. 3.1.1 Differences between Windows XP and Windows 7 A RNDIS driver pack (available from ACD) must be installed on the PC under Windows XP. The installation is described in the chapter below (3.1.2). Another option is described in Chapter 3.1.3. -
Page 66: Driver Installation Under Windows Xp
3.1.2 Driver installation under Windows XP Once the device has been switched on in the docking station, a new hardware is detected on the PC. As the driver you require is stored locally, you do not need a connection to the Windows Update. - Page 67 Press Continue installation to accept the driver without a Windows logo test. The driver is installed. Click Finish to make the hardware ready. WinCEGeräte_Handbuch_Administration_v2 00_en 67 / 84...
-
Page 68: Installing A Network Bridge Under Windows Xp
3.1.3 Installing a network bridge under Windows XP The network bridge is required for routing network packs from/to the device with other network participants. Go to Start / Settings and double-click to open the network connections. A LAN connection option can usually be found on each Windows XP PC which is connected to a network. -
Page 69: Netinfo - Ensuring Network Connectivity On Device Start
Proprietary configuration tools from the wireless card manufacturers are also used that feature options that are not supported by the Wireless Zero Configuration Tool (for example Summit Client Utility). They usually support better software quality to ensure a more stable working environment and are recommended by ACD. WinCEGeräte_Handbuch_Administration_v2 00_en... -
Page 70: Client Utilities (Manufacturer-Specific)
3.3.1 Client utilities (manufacturer-specific) Proprietary configuration tools from the wireless card manufacturers are also recommended as they feature options that are not supported by the Wireless Zero Configuration Tool. 3.3.1.1 SUMMIT wireless card If a Summit wireless card is installed, the configuration tool Summit Client Utility is used which is stored at Start / Programs / WLAN. -
Page 71: Setting The Clock And Time Zone
3.4 Setting the clock and time zone The clock is set automatically when a ntp time server or an ActiveSync partnership is used. Without these resources, the clock and the relevant time zone information can be accessed from the Control Panel (Start / Settings / Control Panel / Date/Time). -
Page 72: Calibrating The Touchscreen
3.5 Calibrating the touchscreen To ensure that the touchscreen transmits the correct touch coordinates on the screen to the operating system, the touchscreen has to be calibrated. This is done using the menu option Touch Calibration under Start / Program. Use the stylus to tap the calibration points for a few seconds until the cross moves position. -
Page 73: Display Backlight Power-Saving Mode (Dimming Mode)
3.6 Display backlight power-saving mode (dimming mode) To extend the battery time, the display light can be dimmed after a user defined time of inactivity or switched off entirely. Edit the dev.ini file in the \flashdisk\system\ini directory by clicking the [Display] section. Code name Definition [Display]... -
Page 74: Time-Controlled Suspend
RAM. In this way, it is possible to quickly resume the device and continue working from where you stopped. The Suspend mechanism is fully supported on ACD devices (with suspend notifications sent to applications). If you want the device to automatically switch to... -
Page 75: Installing The Software
Then click the My Device icon to open the Explorer desktop. Double-tap the CAB file icon to start the CAB file installation. A dialogue box then appears where you can select the installation folder. CAB files supplied by ACD must be installed in the predefined folder. -
Page 76: Installation From Pc Via Activesync
3.8.3 Installation from PC via ActiveSync An exchange ActiveSync connection is set up between the Windows CE device and the PC. An installation program (e.g. Setup.exe) is used to automatically copy an installation file (CAB file) to the Windows CE device from where the installation is launched. The following prompt will appear on the PC: Flashdisk is usually defined as the target storage media. -
Page 77: Configuration Of Desktop Information
3.10 Configuration of desktop information System information that you want to display on the desktop can be customised using a configuration application. The application can be started from a batch file: \Flashdisk\System\Pf\ACDDeskConfig.bat When the batch is executed, the configuration application appears on the screen (as shown below). Text Shift The Text Shift defines the spacing to the left display border (in pixels). -
Page 78: Creating A Sysinfo Protocol File
3.11 Creating a Sysinfo protocol file A system protocol could be requested for reports that are to be sent to ACD. It contains all information in a type of protocol file to record the device and its configuration. This chapter focuses on how to create a protocol file on the device. -
Page 79: Appendix
• The next time you boot the device, the registry will be reset to its default state. The default parameters set by ACD are then entered into the registry and are saved persistently. The device then reboots again automatically. •... -
Page 80: Layout Of Reg Files
4.1.2.1 Layout of reg files .reg files must comply with a specific syntax for them to be accepted by the programs: The file extension is .reg. REGEDIT4 is entered in the first line of the file. The file may only contain valid types of registry entries. If the program identifies an unknown type of registry entry, the processing of a reg. -
Page 81: Setreg Folder
Windows CE devices are configured with four special sub-folders for reg. files. An informal overview is provided below; changes are usually not required: • \Flashdisk\System\reg\APP (reserved for configuration entries from ACD) • \Flashdisk\System\reg\CFG (target for customer reg files. Are created automatically during production. -
Page 82: Cetoolbox - Tool Resources
The CEToolBox functions help to automate various administrative tasks by batch. The CEToolBox should take priority over other solutions as it offers more operational safety and is designed to support the extended features of ACD Windows CE devices. Syntax CEToolBox... - Page 83 [softresetclean|softreset|watchdogclean|watchdog] Reboot softresetclean / watchdogclean: The RAM is also deleted when the device is rebooted (\temp folder, non-persistent registry). "watchdogclean" is recommended. softreset / watchdog: RAM is not deleted when the device is rebooted. Files saved in \temp or the non-persistent registry wil be maintained.
-
Page 84: Index
Index 802.1X 70 Partnership 71 ACDDeskConfig See desktop information Point-to-Point 50 ACDDeskView See desktop information Power management 5 ActiveSync 5, 44, 53, 56, 76 PPP See Point-to-Point Alphabetic keyboard 21 Protocol file See system protocol Alphabetic mode see Alphabetic keyboard RDP client See remote desktop client Autostart See startup reg files 80...
Need help?
Do you have a question about the SE Series and is the answer not in the manual?
Questions and answers