Advertisement
Table of Contents
- 1 Table of Contents
- 2 Chapter 1: Intended Use
- 3 Chapter 2: Explanation of Warnings
- 4 Chapter 3: Electrical and Air Requirements
- 5 Chapter 4: Principles of Heat Sealing
- 6 Chapter 5: Definition of Controls
- 7 Chapter 6: Recommended Replacement Parts
- 8 Chapter 7: Machine Specifications
- 9 Chapter 8: Maintenance
- 10 Chapter 9: Transportation Specs and Storage
- 11 Chapter 10: Technical Requirements
- Download this manual
Instruction Manual
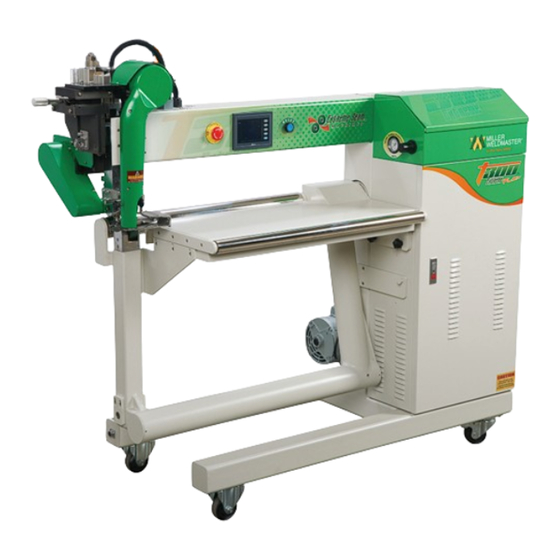
This instruction manual is intended to be a guide when operating the T300 Extreme Seam welder. To
ensure optimal performance from your welder, please follow the recommendations and specifications
precisely.
For more technical information regarding this machine call our Resolution Center at 1-855-888-WELD or
email service@weldmaster.com.
You can also subscribe to Miller Weldmaster Insiders to stay updated on tech tips, machine maintenance
updates, and more at www.weldmaster.com/insiders.
Page 1
Advertisement
Table of Contents

Related Manuals for Miller Weldmaster Extreme T300


Summary of Contents for Miller Weldmaster Extreme T300
- Page 1 For more technical information regarding this machine call our Resolution Center at 1-855-888-WELD or email service@weldmaster.com. You can also subscribe to Miller Weldmaster Insiders to stay updated on tech tips, machine maintenance updates, and more at www.weldmaster.com/insiders. Page 1...
-
Page 2: Table Of Contents
Instruction Manual Table of Contents Chapter 1: Intended Use Page 3 Chapter 2: Explanation of Warnings Pages 4-5 Chapter 3: Electrical and Air Requirements Page 6 Chapter 4: Principles of Heat Sealing Page 7 Chapter 5: Definition of Controls Page 8-10 Chapter 6: Recommended Replacement Parts Page 11 Chapter 7: Machine Specifications... -
Page 3: Chapter 1: Intended Use
Instruction Manual Intended Use The T300 is a rotary hot air welding machine intended to heat-seal weldable thermal plastics such as: •Vinyl (PVC) laminated and coated fabrics •Vinyl (PVC) and Polyurethane (PU) films •Polyurethane (PU) and Polypropylene (PP) coated fabric •Polyethylene (PE) •Thermoplastic rubber (TPR) film and fabrics •Non-woven Polyester and Polypropylene... -
Page 4: Chapter 2: Explanation Of Warnings
Instruction Manual Explanation of Warnings There are several different warning symbols placed on the Miller Weldmaster T300. The symbols are to alert the operator of potentially hazardous areas on the machine. Familiarize yourself with their placement and meaning. Caution: Hot The “Caution: Hot”... - Page 5 Instruction Manual Warning: High Temperature Air The “Warning: High Temperature Air” sticker is placed on the Heater Assembly. Caution: Electricity The “Caution: Electricity” sticker is placed near areas that contain electrical. Page 5 CHAPTER 2 EXPLANATION OF WARNINGS...
-
Page 6: Chapter 3: Electrical And Air Requirements
You may choose to have your power cord hard-wired into your Power Supply. It is recommended that your electrician use a Junction Box with an ON/OFF switch. The Miller Weldmaster T300 requires one of the following electrical requirements: •25 Amp - Single phase - 230 Volts... -
Page 7: Chapter 4: Principles Of Heat Sealing
Instruction Manual Principals of Heat Sealing Heat Hot Air Heating System The Heat required for the welding operation is created electrically by one heating element located inside the Heat Element Housing. The Internal Air Compressor pumps air over the heat element and carries the heat through the Hot Air Nozzle, applying the heat to the material to be welded. -
Page 8: Chapter 5: Definition Of Controls
Instruction Manual Definition of Controls Main Screen - HMI Operation Recipe Number: This is a particular combination of the parameters of heat and speed used to weld different types of fabric. This shows which recipe you’re currently using on the machine. 0 - 24 Available recipe settings. - Page 9 Instruction Manual Definition of Controls Delay Settings: These are used to eliminate voids in seam. Drive Start Delay Time: Once the foot pedal is depressed, the Drive Start Delay Time will delay the weld rollers from turning until the set point is reached.
- Page 10 Instruction Manual Definition of Controls Hi-Temp Limit: maximum heating temperature of the machine. Once the actual temperature is out of this limit, the machine will stop heating automatically. Over-Temp Alarm: when the actual temperature is higher than the Over-Temp Alarm Temperature, there is an on-screen alarm that notifies the operator.
-
Page 11: Chapter 6: Recommended Replacement Parts
Instruction Manual Recommended Replacement Parts Miller Weldmaster recommends keeping the following spare parts in stock: NOTE: The manufacturer will not be held liable for any damage or injuries occurring from any inappropriate use of this machine. Parts Order? Call 855-888-9353 or email service@weldmaster.com... -
Page 12: Chapter 7: Machine Specifications
Instruction Manual Machine Specifications Principles of Operation The T300 is a heat sealing machine which welds thermal plastic fabrics or films by Hot Air or Hot Wedge, through applying pressure, consistent speed, and accurate temperature for perfectly sealing thermal plastic materials. Features •Suitable for multiple-sized tents, inflatable boats, banners, tarps, awnings, and etc. - Page 13 Instruction Manual Machine Specifications Mechanical Section •Removable Roller Table Top: The roller table top assembly is used for paneling applications, edging, edge finishing, and general seaming applications. •Swing Arm: The swing arm is used when products include shapes, curves, and tubes of the seaming area. Heat Source •Hot Air: heat element housing contains the heating element and thermal-couple.
- Page 14 Instruction Manual Machine Specifications Pneumatic System •Pressure Adjustment Regulator: Filters out water and dirt in the air. The Pressure Adjusting regulator, regulates the pressure to the machine. Increase the pressure by rotating clock- wise, and decrease the value by rotating counter-clockwise. •Solenoid Valve: Controls the actions of the Air Cylinders.
-
Page 15: Chapter 8: Maintenance
Instruction Manual Maintenance Warning! The operator must disconnect the power from the machine before proceeding. 1. Loosen and remove the protective cover from the element housing. 2. Unpack the fiberglass insulation around the front of the element housing. Be cautious to avoid eye contact when handling the insulation. - Page 16 1. When replacing parts and components, you must use the part or components of the same type as the original or equivalent to the original type. Original equip ment replacement parts should be purchased through Miller Weldmaster and or a Miller Weldmaster authorize distributor.
- Page 17 Maintenance Cleaning/Replacing Air Filter (For Hot Air Machines Only) The Miller Weldmaster T300 has an external air compressor that supplies airflow to the heat element. Periodic cleaning and changing of the Air Filter Cartridge is necessary to maintain sufficient airflow. Insufficient airflow or any impurities in the airflow will shorten the life of the heat element.
- Page 18 Instruction Manual Maintenance Tightening/Oiling Chains The Miller Weldmaster T300 has several chains that are used to drive weld rollers and puller rollers. Although not a high maintenance item, chains should be inspected once a year to ensure there is not exces- sive corrosion, rust, or dirt.
- Page 19 Instruction Manual Maintenance Replacing Wedge Tip 1. Remove power to the machine by switching the main circuit breaker to the off position. 2. Ensure the wedge has cooled down to a temperature that can be handled. 3. Loosen and remove the housing cover. 4.
- Page 20 Instruction Manual Maintenance Hot Air Heat System Adjustments Begin by turning your hot air on and setting to the desired temperature. Set weld rollers to the closed position by engaging the Weld Roller Pedal. 1. Left to right nozzle position, check this by engaging the Drive Foot Pedal and watch the tip of the nozzle.
- Page 21 Instruction Manual Maintenance Puller Adjustments 1. With the table assembly in place, adjust the height of the material puller by using the steel collar and lock nut to achieve the desired height of the material puller. 2. For most applications the material puller wheel should first be adjusted until it is slightly touching the stainless steel roller.
- Page 22 Instruction Manual Maintenance Hot Wedge Heat System Adjustments A note before beginning; the wedge should be a bit loose (3/16 inch of play). Begin by setting the Master Speed to zero and closing the weld rollers. First Alignment Step When the wedge arm swings in and drives forward, it is imperative that the point of the Alignment Pin fits into the Recess of the wedge arm.
- Page 23 Instruction Manual Maintenance Hot Wedge Heat System Adjustments (Continued) Fifth Alignment Step The last step involves the wedge depth. Check this adjustment by engaging the Drive Foot Pedal to check the contact between the wedge and the weld rollers. Not enough contact, and the wedge will barley touch the rollers.
- Page 24 Instruction Manual Maintenance Replace HMI Battery 1.Remove the access cover from the back of the T-300, this is held in place with 4 screws. 2. Remove the center nut this will release the retaining strap that holds the HMI in the head of the T-300.
- Page 25 Instruction Manual Maintenance Replace Battery When replacing the PLC battery it is important to have the machine POWER ON during the entire procedure to ensure there is no memory loss. 1. Remove access cover from PLC. 2. Remove battery cover 3.
-
Page 26: Chapter 9: Transportation Specs And Storage
Transporting Within a Production Facility Due to the weight of the Miller Weldmaster machine, the manufacturer requires a forklift or tow motor to be used. The forks are to be inserted below the bottom frame along the center of gravity. -
Page 27: Chapter 10: Technical Requirements
Instruction Manual 10.0 Technical Requirements Technical Requirements 1. Total air pressure should be 120 psi (8.3 bar). 2. The pressure of the Upper Unit Weld Wheel should be between 5 psi and 60 psi (.3 bar and 4.1 bar). 3. The lifting of the Upper Weld Roller must be smooth and free, without obvious vibration. - Page 28 Instruction Manual NOTES:_________________________________________________________________ _______________________________________________________________________ _______________________________________________________________________ _______________________________________________________________________ _______________________________________________________________________ _______________________________________________________________________ _______________________________________________________________________ _______________________________________________________________________ _______________________________________________________________________ ______________________________________________________________________ _______________________________________________________________________ _______________________________________________________________________ _______________________________________________________________________ _______________________________________________________________________ _______________________________________________________________________ _______________________________________________________________________ NOTES Page 28...
- Page 29 Instruction Manual NOTES:_________________________________________________________________ _______________________________________________________________________ _______________________________________________________________________ _______________________________________________________________________ _______________________________________________________________________ _______________________________________________________________________ _______________________________________________________________________ _______________________________________________________________________ _______________________________________________________________________ ______________________________________________________________________ _______________________________________________________________________ _______________________________________________________________________ _______________________________________________________________________ _______________________________________________________________________ _______________________________________________________________________ _______________________________________________________________________ Page 29 NOTES...
Need help?
Do you have a question about the Extreme T300 and is the answer not in the manual?
Questions and answers